Another Monday, another week! Hope you all had lovely weekends - did you spend them shopping for Black Friday deals? I did start my Christmas shopping at last - I'm suddenly feeling under pressure to start ticking things off that particular list. i can't quite believe that one month today will be Boxing Day!! Anyway, let's not dwell on that - today I'm sharing a card using this week's sketch over at Freshly Made Sketches:
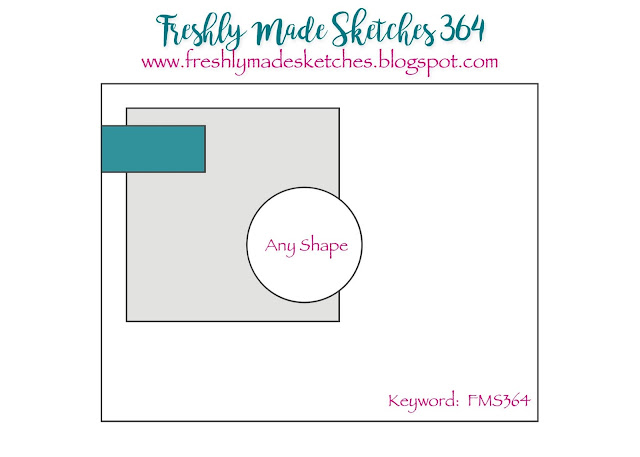
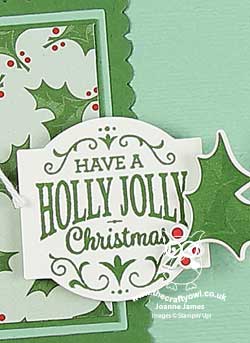
The lovely Kim has a great sketch this week, with lots of creative possibilities. I decided my card was going to be all about the holly - take a look:
Here's the low-down on today's card:
A Jolly Holly Christmas - I decided that holly was going to be the theme for my card today and used the square shape to feature a piece of the holly patterned paper from the Santa's Workshop designer series paper and tied my sentiment and holly embellishment (one of the self-adhesive pieces from the Santa's Workshop Memories & More card pack) into my theme. I even carried it over to the inside of my card and added a stamped sprig of holly alongside my sentiment from the super-useful Merry Christmas To All stamp set:

Christmas Traditions - I found the perfect holly-related sentiment for my card in the Christmas Traditions Punch Box that is featured on pages 2-3 of the Autumn/Winter catalogue:
Just like the Darling Label Punch Box in the annual catalogue (which incidentally has 10% off in the current stamp and kit sale as part of today's Online Extravaganza - order yours here), this festive-themed tin is choc-full of crafting goodies for creating through the festive season: with a block, two ink spots, set of 6 stamps and a Christmas Traditions Punch, all you need is to add some cardstock and adhesives and you are all set for some festive fun! Perfect for tags, cards and embellishments for your home-baked goodies, this set would make a lovely seasonal gift for a crafter or someone who likes to add a personal touch to their packages during the festive season.
Lots of Layers - I added some texture to my card base with the Subtle Dynamic Textured Impressions Embossing Folder, but otherwise all of the detail and interest on today's card is focused around the square element. In order to really draw the eye to it, I stacked the base behind the holly DSP with 3 layers, made easy with the Layering Square Framelits, using the base colours of the paper and adding a piece of Poppy Parade ribbon for a pop of red - so festive!
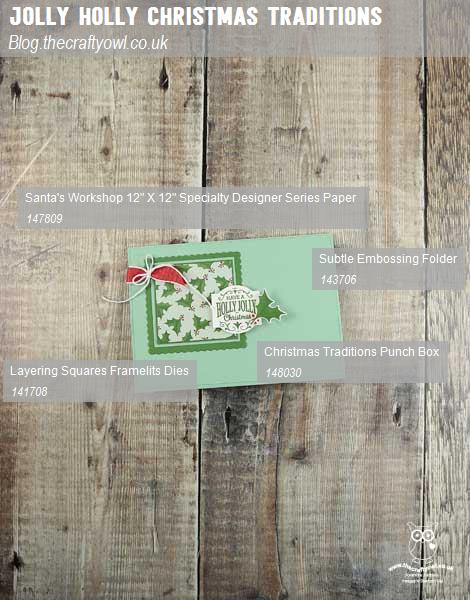
Here is the visual summary of the key products used on today's project for you to pin for easy reference:
You can see all of my 'How To' summaries on my 'How To - Tips and Techniques' Pinterest board in case you've missed any.
I hope you like today's card - tomorrow's card also features the Christmas traditions Punch Box, so be sure to come back and check it out. I have a few more errands before I get back into my painting and decorating - it's a long job! Enjoy your day and I'll be back tomorrow with another project. Until then, happy stampin'!
Stampin' Up! Supplies Used: