Shades of Red Candy Cane Christmas Card

by Joanne James14. November 2018 11:00

Today I'm sharing a card for the current challenge over at As you See It where they have something fun going on:

Speed stamping in shades of red! Now making a card in under 10 minutes is a challenge, however luckily all of your thinking time and preparation is outside of that window so I thought it worth a shot. Following the advice of the design team I decided to 'Keep It Simple' and this is what I came up with:


At first glance my card might appear to have a lot going on, but following one practice run (even with thinking time I still changed things on my first attempt and went over the time - oops!) I managed to turn this beauty out in under 10 minutes by following a few simple rules. Here's the low-down on today's card:

It's All About The Candy - My card today has a clear theme: candy canes (in case you were still in any doubt!) The designer series paper pattern from the Santa's Workshop papers takes centre stage and does most of the work, with everything else tying in to this. This made it easy to narrow down supplies and the things I could use on my card. 

Shades of Red - I went with one shade of red on my card: Poppy Parade. This warm red is full of festive brightness and again made co-ordination really straightforward.

Keeping It Simple - For me to create a card in under 10 minutes, it either needs no layers and some simple stamping, or very little stamping at all, which is the route I chose for this card. My card base is a standard A5 blank, and the mat layers are sizes I use all of the time (my whisper White layer measures 9.5cm x 13.9cm and my DSP measures 9.1cm x 13.5cm) so were quick to cut and position. I decided to add a sparkly candy cane from the Santa's Workshop Memories and More pack to draw the eye to my sentiment - so easy, just peel and stick - no stamping or cutting required and chose my sentiment from the Christmas Pines set to reflect this. I embellished with a few enamel shapes and a piece of co-ordinating ribbon and even had time left to add a scalloped border to my white mat layer courtesy of my Decorative Ribbon Border Punch. I also did a little stamping on the inside, using my retired Candy Cane Christmas set: 


And how long did this take me to complete? Well, my stopwatch finished at 8 minutes and 24 seconds - not bad at all for someone who can often spend hours procrastinating over a card!!! Thank you ladies for a fun challenge this week.

Here is the visual summary of the key products used on today's project for you to pin for easy reference:


You can see all of my 'How To' summaries on my 'How To - Tips and Techniques' Pinterest board in case you've missed any. 

Enjoy your day and I'll be back tomorrow with another project. Until then, happy stampin'!


Stampin' Up! Supplies Used:

Table built using Product Table Builder by The Crafty Owl - Independent Stampin' Up! Demonstrator.

Stepped Up Winter Wonder Embossed Snowflake Card and Coordinating Mini Pizza Gift Box

by Joanne James14. September 2017 21:00

Following yesterday's clean and simple embossed snowflake, I'm following up today as promised with a 'stepped up' version of that card, along with a co-ordinating mini pizza gift box. Let's take a look at today's card:


 Here's the low-down on today's card:

Step It Up If you have a bit more time and are feeling more adventurous, using a few extra tools and embellishments will allow you to 'step up' your card and create something with a little more depth and detail, whilst still relatively easy to make. Here I added a centrepiece of a stamped and silver embossed snowflake from the gorgeous new Snowflake Sentiments set, backed with a punched circle of silver glimmer paper, some metallic edged ribbon and a foil snowflake for some Christmas sparkle. 

Mini Pizza Anyone? - Have you noticed these fabulous little Mini Pizza Boxes on page 44 of the seasonal catalogue? These sturdy white boxes come flat packed for easy storage and are a great size for a few chocolates, notecards or even a cookie - they're foodsafe with a greaseproof lining and perfect for small gifts - and mini pizzas too! I decorated mine with the same embellishments as my card, along with a base of Year Of Cheer Specialty Designer Series Paper:


I also added a little tag made from the useful thinlit in the Swirly Snowflakes Thinlits Dies set, decorated with a diecut snowflake.

Here is the visual summary of the key products used on today's project for you to pin for easy reference:


You can see all of my 'How To' summaries on my 'How To - Tips and Techniques' Pinterest board in case you've missed any. 

Enjoy your day and I'll be back tomorrow with another project. Until then, happy stampin'!


Stampin' Up! Supplies Used:

Table built using Product Table Builder by The Crafty Owl - Independent Stampin' Up! Demonstrator.

Clean And Simple Winter Wonder Embossed Snowflake Card

by Joanne James13. September 2017 21:00

Wednesday already - where does the week go?! I had a technique class yesterday and was out on the rugby touchline for the first game of the season today (a narrow 8-7 defeat, but well-played all round) and have lots of makes to share so thought it was about time I squeezed in a quick blog post! Today I'm sharing a super quick and easy Christmas card that would be perfect for mass production - take a look:


Here's the low-down on today's card:

Winter Wonder - It's that snowflake again! Yes, the Winter Wonder Embossing Folder produces such great texture and dimension, it really is a centrepiece in itself. 

A White Christmas - A simple design in all-white can be really effective; here I've layered my embossed snowflake panel onto an extra-thick whisper white cardbase for a seamless design. 

A Simple Sentiment Banner - To finish, I added a simple sentiment banner, heat embossed in silver. This could just as easily be stamped in a colour of your choice. Equally, I used a sentiment from the 'Christmas Pines' stamp set, but this could be switched out for any similar one-line stamp. I stepped my banner, but it still pushes flat for posting - great for friends and family mailings in the run up to Christmas. A trio of rhinestones for a little festive sparkle complete my card.

Here is the visual summary of the key products used on today's project for you to pin for easy reference:


You can see all of my 'How To' summaries on my 'How To - Tips and Techniques' Pinterest board in case you've missed any. 

This card would be great if you want to make a whole bunch of cards in one go, so if you need to make a big dent on your Christmas card making, this could be the card for you!

Enjoy your day and I'll be back tomorrow with another project that also uses the snowflake embossing folder, but is a stepped up version with a matching gift box too. Until then, happy stampin'!


Stampin' Up! Supplies Used:

Table built using Product Table Builder by The Crafty Owl - Independent Stampin' Up! Demonstrator.

Colorful Seasons Winter Snowflakes Triple Stamping Babywipe Reinker Card

by Joanne James30. August 2017 05:00

The Bank Holiday is over and we are back to normality. I'm sharing another card from my recent technique class featuring the Colorful Seasons stamp set using the baby wipe technique, this time with a winter theme - take a look:


Here's the low-down on today's card:

Triple Stamping Technique - Today's card uses the same babywipe reinker technique that I shared with you yesterday, this time using the snowflake outline images and also incorporates another fun technique: triple stamping. This is where you stamp over several layers to create a dimensional image, or alternatively stamp over a single layer then cut your sheet into a central piece with two surrounding frames using your trimmer. Each stamped section is then layered with a solid coloured mat in between to add dimension to the image.

Seasonal Layers Snowflake - The co-ordinating Seasonal Layers Thinlits have a number of fun dies and today's card features one of the snowflakes, so incredibly detailed - check it out in the close up at the start of today's post. It makes a great focal point, this time with a glitter enamel dot as its centrepiece.

A Frosty Colour Combo - Today's colour combination is all about frosty, cold wintry days - here it is for you if you'd like to save it to use on your winter and Christmas projects:

Here is the visual summary of the key products used on today's project for you to pin for easy reference:


You can see all of my 'How To' summaries on my 'How To - Tips and Techniques' Pinterest board in case you've missed any. 

Enjoy your day and I'll be back tomorrow with another project from my class that also uses the baby wipe reinker technique. Until then, happy stampin'!


Stampin' Up! Supplies Used:

Table built using Product Table Builder by The Crafty Owl - Independent Stampin' Up! Demonstrator.

Frosted Medallions Snowflake

by Joanne James4. December 2016 09:00

It's Sunday and time for a new challenge over at The Paper Players! It's the turn of our fearless leader the wonderful Nance to host this week and she has a fun wintery theme to get your creative juices flowing:
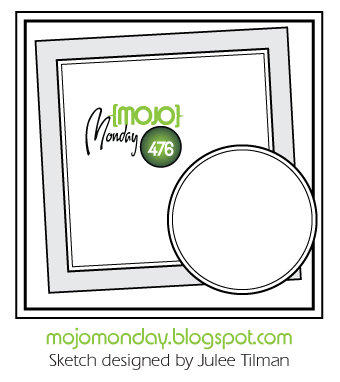
       

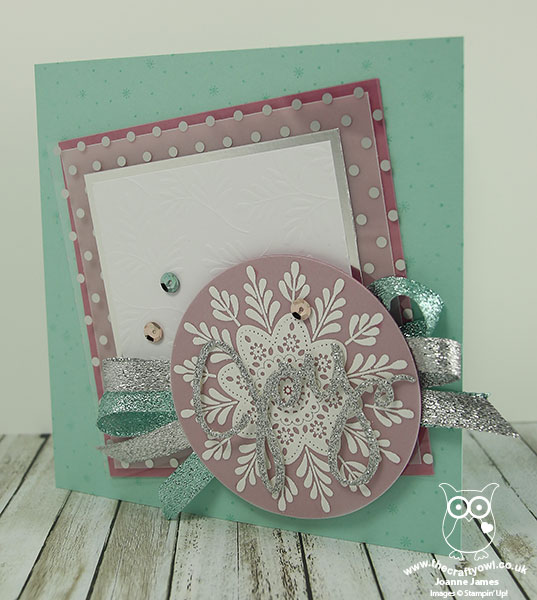
Use a snowflake (or two!) on your card. I decided that I wanted to feature the large frosted medallion snowflake from the stamp set of the same name on my card this week and this week's Mojo Monday sketch gave me the perfect layout - here's my card:
 

Here's the low-down on today's card:

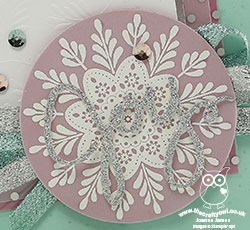
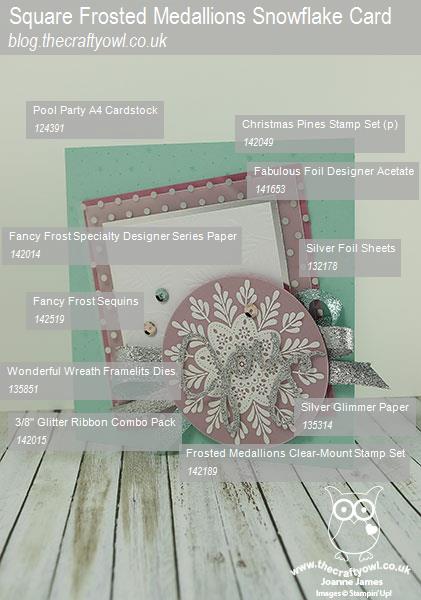
All About The Layers - My card this week has 9 layers in total, rather a lot even by my standards! Can you spot them all? They are, in order: Pool Party card base, Sugarplum square panel, vellum square, Fabulous Foil Designer Acetate, silver foil, Fancy Frost Specialty DSP, Sweet Sugarplum circle, a vellum circle with the frosted medallion stamped in Versamark and heat embossed in white and lastly the word 'joy' cut out of silver glimmer paper with my Wonderful Wreath framelits. A lot of layers indeed, yet I think they all play a part in contributing to the balance of the card design.

Glitter, Glitter - I used lots of elements to add sparkle to my card, from the Fabulous Foil Acetate, to the glimmer paper and sprinkle of Fancy Frost sequins, along with a rather fancy bow in silver (current) and Pool Party (retired) glitter ribbon beneath my snowflake. This card is definitely not practical for posting, but will make a nice special one to be hand delivered. The snowflake/glitter combination means I am linking up with CAS-ual Fridays too where these are both the order of the day!

A Contemporary Colour Combination - you may recognise my colour combination this week as the one our very own lovely Nance used for her pines card last week - you can see her card here. This isn't a colour combination I would ordinarily choose for a Christmas card, and I did start out using just white, silver and Sweet Sugarplum, but I felt it needed something more. I decided to add in the Pool Party as it looked so great on Nance's card and voila - an altogether brighter card, so thank you Nance! If you like this colour combination, feel free to save it:
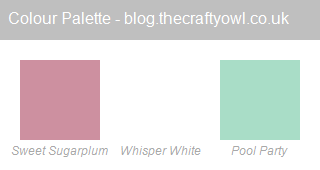
 

So only one main snowflake on my card, but it is a big one! That said, I did use the snowflake background stamp from the Pretty Pines stamp set on my card base to add a little background decoration, so there are lots more there too!

Here is the visual summary of the key products used on today's project for you to pin for easy reference:
 

You can see all of my 'How To' summaries on my 'How To - Tips and Techniques' Pinterest board in case you've missed any. 

Before you reach for your ink and papers, check out what our amazing team has created to inspire you this week:

The Paper Players Design Team
 
 
Here's a quick recap of our challenge rules:
 
1.  Create a new paper project
2.  Upload your creation to your blog with a link back to us and provide a direct link to the post featuring your challenge submission.
3.  Please link your card to no more than four challenges, TOTAL.
4.  Have FUN! 


I look forward to seeing what you create with our theme this week. We are off for our usual Sunday morning of sport, followed by a spot of lunch and then we are going to watch a basketball game this afternoon - go Northampton Neptunes!

Enjoy the rest of your weekend as it will be over all too quickly; I'll be back soon with another project; until then, happy stampin'!


Stampin' Up! Supplies Used:

Table built using Product Table Builder by The Crafty Owl - Independent Stampin' Up! Demonstrator.

Presents and Pinecones Large Square Double Display Christmas Card

by Joanne James1. November 2016 20:00

This is my second post of today - if you missed the first one about the new Stitched Shapes Framelits you are going to want to check that out here. No blog post yesterday as I still have one of the James Juniors on half term this week and then my evening was spent trick or treating. Today I've had full day with back to back classes, one of which was my first technique class of the month featuring the Christmas/Pretty Pines bundle. I've made lots of projects with this bundle, although I've yet to blog them all (so many projects, so little time!) Click here to see one of the cards that I've shared previously using this set, that was also one of our makes in our class. 

Today I want to share a card that I CASE'd from the lovely Amanda Bates over at The Craft Spa, who is for me the queen of fancy folds. She has made lots of versions of her Large Square Double Display Card but this one using the Presents and Pinecones Designer Series Paper and the Pretty Pines Thinlits Dies really caught my eye and I just had to have a go at re-creating it. Here's my card:


Here's the low-down on today's card:

Presents & Pinecones - What can I say, the Presents & Pinecones Designer Series Paper is definitely the star of this card. Four of the twelve designs in this pack are showcased here, such a great layout to really let these papers shine. What's more, they are the perfect pairing for the Christmas/Pretty Pines stamp set thinlits combo. The colours are traditional yet fresh and modern, with the addition of the mint and white to the red and Emerald Envy green.

Christmas Pines - Whilst it's rare that I advocate buying a stamp set or thinlit set without its counterpart when it's available as a bundle (and this is most definitely not one of those times!), it is easy to focus on the detail of the thinlits with this set and rather overlook the stamp set. This would be such a mistake though, as it's a set choc full of great scripted sentiments in a variety of sizes, along with some useful border stamps, a fancy frame and a snowy background stamp that will have tons of uses on so many Christmas cards. This card showcases two of the sentiments and the snowflake background stamp, which adds subtle interest and detail to the panels on the front and inside. This set is definitely worthy of a place on your shelf!

The 'How' - I made a few tweaks to Amanda's tutorial when I made this card, so thought I would share the details with measurements below. This card is measured in cm and is a metric template for standard A4 cardstock; if you would like to make one in inches or using 12" x 12" cardstock, do check out Amanda's blog via the above link where she has lots of useful tutorials to follow. Here goes:

To make this A4 metric large square double display card, you will need:

  • Thick Whisper White A4 Cardstock 15x 29cm
  • Whisper White Cardstock 15cm Square
  • Early Espresso Cardstock 10 cm Square
  • Presents & Pinecones Paper Mint Macaron Mini Chevron 9.5cm Square (x2)
  • Presents & Pinecones Paper White Cones and Pines 4.5cm x 9.5cm (x2)
  • Presents & Pinecones Paper White Cones and Pines 4.5cm x 2cm (x2)
  • Presents & Pinecones Paper Stripes 4.5cm x 2cm (x4)
  • Stamps & Dies – Christmas Pines Stamp Set and Pretty Pines Thinlits Dies Bundle 
 Instructions:
  • PORTRAIT (short side): 
  • Line up at 2.5cm across the top ruler
  • Cut from 2 to 12cm. LIFT. Cut from 17 to 27cm
  • Turn 180 degrees and repeat both steps above.
  • LANDSCAPE (long side):
  • Score across whole width at 4.5cm and 9.5cm 
  • Score top and bottom sections only at 2cm and 12cm 
  • Turn 180 degrees and repeat both steps above.
  • From the PORTRAIT end (short side):
  • Fold the outer creases into a mountain, valley, mountain, valley set of folds
  • Fold the centre section score lines into first a mountain fold then a valley fold 
  • This gives you the basic layout for the base of your card.

I just love this card - a little time and effort but well worth it for the end result. Thank you Amanda for the inspiration!

Here is the visual summary of the key products used on today's project for you to pin for easy reference:


You can see all of my 'How To' summaries on my 'How To - Tips and Techniques' Pinterest board in case you've missed any. 

I'll be back tomorrow with another project. Until then, happy stampin'!


Stampin' Up! Supplies Used:

Table built using Product Table Builder by The Crafty Owl - Independent Stampin' Up! Demonstrator.

New Stitched Shapes Framelits and 25% Off Stamp Sets

by Joanne James1. November 2016 07:00

I'm back today with some great news for the start of November: from today we have the early release of a new product from the 2017-18 annual catalogue, Stitched Shapes Framelits, and a product promotion!

StitchFramelit_DemoHeader_SPUK

A Great New Product

Let’s start with the Framelits: the Stitched Shapes Framelits Dies are a set of 12 dies that include four circles, four ovals and four squares that coordinate with our Layering Circles, Ovals and Squares.  Brilliant!

These new dies are available for purchase beginning November 1 – that’s today!

So, what makes these Framelits a necessity?  When run through the Big Shot, these dies leave a detailed stitch around the edge of the Framelit.  The stitched look is so on-trend right now and will add a great extra touch to your stamped projects. Here’s a video with details about the new dies and some great project ideas:


Aren't they great? You are definitely going to want to add these to your framelit collection.

Here are the measurements for these new shapes:

Circles:  1-3/8″, 1-7/8″, 2-3/8″, 2-7/8″

Squares: 1-3/16″, 1-5/8″, 2-1/8″, 2-5/8″

Ovals: 1-3/4″ x 13/16″, 2-1/4″ x 1-5/16″, 2-3/4″ x 1-13/16″, 3-1/4″ x 2-5/16″


25% Off Selected Stamp Sets

What's more, there's a promotion to run alongside the launch of these new framelits too! As if the new Stitched Shapes Dies weren’t great enough…there is also a long list of stamp sets from the Autumn-Winter Catalogue and Annual Catalogue are available for 25% off during November.  Yes, you heard it - 25% OFF! here's the complete list:


Right - I'm off to put in my order for these fabulous new framelits and then get on with my busy day of back-to-back classes. I will be back later with today's project blog post; until then, happy shopping! Oh and don't forget to use this month's hostess code SQN297RD when placing your order online to get a little thank you in the post from me!

Table built using Product Table Builder by The Crafty Owl - Independent Stampin' Up! Demonstrator.


Banners For Christmas Candy Cane Card

by Joanne James28. October 2016 08:00

Yay it's Friday - the weekend is almost upon us! Today I have a clean and simple Christmas card inspire by the great photo over at The Challenge this week:

I was totally inspired by the gift on the left to create this festive card:


Here's the low-down on today's card:

Christmas Pines - For the background to my candy cane, I both stamped a pine sprig from teh 'Christmas Pines' stamp set and added a couple of Garden green Pretty Pines diecuts for a little extra dimension.

Banners for Christmas - My oversize candy cane is from the 'Banners for Christmas' set, stamped in Real Red and fussy cut. I also used the sentiment and banner, evocative of the blue ribbon on the parcel in the inspiration photo, from the same set. 

A Sweet Colour Combination - My colour palette for today's card was pulled directly from the inspiration photo and is one that works really well for a fresh, festive take on Christmas. Here it is if you would like to save it to use on your seasonal projects:


I added a little striped washi tape and sentiment inside my card and then - card complete! Here is the visual summary of the key products used on today's project for you to pin for easy reference:


You can see all of my 'How To' summaries on my 'How To - Tips and Techniques' Pinterest board in case you've missed any. 

Enjoy your day and I'll be back tomorrow with another project; until then, happy stampin'!


Stampin' Up! Supplies Used:

Table built using Product Table Builder by The Crafty Owl - Independent Stampin' Up! Demonstrator.

Pines, More Pines and Pinecones!

by Joanne James22. September 2016 08:05

Today it's time for a new challenge over at Create With Connie and Mary and this week we have a sketch for you:


I spent some time deciding what to use on my card and eventually decided another Christmas card was the order of the day - take a look:


Here's the low-down on today's card:

Pretty Pinecones - The Pretty Pines Thinlits Dies were the starting point for my card today. I have been wanting to use these gorgeous detailed dies to create a festive pine embellishment and today's layout was perfect for this. I used two different pinecones - the uppermost one has the pieces that can be pushed out, but I kept mine in place as I liked the effect (they can be held in place with a little tape behind).

Presents and Pinecones - I love the fresh reds and greens of the Presents and Pinecones designer series paper and knew they would be the perfect background to my embellishment. I actually cut one length from my DSP and used one side - the stripes - for the first panel, then the reverse - the pinecones - for the uppermost panel. The best of both worlds!

And Christmas Pines Makes Three - I used a sentiment from the bundled stamp set 'Christmas Pines' in Cherry Cobbler to complete my card. 

Here is the visual summary of the key products used on today's project for you to pin for easy reference:


You can see all of my 'How To' summaries on my 'How To - Tips and Techniques' Pinterest board in case you've missed any. 

Do visit the other Design Team members to see what they did with this week's sketch; there's lots of inspiration over on their blogs too!

Enjoy your day and I'll be back tomorrow with another project; until then, happy stampin'!


Stampin' Up! Supplies Used:

Table built using Product Table Builder by The Crafty Owl - Independent Stampin' Up! Demonstrator.

Scrapbooking

Stampin' Up! has introduced a new range of 12x12" scrapbooking product and kit - the full range is now available to purchase online. To download a copy of the new digital Scrapbooking Catalogue click here.

Mini Catalogue

BROWSE THE CATALOGUE

'Tis The Season - the new Stampin' Up! Mini Catalogue is here! For more details and to download your copy click here

Shop Online

Access my online shop 24 x 7, 365 days of the year:

Current September hostess code:

JQEHTZGK

Shop Online

2024-25 Annual Catalogue

BROWSE THE CATALOGUE

Click on the image to download your copy of the 2024-25 annual catalogue. For a full list of current SU! supplies, go to my online store. If you would like any help or advice, please drop me a line at joanne@thecraftyowl.co.uk or give me a call on 07773 421446 - I'd be happy to help.

Join My Team

It's always a great time to join Stampin’ Up! New team members can get £130 worth of products for only £99 + free business supplies + free shipping + all the fun being a part of Stampin’ Up! Stampin' Up! has something for everyone: join my growing team and benefit from my support to enjoy Stampin' Up! however you choose.

If you're interested, call me for a chat to understand how I can help you realise your goals. Alternatively, if you have already decided to sign up and you just can't wait, please click here for the link to the online form where you can sign up and order your starter kit right away! 

Latest Kits!

Stampin Cut and Emboss

The Christmas Ornaments Kit and Card Keeper Kit are the latest kits that will be arriving in the online store later this month - get yours here!

New Online Exclusives

There are new products available exclusively in the online store from 3 July - check them out here.

About Me

Hi I'm Joanne and live in Northampton and when I'm not looking after my husband and two beautiful children, am an avid crafter with a passion for all things Stampin' Up!

I must confess that I have never been a big rubber stamper - until I discovered Stampin' Up! that is. I love the fact that I can get such great results with co-ordinating stamps, inks, papers and punches - the possibilities are endless! Join me on my stamping journey as I share the things I love and be inspired to create amazing things yourself!

Follow Me

Monthly Newsletter

Box Builder

Click the button above to use Box Buster to create your custom box design using the Envelope Punch Board!

Kits Collection Now Available!

Stampin Cut and Emboss

The new Kits Collection from Stampin' Up! is now available!

Click here to see the current kits available and order yours online today.

I Design For


Stampin' Up Stuff

This is my personal blog and is not endorsed by Stampin’ Up! I hope you find it a plentiful source of ideas and personal inspiration but please don't copy my designs for contest submission or use for classes, publication or sale without express permission.