It's Sunday and time for a new challenge over at The Paper Players! It's the turn of the super-talented Claire to host our challenge this week and she has a timely theme for you to play along with:

With only a couple of weeks to go until Father's Day, today's challenge is a great opportunity for you to get your cards made (and posted if necessary!) in a timely manner. For my card this week I debated with myself what stamps to use: old or new! In the end I ended up making not one but 3 cards, each using a different set. I will be sharing them all over the next three days so if you're in need of masculine inspiration be sure to check back for three very different cards, each of which would work for both Father's Day or a male/Dad's birthday.
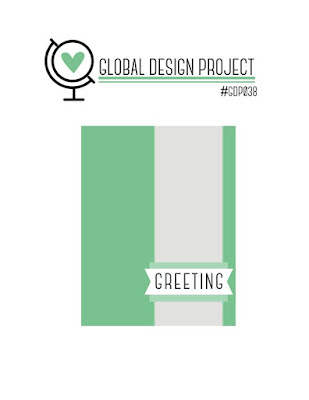
For today's card I used this week's sketch over at the Global Design Project and decided to go with one of my favourite existing masculine sets, Guy Greetings, along with some new product - copper embossing powder. Take a look:
Here's the low-down on today's card:
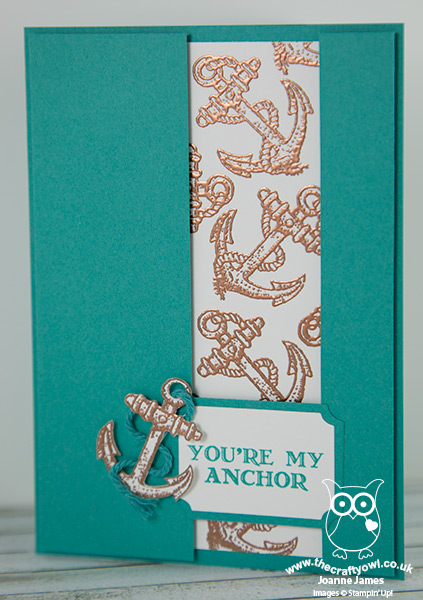
Add Shine With Copper - Heat embossing adds a 'wow' to any project and the new copper embossing powder is no exception. I stamped my anchors from the 'Guy Greetings' stamp set in Versamark onto a panel of Whisper White and heat embossed them in copper. Check out the lovely sheen that you get when the light bounces off it on my card above! I chose Bermuda Bay for the base and top split layer above my recessed anchor panel; it looks great with the copper and reminds me of the sea, so seemed appropriate for today's card.
A Multi-Purpose Guy Greeting - I saved my 'Happy Father's Day' sentiment for the inside of my card and chose the anchor one for the front. It ties in with my visuals of course, but would also make this card a multi-purpose masculine card that could be used for other occasions too.
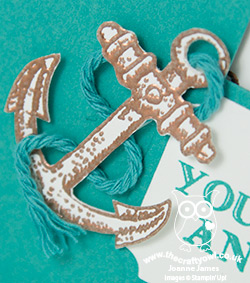
A Layered Label And Embellished Anchor - I used a layered label from the Tags & Labels Framelits set for my sentiment, modifying the mat as I wanted it to have a thinner border than the standard framelit size. This was easy to do: I just cut a standard sized one, then cut it again to remove a slice off two of the four sides. To finish I embossed another anchor in copper, then fussy cut it by hand, removing the rope pieces. I then took some thick Bermuda Bay baker's twine and wrapped it around the anchor where the embossed rope would have been and secured it in place with glue dots. You can see it in more detail in the thumbnail at the top of today's post.
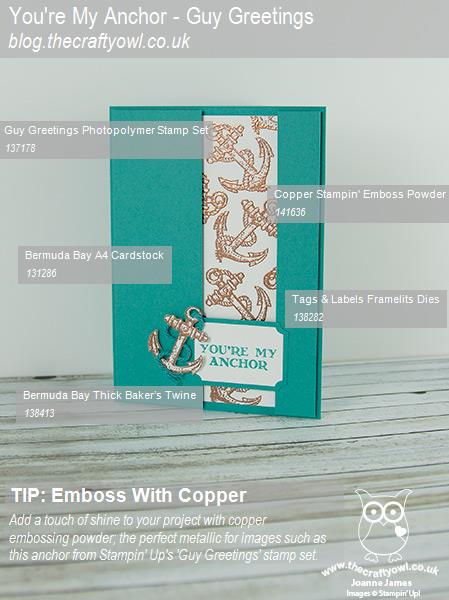
Here is the visual summary of the key products used on today's project for you to pin for easy reference:
You can see all of my 'How To' summaries on my 'How To - Tips and Techniques' Pinterest board in case you've missed any.
Before you reach for your ink and papers, check out what our amazing team has created to inspire you this week:
The Paper Players Design Team
Here's a quick recap of our challenge rules:
1. Create a new paper project
2. Upload your creation to your blog with a link back to us and provide a direct link to the post featuring your challenge submission.
3. Please link your card to no more than four challenges, TOTAL.
4. Have FUN!
I look forward to seeing your masculine creations in our gallery this week. The weather hasn't been great here this week, however yesterday was a little warmer and today is forecast the same, so I'm looking forward to a BBQ lunch in the garden - doesn't food always taste better if eaten in the open air? I think so! Then I'm hoping to spend some time in the afternoon preparing for my Annual Catalogue Open House on Friday later this week. I hope you enjoy your Sunday too.
I'll be back tomorrow with another masculine project; until then, happy stampin'!
Stampin' Up! Supplies Used: