by Joanne James27. May 2019 08:00
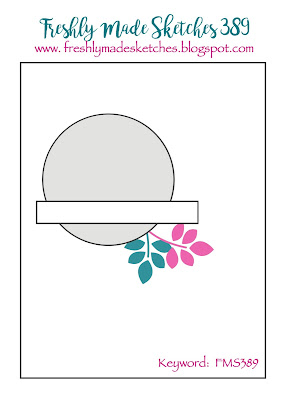
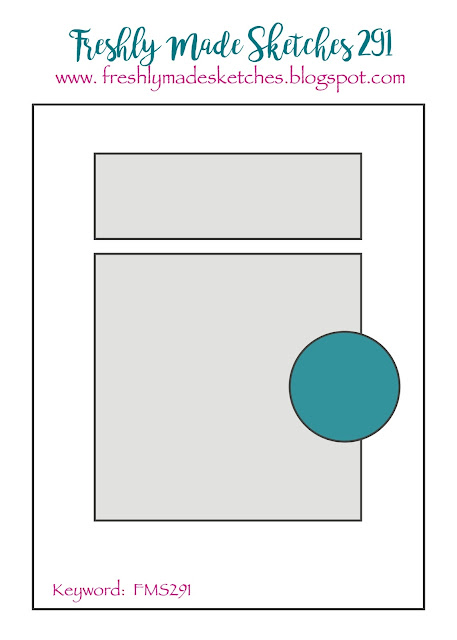
Happy Bank Holiday Monday to everyone in the UK and to those celebrating memorial Day in the US I hope your day is a reflective one. Today I'm sharing a card using this week's colour palette over at CAS Colours and Sketches and the sketch over at Freshly Made Sketches:

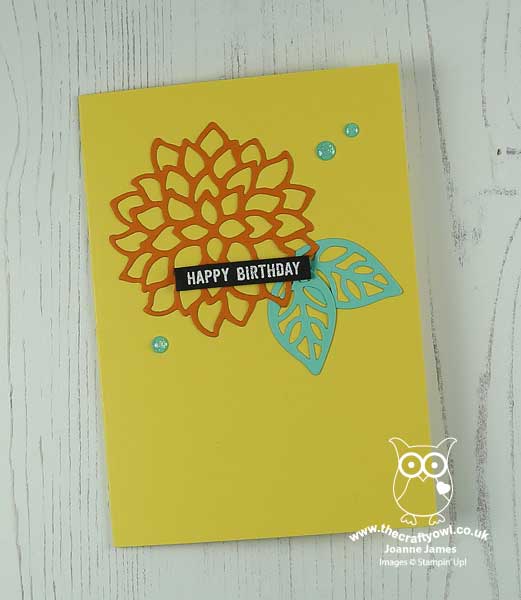
I love this bright colour palette and combined it with an almost no-stamping card to say farewell to a favourite die set from the retiring annual catalogue - take a look:
Here's the low-down on today's card:
Farewell May Flowers - The lovely Narelle who designed this week's FMS sketch is famed for her fabulous flowers (check out her card this week and you will see what I mean - gorgeous!) so there was only one way for me to go this week. My single diecut dahlia along with a pair of leaves from the retiring May Flowers Framelits Dies really allows these bright colours to shine.
A Simple Sentiment - Another retiring set, Thoughtful Banners, gave me my simple sentiment, that I heat embossed in white onto Basic Black cardstock so that it would stand out.
A Trio of Glimmer - To finish my card, I added a simple trio of Coastal Cabana glimmer dots for a little sparkle.
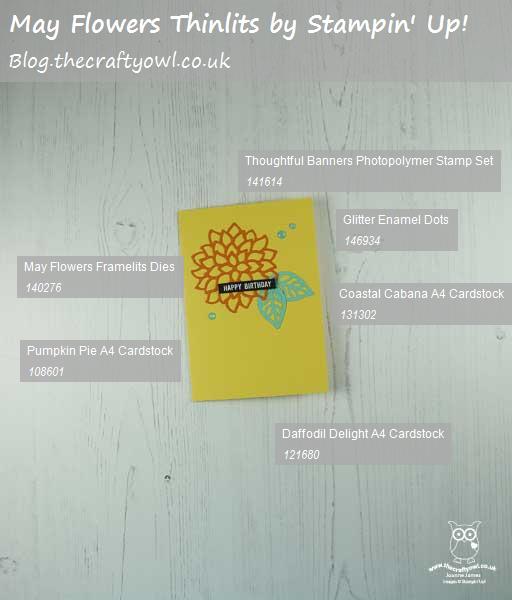
Here is the visual summary of the key products used on today's project for you to pin for easy reference:
You can see all of my 'How To' summaries on my 'How To - Tips and Techniques' Pinterest board in case you've missed any.
Enjoy your day and I'll be back tomorrow with another project. Until then, happy stampin'!
Stampin' Up! Supplies Used:
by Joanne James14. May 2019 16:45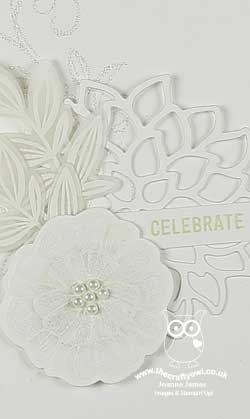
Today I'm sharing a card for the current challenge over at Just Add Ink where they have a photo for inspiration this week:

Hmmm - a virtually all-white floral card! I've created with all-white before and it can be fun although a devil to photograph. I'm not sure today's pictures do it justice, so you're just going to have to take my word for it that in real life this is SO pretty! I pulled out some of my retiring products for a last run around the block for my card - take a look:
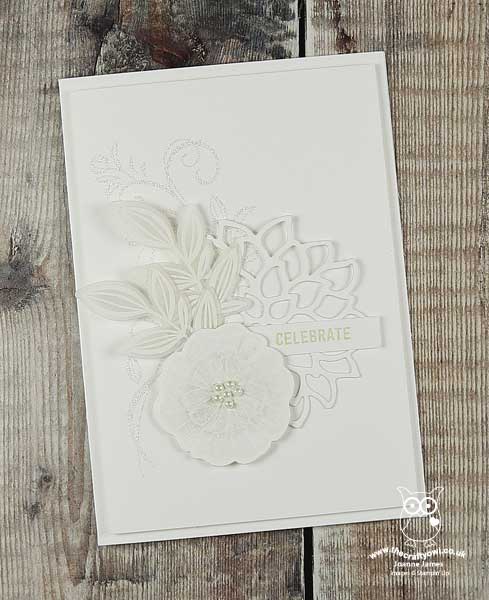
Here's the low-down on today's card:
Falling Flowers - I wanted to use a single stamp set for today's card and I did pretty much manage that (except for my sentiment which comes from 'Thoughtful Banners'). I decided to use the retiring 'Falling Flowers' set as this is a set that exclusively features florals. I also like the fact that the co-ordinating May Flowers Framelits (also retiring) includes both some dies that cut out the stamped images and additional stand-alone dies, including the large dahlia-like one that I used in combination with my stamped images.
Ways With White - When working with white alone, it's important to create interest and detail with shape, texture and layers so that it doesn't all look the same. I stamped the large vertical image in Versamark onto my base panel first and heat embossed it with some (retired) Irredescent Ice sparkly embossing powder, for some subtle background texture and detail. I then layered a combination of images stamped on both white and vellum and heat embossed in white, along with the large diecut dahlia and arranged them around my sentiment. I also brushed my main stamped flower liberally with clear Wink of Stella before adding some small pearls to the centre to finish for added sparkle and shine.
A Subtle Hint of Green - I added the tiniest hint of pale green to my stamped flower with a light Soft Sea Foam Blends marker and then worked it with the colour lifter to add just enough colour to highlight the embossed detail of the petals. I also used the green to stamp my sentiment.
Here is the visual summary of the key products used on today's project for you to pin for easy reference:
You can see all of my 'How To' summaries on my 'How To - Tips and Techniques' Pinterest board in case you've missed any.
One last reminder before I go: the limited edition So Shelli Paper Pumpkin Kit goes on sale tonight at 11pm, so be ready to order yours. If you missed the announcement, you can read all about it here.
Enjoy your evening and I'll be back tomorrow with another project. Until then, happy stampin'!
Stampin' Up! Supplies Used:
by Joanne James12. June 2017 07:00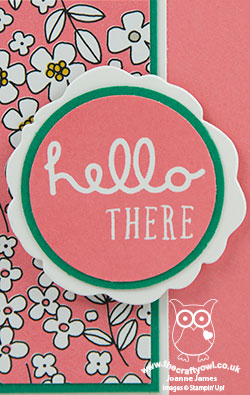
Happy Monday everyone - a fresh start to a new week! Today I'm sharing a card for this week's challenge over at Freshly Made Sketches:
I kept my card simple with a showcase of some new designer series paper - take a look:
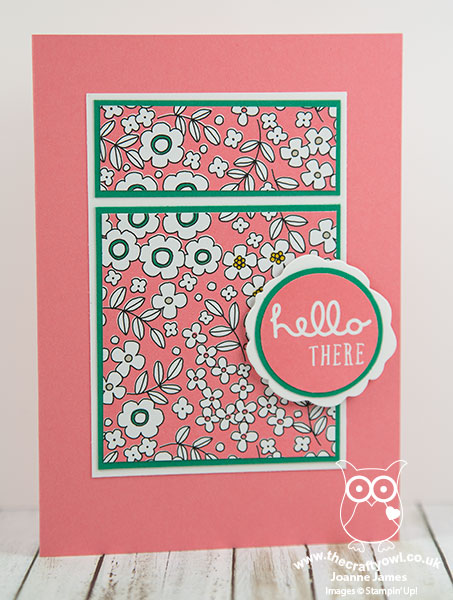
Here's the low-down on today's card:
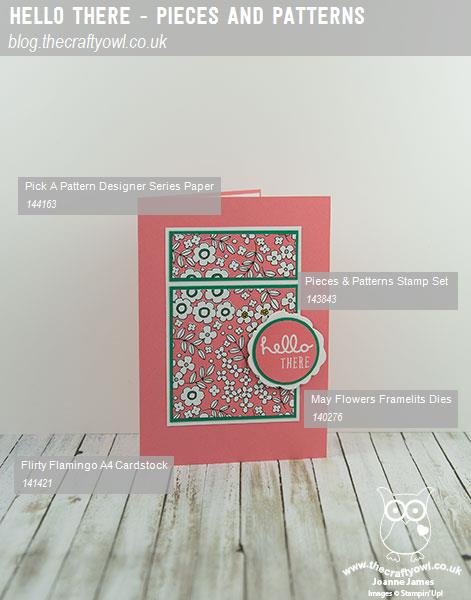
Pick A Floral Pattern - There are some great patterns in the Pick A Pattern designer series paper pack - an eclectic mix of everything from dinosaurs to mushrooms, cameras to this lovely floral pattern. The thing I love most about this pattern is that the white flowers, with the accents of green and yellow, really balance the brightness of the Flirty Flamingo, which I sometimes find a little intense. Framing in white and Emerald Envy green also helps to tone down the pink too.
Patterns and Pieces - I used the simple 'hello there' sentiment from the co-ordinating stamp set, Patterns and Pieces, for the centre of my floral accent, although I cropped it to a regular circle with my 1 3/8" circle punch rather than the slightly more fluid circle of the stamp itself.
May Flower - I decided that instead of a standard layered circle for my accent, i wanted to create something more in keeping with the flower pattern of the designer series paper. A quick sort through my framelits decided me on one of the framelits in the May Flowers set: whilst not an even-petalled flower, I think it still works to create a flower to ground my sentiment and tie in with my overall clean design. What do you think - does it work for you? I'd be interested to hear your thoughts - do leave me a comment below.
Here is the visual summary of the key products used on today's project for you to pin for easy reference:
You can see all of my 'How To' summaries on my 'How To - Tips and Techniques' Pinterest board in case you've missed any.
Enjoy your day; I have time at my desk and housework planned. I'll be back tomorrow with another project. Until then, happy stampin'!
Stampin' Up! Supplies Used:
by Joanne James22. February 2017 07:00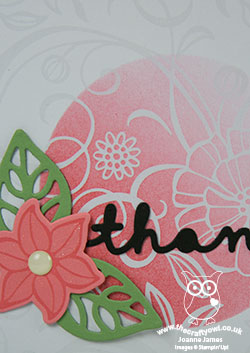
Today I'm sharing a card for this week's challenge over at CAS(E) This Sketch:

I decided to break out one of my new sponge brayers and some Irresistibly Floral embossed paper for my card today - take a look:
Here's the low-down on today's card:
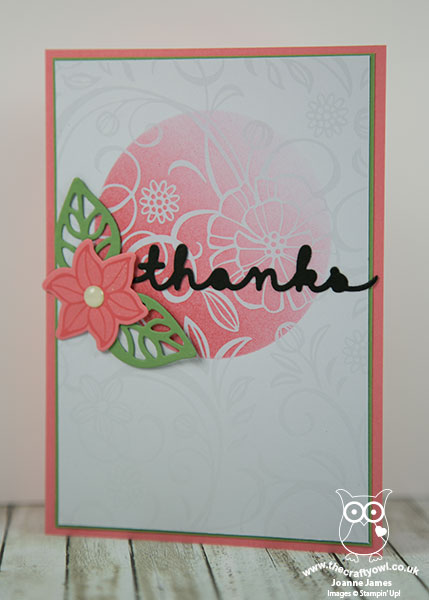
Easy Embossing - I decided to brayer the circle shape onto a piece of Irresistibly Floral Specialty Designer Series Paper using a sponge brayer. This is the first time I've brayered with one of these and I must confess I'm rather impressed - they make it so easy to get a smooth graduated finish and are great for this kind of ink technique, really bringing out the pattern of the paper. I created a simple circle stencil using a spare piece of cardstock and my Circle Framelits and brayered from bottom left to top right of my circle as I wanted to try and emulate the less-than-perfect circle of the sketch. As for the paper - this patterned clear-embossed white paper is great for colouring and sponging - a great embossed finish without any for of Versamark or heat tool required. Cheating? No! Easy? Most definitely!!
Co-ordinating Florals - I stamped a flower from the Falling Flowers stamp set and diecut it and a couple of leaves from the co-ordinating May Flowers Framelits to ground my simple diecut sentiment (cut from the now retired Greetings Thinlits - still one of my go-to sets!) This bundle which you can see on page 127 of the annual catalogue also co-ordinates with the patterns on the Irresistibly Floral embossed paper - and makes designing easy!
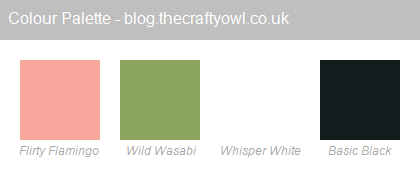
Fresh Colour Combination - I chose a fresh, spring colour combination of pink and green to compliment my contrasting black and white background and sentiment today - here it is if you would like to save it for future inspiration too:
Here is the visual summary of the key products used on today's project for you to pin for easy reference:

You can see all of my 'How To' summaries on my 'How To - Tips and Techniques' Pinterest board in case you've missed any.
Enjoy your day and I'll be back tomorrow with another project. Until then, happy stampin'!
Stampin' Up! Supplies Used:
681238de-88b0-4ef5-9123-59052f7293fe|0|.0|96d5b379-7e1d-4dac-a6ba-1e50db561b04
Tags: Irresistibly Floral, Falling Flowers, May Flowers Framelits, Brayering, Greetings Thinlits, Shop Stampin' Up online, Shop Stampin' Up! Online, Shop online, Stampin' Up, Stampin' Up Card, Stampin' Up Card ideas, Stampin' Up Supplies, Circles Framelits
Cards | Shop Online | Shop Stampin' Up! Online | Stamping
by Joanne James15. October 2016 19:49 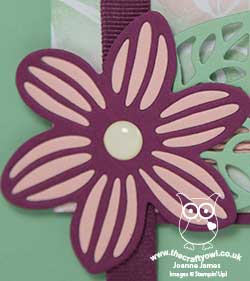
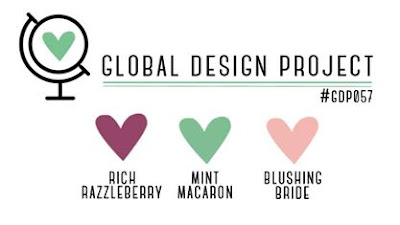
Welcome to the weekend! Yesterday I finally feel like I turned a corner with this rotten cold I've been struggling with this week and today I'm feeling much more like my old self - hurrah! Even better, after a morning spent on the sidelines of the rugby pitch I managed to spend the afternoon in my craft room catching up on some challenge cards and enjoying a few hours of welcome creativity now that my personal fog has lifted! Thanks for your patience; this evening I have a card that was inspired by this week's Freshly Made Sketches layout and the colours over at Global Design Project:

I was immediately drawn to Jen Mitchell's card over at FMS this week and it inspired me to turn to florals for my card today - take a look:

Here's the low-down on today's card:
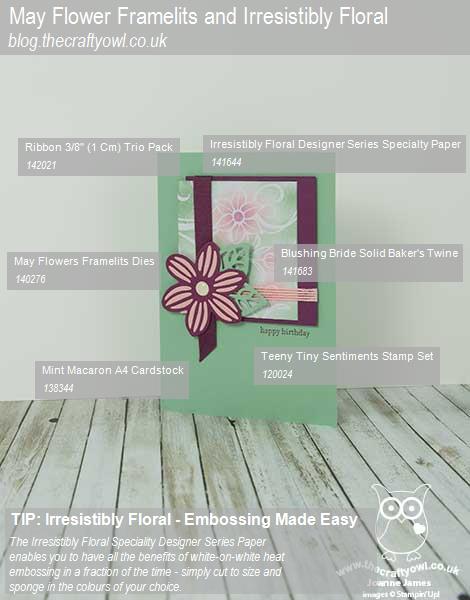
Irresistibly Floral - The main panel of my card today is a piece of Irresistibly Floral Specialty Designer Series Paper, sponged in the challenge colours to bring out the beautiful white-on-white floral pattern. This was mounted on a piece of Rich Razzleberry and finished with a Razzleberry ribbon banner and some Blushing Bride baker's twine.
May Flower in October - I paper-pieced a flower cut with the May Flowers Framelits to create a focal point on my card and added some Mint Macaron leaf diecuts and a white Perfect Accent to the centre.
A Teeny Tiny Sentiment - I chose to use a 'happy birthday' from the Teeny Tiny Sentiment stamp set for my sentiment today. Teeny tiny it may be, but it is just the right size to ensure a sentiment on my card today, without detracting from the detail of the sponged floral paper and flower embellishment.
These colours were much easier to work with than I imagined and I just love the detail of the floral embossed designer series paper.
Here is the visual summary of the key products used on today's project for you to pin for easy reference:
You can see all of my 'How To' summaries on my 'How To - Tips and Techniques' Pinterest board in case you've missed any.
Enjoy your day and I'll be back tomorrow with my card for this week's new challenge over at The Paper Players. Until then, happy stampin'!
Stampin' Up! Supplies Used: