B Is For Birthday - Happy 500th Birthday Paper Players PP500

by Joanne James19. July 2020 09:00

Today it's Sunday and time for this week's new challenge over at The Paper Players! It's the turn of the fabulous Jaydee to host and this week it's a special one - it's our 500th challenge! Can you believe it? 500 challenges! Paper Players has been one of my favourite challenges ever since I started blogging; it was the first challenge I ever entered - that card was for the sketch challenge PP164 and you can see my card here if you'd like a trip down memory lane. I've been designing with this fabulous team since challenge PP203 (you can see that card here) and they seriously are a special bunch!

It's clean and simple week and in light of our milestone we simply had to go with a celebratory theme:


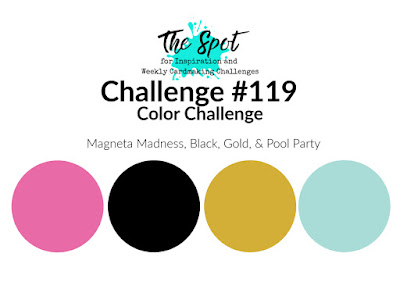
I combined our theme with this week's colours over at The Spot and the sketch over at CAS Colours and Sketches and came up with a fun birthday card - take a look:


REMEMBER THIS IS CLEAN AND SIMPLE WEEK - What do we mean by Clean and Simple?

  • Minimal layers and embellishments
  • Plenty of open space, aka "white" space
  • Simple and uncluttered

With that in mind, here's the low-down on today's card:

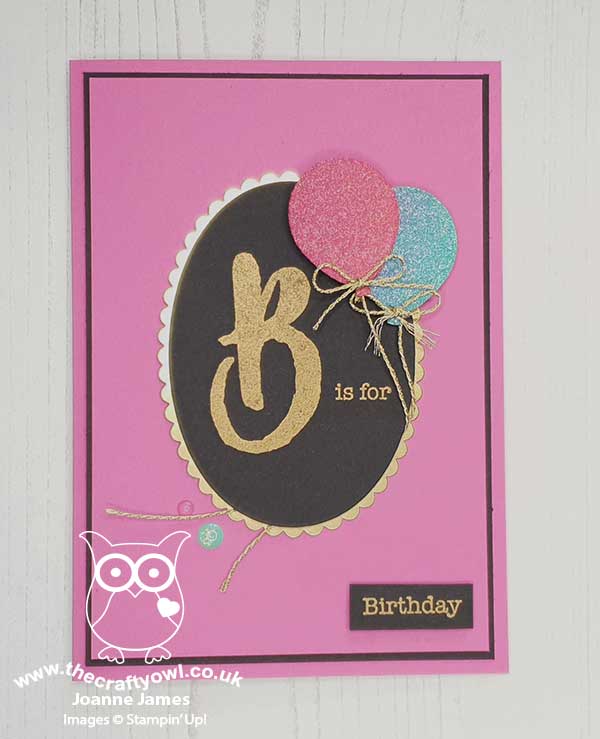
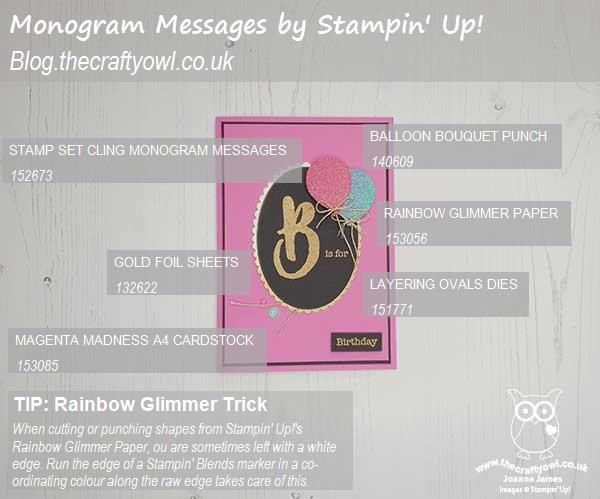
B Is For... - I used the new set 'Monogram Messages' to spell out my birthday greeting today and thought the colours over at The Spot were perfect for a bold and colourful birthday card for a discerning teenage girl - and I have lots of those to make cards for these days! I heat embossed my greeting in gold on black and layered my oval on a scalloped one of gold foil. I used a few layers on today's card but I kept my design clean with blocks of colour to maintain the CAS feel.

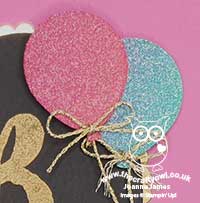
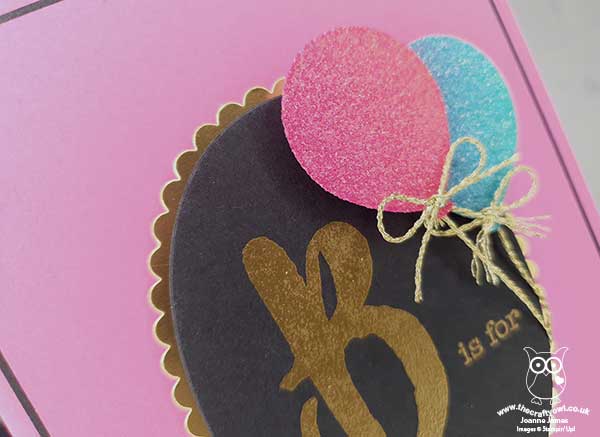
A Rainbow Glimmer Tip - I added a couple of glimmer balloons punched with my Balloon Bouquet punch, one in Magenta Madness and one in Pool Party - I just love the effect of all that sparkle! I have a little tip for you when punching glimmer paper: if you gently run a Stampin' Blend in a co-ordinating colour around the edge, it will colour any white fibres and blend the edge perfectly with the glitter on the front of the card. I added a couple of gold twine bows and threads too.


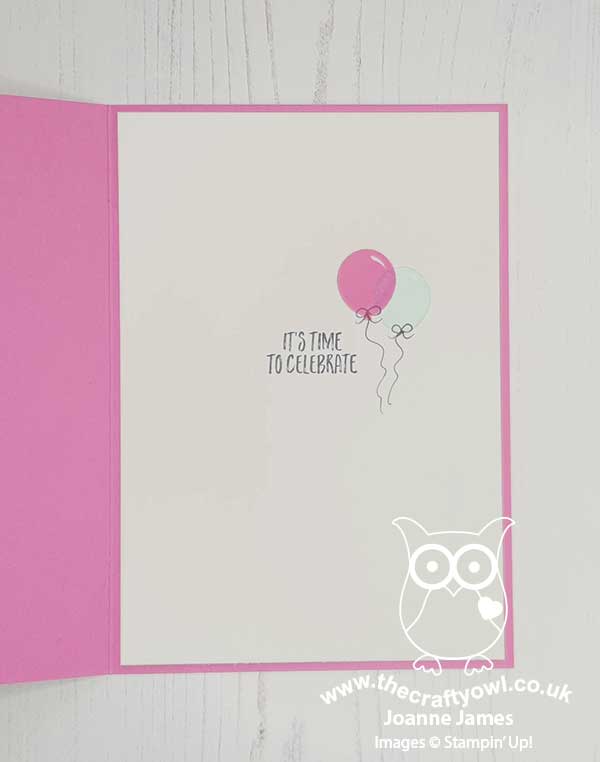
Don't Forget The Inside - I added a sentiment from 'Zany Zebras' to the inside of my card, along with a couple of stamped balloons with hand-drawn strings to continue the party feel:


I love this funky colour scheme and simple layout - perfect for a clean and simple yet special birthday card.

Here is the visual summary of the key products used on today's project for you to pin for easy reference:


You can see all of my Product and 'How To' summaries on my 'How To - Tips and Techniques' Pinterest board in case you've missed any. 

Before you reach for your ink and papers, check out what our amazing team has created to inspire you this week:

Here's a quick recap of our challenge rules:
 
1.  Create a new paper project
2.  Upload your creation to your blog with a link back to us and provide a direct link to the post featuring your challenge submission.
3.  Please link your card to no more than four challenges, TOTAL.
4.  Have FUN!

You can see all of my 'How To' summaries on my 'How To - Tips and Techniques' Pinterest board in case you've missed any. 

Enjoy your day; the weather is due to change and we are expecting rain here today, so we may be restricted to indoor activities although we have no special plans - sometimes that is the best kind of day. I'll be back tomorrow with another project. Until then, happy stampin'!


Stampin' Up! Supplies Used: 

Table built using Product Table Builder by The Crafty Owl - Independent Stampin' Up! Demonstrator.

Rainbow Glimmer Balloons for an Amazing Daughter Birthday Card

by Joanne James4. July 2020 20:00

Today I'm sharing a card that is totally fitting for the current Color My Heart Color Dare colour combo - this challenge is celebrating it's 400th challenge, although this is a new-to-me challenge and this is only the second time I've played along (the first time was #399!)

   RRCB 138

My card is for a special celebration too - a certain member of the James household recently celebrated her 15th birthday and as anyone who has been reading my blog for a long time knows, she usually has some exacting requirements as far as her birthday card is concerned! Here is my finished card:


Here's the low-down on today's card:

Rainbow Glimmer and Artistry Blooms - Like me, the minute Miss Rebecca saw the rainbow glimmer paper she fell in love with it - and wanted me to use the green, blue and purple hues for her card. I punched a whole bunch of balloons from this glittery paper, added an epoxy dot to highlight each one and tied each one with some silver thread tied with some retired two-tone ribbon to create my bunch. They really are so pretty and sparkly in real life! I paired them with a co-ordinating ombre paper from the Artistry Blooms pack for the perfect backdrop.Check out all that sparkle and dimension:

Everything Amazing - I'll be honest, I wasn't sure what to combine my glimmer paper with; Master James came to the rescue with his '3 word' game. He suggested we choose 3 words that describe Rebecca that we should then try to incorporate into her card. One of his words was 'amazing' - which led me to the now retired 'Everything Amazing' stamp set. This set dates back to June 2019 and is now but is one I never got to use whilst it was current, so it was good to be able to give it an airing. It's also perfect for Retro Rubber this week since anything goes! I heat embossed the main sentiment in silver then infilled the words in Night of Navy.

And For The Inside - I created a customised inside with the super-useful Family Party set and perfect for special, personalised greetings:


I'm glad to report Rebecca loved her card so another successful birthday card challenge achieved!

Here is the visual summary of the key products used on today's project for you to pin for easy reference:


You can see all of my 'How To' summaries on my 'How To - Tips and Techniques' Pinterest board in case you've missed any. 

Enjoy your evening and I'll be back tomorrow with another project. Until then, happy stampin'!


Stampin' Up! Supplies Used:

Table built using Product Table Builder by The Crafty Owl - Independent Stampin' Up! Demonstrator.

Balloons Floating Frame Birthday Cards

by Joanne James8. April 2019 11:30

Happy Monday everyone! Today I'm sharing a card using the sketch over at Freshly Made Sketches and the current colour palette at Fab Friday:


My card features a technique that is currently all the rage and I've been wanting to have a go at - the floating frame technique. This actually means I have two cards for you! Here's the first one:


And here's the second one, featuring the outer frame element:


Here's the low-down on today's card:

Floating Frames - The floating frame technique is really easy to create with a few basic tools: some 'Press and Seal' food wrap or similar, a framelit - I used my Rectangle Stitched Framelits Dies - and lots of dimensionals! You simply stamp and punch/diecut your images, lay them out, cover with Press and Seal, trim to frame size and cut out your central piece, before adhering dimensionals to the back of the diecut pieces and adhering to your chosen card base. Finally you remove the Press and Seal and your floating shapes remain in place. Jennifer McGuire has a fabulous video on this technique if you want to see one of these cards being made - you can see it here

Birthday Balloons - I've seen some fabulous examples of this technique, mostly using florals, but I was in need of some birthday cards and I thought the colours over at Fab Friday would be perfect for some bright and colourful balloons. I had so much fun making these cards I'm going to make a few more in alternative colour combos too - this is a great card design that would work well for both boys and girls, so makes a great storecupboard standby. I stamped my balloons with one of the stamps in the 'Happy Birthday Gorgeous' stamp set before punching them for added interest and I used one of the other balloon stamps in the set to decorate the envelope, as you can see below:

No need for a naked envelope here!

A Birthday Greeting - For my second card, I needed a larger greeting to sit inside my frame so my Well Written Framelits were the perfect choice. I also added an extra balloon for balance, tied with some white baker's twine. The same design could be used with other stamps and sentiments from this set too to make cards for other occasions - how many other combinations can you come up with? 

Here are the visual summaries of the key products used on today's projects for you to pin for easy reference:


You can see all of my 'How To' summaries on my 'How To - Tips and Techniques' Pinterest board in case you've missed any. 

Enjoy your day; we are having a kit clear-out in the playroom today. So far we've made an erupting volcano, an insect hut, a flying helicopter and two solar-powered motorised dinosaurs. You've got to love the Easter holidays! I'll be back tomorrow with another project. Until then, happy stampin'!


Stampin' Up! Supplies Used:

Table built using Product Table Builder by The Crafty Owl - Independent Stampin' Up! Demonstrator.


Happy Birthday Thinlits Brights

by Joanne James5. June 2017 12:00

I'm a little later posting today as I had the first of this month's technique classes this morning and I wasn't quite organised enough to post beforehand. Anyway, I'm here now with a bright and colourful card to cheer your day! I have another birthday card for you - this time one that uses the current sketch over at the Fab Friday Challenge:


This circle could be so many things, but I really felt it needed words - in fact, two big ones! Take a look:


 Here's the low-down on today's card:

Happy Birthday - It's big, it's bold and says it all right there: the Happy Birthday Thinlits Die really does make a big impact! Whether you pair it with flowers or balloons (the bundled stamp set 'Happy Birthday Gorgeous' has both), this die makes a statement when used on a card front or birthday packaging. Here I've layered it and offset both diecuts, for added impact. This is one die that is going to get lots of use, for sure.

Reversing Birthday Memories - The paper I've used on my card today is from the Birthday Memories designer series paper from the product suite of the same name. You will no doubt like me swoon over this fabulous paper and it's adorable hand painted colourful children's illustrations, however the reverse side should also not be overlooked - it includes some great repeat patterns, along with a wonderful rainbow striped pattern and the dotty pattern that I've used on my card today. 

Blue With A Touch Of Citrus - My choice of patterned paper inspired my colour choices today, although I switched out the Soft Sky for Pool Party as I wanted a warmer blue to balance my zingy citrus colours of Lemon-Lime Twist and Pumpkin Pie. Here's today's colour combination for you to save to inspire your future creations too:

Here is the visual summary of the key products used on today's project for you to pin for easy reference:


You can see all of my 'How To' summaries on my 'How To - Tips and Techniques' Pinterest board in case you've missed any. 

Enjoy your day and I'll be back tomorrow with another project. Until then, happy stampin'!


Stampin' Up! Supplies Used:

Table built using Product Table Builder by The Crafty Owl - Independent Stampin' Up! Demonstrator.

Confetti Celebration Shaker Card

by Joanne James23. May 2016 16:05

Happy Monday everyone! I've spent a busy day doing housework today, with the result that 'Chez James' now looks as neat as a pin and the ironing basket is completely empty, so I am writing my blog post before collecting Rebecca from school. I am collecting her from her rounders practice a little earlier than usual today as her singing lesson this week has been rescheduled; she is off on a school trip to Harry Potter world at Elstree Studios on Wednesday - lucky girl! 

So today's card uses yesterday's Paper Players sketch again, but this time to make a shaker card for this week's challenge over at Pals Paper Arts:

   Pals Paper Arts PPA301

I loved this bright and cheery colour combo and there are some lovely Design Team cards this week. My fellow Paper Players designer Linda Callahan also used them on her Paper Players card yesterday (you can see Linda's card here) with some gorgeous florals. I decided to go with a shaker card for my entry - take a look:

For today's card the colours may well be familiar to you, but there are some fabulous 'sneak peeks' of new catalogue product:

Time to Party With Confetti Celebration - Confetti Celebration is a fun new stamp set with all the making of a good party: decorations (check out the string of lights that I used on the front of my card), stars, balloons and some great sentiments. Both of the sentiments on my card are in this new set and I love that the 'Hooray' is framed perfectly in the shaker window.

Lots of Sprinkles - The sprinkles for today's shaker were created with a new punch of the same name. The Sprinkles Punch will be perfect for creating table confetti or the insides for shakers in a range of colours and glimmer papers. I colour-co-ordinated mine with the challenge colours and added a few gold star sequins too for good measure.

A Hidden Shaker 'Gem' - The best thing about today's shaker card is the one thing you can't see! A strange thing to say I know, but the new catalogue has a new supply item that will revolutionise shaker card construction: foam adhesive strips! Just like the ones in the Christmas shaker card kits in the last Autumn-Winter seasonal catalogue, they are a little deeper than Dimensionals and give just the right height for a good shaker card. I am going to get so much use out of these!

Here is the visual summary of the key products used on today's project for you to pin for easy reference:


You can see all of my 'How To' summaries on my 'How To - Tips and Techniques' Pinterest board in case you've missed any. 

Enjoy your day and I'll be back tomorrow with another project; until then, happy stampin'!


Colour Combo - Zoo Babies Rhino Party Animal Birthday Card

by Joanne James1. April 2016 08:00

Happy Friday everyone and April Fools Day! Sale-A-Bration is over for another year and the end of the week is here - although this week has been much more laid back than usual; I do love school holidays! Today I have a fun card for this week's challenge over at Less is More, where the theme is to include polka dots on your card. I immediately thought about my Zoo Babies stamps, as a number of these animals have polka dots in their patterns. Here is my card:

I wanted to make a fun birthday card rather than a baby congratulations card this week - so tied a polka dot balloon to him! Here's the low-down on today's card:

Seeing Spots - If you look closely, the horns of my cute rhino have a polka dot pattern. The giraffe in this set is much more spotty, but I could resist the rhino :-) To ensure that polka dots were a clear feature of my card, I used some stripped jute ribbon to tie a balloon punched from Real Red Brights Designer Series Paper and punched with my balloon punch to the back of my party animal.

Party Animal - No party is complete without a party hat, right? My rhino is sporting one that he borrowed from the dinosaurs in the 'No Bones About It' stamp set. The 'happy birthday' sentiment on the front of my card is from the 'Balloon Builders' stamp set and is paired on the inside of my card with another great sentiment from this set 'Party Animal' - my rhino totally knows how to celebrate!

Tip Top Colour Combo - I chose Tip Top Taupe for my rhino today - warmer than grey yet still a true colour for this fun fella. I paired it with Bermuda Bay and Real Red for a pop of colour on my CAS card - here's my colour combo for you to save to use too:


I hope you like it - this is one of those cards that make me smile and I've been desperate to share all week!

Here is the visual summary of the key products used on today's project for you to pin for easy reference:


You can see all of my 'How To' summaries on my 'How To - Tips and Techniques' Pinterest board in case you've missed any. 

I'm also linking my card up today with the team over at SUO Challenges where the current theme is 'cute critters'. My rhino may not be warm and fluffy, but I think you'd have to agree he is definitely cute!!

Enjoy your day and I'll be back tomorrow with another project; until then, happy stampin'!


Stampin' Up! Supplies Used: 

Table built using Product Table Builder by The Crafty Owl - Independent Stampin' Up! Demonstrator.

Birthday Bouquet Balloons Card

by Joanne James21. February 2016 09:00

It's Sunday and time for a new challenge over at The Paper Players! It's my turn to host our challenge this week and I have a fun clean and simple challenge for you to play along with:


Up, up and away! Balloons are very on-trend currently, but you can use any airborne object on your card today - just keep it clean and simple. For my card this week I was inspired to use balloons and in contrast to yesterday's bright balloon card decided to feature a piece of the delicately patterned balloon paper from the Birthday Bouquet designer series paper set:


I used a base of Mint Macaron to which I adhered a strip of Pool Party 3/8" Glitter Ribbon before adding a piece of the balloon patterned paper. I added a simple sentiment from the 'Suite Sayings' stamp set, which I cut out with my Project Life Cards & Labels Framelits, and added a couple of balloons stamped with the 'Balloon Builders' stamp set to give the same muted effect as the paper. Finally, I created some tassels with some frayed Pool Party Glitter Ribbon and a few clear sequins to finish my card. On reflection, whilst my card has minimal layers it doesn't have much of the 'white space' that is traditionally typical of 'clean and simple' cards, but I love the soft feel if it and the glimmer from the ribbon and the balloon tassles so I had to share it with you! I'm also linking up again with the team over at The Global Design Project where their theme this week has been balloons - what can I say, we were obviously thinking along similar lines!

For those of you who like a visual summary, here's something new that I will be featuring in my blog posts - a labelled photograph of the key products required to make today's card: 

These images are perfect for pinning to give you a visual reference of the supplies needed to re-create this card which can be useful if you want to come back to it at a later date. I will be pinning these to my new 'How To - Tips and Techniques' Board on Pinterest too, which you can find here.

Before you reach for your ink and papers, check out what our amazing team has created to inspire you this week, all of whom have created some fantastic examples of clean and simple cards:

The Paper Players Design Team
 
 
Here's a quick recap of our challenge rules:
 
1.  Create a new paper project
2.  Upload your creation to your blog with a link back to us and provide a direct link to the post featuring your challenge submission.
3.  Please link your card to no more than four challenges, TOTAL.
4.  Have FUN! 

I look forward to seeing your clean and simple creations in the gallery. We are off to basketball and back to hockey today and are planning a fun afternoon of board games and maybe a walk out along the canal if the weather stays dry for long enough. 

Back tomorrow with another project; until then, happy stampin'!


Stampin' Up! Supplies Used: 

Table built using Product Table Builder by The Crafty Owl - Independent Stampin' Up! Demonstrator.


Mini Catalogue

BROWSE THE CATALOGUE

The mini catalogue is now live! Read and download your copy here.

Shop Online

Access my online shop 24 x 7, 365 days of the year:

Current March hostess code:

S9F2XJJW

Shop Online

Join My Team

It's always a great time to join Stampin’ Up! New team members can get £130 worth of products for only £99 + free business supplies + free shipping + all the fun being a part of Stampin’ Up! Stampin' Up! has something for everyone: join my growing team and benefit from my support to enjoy Stampin' Up! however you choose.

If you're interested, call me for a chat to understand how I can help you realise your goals. Alternatively, if you have already decided to sign up and you just can't wait, please click here for the link to the online form where you can sign up and order your starter kit right away! 

Latest Kit!

Stampin Cut and Emboss

The Rock Legend Kit has all you need to make 8 cards with coordinating envelopes. Along with the new Panda Friends Kit, both are available from January 4th for just £14 each - get yours here!

2023-24 Annual Catalogue

BROWSE THE CATALOGUE

Click on the catalogue for a full list of current SU! supplies - if you would like to order any of the items featured, please drop me a line at [email protected] or give me a call on 07773 421446 - I'd be happy to help.

New Online Exclusives

There will be new products available exclusively in the online store from 5 March - check them out here.

About Me

Hi I'm Joanne and live in Northampton and when I'm not looking after my husband and two beautiful children, am an avid crafter with a passion for all things Stampin' Up!

I must confess that I have never been a big rubber stamper - until I discovered Stampin' Up! that is. I love the fact that I can get such great results with co-ordinating stamps, inks, papers and punches - the possibilities are endless! Join me on my stamping journey as I share the things I love and be inspired to create amazing things yourself!

Follow Me

Monthly Newsletter

Box Builder

Click the button above to use Box Buster to create your custom box design using the Envelope Punch Board!

Kits Collection Now Available!

Stampin Cut and Emboss

The new Kits Collection from Stampin' Up! is now available!

Click here to see the current kits available and order yours online today.

I Design For


Stampin' Up Stuff

This is my personal blog and is not endorsed by Stampin’ Up! I hope you find it a plentiful source of ideas and personal inspiration but please don't copy my designs for contest submission or use for classes, publication or sale without express permission.