by Joanne James4. March 2015 08:57It's Wednesday so that means a new collection of Wednesday Weekly Deals! This week's deals are included below - they will be available for one week only, before a new collection of deals is announced.
As always, if you want to take advantage of any of the deals on offer, you can support my business by placing your order online by clicking here or using the link to my store on the right hand side of my blog page where it says 'Shop Online' or with me in person. Don't forget to add the Hostess Code for March (you can find this under the 'Shop Online' section on the right) and be sure to make sure that you don't check the 'no contact' box if you'd like to be kept updated with the progress of you order and receive a little thank you in the post from me.
Here's a summary of this week's one-week only Wednesday deals - click on each item to go to the online store to purchase:
This week we have a gift box kit - perfect for packaging small gifts in a hurry - and the Label Love stamp set and co-ordinating punch, a great opportunity to pick up this bundle for a bargain price. In addition, gold vellum, baker's twine and Epic Day washi tape, fringe scissors - perfect for grass on all those spring projects! - and the 'Lucky You' MDS download, which will make light work of decorations for any St Patrick's Day celebrations you might be planning.
Lots to choose from this week; I'll be back later with today's creative project, but until then happy shopping!
2621bb79-dc71-4369-ac51-f4f2581e50ee|0|.0|96d5b379-7e1d-4dac-a6ba-1e50db561b04
Tags: Artisan Label Punch, Label Love, Fringe Scissors, Washi Tape, Wednesday Weekly Deals, Promotions, Shop online, Stampin' Up, Stampin' Up Card, Stampin' Up Card ideas, Stampin' Up Supplies
Promotions | Shop Online
by Joanne James15. June 2014 20:58Well today might be Father's Day, but in the James household there has been an apparently altogether more important celebration - the oldest of my James Juniors, Rebecca, turned 9 today. Her birthday always falls near to Father's Day, but as they actually clashed today she informed Daddy that every day is Father's Day and you'll only be 9 once - so one definitely trumps the other! My lack of blog post yesterday was due to my sheer exhaustion having held a day of party celebrations at home for Rebecca with a little group of friends - I'll tell you more about this another time as this is a Project Life page in the making! - so today I thought I would share the card I made for her.
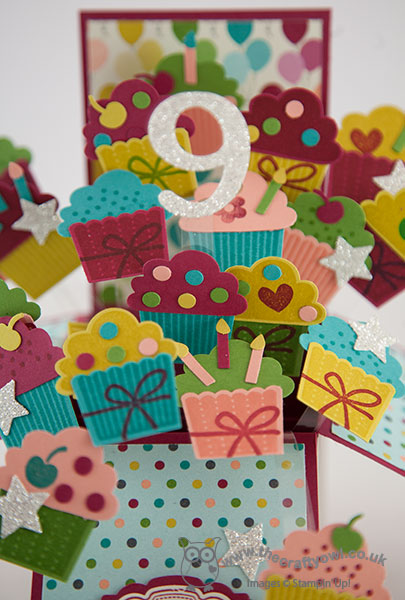
I finally had a go at one of the 'card in a box' cards that are currently all the rage in the papercrafting world and decided that mine would feature my favourite DSP for birthday cards, Birthday Basics, and one of Rebecca's favoutie foodstuffs - cake! Well, cupcakes to be precise; here is my card, which is A5 size when folded flat:
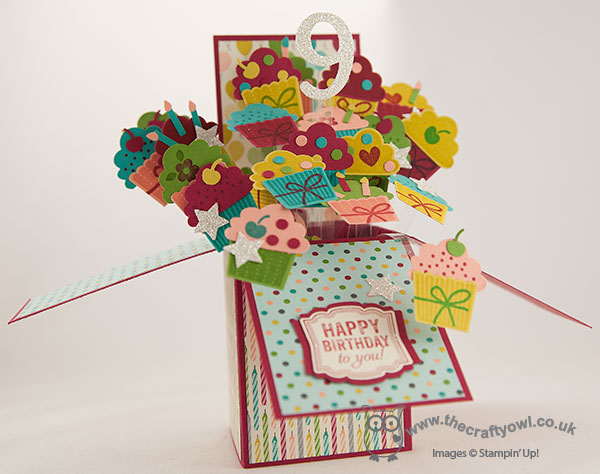
I took the opportunity to use my 'Create a Cupcake' stamp set; it's on the retiring list, but the co-ordinating punch is staying and there is more cupcake loveliness just around the corner :-) Now I know this card does look rather on the crowded side with cakes popping out all over the place and nicely wobbly on their acetate supports, but when a card is for a 9 year old, excess is the name of the game - along with a little glimmer. A nice sparkly number 9 and a few sparkly stars complete the card. And Rebecca's verdict: "Perfect!"
Back tomorrow with another card; until then, happy stampin'!
Stampin' Up! Supplies Used:
3190a3a9-54ff-4bda-b350-8f1ca7cf1ce5|0|.0|96d5b379-7e1d-4dac-a6ba-1e50db561b04
Tags: Card in a Box, Birthday Basics, Create a Cupcake, Cupcake Builder Punch, Artisan Label Punch, Label Love, retiring stamps, Shop online, Stampin' Up, Stampin' Up Card, Stampin' Up Card ideas, Stampin' Up Supplies
Cards | Stamping
by Joanne James11. March 2014 15:13Firstly, thank you to everyone who has left comments on my blog, Facebook page, youTube channel or emailed me in person with comments and praise for my new Box Buster tool - I am genuinely touched that you have gone out of your way to share with me what a great tool you think this is and I'm delighted to be able to share it with you. Today I'm back with another video tutorial showing you a different box that you can make using your Envelope Punch Board - an open topped Easter bunny treat box - made using paper from the lovely Fresh Prints Designer Series Paper stack:
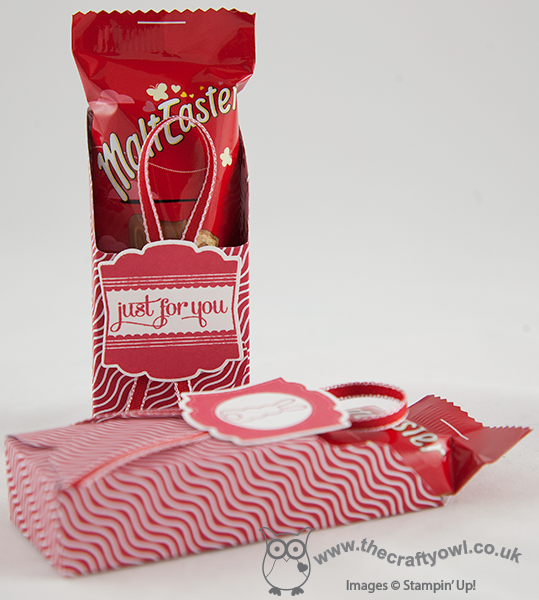
Sometimes you want to be able to see the contents of your box and today's box is just perfect for that. It also means that when you're making your box out of such lovely double-sided designer paper, you get a lovely glimpse of the reverse side too:
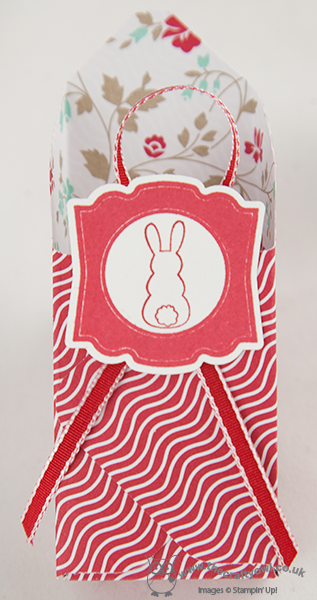
I love the Fresh Prints DSP stack - these paper stacks are great for small boxes and perfect if you're a card maker; I always get through several of these each season! Today's boxes were made to fit the Malteser Easter bunnies that are currently on sale in store right now, but as always with the aid of my Box Buster tool you could adapt the same style box to fit any size contents, just by measuring them; Box Buster from The Crafty Owl will do all the hard work for you and tell you what size paper you need and where you should make your punch marks. So, without further ado, here's what you've all been waiting for - the link to today's video:
)
I hope you found the tutorial useful - there's lots more still to come! Don't forget - you can access the Box Buster tool via the button on the right hand side of my blog home page or simply by clicking here.
Back tomorrow with another project; until then, happy box making!
Stampin' Up! Supplies Used:
c5d11fe0-3556-4a4f-8586-67c08127827c|0|.0|96d5b379-7e1d-4dac-a6ba-1e50db561b04
Tags: Box Buster, boxes, Artisan Label Punch, Eggstra Spectacular, Easter, Envelope Punch Board, Fresh Prints DSP Stack, Label Love, Shop online, Stamp-a-ma-jig, Stampin' Up, Stampin' Up Card ideas, Stampin' Up Supplies, video tutorial
Box Buster | Boxes | Envelope Punch Board | Video Tutorials
by Joanne James18. January 2014 20:52Well it's the weekend and in our house that can only mean one thing - even more Lego on the living room floor than during the week! This morning we even paid a visit to the Lego store to spend some of the money that James' juniors received at Christmas, so we've further added to the total brick count. I would share a picture of the living room floor, but to be honest I'm embarrassed at the state of it; at least I'm out at team training all day tomorrow, so I can pretend it's neat and tidy whilst I'm gone :-)
Anyway, today's card is my entry for this week's Pals Paper Arts challenge. This week it's a sketch by the very talented Margaret Moody:
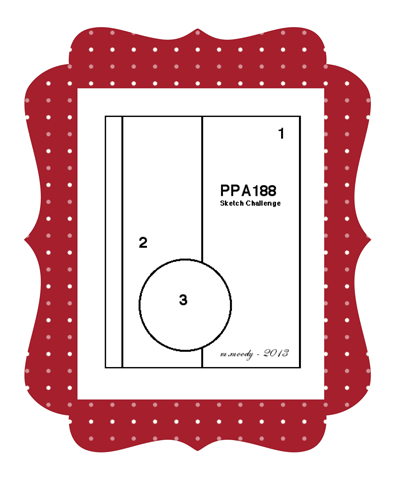
This is something of a classic sketch, as it's a layout that can be used for all kinds of occasions. I decided I was in need of a bright card today, so went with this bold and cheerful birthday card:
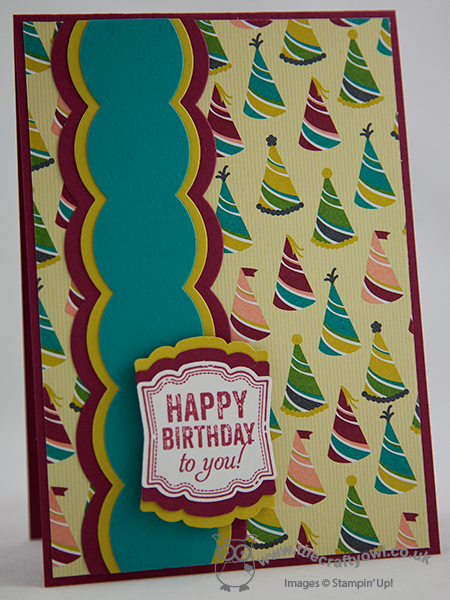
I let the bold and bright 'Birthday Basics' DSP pattern take centre stage with its colourful party hats. Instead of leaving my vertical band straight, I decided to echo the scallop trim seen on some of the hats and create a layered strip that I cut with the Large Scallop Edgelit - it reminded me of party streamers too (I know, I have a vivid imagination!) I finished off with a sentiment from the 'Label Love' set stamped in Raspberry Ripple and punched with the Artisan Label Punch, then layered on another two pieces of punched cardstock in co-ordinating colours.
I really like this card, as it's as versatile as the layout and would suit either a boy or a girl. Don't forget to check out how the design team over at the Pals interpreted this week's sketch for lots more card making inspiration.
Back tomorrow with all the latest news from training and a picture of my swaps. Until then, happy stampin'!
Stampin' Up! Supplies Used:
by Joanne James28. August 2013 07:30Today I'm sharing a recent commission card I made for a friend of mine who wanted to welcome the latest addition to her extended family, another in a long line of little boys! The brief was 'simple classic' and we agreed a bib style card would be perfect. I made a 6" square card, using the new Circles Framelits to create the bib:
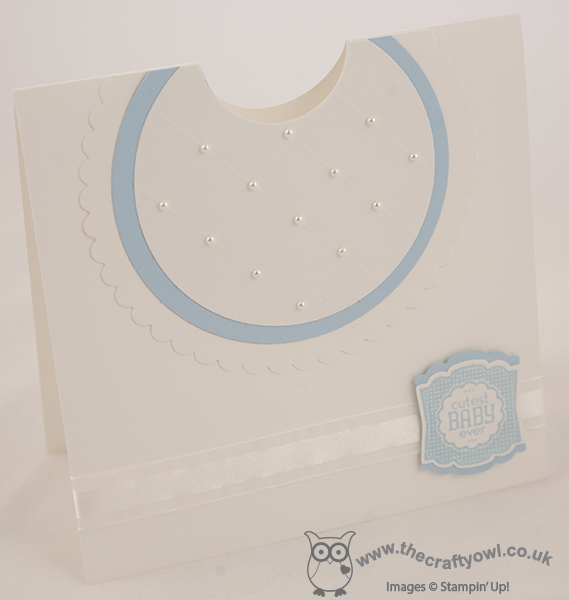
I scored the central section on the reverse at 1/2" intervals and finished with tiny pearls for added detail. I added took the opportunity to create a layered label using my new baby Label Love stamp and co-ordinating Artisan Label punch - here's a close up:
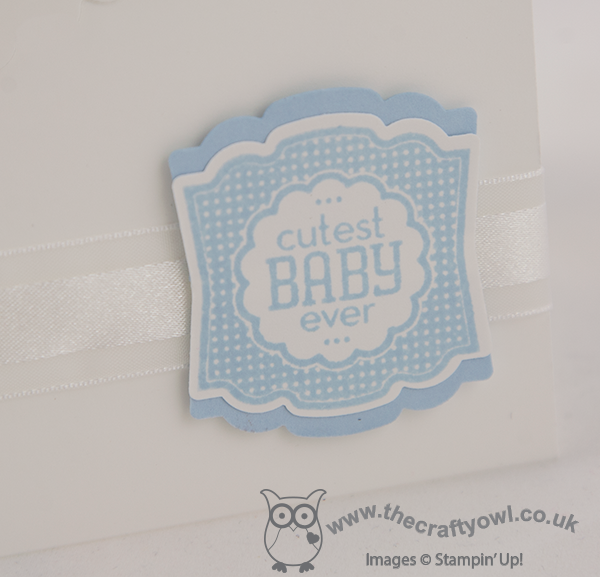
How cute is this? I love how easy it is to create the background layer which in this instance added just enough colour to pop this off the front of this largely white card. I used some of my retired Bashful Blue card stock - I will miss this colour for baby boy cards, it's such a perfect shade.
Back tomorrow with another project; until then, happy stampin'!
Stampin' Up Supplies:
Stamps: Label Love
Cardstock: Whisper White, Bashful Blue (retired)
Ink/Stampin' Write Markers: Bashful Blue (retired)
Tools: Artisan Label Punch, Circles Framelits, Simply Scored
Finishing Touches: Whisper White 5/8" Organza Ribbon, Basics Pearls