by Joanne James20. April 2014 20:58Happy Easter everyone! I hope you've all had a lovely day and that the Easter bunny left you lots of yummy chocolate eggs. We've had a lovely day, with our traditional Easter egg hunt around the garden and then a family roast for lunch. Not even the rain this afternoon could dampen our spirits. I made this really quick card this morning as an absolute last-minute Easter card - I needed one more opportunity to use an Easter stamp! I wasn't intending to share it on my blog, then this afternoon I saw that the Paper Players challenge this week is to create a CAS card with washi tape, so thought I would link up;
Here is my super-quick card:
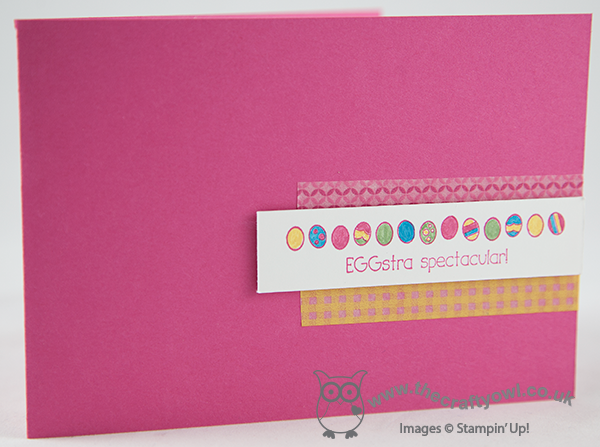
I must confess that I am something of a hoarder of washi tape - I love to buy it, then struggle to use it! One thing it's great for though is adding detail to really quick cards, like this one: I simply took a plain piece of Melon mambo for my card base, added two strips of Gingham Garden washi tape and then stamped the 'Eggstra Spectacular' stamp in pink, coloured with marker pens then popped up on a couple of dimensionals. As easy as that! I cut my washi tape with scissors as I wanted a straight edge, but it tears really easily and looks great with a torn edge too. I don't know why, but having come to edit my photo the pink washi tape doesn't look straight, but I can assure you it is - next time I'll go with something more random!
Back tomorrow with another card; until then, happy stampin'!
Stampin' Up! Supplies Used:
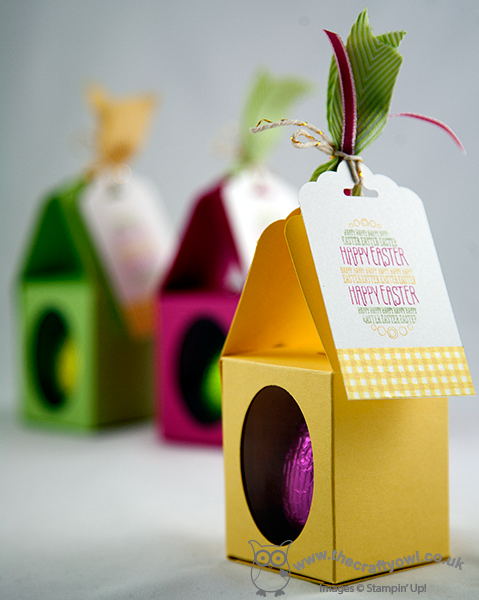
by Joanne James3. April 2014 21:03Evening everyone! I promised you a special project today and here it is! Several months ago Stampin' Up! asked me if I would create an Easter box for a magazine commission and that magazine hits the shelves of the newsagents today! The box I created for Stampin' Up! is featured in the April 2014 issue of Prima Baby and Parenting and is part of an extended feature on Easter Family Fun - great things to make and do with your family this Easter. There are cute cakes and biscuits to bake and this fabulous Easter egg box to make:
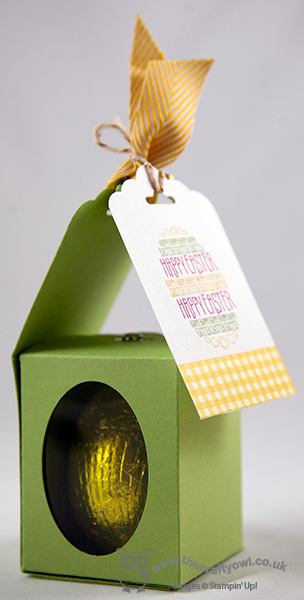
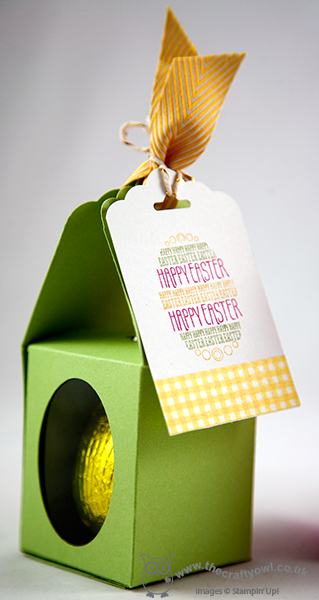
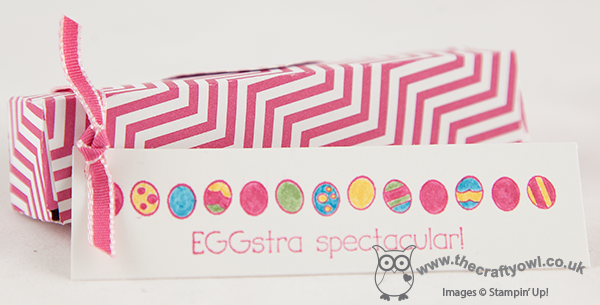
Here's another shot from a different angle showing a close up of the tag, stamped with the egg from the 'Eggstra Spectacular' stamp set:
Lastly the trio of boxes that the magazine used for the title page of the two-page spread:
Here is my photograph of the title page in the magazine itself - the facing page contains a step-by-step 'how to' tutorial showing how to make it:
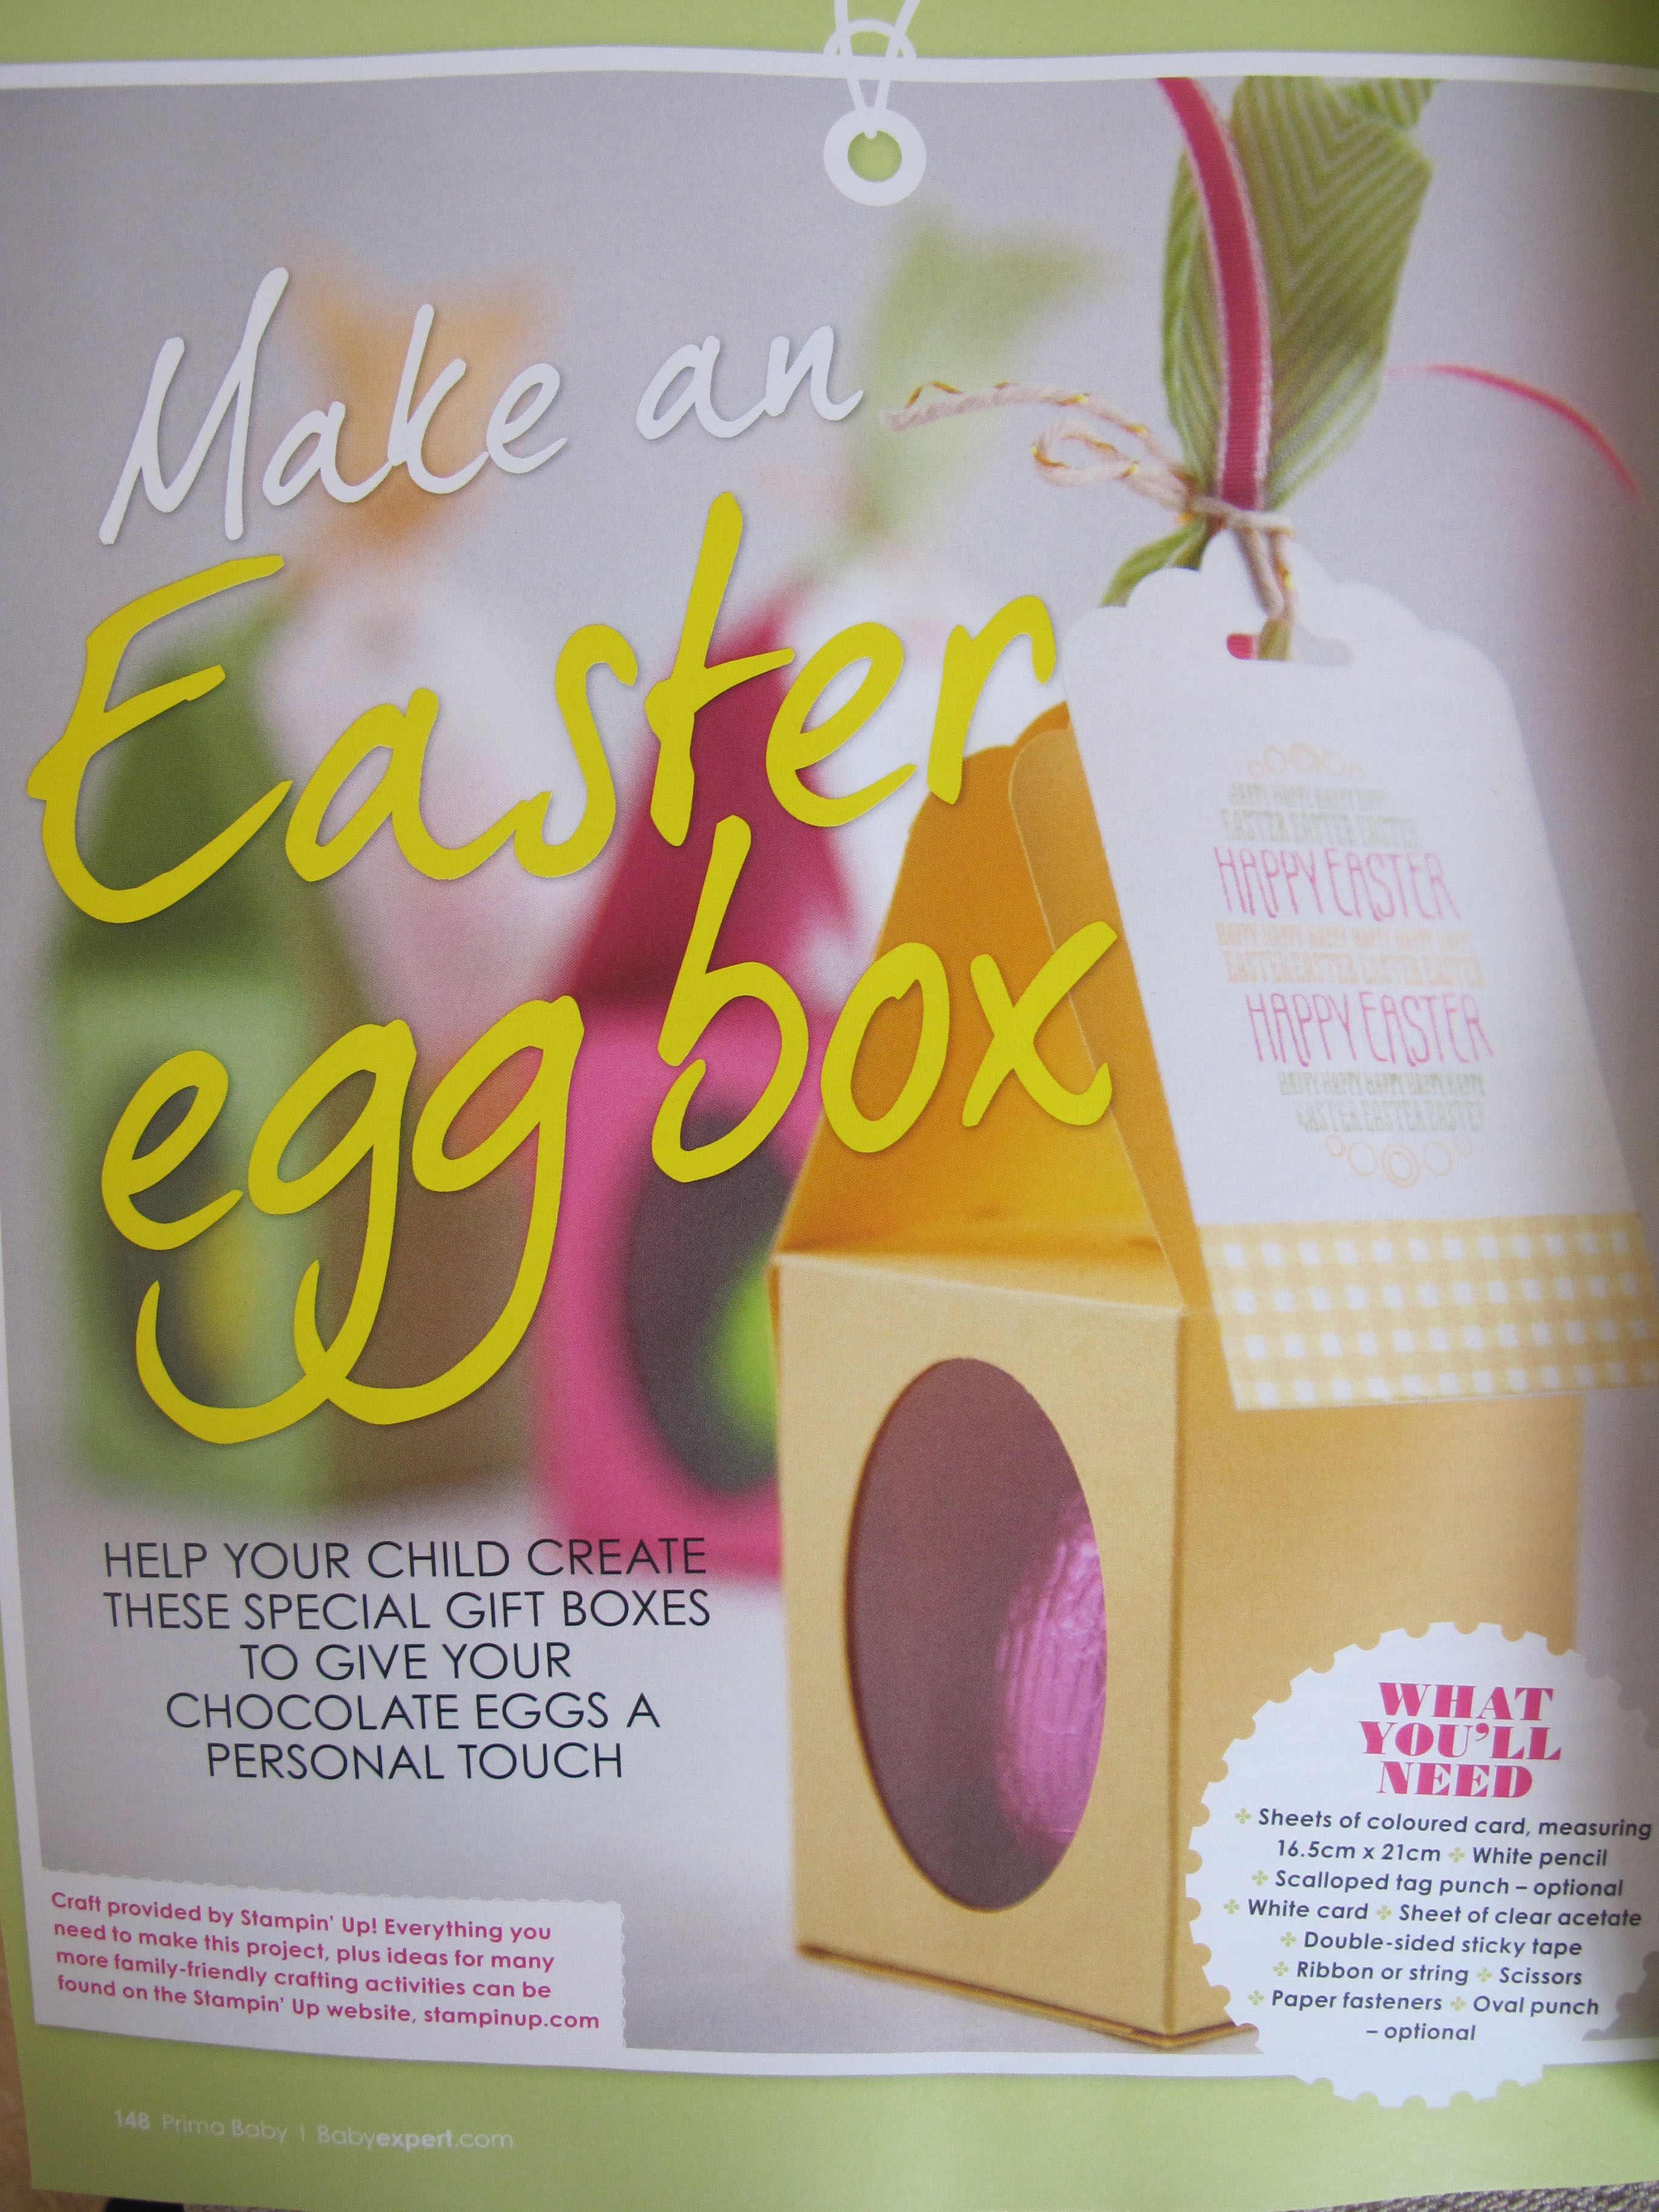
The sides of the body of the finished box measures 2" x 2 1/2" which is perfect for a small Easter egg (I used the ones you can buy in packs for Easter egg hunts) but this box could be used for anything small and attractive where you want to give a glimpse of the contents. If you would like a copy of the tutorial you can see it in this month's Prima Baby magazine - if you live in Northampton, you'd better get to the shops quick though before I buy all the copies :-) I also made a short video tutorial showing you how I made this box - click the link below to watch it:
That's all from me today; back tomorrow with another project; happy stampin'!
Stampin' Up! Supplies Used:
5a410a65-8882-46df-b9d9-50c6b2560efa|0|.0|96d5b379-7e1d-4dac-a6ba-1e50db561b04
Tags: 3D Projects, boxes, Candy Dot Brads, Easter, Eggstra Spectacular, Scalloped Tag Topper Punch, Shop online, Stampin' Up, Stampin' Up Card, Stampin' Up Card ideas, Stampin' Up Supplies, video tutorial
3D Projects | Boxes | Stamping
by Joanne James25. March 2014 23:00Good evening lovely blog readers - a quick post from me today as I've been out and had a full-on day today. I finally found the time to make a card for this week's challenge over at Create with Connie and Mary. They have a great design team with inspiring sketches and designs; this week it's a sketch challenge:
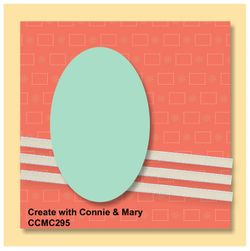
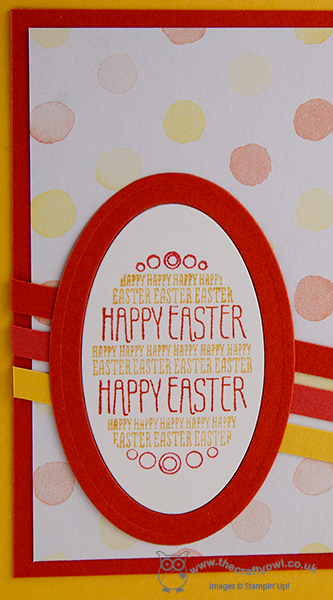
I decided to make an Easter card using the egg stamp from the Eggstra Spectacular stamp and designed a card that is entirely faithful to the sketch layout - here it is:
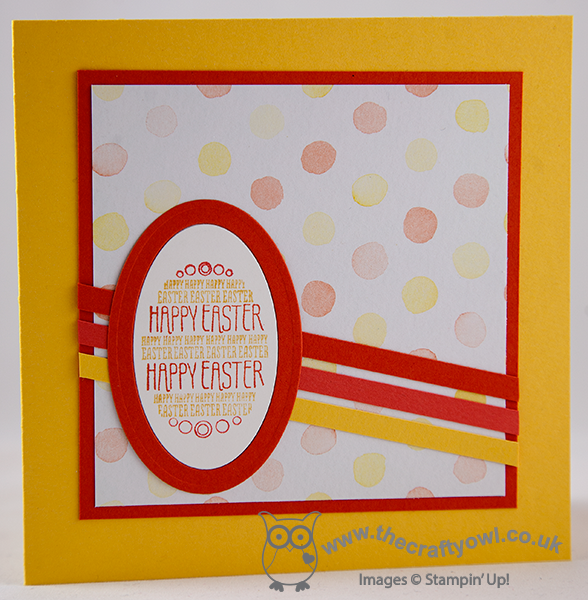
I made a 5" x 5" square card and using a piece of the lovely Watercolour Wonder DSP as my focal background and layered with some simple card stock strips, picking out the colours in the paper. I finished with an oval featuring the 'Happy Easter' stamp which I inked up with my Stampin' Write Markers in the same 3 colours as my paper strips. I inset this oval inside a larger one in Tangerine Tango as opposed to mounting it onto a base layer, as I wanted the oval to sit flat across the strips underneath. Here's a close up:
Hope you like today's card; back tomorrow with another project. Until then, happy stampin'!
Stampin' Up! Supplies Used:
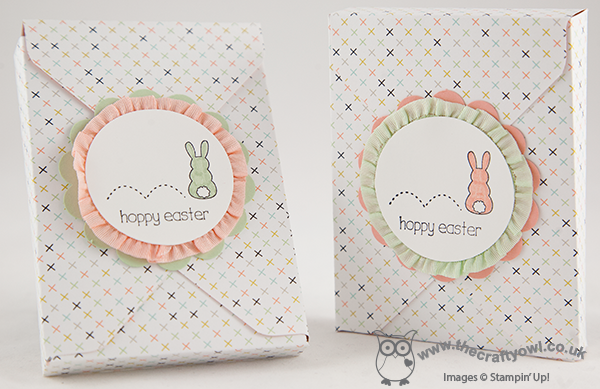
by Joanne James11. March 2014 15:13Firstly, thank you to everyone who has left comments on my blog, Facebook page, youTube channel or emailed me in person with comments and praise for my new Box Buster tool - I am genuinely touched that you have gone out of your way to share with me what a great tool you think this is and I'm delighted to be able to share it with you. Today I'm back with another video tutorial showing you a different box that you can make using your Envelope Punch Board - an open topped Easter bunny treat box - made using paper from the lovely Fresh Prints Designer Series Paper stack:
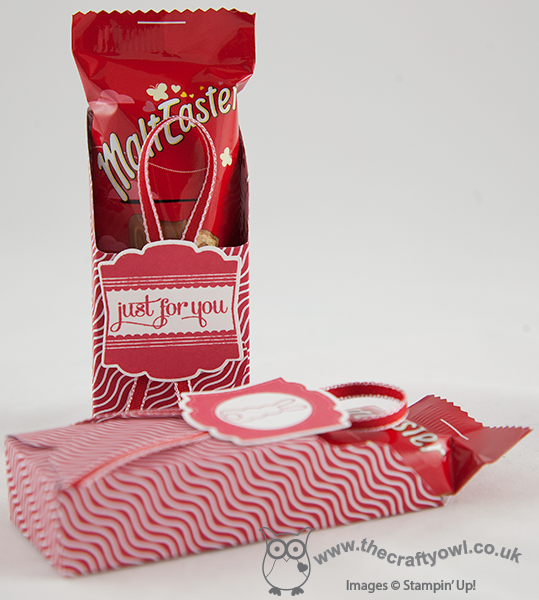
Sometimes you want to be able to see the contents of your box and today's box is just perfect for that. It also means that when you're making your box out of such lovely double-sided designer paper, you get a lovely glimpse of the reverse side too:
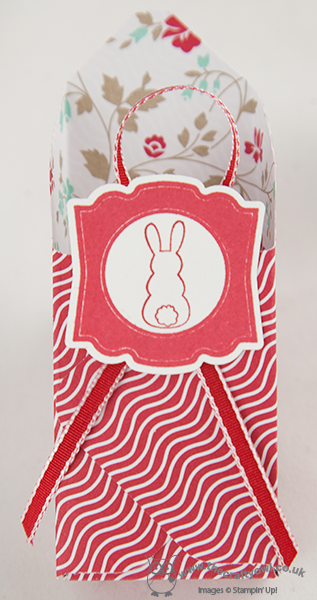
I love the Fresh Prints DSP stack - these paper stacks are great for small boxes and perfect if you're a card maker; I always get through several of these each season! Today's boxes were made to fit the Malteser Easter bunnies that are currently on sale in store right now, but as always with the aid of my Box Buster tool you could adapt the same style box to fit any size contents, just by measuring them; Box Buster from The Crafty Owl will do all the hard work for you and tell you what size paper you need and where you should make your punch marks. So, without further ado, here's what you've all been waiting for - the link to today's video:
)
I hope you found the tutorial useful - there's lots more still to come! Don't forget - you can access the Box Buster tool via the button on the right hand side of my blog home page or simply by clicking here.
Back tomorrow with another project; until then, happy box making!
Stampin' Up! Supplies Used:
c5d11fe0-3556-4a4f-8586-67c08127827c|0|.0|96d5b379-7e1d-4dac-a6ba-1e50db561b04
Tags: Box Buster, boxes, Artisan Label Punch, Eggstra Spectacular, Easter, Envelope Punch Board, Fresh Prints DSP Stack, Label Love, Shop online, Stamp-a-ma-jig, Stampin' Up, Stampin' Up Card ideas, Stampin' Up Supplies, video tutorial
Box Buster | Boxes | Envelope Punch Board | Video Tutorials
by Joanne James7. March 2014 19:25Hello everyone! From the home of 'cool time-saving tools' (if you're reading this and you're an SU! demonstrator you should also check out my Product Table Builder application) today I have the third of this week's video tutorials showing you how to make a super cute Easter mini-egg treat box using your Envelope Punch Board and my new Box Buster tool. You can use your Envelope Punch Board to make boxes of all shapes and sizes - including some rather dinky small ones. Check out this box that I made to hold 5 foil-wrapped mini eggs ready for Easter:
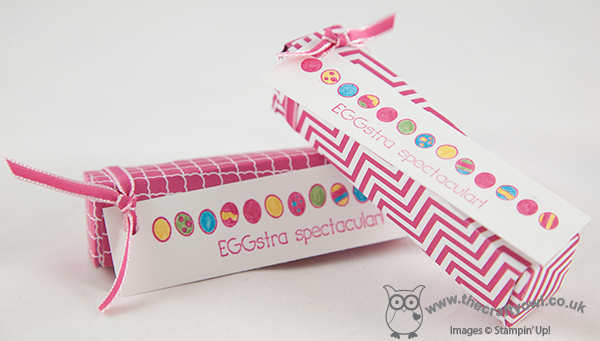
It measures just 20mm x 20mm x 85mm and it was so easy to work out the paper dimensions and punch points with the help of the Box Buster tool. Here's the video that shows you how I did it, along with a 'top tip' when creating narrow boxes like this:
This size box would also make a great wedding favour - it's the perfect size for sugared almonds if you're looking for something traditional. I hope you found today's video useful; why not use the Box Buster tool to create your own small or narrow boxes? You can use either millimetres or inches (to 1/8 of an inch) and create the box size of your choice?
Back tomorrow with another project; until then, happy stampin'!
Stampin' Up! Supplies Used:
by Joanne James5. March 2014 09:52Good morning blog readers and crafters! Back nice and early this morning with the second of my video tutorial posts showing you how to make any size box using your Envelope Punch Board and my new Box Buster tool. I've started early on my Easter treat boxes, so today's box shows you how to make this cute box:
The finished dimensions of today's box are 100mm x 75mm x 15mm. It was designed to fit a specific Easter treat - but you'll have to watch the video below to find out what it was! My new Box Buster from The Crafty Owl tool is just great for that - you can easily create a box to fit your chosen contents, without any hassle or wasted paper - you just measure the thing you want to put in the box, input the dimensions into the Box Buster tool and it does all the hard work for you: it will tell you exactly what size paper you need and where to make your first and second punch markings.
Today's project was worked out in millimetres, but the Box Buster tool will let you construct your box in either millimetres or inches - you choose! Here's the link to today's video tutorial:
Wasn't that SOOO easy?! Keep following this week as there are more box tutorials to come, showcasing a variety of box types with handy hints and tips for making the most of your Envelope Punch Board and my new Box Buster tool.
Back soon with another project; until then, happy stampin' (and box making!)
Stampin' Up! Supplies Used:
184e6871-6a47-4103-a0a0-0c3eb90de4fd|0|.0|96d5b379-7e1d-4dac-a6ba-1e50db561b04
Tags: 3D Projects, boxes, circle punch, Eggstra Spectacular, Envelope Punch Board, Sale-a-bration, Sale-a-bration 2014, Stampin' Up Card, Stampin' Up, Shop online, scallop circle punch, Sweet Sorbet, video tutorial
3D Projects | Boxes | Envelope Punch Board | Sale-a-bration | Stamping | Video Tutorials
by Joanne James4. March 2014 22:24Good evening lovely readers! I have finished editing my next video tutorial but have bumped it to tomorrow so that I can fit in a quick card that I made for this week's Paper Craft Crew challenge. here is this week's sketch layout:
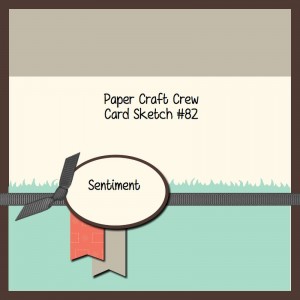
Here is the card I made using this layout:
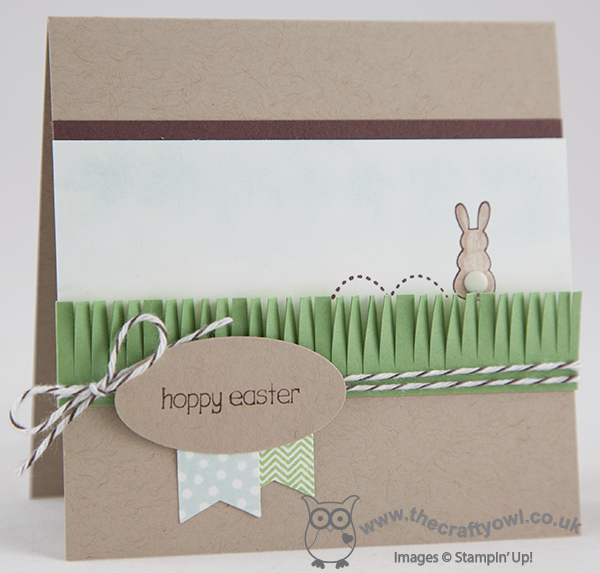
I went with a 4" square card for a change and a Crumb Cake base, then took a strip of Whisper White that I lightly sponged in Soft Sky across the top with Wild Wasabi across the bottom, then stamped the bunny minus the sentiment in Chocolate Chip and coloured him with Crumb Cake ink and a blender pen, before adding a candy dot for his tail. I matted this section on a strip of Chocolate Chip and then added a fringe of Wild Wasabi to the front of the card to make it look like the bunny was hiding in the grass. The new fringe scissors are great for creating grass in an instant and add a lovely texture. I then finished by wrapping some Early Espresso baker's twine around my card and tying in a bow. I stamped the sentiment onto an oval of Crumb Cake cardstock and finished with two co-ordinating banners, stamped using the Banner Blast stamp set and punched out with the matching punch. Both of these items are available free with a spend of £45 or more during Sale-A-Bration - contact me or visit my online store if you would like to place a £45 order and receive these gifts for free.
I've had a busy day today so am off to bed for a well-earned rest; back tomorrow with the second in my 'Any Size' box tutorial series. Until then, happy stampin'!
Stampin' Up! Supplies Used:
857a10ab-e2de-414a-a7f9-f2ec4120ed25|0|.0|96d5b379-7e1d-4dac-a6ba-1e50db561b04
Tags: Candy Dots, Easter, Earn Free Products, Sale-a-bration 2014, Sale-a-bration, Shop online, Stampin' Up, Stamp-a-ma-jig, Stampin' Up Card, Stampin' Up Supplies, Eggstra Spectacular, Fringe Scissors
Cards | Sale-a-bration | Stamping