by Joanne James23. April 2014 07:45It's Wednesday and they're here: week 3 of Wednesday Weekly Deals! This week's deals are included below - they will be available for one week only, before a new collection of deals is announced.
As always, if you want to take advantage of any of the deals on offer, you can support my business by placing your order online by clicking here or using the link to my store on the right hand side of my blog page where it says 'Shop Online' or with me in person. Don't forget to add the Hostess Code for April (you can find this under the 'Shop Online' section on the right.
Here's a summary of this week's one-week only Wednesday deals - click on each item to go to the online store to purchase:
Back shortly with today's creative post; until then, happy shopping!
by Joanne James22. April 2014 08:00This week the Pals Paper Arts Card Challenge is celebrating its 200th anniversary - a whole 200 challenges! To celebrate this milestone, they have a sketch along with a twist - to complete your card in a monochromatic colour scheme. Here is the sketch:
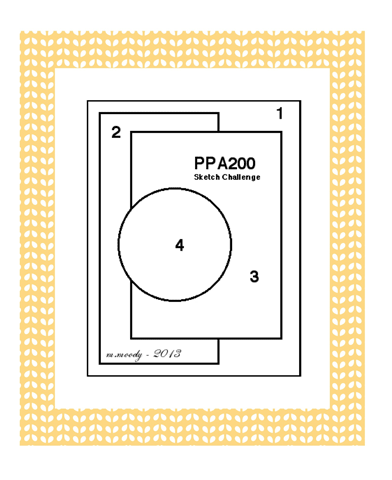
Both design teams have designed cards to inspire this week; initially I was really tempted to use the Starburst Sayings stamps and framelits which lend themselves totally to this sketch and worl with my favourite Brights colour palette, but as lots of the designers had the same idea and I couldn't see how I was going to create something suitably unique, I decided to go with something completely different - a baby card using the 'Baby We've Grown' stamp set in Blushing Bride pastel pink:
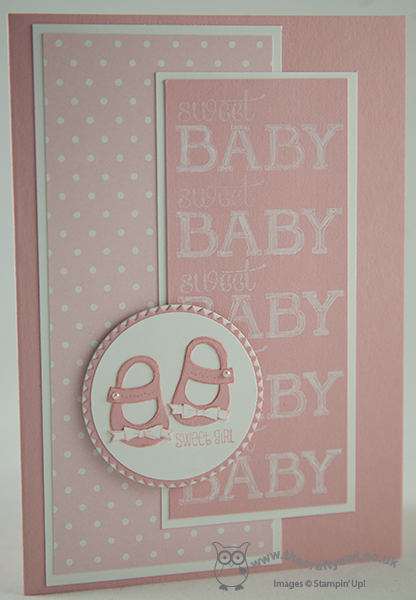
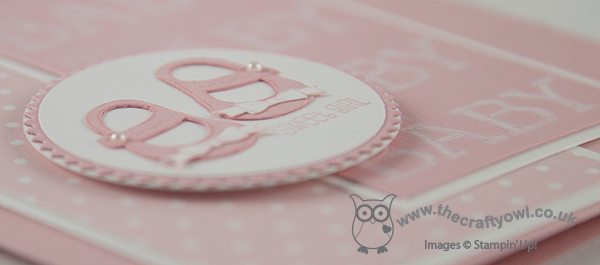
Using a pink base, I matted both of my cardstock layers on Whisper White and used a piece of Polka Dot DSP from the Subtles DSP stack for panel 2, whilst for panel 3 I stamped the 'sweet baby' stamp repeatedly in Whisper White onto Blushing Bride cardstock - a stamp-a-ma-jig is essential for this - and coloured the word 'baby' with my chalk marker to give it a powdery look. Lastly, my focal point panel 4 is a triumph of layers and fussy cutting: I stamped the shoe stamp 3 times, twice on Whisper White and once on Blushing Bride, then I fussy cut the shoes from the pink and glued them to the white base; with the other image stamped on white, I fussy cut the bows from the shoes and adhered them on top. I finished the shoes with two tiny seed pearls for fastenings, and layered this circle on a pink starburst mat and a further white circle. My card has 10 separate layers in total - this must be something of a record!
This card took a little while to create, but I love it - and only Blushing Bride and Whisper White used throughout. Do check out the other monochromatic cards at the Pals paper Arts this week - there is a mass of inspiration.
Back tomorrow with another card; until then, happy stampin'!
Stampin' Up! Supplies Used:
be73746b-d8f5-41a8-98bb-b97ab519a2ff|0|.0|96d5b379-7e1d-4dac-a6ba-1e50db561b04
Tags: Baby We've Grown, Baby cards, Starburst Framelits, Big Shot, Magnetic Platform, Stamp-a-ma-jig, Stampin' Up, Stampin' Up Card, Stampin' Up Card ideas, Stampin' Up Supplies, Shop online
Cards | Stamping
by Joanne James21. April 2014 08:00Today I'm sharing a card I made with Jen Brum's great sketch over at Freshly Made Sketches - I combined it with the colours over at The Colour Throwdown, where one of my favourite colour combinations - Basic Grey and Melon Mambo - is trio'd with Garden Green:
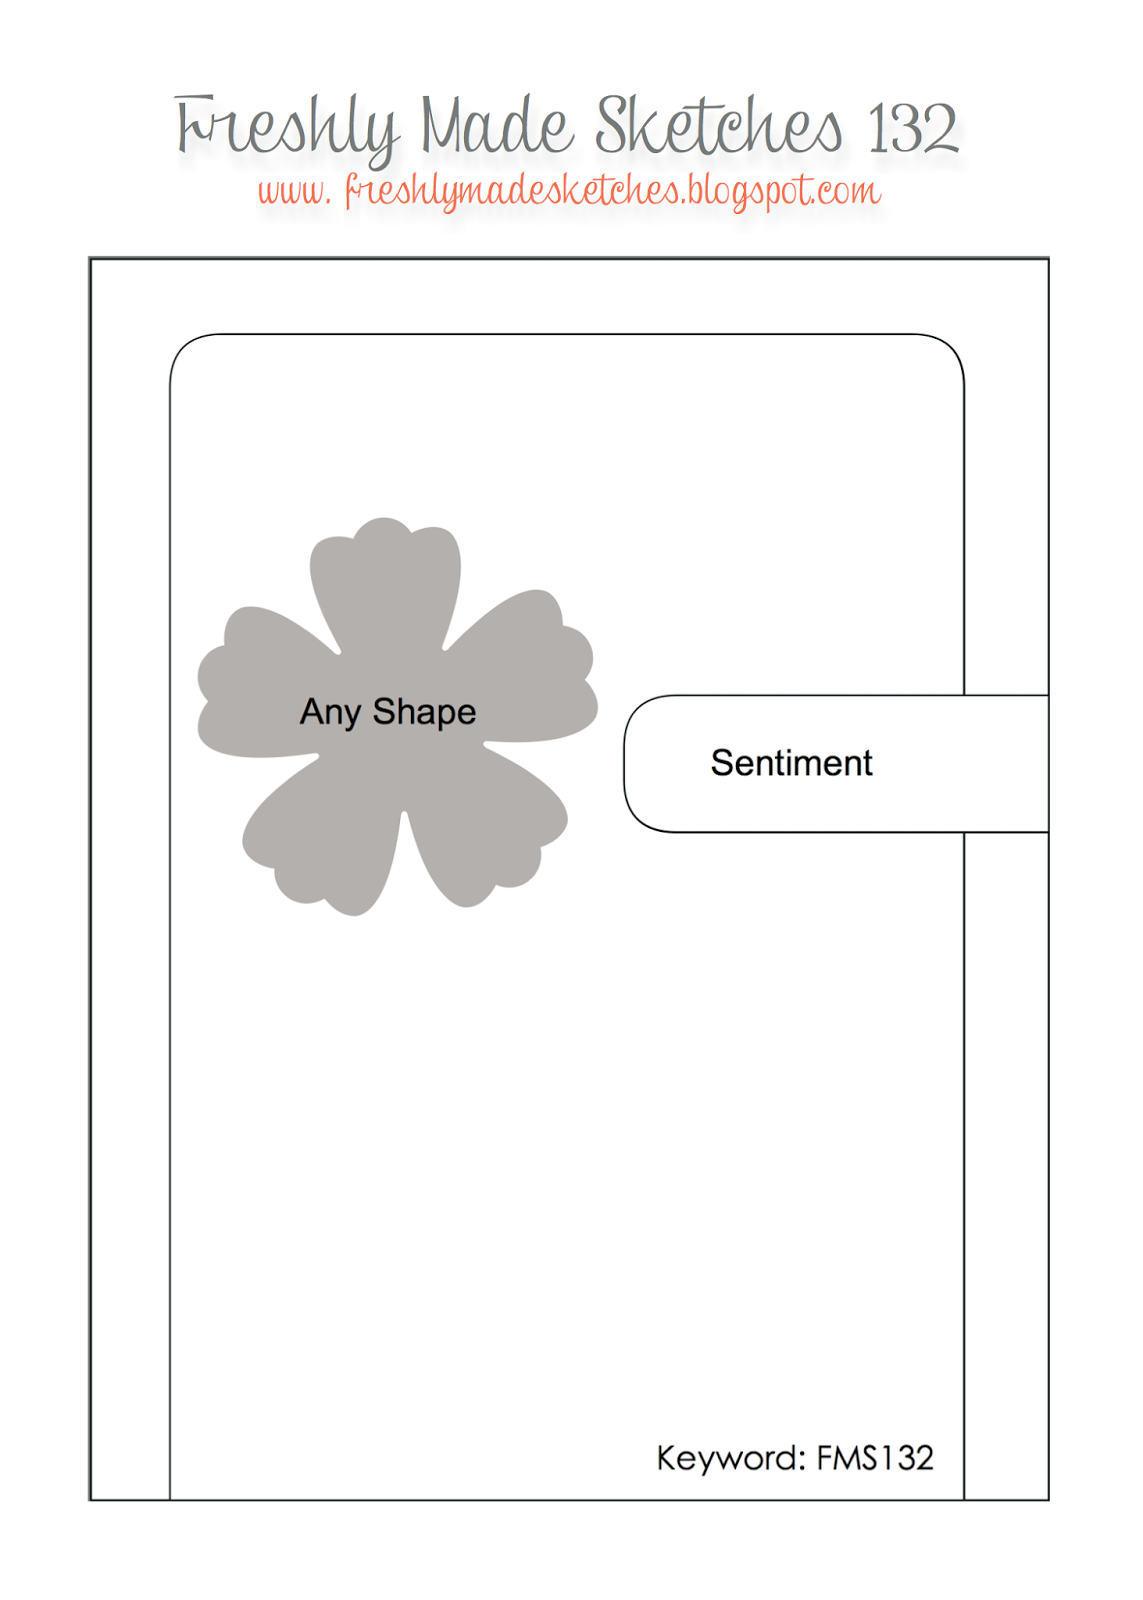
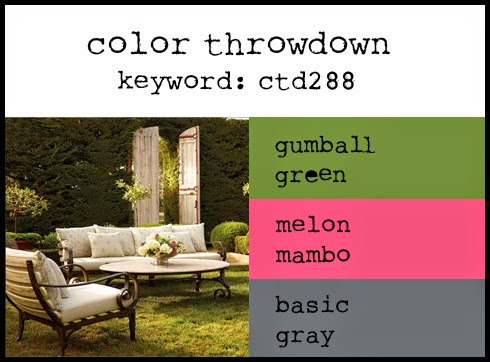
A great combination - here is my card:
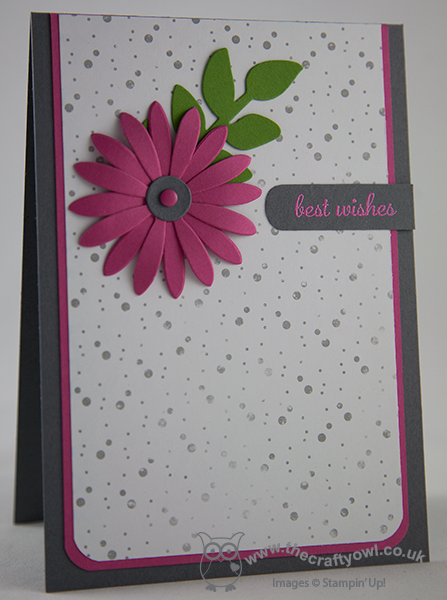
I used Basic Grey for my base and matted this with a piece of Melon Mambo to create a narrow border between my base and my central panel of High Tide DSP. I decided to use a flower as my focal point, but instead of stamping I decided to die cut two flowers with my Blossoms Originals die and layer them together, finishing with a small grey circle and pink candy dot centre. I tucked a Gumball Green leaf behind (cut with the Secret Garden framelits) and stamped my sentiment in Versamark onto Basic Grey and heat embossed with Melon Mambo embossing powder. The green leaf provides a lovely 'pop' of colour behind the flower and lifts the whole card, I think. Gumball Green has to be my favourite of the soon-to-be retiring In-Colours - I will so miss it when it's gone!
As I stepped back to admire my card, I realised that I had adhered my mat panels upside down in relation to Jen's sketch - and by this point, my Tombo was well and truly stuck fast - oops! I am hoping the team at FMS will forgive me this oversight ;-)
Back tomorrow with another card; until then, happy stampin'!
Stampin' Up! Supplies Used:
6eda0766-b520-4816-99ec-262249451e26|0|.0|96d5b379-7e1d-4dac-a6ba-1e50db561b04
Tags: Blossom Party Originals, Secret Garden Framelits, Big Shot, Magnetic Platform, High Tide, Shop online, Stampin' Up, Stampin' Up Card, Stampin' Up Card ideas, Stampin' Up Supplies, Envelope Punch Board
Cards | Stamping
by Joanne James20. April 2014 20:58Happy Easter everyone! I hope you've all had a lovely day and that the Easter bunny left you lots of yummy chocolate eggs. We've had a lovely day, with our traditional Easter egg hunt around the garden and then a family roast for lunch. Not even the rain this afternoon could dampen our spirits. I made this really quick card this morning as an absolute last-minute Easter card - I needed one more opportunity to use an Easter stamp! I wasn't intending to share it on my blog, then this afternoon I saw that the Paper Players challenge this week is to create a CAS card with washi tape, so thought I would link up;
Here is my super-quick card:
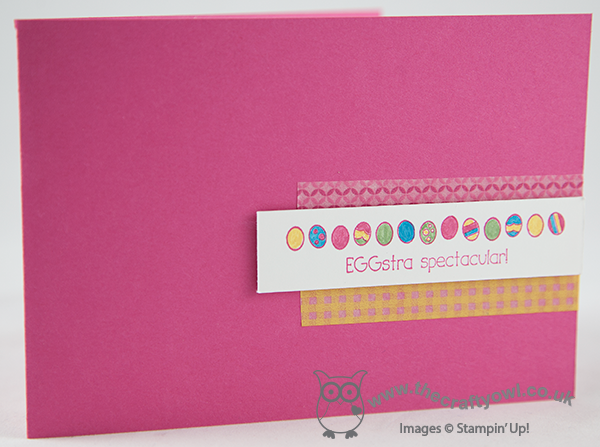
I must confess that I am something of a hoarder of washi tape - I love to buy it, then struggle to use it! One thing it's great for though is adding detail to really quick cards, like this one: I simply took a plain piece of Melon mambo for my card base, added two strips of Gingham Garden washi tape and then stamped the 'Eggstra Spectacular' stamp in pink, coloured with marker pens then popped up on a couple of dimensionals. As easy as that! I cut my washi tape with scissors as I wanted a straight edge, but it tears really easily and looks great with a torn edge too. I don't know why, but having come to edit my photo the pink washi tape doesn't look straight, but I can assure you it is - next time I'll go with something more random!
Back tomorrow with another card; until then, happy stampin'!
Stampin' Up! Supplies Used:
by Joanne James19. April 2014 21:56Good evening everyone! I hope you are all making the most of the long Easter weekend. I've been busy decorating and making new wall art for Ben's Lego-themed bedroom today. I also got to spend a couple of hours in my craft room, but unfortunately tidying and re-organising rather than creating today. So a quick post from me this evening to share a scrapbook page I made at our team training event last week.
The page was designed by the lovely Bekka Prideaux and is in the style of a Project Life page - i.e. divided into regular sized sections with space for journaling and photos, just like those designed by Becky Higgins, the creator of the hugely successful modern day scrapbooking phenomenon that is Project Life. Here is my page, finished with photos from the Dads, Lads & Lasses camping trip that was held at school last September:
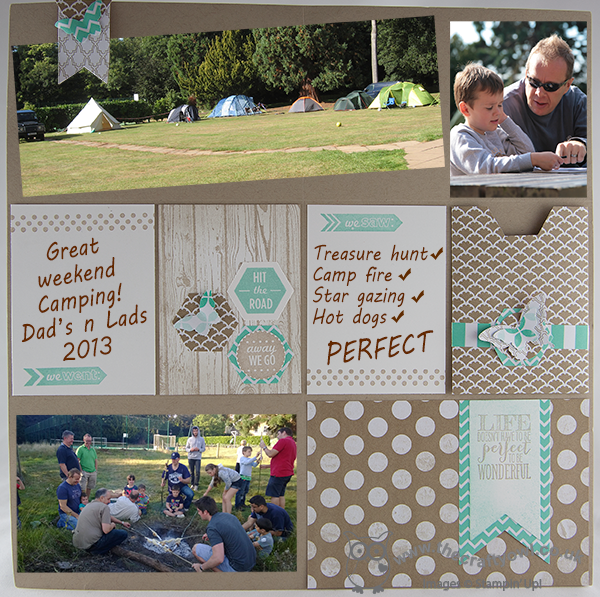
This style of scrapbooking appeals to busy mums like me; I take lots of photographs and need a quick and easy method of presenting them and recording my memories, so I'm thrilled that Stampin' Up! has joined forces with Becky Higgins to produce our very own line of Project Life-themed accessories in the new Annual Catalogue, out in July - read all about it in my earlier post here. As a demonstrator, one of my perks is that I'll be able to get my hands on this and other new and exciting offerings ahead of customers and I can assure you I'll be first in line for this one!
If you'd like to be one of the first to get your hands on Stampin' Up's new range of Project Life accessories, now is a great time to join my team of Stampin' Up! demonstrators. If you're interested, please do get in touch - I would love to share with you the benefits that being a part of my Stampin' Up! team of demonstrators brings.
Back tomorrow with another project; until then, happy stampin'!
Stampin' Up! Supplies Used:
by Joanne James18. April 2014 10:00Yay, it's Friday - where did that week go?! Today I'm sharing my entry for this week's challenge over at The Paper Players, where Ann has laid down the following colour challenge:
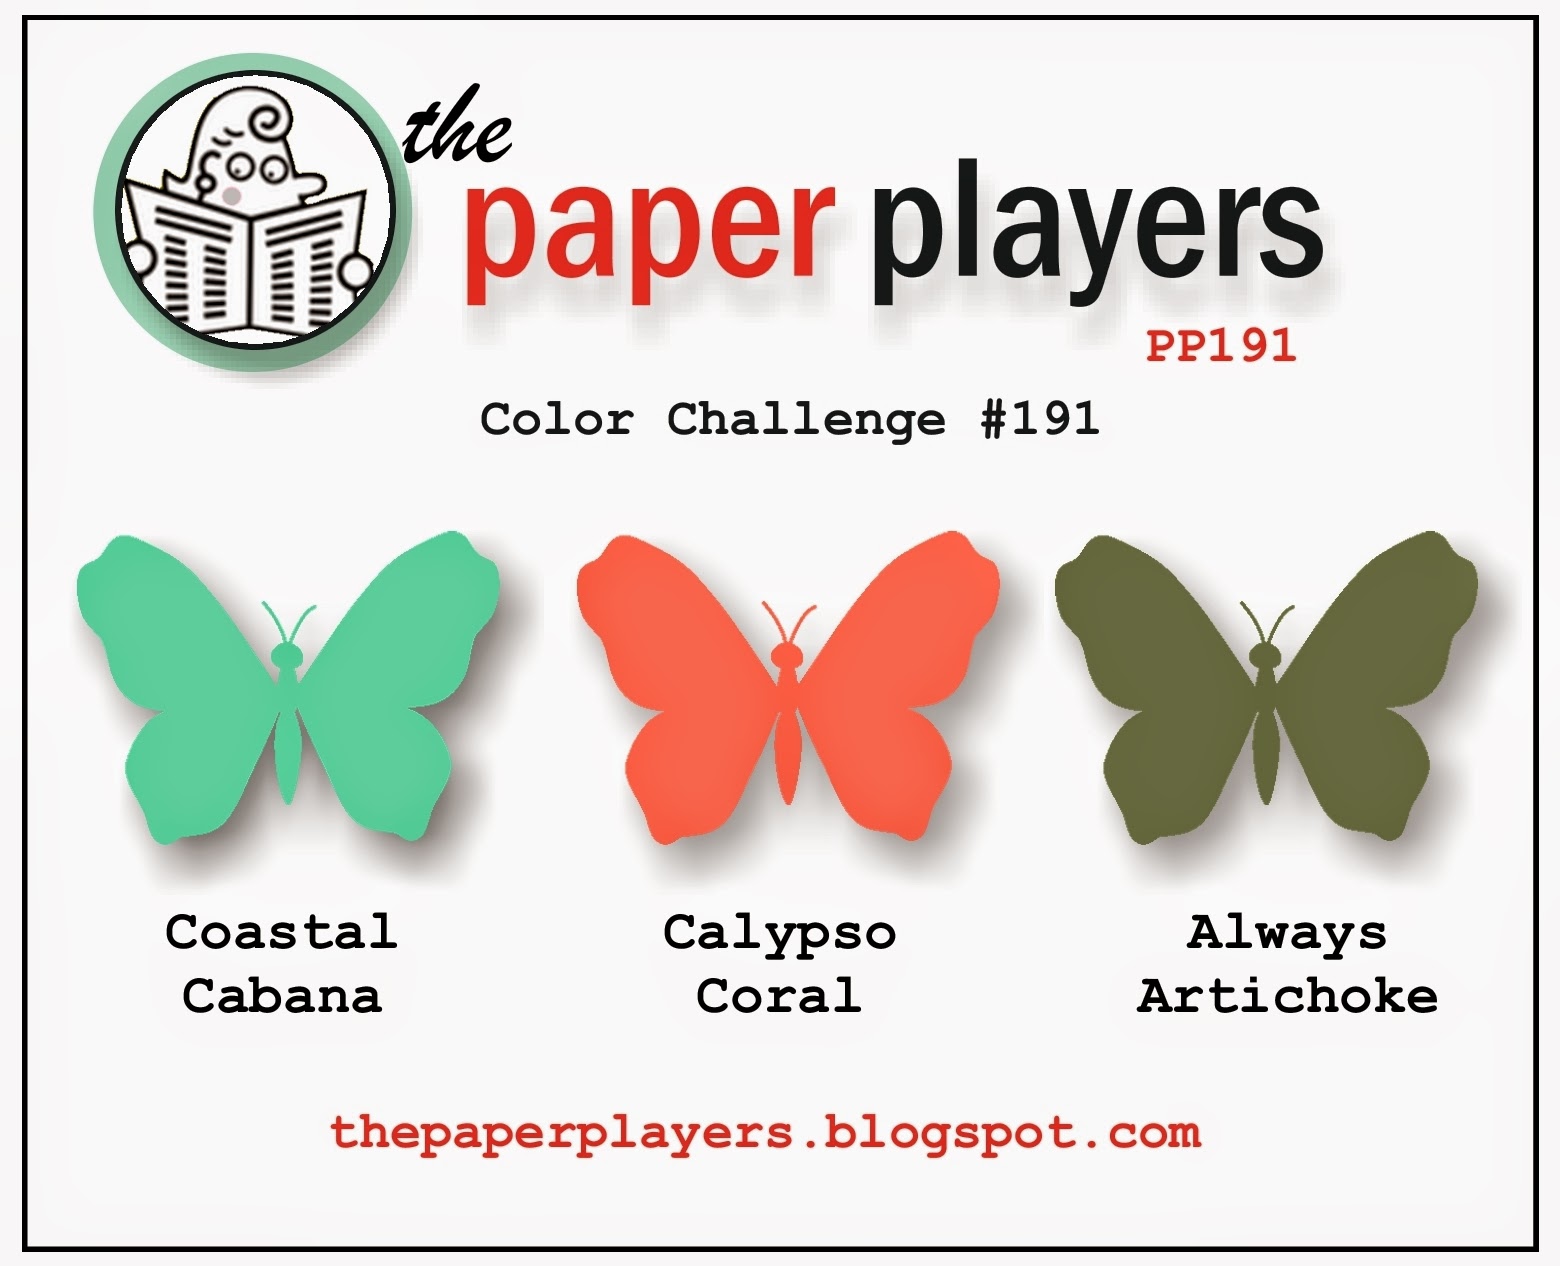
I really wanted to enter this week's challenge as I missed last week's, however this colour combination filled me with some dread: I use Coastal Cabana a lot, I use Calypso Coral less so; as for Always Artichoke - I've only used this colour ONCE before - EVER!! The design team provided such great and varied inspiration this week though that I thought I should endeavour to rise to the challenge and have a go. It took a long while, but eventually this is what I came up with - that I'm prepared to share with the world, anyway :-):
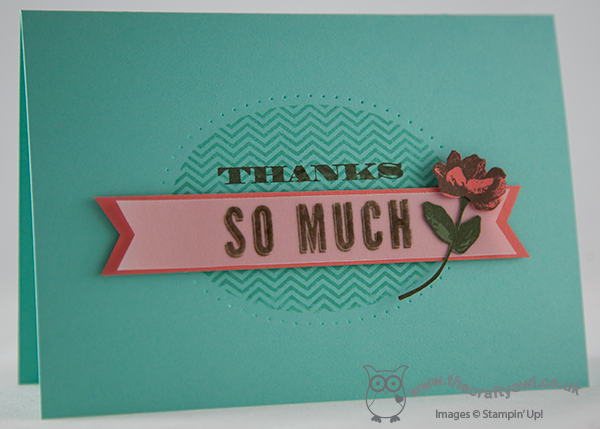
After much (unsuccessful) experimentation with a variety of designer series paper, I decided that simple was the way to go and I reached for my 'Oh, Hello' stamp set which I haven't used in a while. I stamped the oval chevron background in Coastal Cabana on the same colour base and paper pierced the outline for added interest. Then I split the sentiment, stamping part of it directly onto the card base and part of it onto a layered vellum banner that I popped up on some dimensionals. I then decorated this with a flower that I stamped twice, once on Calypso Coral Cardstock and once onto Always Artichoke, then carefully cut both out with my paper snips and paper-pieced them together.
Not an overly complicated card, but one of those that took way longer to execute than anticipated! Always nice to move outside of one's comfort zone though, and I like the result even though this is a colour combination I would never ordinarily choose.
Right - I'm off for some serious painting today - the preparation has been done, so today the nursery walls of Ben's bedroom will be officially transformed into a Lego-lovers paradise!
Back tomorrow with another project; until then, happy stampin'!
Stampin' Up! Supplies Used:
by Joanne James17. April 2014 10:00As promised, today I have the second of the cards I made for this week's sketch over at CAS(E) This Sketch - I saw this layout and couldn't resist another interpretation. This time I also combined it with the colour challenge over at Dynamic Duos:
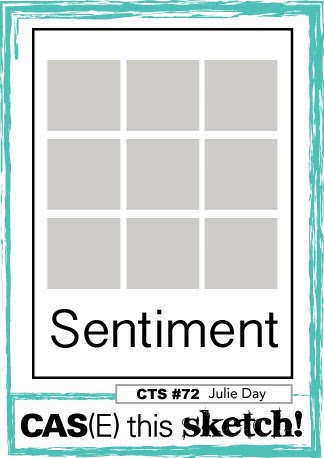
This card is altogether more fun than yesterday's - take a look and you'll see what I mean:
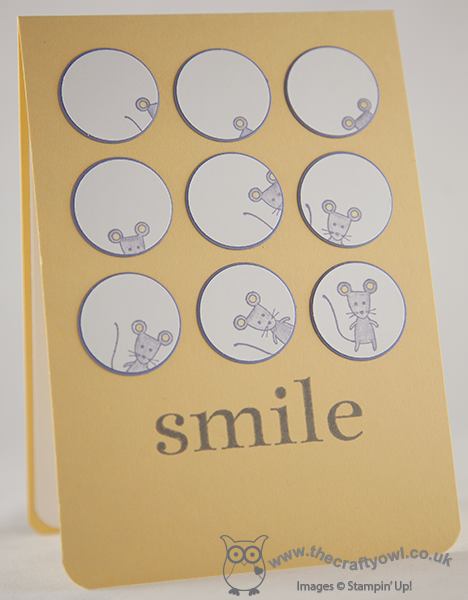
I had the idea that if the squares were circles, the little mouse from the 'Life in the Forest' stamp set could play 'peek a boo' as if he was in a block of Swiss cheese (something of a graphic interpretation, given that the circles are identically sized and placed, but hopefully you can see what I mean!) I stamped the mice onto Whisper White and simply punched out with my 1" circle punch so that only parts of them were showing, and I mounted these onto circles of Wisteria Wonder only slightly larger that I cut with my Circle Framelits. I coloured the mice with my Wisteria Wonder and So Saffron inks and a blender pen and finished the card with the sentiment 'smile' - well, I didn't have one that says 'chuckle', which is what I was doing as I coloured these little fellas so this was the next best thing :-)
I hope you like my fun take-two on the sketch; back tomorrow with my entry for this week's Paper Players challenge (and yes, it was a challenge indeed!) Until then, I'm off to the theatre with Ben this morning whilst Rebecca is on a swimming course and my dear husband is having to monitor the bathroom fitter who is replacing a floor tile that has been booked to do the job for some 14 months - hopefully today is (finally) the day!
Until then, happy stampin'!
Stampin' Up! Supplies Used:
by Joanne James16. April 2014 22:47

It's Wednesday and they're here: week 2 of Wednesday Weekly Deals! This week's deals are included below - they will be available for one week only, before a new collection of deals is announced.
As always, if you want to take advantage of any of the deals on offer, you can support my business by placing your order online by clicking here or using the link to my store on the right hand side of my blog page where it says 'Shop Online' or with me in person.
Here's a summary of this week's one-week only Wednesday deals - click on each item to go to the online store to purchase:
by Joanne James16. April 2014 21:50Good evening blog readers! I hope you are enjoying weather as glorious as we have had here in the UK the last few days - it feels long overdue and long may it continue. We went out on another bike ride today, just for fun - our bike ride earlier in the week involved our first attempt at geocaching, but since we didn't manage to find a single box the novelty of this wore off rather quickly! It's just so nice to be outdoors. Today's card is one of two entries that I have for this week's CAS(E) This Sketch challenge - I love this week's layout, so many possibilities:

For my first card, I decided to stay with the layout of squares, and created a pattern with an ombre effect:
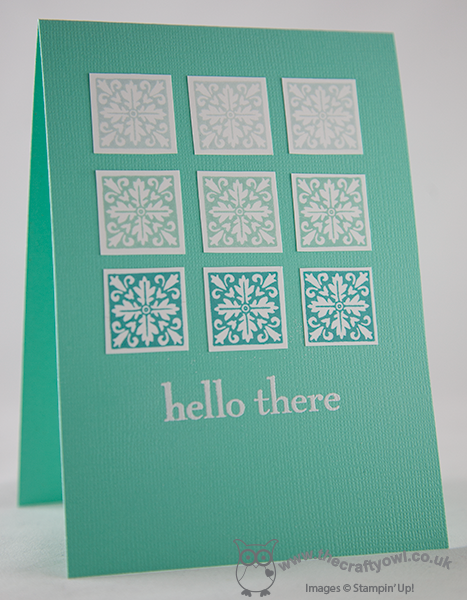
I used one of the square stamps from the 'You're Lovely' stamp set which is great for a repeat pattern, and stamped each row in a slightly darker shade of aqua blue-green, to give the graduated ombre effect. I used a piece of Core-d'inations card in Coastal Cabana for my base, as this card has a lovely textured finish when unsanded. Because of this texture, it is quite difficult to get an evenly inked stamp on it, so I stamped my sentiment in Versamark and heat embossed with white embossing powder to provide a more even and vibrant finish.
Come back tomorrow to see my alternative and altogether more humorous take on this sketch; until then, happy stampin'!
Stampin' Up! Supplies Used:
by Joanne James15. April 2014 22:17We've had a lovely family day out today at one of our favourite places locally, Twycross Zoo - a lovely little zoo for monkeys (of the Junior and primate variety!) and whilst I haven't had time to take any photos in my studio today - I might share two creative projects tomorrow to make up for it, so watch this space - I do have some very exciting Stampin' Up! news to share with you today: Stampin' Up! are partnering with Becky Higgins, the creator of Project Life, to bring Project Life products in a range of exclusive and co-ordinating Stampin' Up! colours and designs.
If you're not familiar with Project Life, it's a really simple, affordable way to get your photographs into albums; it's a pocket-based scrapbooking system, that allows you to file your photos and journaling cards easily so that you spend more time making making memories and less time scrapbooking them - sounds good to me!
There will be a complete Project Life product line on offer in the new annual catalogue that launches here in the UK on 1st July, but in the meantime, here's a short introduction from Shelli Gardner, Stampin' Up! CEO and Becky Higgins herself to tell you more:
As a mother of young children who takes hundreds of photographs each year, most of which never go beyond my computer's hard drive, this is a system that really appeals to me and I'm excited that Stampin' Up! are getting involved with Project Life.
I'll be sure to bring you more news as it emerges; I'm sure this is just one of the new things that Stampin' Up! will be introducing with the new annual catalogue - exciting times!
One last thing - today is the last day for this week's weekly deals, so if there's anything on the list that you fancy, then get in quick and place your online order in my shop now. Full details of this week's offers can be found here. A new collection of weekly deals will be announced tomorrow!
Back tomorrow with a project (or two!) and details of the new weekly deals; until then, happy stampin'!