Enjoy Life And A Million Dollar Sunrise For The Paper Players PP405

by Joanne James12. August 2018 09:00

It's Sunday and time for this week's new challenge over at The Paper Players! It's the turn of my wonderful and talented friend LeAnne to host this week and she has a gorgeous colour challenge for us to work with:


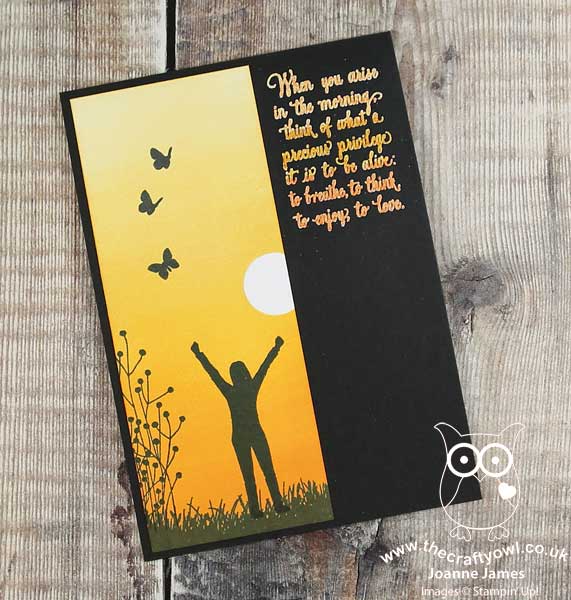
I fell in love with this trio of orange/yellows that LeAnne chose and whilst I was tempted to go floral, I decided instead to use the sketch inspiration over at Fusion for my layout and create a pretty sunrise and silhouette scene using the Enjoy Life stamp set - take a look:


Here's the low-down on today's card:

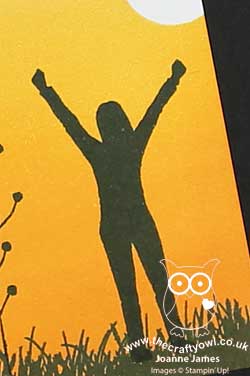
A Million Dollar Stamp Set - I decided to use a combination of images from the 'Enjoy Life' stamp set on my card today. This stamp set, with its beautiful collection of silhouettes and inspirational sentiments, was designed by Connie Fitzgerald, one of Stampin' Up!'s Million Dollar Sales Achievers, as a celebration of this milestone achievement. I absolutely love this set and it was one of the first on my wishlist when the annual catalogue was launched - thank you Connie for such a great set!

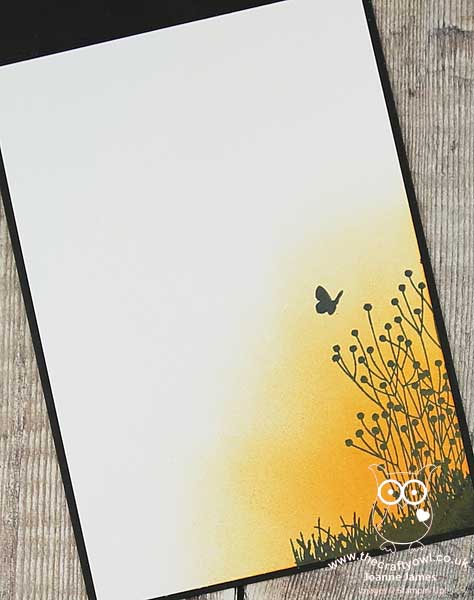
Sunrise, Sunset Made Easy - I wanted to create a vertical panel with a sunrise that featured all three of the challenge colours, so I punched a 3/4" circle and masked off my sun and used a sponge brayer to build up a graduated sunrise, blending each of the colours in turn starting with the lightest colour at the top. Sponge brayers are so great for this; they make light work of the art of ink blending, and can be washed out when you're done. I also brayered the colours on the diagonal of the bottom corner of the inside panel too and added a little interior detail:


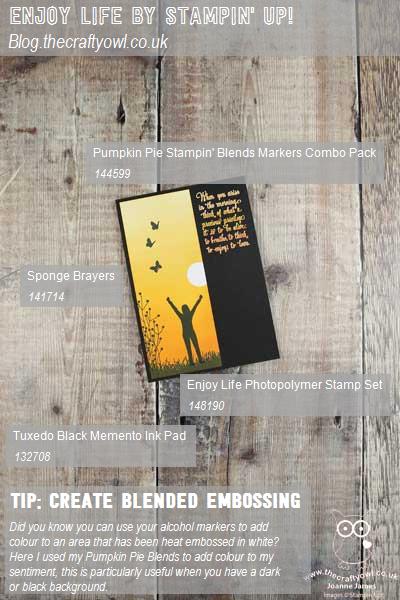
Blended Ombre Embossing - My card today is ultra-clean, with minimal layers and detail to allow my inked panel to really shine, but I'd also like to share another great tip with you; did you notice I created a blended ombre of colour on my sentiment that mimics my sunrise? Curious as to how I created it? With a Basic Black card base, I originally heat-embossed the sentiment in white, but this was too stark. I decided to use my Pumpkin Pie Blends to carefully colour the lettering and change its colour. Did you know you can use your Stampin' Blends alcohol markers in this way? This tones down the brightness of the white and adds a co-ordinating pop of colour that wouldn't have been possible with ink alone on such a dark background.

Here is the visual summary of the key products used on today's project for you to pin for easy reference:


You can see all of my Product and 'How To' summaries on my 'How To - Tips and Techniques' Pinterest board in case you've missed any. 

Before you reach for your ink and papers, check out what our amazing team has created to inspire you this week:

Here's a quick recap of our challenge rules:
 
1.  Create a new paper project
2.  Upload your creation to your blog with a link back to us and provide a direct link to the post featuring your challenge submission.
3.  Please link your card to no more than four challenges, TOTAL.
4.  Have FUN!

I usually struggle with colour challenges, but this bright, monotone pallet really spoke to me - so many creative possibilities! I can't wait to see what you create with this week's colours and look forward to visiting your blogs this week. Enjoy the rest of your weekend as it will be over all too quickly. I'll be back tomorrow with another project; until then, happy stampin'!


Stampin' Up! Supplies Used: 

Table built using Product Table Builder by The Crafty Owl - Independent Stampin' Up! Demonstrator.

Bethlehem With The Sleigh Ride Edgelits Christmas Card

by Joanne James19. November 2015 08:05

Today it's time for a new challenge over at Create With Connie and Mary and this week we have a great colour challenge for you:


I decided that this week's colours were perfect for a night sky, so decided to indulge in a spot of masking and sponging to create my Bethlehem-inspired scene. here's my card:


I used a base of Delightful Dijon and a matt of Elegant Eggplant, then on a piece of Whisper White I masked off a rectangle and sponged in my sky, starting at the top with Island Indigo and the bottom with Elegant Eggplant. I stamped the stars from the 'Holly Jolly Greetings' stamp set in the sky in Versamark and heat embossed them in gold, then overlaid my landscape cut from Delightful Dijon using the Sleigh Ride Edgelits. To finish, I added my sentiment from the 'All ye Faithful' stamp set in Elegant Eggplant across the bottom.

A simple design, but I can't begin to tell you how much I love this card! I thought I would find these colours intimidating, but it turns out the opposite is true.

Do visit the other Design Team members to see how they used this week's challenge colours; there's lots of inspiration over on their blogs too!

Enjoy your day and I'll be back tomorrow with another project; until then, happy stampin'!


Stampin' Up! Supplies Used:

  • Sleigh Ride Edgelits Dies
  • Big Shot
  • Holly Jolly Greetings Wood-Mount Stamp Set
  • All Ye Faithful Wood-Mount Stamp Set
  • Embossing Buddy
  • Versamark Pad
  • Gold Stampin' Emboss Powder
  • Heat Tool (Uk)
  • Delightful Dijon A4 Cardstock
  • Elegant Eggplant Classic Stampin' Pad
  • Elegant Eggplant A4 Cardstock
  • Island Indigo Classic Stampin' Pad
  • Island Indigo A4 Cardstock
  • Whisper White A4 Cardstock


You're My Number One Valentine

by Joanne James22. January 2015 09:00

Past the mid-way point - we are nearly at the end of the 'working week'! Today I'm sharing a cute little card that I made using the sketch over at Retrosketches this week, with a certain young man in mind:


 I turned the sketch clockwise through 90 degrees for my card, which is a cute little Valentine's card for someone foxy! Take a look:

I bought this little Valentine's set called 'Hey, Valentine' because it has some great little stamps in it, many of which can be stamped without their Valentine-themed sentiment and would work really well on a children's birthday card (especially the little pirate and the fish!) Today's card is my Valentine offering for my youngest James junior - I think he will love the adorable fox and the bright colours of today's card. I coloured the fox with my Pumpkin Pie Blendabilities and used a Pumpkin Pie card base to tie in the colour, highlighting around the edges with one of the lighter skin tone Blendabilities. I punched the tag out with my Note Tag punch and mounted it onto a piece of Real Red cut out with one of the Chalk Talk framelits and trimmed across the bottom to give a straight edge. I sponged hearts onto the corner of my Whisper White layer using Real Red ink and my hearts stencilling mask, to add to the Valentine's feel. A leftover piece of red satin ribbon (the current red cotton ribbon would work just as well) finishes my tag. Cute, eh? Plus the Chalk Talk Framelits and Skin Tone Blendabilties are both available on weekly deals this week so can be picked up at a fraction of their usual price. Why not treat yourself? You know you want to :-)

Back tomorrow with another project; until then, happy stampin'!


Stampin' Up! Supplies Used:

Table built using Product Table Builder by The Crafty Owl - Independent Stampin' Up! Demonstrator.


One Layer Festival of Trees Starry Night Card

by Joanne James13. November 2014 20:10

Today I'm sharing my card for this week's challenge over at Less is More, where the focus for this week's one layer challenge is a 'starry, starry night'. I was aiming for an early LIM entry this week and this post was originally scheduled for Tuesday, but best laid plans and all that .... So two days later, here it is:

So how did I create today's card? Well, I've been wanting to create a sponged snowy scene for a while, so this card was the perfect opportunity. I masked off a horizontal panel, added a masked circle for my moon and then created a 'hill' mask to create my landscape itself. I sponged in my sky using Night of Navy ink and used the same colour to highlight the edges of the snow dunes and some subtle tree shadows (I did this bit after I stamped in the trees). Once I'd created my snowscape, I used the tip of the pine tree from the Festival of Tree stamp set to add in my trees. I stamped them in Memento Black ink, being careful to keep my mask in place each time so that the trees were behind the surface of the snow. To finish, I used some Encore silver ink to sponge in some tiny stars using a stencil I created with my Confetti Stars punch, along with a few dots added with my Silver marker. I also lightly sponged some Encore Silver onto some areas of the sky to add a subtle sheen. To finish, I stamped my sentiment from the 'Good Greetings' stamp set beneath my scene. Here's a closeup of the scene itself so that you can see it in more detail: 

For such a 'blue' card, this really is very pretty and for a one layer card has so much going on. I think I might have to make a few more like this!

Back tomorrow with another card; until then, happy stampin'!


Stampin' Up! Supplies Used:

Table built using Product Table Builder by The Crafty Owl - Independent Stampin' Up! Demonstrator.


Halloween Graveyard E-Cutter Card For Colour Me...!

by Joanne James22. October 2014 09:00

DON'T FORGET: 2 DAYS LEFT UNTIL THE FREE PACK OF PAPER FOR 6 MONTHS SIGN UP DEAL ENDS - CLICK HERE TO FIND OUT MORE AND JOIN MY STAMPIN' UP! TEAM TODAY!


It's Wednesday and time for this week's challenge over at Colour Me...! where we have a playful colour palette for you to work with this week:

For my card, I took my inspiration straight from this week's challenge badge and those lovely spooky mason jars and decided to create a similar effect with the aid of my Silhouette Cameo - take a look:

I couldn't find a suitable file in My Digital Studio to work with, so I downloaded this Halloween Graveyard scene from the Silhouette store and cut it out of Basic Black. For the background, I sponged a panel of Whisper White using each of the challenge colours, having first masked off a circle with a post-it note punched with a 1 3/4" circle punch for my moon. I'm surprised at just how well these three colours blend together to create the spooky scene - it's really quite atmospheric. I left the front of my card sentiment-free and added one to the inside, as I didn't want to interrupt my picture.

So what do you think? This card was surprisingly easy to create with my e-cutter. Feel free to leave a comment on today's card, before hopping over to check out the amazing cards by the rest of the Colour Me...! team:

And our talented guest designer for October - Jen Mitchell
 
We look forward to seeing your subtle creations. 
 
Back tomorrow with another project; until then, happy stampin'!
 

Stampin' Up! Supplies Used:

Table built using Product Table Builder by The Crafty Owl - Independent Stampin' Up! Demonstrator.

Tags: , , , , , , , ,

Cards | E-Cutter

Autumn /Fall Home Decor Frame

by Joanne James29. August 2014 19:08

It's Friday and I've had the most productive day today - and it's not over yet! Today I'm sharing a lovely piece of autumn (or fall, if you're American) home décor, similar to a piece by Sara Douglas that Shelli Gardner shared on her blog recently. It features a lovely new stamp set from the new seasonal catalogue called 'Gratitude For Days', along with some gorgeous Autumn Wooden Elements embellishments that are also a new item. Here is my finished frame:

I used the stamps in the set to create a circular wreath-like pattern, using a cotton bud (cue-tip) to add some sponged colour to the centre of the leaves. I added three wooden leaves and some gold sequins, finishing with the sentiment, which I stamped in Baked Brown Sugar onto Hello Honey cardstock, and finished with a bow tied in gold baker's twine. Here's a close up of the detail:

A great reminder that we have lots to be thankful for and quite simple to create. I'm really pleased with the result - I'm already working on a winter-themed one so that I will have a seasonal pair.

Short and sweet from me today; back tomorrow with another project. Until then, happy stampin'!


Stampin' Up! Supplies Used:

Table built using Product Table Builder by The Crafty Owl - Independent Stampin' Up! Demonstrator.


You're Too Kind Card for Colour Q

by Joanne James22. August 2014 08:00

Yay - it's Friday and a two-post day! If you haven't seen my earlier post about this week's enhanced sign up offer, please scroll back or click here for more information. Valid for one week only, it's worth checking out!

So for today's creative post, I was inspired by the beautiful colours and inspiration photo over at Colour Q this week:

So here's the thing - I love the colour purple. If you asked me my favourite colour, I wouldn't say purple (I'd say blue or yellow, in case you were wondering!) however as one of my downlines pointed out to me once, I must like purple - lots of my clothes are shades of purple and I do find myself drawn to it as a colour. All that said, it's not a colour I often use in my cardmaking either, so when I saw this challenge, I thought I should at least remedy that in part - here's my entry to this week's challenge:

I used the Old Olive for the flower stems, then focused my card around the other three colours. I created a mask and sponged a panel blending the remaining three colours, then stamped the flower stems over the top, stamping off the Wisteria Wonder flowerhead once first to give a paler flower and then stamping the second layer in Rich Razzleberry, using my stamp-a-ma-jig to ensure perfect placement. Lastly, I added a sentiment and a bow using some retired stitched grosgrain ribbon (you could substitute the new cotton ribbon in the same colour) and a few rhinestones to finish. The result? I love it - maybe I should make purple cards more often!

That's me done for today - it's a Bank Holiday weekend here in the UK, the last one before the kiddies go back to school in just over a week's time, so we have some family activities planned (more on that next week).

Enjoy your weekend; back tomorrow with another project, until then, happy stampin'!


Stampin' Up! Supplies Used:

Table built using Product Table Builder by The Crafty Owl - Independent Stampin' Up! Demonstrator.


Tags: , , , , , , ,

Cards | Join My Team | Stamping

Monochromatic Purple And To The Point!

by Joanne James5. May 2014 21:17

It's so nice to have an extra day added onto the weekend; a bonus day of family time and today with the added extra of a visit to some friends to see some of the cutest tiny black Labrador puppies EVER (no we didn't bring one home, although I think Rebecca was tempted to smuggle one out in her pocket!)

Today's card was initially inspired by the unusual sketch over at CAS(E) This Sketch this week:

I played about with a few ideas for this sketch and eventually settled on the following card:

I decided to make the swirl into a path of colour from my pencil, which is one of the stamps in the 'Making a Point' hostess set. I created a mask then sponged three blended shades of purple (Wisteria Wonder, Elegant Eggplant and Perfect Plum) to create my swathe of variegated colour. I then stamped the sentiment only from the pencil stamp directly onto the card base and stamped the pencil onto a separate piece of Whisper White cardstock, coloured with the same shades of purple and a blender pen, and cut out with my paper snips and mounted at an angle on dimensionals.

I'm also linking my 'Clean and Simple' card up with the challenge over at Less is More this week where the challenge is to use either three colours or three shades of one colour and The Card Concept where the challenge is to use monochromatic purple on your card.

Back tomorrow with another card; until then, happy stampin'.


Stampin' Up! Supplies Used:

Table built using Product Table Builder by The Crafty Owl - Independent Stampin' Up! Demonstrator.


Tags: , , , , , ,

Cards | Stamping

One Layer Love Hearts

by Joanne James22. January 2014 09:43

I'm sticking with the Valentine's theme today as today's card is also this week's entry for The Paper Players weekly challenge, where Sandy has asked us to create a one layer Valentine's card:

I decided to use the heart as per the challenge tile, but today's card is also showing you how to use one of my favourite Stampin' Up! products, the Expressions Thinlits dies, in a different way. You've seen me use the die cut word itself as in yesterday's card, and I've also used the negative space created by the die cut (you can see an example of that here). Today I thought I would show you how you can use them to create a mask, which gives yet another effect and one that is particularly suited to a one-layer card. Here is my card:

I cut out the die cut word 'love', along with two overlapping hearts cut with my Hearts Framelits and created a mask. Then using Melon Mambo and Smoky Slate ink and a couple of sponge daubers, I carefully sponged around the die cuts to give the illusion of two overlapping hearts, with love running through the centre. I created a second mask using the small heart from the Owl Builder Punch; I could have used a stamp, but I wanted to retain the soft sponged effect so created another stencil then simply sponged a few random hearts across some of the remaining white space. I rounded the bottom corners of the card, but otherwise left well alone; as the Paper Players point out this week, less is more!

I'm really pleased with how this card turned out and it shows yet another way you can use the thinlits to achieve an alternative effect. If you too are 'in love' with 'love' and the other words in the Expressions Thinlits set, don't forget these are only available until 1st February when the current seasonal Autumn-winter catalogue ends - click on the link below to my online store if you would like to purchase. I know I wouldn't be without mine - they can be used in so many ways.

Back tomorrow with another one layer card; until then, happy stampin'!


Stampin' Up! Supplies Used:

Table built using Stampin' Up! Product Table Builder from The Crafty Owl.


Mini Catalogue

BROWSE THE CATALOGUE

The mini catalogue is now live! Read and download your copy here.

Shop Online

Access my online shop 24 x 7, 365 days of the year:

Current March hostess code:

S9F2XJJW

Shop Online

Join My Team

It's always a great time to join Stampin’ Up! New team members can get £130 worth of products for only £99 + free business supplies + free shipping + all the fun being a part of Stampin’ Up! Stampin' Up! has something for everyone: join my growing team and benefit from my support to enjoy Stampin' Up! however you choose.

If you're interested, call me for a chat to understand how I can help you realise your goals. Alternatively, if you have already decided to sign up and you just can't wait, please click here for the link to the online form where you can sign up and order your starter kit right away! 

Latest Kit!

Stampin Cut and Emboss

The Rock Legend Kit has all you need to make 8 cards with coordinating envelopes. Along with the new Panda Friends Kit, both are available from January 4th for just £14 each - get yours here!

2023-24 Annual Catalogue

BROWSE THE CATALOGUE

Click on the catalogue for a full list of current SU! supplies - if you would like to order any of the items featured, please drop me a line at [email protected] or give me a call on 07773 421446 - I'd be happy to help.

New Online Exclusives

There will be new products available exclusively in the online store from 5 March - check them out here.

About Me

Hi I'm Joanne and live in Northampton and when I'm not looking after my husband and two beautiful children, am an avid crafter with a passion for all things Stampin' Up!

I must confess that I have never been a big rubber stamper - until I discovered Stampin' Up! that is. I love the fact that I can get such great results with co-ordinating stamps, inks, papers and punches - the possibilities are endless! Join me on my stamping journey as I share the things I love and be inspired to create amazing things yourself!

Follow Me

Monthly Newsletter

Box Builder

Click the button above to use Box Buster to create your custom box design using the Envelope Punch Board!

Kits Collection Now Available!

Stampin Cut and Emboss

The new Kits Collection from Stampin' Up! is now available!

Click here to see the current kits available and order yours online today.

I Design For


Stampin' Up Stuff

This is my personal blog and is not endorsed by Stampin’ Up! I hope you find it a plentiful source of ideas and personal inspiration but please don't copy my designs for contest submission or use for classes, publication or sale without express permission.