It's Sunday and you know what that means: time for a new challenge over at The Paper Players! As you may well have already read on our home page, the lovely and so talented Ann Schach, one of our longest serving members, is stepping down; we will all miss her dreadfully but at the same time we wish her well for the future she both wants and deserves. Love you Ann!!
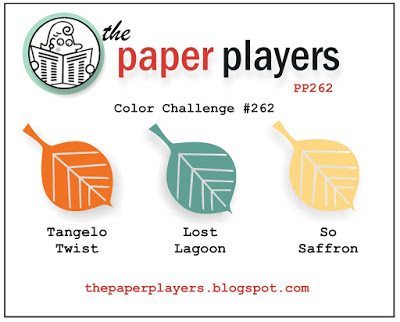
I am therefore hosting this week and I would like to share Ann's last great colour challenge with you:

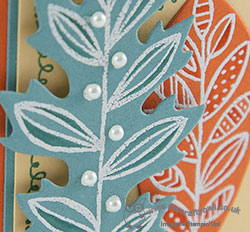
I am loving the Lighthearted Leaves set and given the lovely comments I received on the card I made last week (if you missed it you can see it here), and inspired by the leaves on our badge this week, I thought I would use this set again for today's card:

I also used the sketch over at The Challenge (welcome back ladies!) for my layout. I used Tangelo Twist for my card base, and partially covered this with a piece of Into The Woods DSP with a bold leaf pattern - I've been longing to use this paper with the Lighthearted Leaves, the two seem made for each other, don't you think? I decided to use So Saffron for my main panel on a mat of Lost Lagoon. I stamped my sentiment in Lost Lagoon and stamped a zentangle-like border, also in Lost Lagoon, around the edge using one of the border stamps from the Tin Of Cards stamp set. I then stamped two if the leaf shapes in Versamark and heat embossed in white, onto one each of Lost Lagoon and Tangelo twist cardstock and using my Stampin' Write markers, I coloured in some of the pattern just to add a little more depth of colour before cutting them out with my Leaflets framelits. The orange leaf I adhered directly onto the top panel, and for my larger Lost Lagoon leaf I popped it up onto a double height of dimesionals, having tied a bow with some of the retired SAB thick baker's twine in Tangelo Twist and highlighting the spots with pearls (that's my nod to the lovely Ann this week :-))
This card took longer to come together in reality than it did in my head (does that ever happen to you?!) but now that it's finished I really rather like it. What do you think?
Before you reach for your ink and papers, check out what our amazing team has created to inspire you this week:
The Paper Players Design Team
Here's a quick recap of our challenge rules:
1. Create a new paper project
2. Upload your creation to your blog with a link back to us and provide a direct link to the post featuring your challenge submission.
3. Please link your card to no more than three challenges, TOTAL.
4. Have FUN!
I have a morning of sport to look forward to today followed by a family lunch in honour of my mother-in-law, who is celebrating her birthday this weekend. I look forward to seeing how you use my chosen challenge colours on your cards in the gallery this week.
Back tomorrow with another project; until then, happy stampin'!
Stampin' Up! Supplies Used: