An Apple For The Teacher Thank You Card And Gift PP495

by Joanne James14. June 2020 09:00


Today it's Sunday and time for this week's new challenge over at The Paper Players! It's the turn of the lovely Laurie to host this week and she has an interesting colour challenge for you to work with:


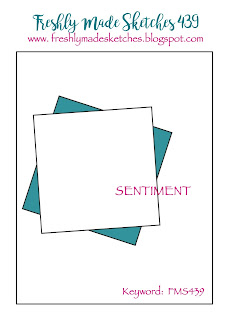
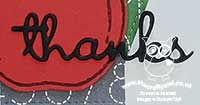
First up, I have a confession to make: I couldn't find my Tranquil Tide ink pad so substituted with Garden Green. I have a few projects for you today; armed with Narelle's sketch over at Freshly Made Sketches I decided to use some retired designer series papers in the challenge colours and my 'Harvest Hellos' stamp set to make a couple of teacher thank you cards and some cute gift packaging.  Here's the first of my cards:


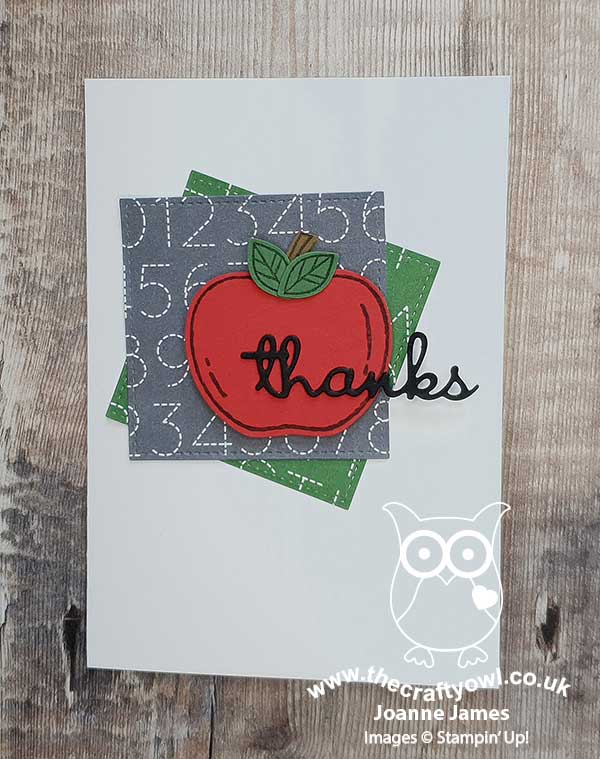
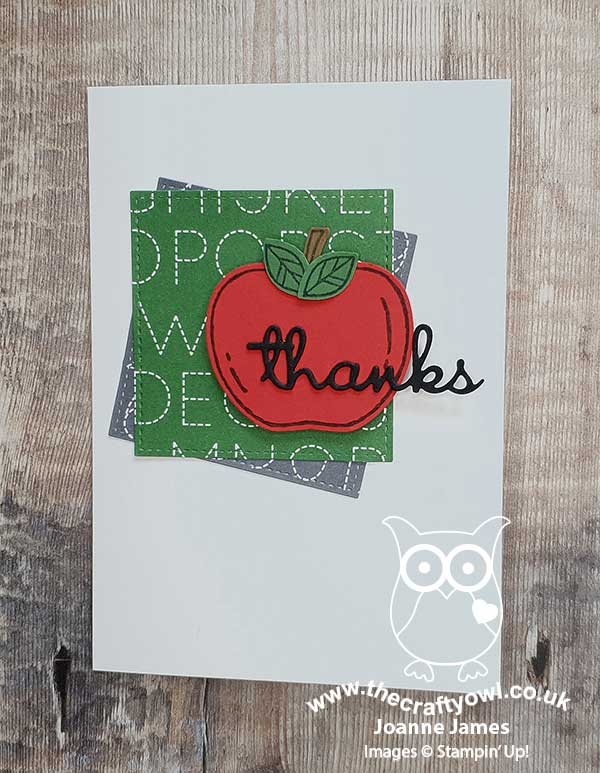
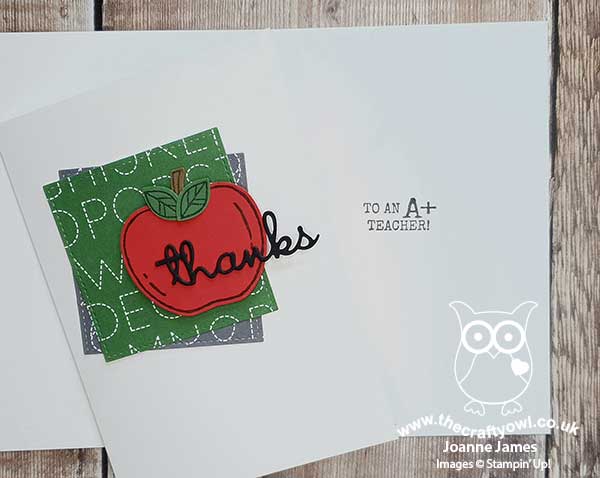
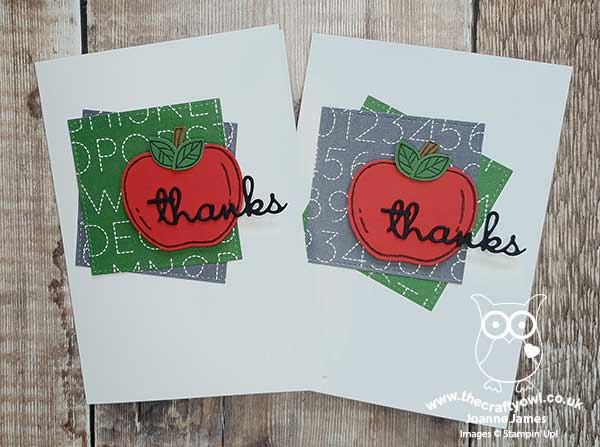
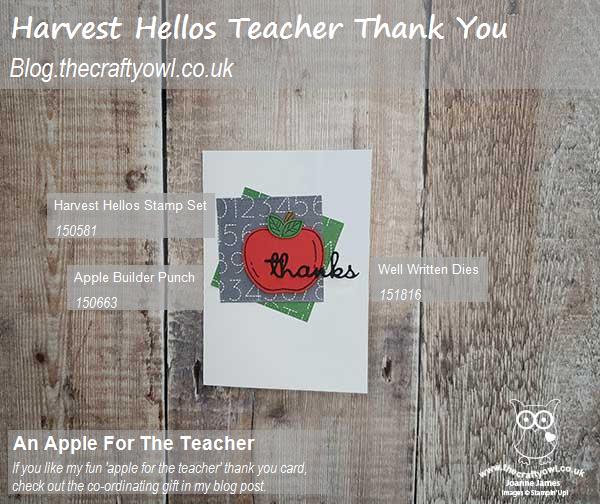
Some simple layering of my DSP and a stamped and punched apple, along with a 'thanks' diecut courtesy of the Well Written Dies, completed my card. I actually made two - on the second one, I reversed the layering of the papers and had the letter paper in front as opposed to the numbers:


 I added some simple stamping to the inside of my card from the same set:

 Here are the two cards together - which one do you prefer?

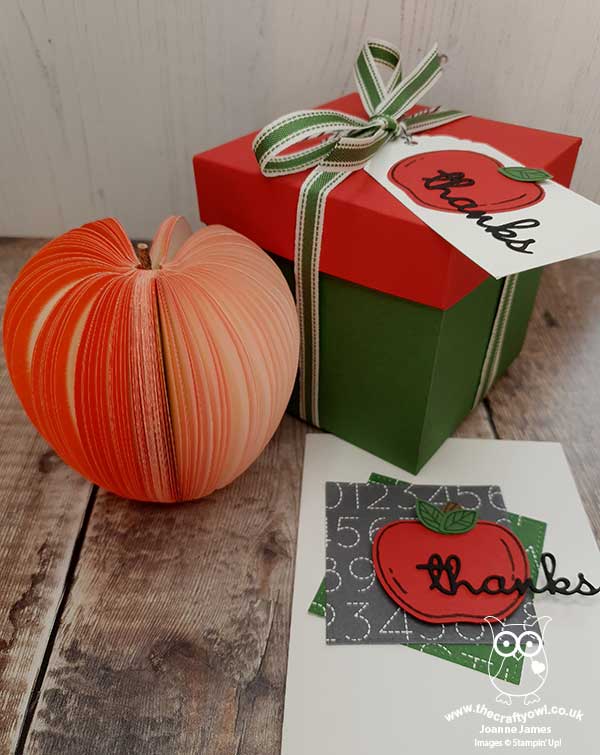
I had picked up a couple of cute apple notepads that I thought would be perfect for some extra small teacher gifts so took the opportunity to create some co-ordinating boxes for my cards, complete with tags:


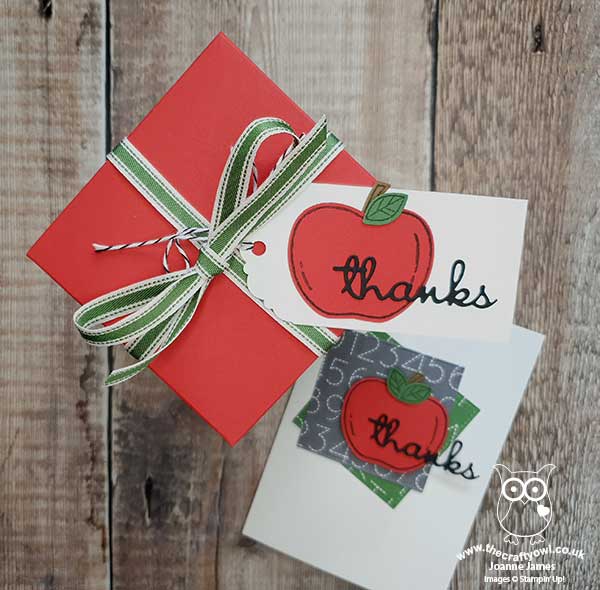
And here's another view:


And that cute apple notepad that is in the box? Here it is:


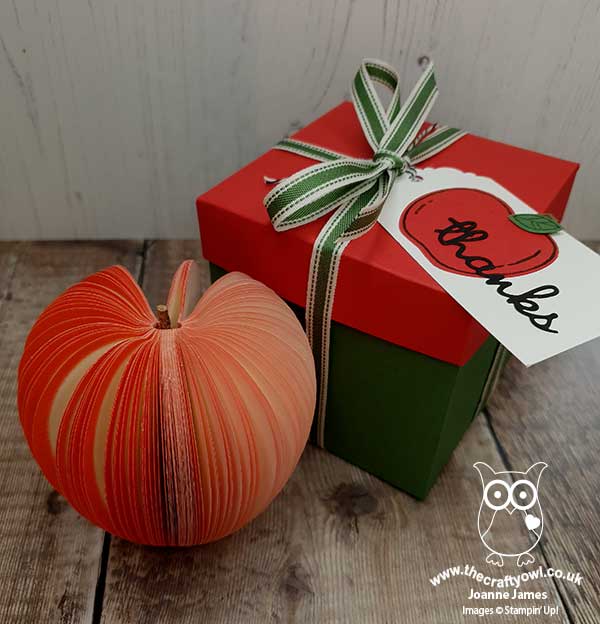
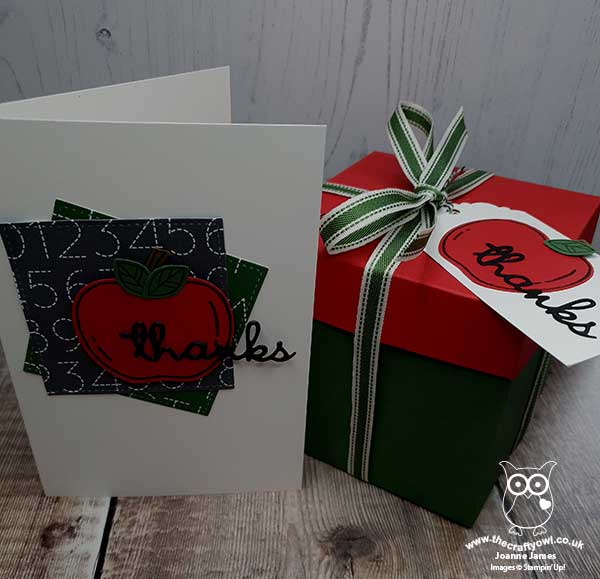
The apple folds flat but when clipped open it forms an apple shape, so I just had to create a lidded box that could present it whole for full effect - here are both projects together:


Here is the visual summary of the key products used on today's project for you to pin for easy reference:


You can see all of my Product and 'How To' summaries on my 'How To - Tips and Techniques' Pinterest board in case you've missed any. 

Before you reach for your ink and papers, check out what our amazing team has created to inspire you this week:

Here's a quick recap of our challenge rules:
 
1.  Create a new paper project
2.  Upload your creation to your blog with a link back to us and provide a direct link to the post featuring your challenge submission.
3.  Please link your card to no more than four challenges, TOTAL.
4.  Have FUN!

You can see all of my 'How To' summaries on my 'How To - Tips and Techniques' Pinterest board in case you've missed any. 

Enjoy your day; the weather was glorious here in the UK yesterday so I'm hoping that will continue today and I can spend some time in the garden. I'll be back tomorrow with another project. Until then, happy stampin'!


Stampin' Up! Supplies Used: 

Table built using Product Table Builder by The Crafty Owl - Independent Stampin' Up! Demonstrator.

An Apple For An APlus Teacher Thank You Card

by Joanne James11. May 2020 19:00


Another Monday, the start of a new week! I had an online demonstration this morning and something of an admin afternoon, so I've just time for a quick post to share another card for the current Fusion challenge, this time using both the sketch and inspiration layout:


The sketch and inspo photo combined to make the perfect teacher thank you card - take a look:


My bright red apple is courtesy of the 'Harvest Hellos' stamp set and the Apple Builder punch, two of my favourite items for creating teacher thank you cards and on carryover to the new catalogue too - yay! I paired my apple with a retired stamped notepaper background on a Crumb Cake base and swirly thanks diecut, again courtesy of a retired die; the notepaper and die were perfect to replicate the biscuit in the photo though, so it had to be! I also finished the inside with some added decoration courtesy of 'Harvest Hellos': 


I made a few of these cards at the same time to add to my end of year stash; the youngest of my James Juniors is in a transition year at school so I will need a lot of teacher thank you cards come July, so I'm starting now!

Here is the visual summary of the key products used on today's project for you to pin for easy reference:


You can see all of my 'How To' summaries on my 'How To - Tips and Techniques' Pinterest board in case you've missed any. 

Enjoy your evening and I'll be back tomorrow with another project. Until then, happy stampin'!


Stampin' Up! Supplies Used:

Table built using Product Table Builder by The Crafty Owl - Independent Stampin' Up! Demonstrator.

An Apple For A Teacher Thank You Card

by Joanne James11. May 2020 19:00


Another Monday, the start of a new week! I had an online demonstration this morning and something of an admin afternoon, so I've just time for a quick post to share another card for the current Fusion challenge, this time using both the sketch and inspiration layout:


The sketch and inspo photo combined to make the perfect teacher thank you card - take a look:


My bright red apple is courtesy of the 'Harvest Hellos' stamp set and the Apple Builder punch, two of my favourite items for creating teacher thank you cards and on carryover to the new catalogue too - yay! I paired my apple with a retired stamped notepaper background on a Crumb Cake base and swirly thanks diecut, again courtesy of a retired die; the notepaper and die were perfect to replicate the biscuit in the photo though, so it had to be! I also finished the inside with some added decoration courtesy of 'Harvest Hellos': 


I made a few of these cards at the same time to add to my end of year stash; the youngest of my James Juniors is in a transition year at school so I will need a lot of teacher thank you cards come July, so I'm starting now!

Here is the visual summary of the key products used on today's project for you to pin for easy reference:


You can see all of my 'How To' summaries on my 'How To - Tips and Techniques' Pinterest board in case you've missed any. 

Enjoy your evening and I'll be back tomorrow with another project. Until then, happy stampin'!


Stampin' Up! Supplies Used:

Table built using Product Table Builder by The Crafty Owl - Independent Stampin' Up! Demonstrator.

Harvest Hellos Clean and Simple Teacher Thank You Card

by Joanne James15. April 2020 21:02

A quick post today and I'm sharing a card using the current sketch over at CAS(E) This Sketch:

I didn't manage to play along last week (I managed a so-so card, but wasn't thrilled with it and decided not to share!). All change this week though - as soon as I saw the sketch I knew what I was going to do with it. Here's my clean and simple creation:


Here's the low-down on today's card:

I decided to go with a teacher thank you card. I know that schools here and all around the world are closed as we try and protect each other from this dreadful virus, however whether the Juniors go back to school or not next term, I figure there will still be the need for teacher thank you cards, so I'm getting organised!

I decided to add a trio of yellow pencils (this is from a retired Project Life stamp set) in the corner and over-stamped the bottom one with my thank you sentiment. I have a confession to make - as I came to write up my post I realise there were 4 stripes of ombre on the sketch, and I've only included 3 - oops! I genuinely hadn't noticed. I like to have odd numbers though, so I think my subconscious was probably responsible for the decision. I overlaid my pencils with a red apple from the 'Harvest Hellos' stamp set, coloured with Blends and punched out using my Apple Builder Punch and with a little tag and linen thread bow to finish.

Here is the visual summary of the key products used on today's project for you to pin for easy reference:


You can see all of my 'How To' summaries on my 'How To - Tips and Techniques' Pinterest board in case you've missed any. 

The warm weather has returned today so I made the most of it, getting some washing done and the children and I went on a nice bike ride this evening after dinner. I did sneak in a little crafting time too so have lots to share with you in coming days! Enjoy your evening and I'll be back tomorrow with another project. Until then, happy stampin'!


Stampin' Up! Supplies Used:

Table built using Product Table Builder by The Crafty Owl - Independent Stampin' Up! Demonstrator.


Swirly Scribbles Tree Teacher Thank You Cards

by Joanne James6. July 2016 07:00

Happy hump day one and all! Today as promised I have this year's teacher thank you cards to share with you. Both of the James Juniors are moving schools at the end of this term so it feels like there are even more people to thank thank usual. Coupled with the fact that terms ends this week and we have all had packed social calendars, a seriously CAS card capable of mass production was the order of the day! Those of you that follow my blog will know that I generally like to send school thank you cards that are school/teacher themed, so they will often feature school imagery or apples - I don't know if it's just me, but I still think that the 'apple for a teacher' thing holds true!

Here is my final design: 


Here's the low-down on today's card:

Clean and Simple - This card is literally all about the white space! I used Whisper White Extra Thick cardstock for my base and used one simple image - the apple tree - alongside my sentiment to serve as a focal point. I added Cucumber Crush thick baker's twine to one of the cards, but didn't add it to the remainder as it was too much for my ultra clean and simple look.

Swirly Scribbles Meets Tree Builder - I could have created my tree using the Tree Builder Punch in its entirety, but I love the stylised look you get when you switch out the leaves for a Swirly Scribble diecut. I actually used two pieces from the this framelit set: the round Cucumber Crush circle is the inner piece from the large swirly scribble, and the darker Garden Green is the smaller swirly scribble die cut. So don't throw away those middles of the larger scribbles diecut - they have their uses too!

Helping Me Grow - My two-tone sentiment comes from the 'Helping Me Grow' stamp set, which as much as I love the flowers in this set, I must confess I bought it for this sentiment primarily; is there anything more fitting to put on a teacher appreciation card?

Here is the visual summary of the key products used on today's project for you to pin for easy reference:


You can see all of my 'How To' summaries on my 'How To - Tips and Techniques' Pinterest board in case you've missed any. 

I'll be back tomorrow with another project for this week's new challenge over at Create With Connie and Mary; until then, happy stampin'!


Stampin' Up! Supplies Used:

Table built using Product Table Builder by The Crafty Owl - Independent Stampin' Up! Demonstrator.

Schoolhouse Teacher Thank You Card

by Joanne James30. May 2016 09:00

Bank Holiday Monday - what better than a long weekend! I spent yesterday catching up on some gardening and had dinner with my in-laws and nephew, which made for a nice change. Today my parents are visiting so I'm looking forward to more time in the garden and another BBQ - is it me, or is there something that makes food taste so much better when cooked and eaten outdoors?!

Anyway, my card for today uses this week's sketch over at Less is More; I was so pleased to see my turtle card from a couple of weeks ago chosen as a Top 3 card this week - the competition over there is stiff, so this makes a win all the more special (thank you ladies!) With only 6 weeks to go until the end of the school year here in the UK, I thought it was time to get cracking on my teacher thank you cards, so here is today's card:

Here's the low-down on today's card:

ABC, 123 - I used a piece of retiring Schoolhouse Designer Series Paper to cover one of the portions of my background on my extra-thick Whisper White card base. Perfect for adding to the school theme, whilst leaving the all-important white space.

An Apple For The Teacher - I stamped my apple from the retiring 'Apple of My Eye' set in Real Red and fussy cut it out, cutting the leaf out separately and adding it on top. I'm not sure that children give an apple to their teacher any more (we are more likely to send cake in to ours!) Nevertheless this is such a good stamp set for teacher cards - a keeper, for sure.

Thanks, You're The Best - I finished my card with a die cut sentiment cut using my Big Shot and 'thanks' from the Greetings Thinlits. I used black cardstock and stamped the front in Versamark and heat embossed with black embossing powder a few times to give a nice shiny finish. I popped this up on dimensionals aligned with my apple and finished my card inside with 'you're the best' from the 'Sunburst Sayings' stamp set.

Easy and quick to create - just what you need if you've lots of these to make. Here is the visual summary of the key products used on today's project for you to pin for easy reference:


You can see all of my 'How To' summaries on my 'How To - Tips and Techniques' Pinterest board in case you've missed any. 

Enjoy your day and I'll be back tomorrow with another project; until then, happy stampin'!


Stampin' Up! Supplies Used:

Table built using Product Table Builder by The Crafty Owl - Independent Stampin' Up! Demonstrator.

Doodling with Dots Decorative Mask For A Teacher Thank You Card

by Joanne James7. July 2015 08:00

Today I have a card using the sketch challenge over at Paper Craft Crew and the colours over at Pals Paper Arts as the inspiration for my teacher thank you card:

Paper Craft Crew Card Sketch 151. #stampinup #papercraftcrew   PPA 258 Jul. 2

Now I know I entered a teacher thank you card into last week's challenge over at Pals Paper Arts (if you missed it you can see that card here) but what can I say - I need lots of them! I love the bright colour combination here so took the opportunity to do a little doodling - take a look:

I used Night of Navy for my card base which measures 5 3/4" x 5 3/4" and matted a strip of Cucumber Crush striped envelope paper with a strip of Watermelon Wonder cardstock. For my central panel, I embossed a piece of Whisper White with the large polka dot embossing folder for added texture, although difficult to see in the photograph, and then overlaid this with my circle stencil and used my Watermelon Wonder Stampin' Write Marker to doodle an apple shape. I added my stem and leaves freehand and finished with a navy seam binding ribbon bow, some Cucumber Crush lace trim and a trio of white candy dots. I finished with the thank you sentiment from the 'Tin of Cards' stamp set - this is such a great set, I've used it lots already and haven't even made my tin of cards yet!! - stamped in Night of Navy on Watermelon Wonder, and finished with a juicy green apple punched using my tree builder punch. 

I think the colours of this card really pack a punch and my non-standard card size meant a custom envelope would be the order of the day. What better way to finish than with a co-ordinating envelope made from the gorgeous new Cucumber Crush envelope paper? This lightweight paper makes beautifully crisp envelopes and with the aid of my trusty Envelope Expert from The Crafty Owl it was easy to work out what size paper and punch markings I required (9 1/4" and 4 5/8" respectively, in case you were wondering!)

I hope you like today's card; I'll be back tomorrow with a new set of Wednesday Weekly Deals and another project for you. Until then, happy stampin'!


Stampin' Up! Supplies Used:

Table built using Product Table Builder by The Crafty Owl - Independent Stampin' Up! Demonstrator.


Sprinkles of Life Thank You Apple Tree Card

by Joanne James28. June 2015 11:00

It's Sunday and time for our new challenge over at The Paper Players! I really enjoyed our gallery full of summer treats last week; this week should be easier on the waistline though, as the lovely Nance has a great sketch challenge for us:


My card features an altogether more healthy treat this week in the form of apples, on a tree created with the Sprinkles of Life stamp set and co-ordinating tree builder punch:

My card also features three of the five new in-colours: Tip Top Taupe, Cucumber Crush and Watermelon Wonder so I am also linking up with the team over at Fab Friday as their challenge is all about the new in-colours this week. I used Tip Top Taupe for my card base, then adhered a piece of Whisper White to the card front. I embossed another piece of Taupe with my woodgrain textured embossing folder then using my Big Shot and Circles Framelits cut away a partial circle from one side before adhering this on top of the white layer. I stamped the tree trunk in Taupe onto the white panel, then stamped my leaves in Cucumber Crush and my apples in Watermelon Wonder onto Whisper White and punched them out with the co-ordinating tree builder punch. I wanted a full tree so punched three treetops and layered them to create my tree, adding the last one with a dimensional to create some lift. For my banners I used a strip of Watermelon Wonder and a piece of green patterned paper from the Cherry on Top DSP stack, tied with white baker's twine and flagged with the triple banner punch. I stamped my sentiment in white Stazon onto Basic Black and cropped it tightly. I finished with another punched apple, which I covered in Crystal Effects to make it nice and shiny, although it's hard to see in the photo above. The Sprinkles of Life Stamp stamp set is so versatile with so many creative options; not only that, every purchase benefits the Ronald McDonald House Charity too as £2 is donated for every stamp set purchased.

With only three more weeks until the end of the school year, I am needing to make more and more teacher thank you cards, so this one is definitely heading for the teacher pile. Well, an apple for the teacher as the saying goes - or in this case, six!

Before you reach for your ink and papers, check out what our amazing team has created to inspire you this week:

The Paper Players Design Team
 
 
Here's a quick recap of our challenge rules:
 
1.  Create a new paper project
2.  Upload your creation to your blog with a link back to us and provide a direct link to the post featuring your challenge submission.
3.  Please link your card to no more than three challenges, TOTAL.
4.  Have FUN! 

I love a good sketch challenge so I look forward to seeing what you make of this one in the gallery this week. If the weather holds we may manage to squeeze in another weekend BBQ - keep your fingers crossed for me!

Back tomorrow with another project; until then, happy stampin'!


Stampin' Up! Supplies Used:

Table built using Product Table Builder by The Crafty Owl - Independent Stampin' Up! Demonstrator.


Teacher Thank You Card

by Joanne James27. May 2015 21:42

So I'm back with the second of my cards for this week's challenge over at CAS(E) This Sketch:


As the end of the school year will be upon us soon enough, I decided to combine this card with this week's theme over at The Challenge and get ahead and make a teacher thank you card:

I used a base of Pear Pizzazz and a mat of real Red - apple colours! - and having cut a stencil of the word 'Thank' using my Silhouette e-cutter, I stamped the word Thanks from the 'Another Thank You' stamp set repeatedly in Memento Black into the space and sponged over the whole space in Pear Pizzazz to give the letters more definition. To complete the sentiment, I die cut the word 'you' using my Big Shot and 'Hello You' thinlits three times out of Real Red cardstock and stuck them together to create a raised piece, then painted it in Crystal Effects to give a glossy finish. I used a snippet of chalkboard paper and stamped the word 'teacher' in white kraft ink to give a chalkboard effect (the stamp is from the retired set 'for my family' - it's a keeper!) and added both to my card, along with a cardboard apple embellishment from my Project Life Playground accessory kit and also a 'vintage' wire paper clip. This final addition also enables me to link up to 'Less is More' this week, where the recipe is to add metal to your card. 

I really love the way this card turned out; I like the collage feel it has, yet still retaining my clean and simple style - here's a close up of the stamping and stencilling detail: 

It's a little more embellished than my usual LIM cards, so I'm hoping it will still be permissible although I know the lovely ladies over there will give me some pointers if I've strayed too far from the brief :-) This is however much more what I had in mind for the sketch, so I hope the CAS(E) This Sketch team like it! The James Juniors are already arguing about which of their teachers will be receiving it - I think I might have to make a few copies before the end of term approaches!

Back tomorrow with my card for this week's new challenge over at Create With Connie and Mary. Until then, happy stampin'!


Stampin' Up! Supplies Used:

Table built using Product Table Builder by The Crafty Owl - Independent Stampin' Up! Demonstrator.


An Apple for the Teacher

by Joanne James12. July 2013 20:45

That's it for another year - school is officially out! Where does the time go? Today I'm sharing some of my teacher thank you gifts with you. I love to create handmade gifts and as some of my readers know, one of my other hobbies is biscuit making. So for my end of year teacher gifts, I decided to make apple-shaped chocolate iced biscuits, presented in the fab new Tag a Bag Gift Boxes and finished with a decorated tag from the co-ordinating accessory kit:

I often make mini-cookies and present in glass jars, but on this occasion these gift boxes were the perfect size and shape to hold ten of my apple biscuits. These boxes are great value at £6.25 for eight boxes and as they're food safe they are perfect for biscuits, cupcakes or other edible as well as non-edible gifts. I also made use of my accessory kit to seal and label the boxes. Here's a close up of one of the tags:

Wondering how I made the apples? I used the heart from my Hearts a Flutter framelits and then removed the bottom point with my Petite Curly Label Punch, added a leaf and stalk and done. A quick stamped and cut Bitty Banner 'thank you' and some Gumball Green ribbon added the finishing touch. One more photo for you with one of the biscuits out of the box so that you can see exactly what they look like:

Hoping to be back tomorrow with another project; have a busy day making tomorrow, as I have swaps to prepare for quarterly team training on Sunday and I haven't even started yet - oops! Until then, happy stampin'!


Stampin' Up Supplies:

Stamps: Bitty Banners

Cardstock: Whisper White, Real Red, Gumball Green, Chocolate Chip

Ink/Stampin' Write Markers: Real Red

Tools: Hearts a Flutter Framelits, Bitty Banners Framelits, 3/4" Circle Punch

Finishing Touches: Tag a Bag Gift Boxes, Tag a Bag Accessory Kit, White Baker's Twine

Mini Catalogue

BROWSE THE CATALOGUE

The mini catalogue is now live! Read and download your copy here.

Shop Online

Access my online shop 24 x 7, 365 days of the year:

Current April hostess code:

VDKNV7BH

Shop Online

Join My Team

It's always a great time to join Stampin’ Up! New team members can get £130 worth of products for only £99 + free business supplies + free shipping + all the fun being a part of Stampin’ Up! Stampin' Up! has something for everyone: join my growing team and benefit from my support to enjoy Stampin' Up! however you choose.

If you're interested, call me for a chat to understand how I can help you realise your goals. Alternatively, if you have already decided to sign up and you just can't wait, please click here for the link to the online form where you can sign up and order your starter kit right away! 

Latest Kit!

Stampin Cut and Emboss

The Rock Legend Kit has all you need to make 8 cards with coordinating envelopes. Along with the new Panda Friends Kit, both are available from January 4th for just £14 each - get yours here!

2023-24 Annual Catalogue

BROWSE THE CATALOGUE

Click on the catalogue for a full list of current SU! supplies - if you would like to order any of the items featured, please drop me a line at [email protected] or give me a call on 07773 421446 - I'd be happy to help.

New Online Exclusives

There are new products available exclusively in the online store from 5 March - check them out here.

About Me

Hi I'm Joanne and live in Northampton and when I'm not looking after my husband and two beautiful children, am an avid crafter with a passion for all things Stampin' Up!

I must confess that I have never been a big rubber stamper - until I discovered Stampin' Up! that is. I love the fact that I can get such great results with co-ordinating stamps, inks, papers and punches - the possibilities are endless! Join me on my stamping journey as I share the things I love and be inspired to create amazing things yourself!

Follow Me

Monthly Newsletter

Box Builder

Click the button above to use Box Buster to create your custom box design using the Envelope Punch Board!

Kits Collection Now Available!

Stampin Cut and Emboss

The new Kits Collection from Stampin' Up! is now available!

Click here to see the current kits available and order yours online today.

I Design For


Stampin' Up Stuff

This is my personal blog and is not endorsed by Stampin’ Up! I hope you find it a plentiful source of ideas and personal inspiration but please don't copy my designs for contest submission or use for classes, publication or sale without express permission.