by Joanne James16. April 2018 12:00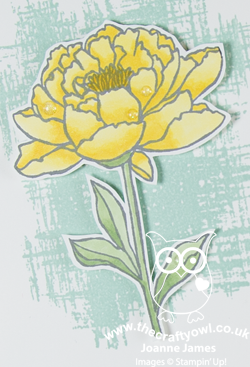
Happy Monday everyone! It's a tad chilly here in the UK but the sun is trying to shine, so I'll take that as the start to a good week! Today is the last day of the Easter holidays for one of the James Juniors at least so we are making the most of it! I'm sharing a card that I made at the weekend for one of my favourite challenges, As You See It (it's been too long since I've played along with these lovely ladies!) and uses the fresh Spring colour palette over at The Color Throwdown:


My card today says farewell to one of my favourite florals from the Annual Catalogue - which makes it perfect for the current challenge over at SUO Challenges too - take a look:
Here's the low-down on today's card:
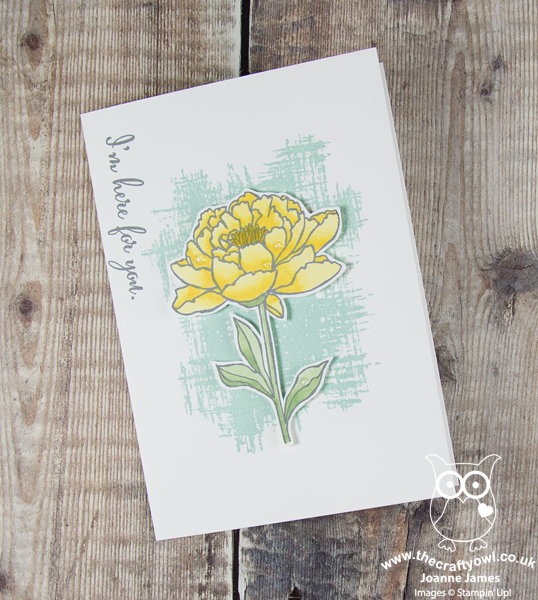
Farewell Flower - 'You've Got This' is one of my favourite florals and I will be sad to see it retire next month, I love that single peony-like bloom and the hatched background is so useful, both as a background for this flower and lots of other projects too. Here I've used it in one of my favourite ways, fussy cutting the flower and popping up on dimensionals. I stamped the background onto my white cardbase in Pool Party and coloured my flower with my Daffodil Delight Blends and retired Wild Wasabi Blendabilities alcohol markers.
Raindrops On Petals - I added a few glitter epoxy raindrops onto my flower petals and leaves for a little sparkle and detail, without detracting from the flower itself. You can see them better on the close-up here:
As You See It - I was intrigued by the current As You See it sketch: whilst my hatched background is not as brave as some of the beautiful watercoloured or inked backgrounds of the design team, I think it does a good job of representing the idea of the sketch. The thing I like the most about the sketch though is the positioning of the sentiment; having rotated the sketch through 90 degrees, this put my sentiment running sideways along the central fold of my card. This is not a position that I would have naturally chosen for my wording, yet I think it really rings the changes and I love the finished card. I love how sketches encourage us to push the boundaries of convention sometimes.
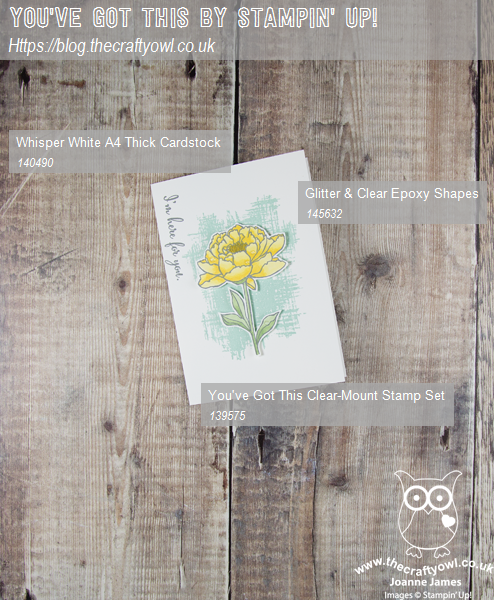
Here is the visual summary of the key products used on today's project for you to pin for easy reference:
You can see all of my 'How To' summaries on my 'How To - Tips and Techniques' Pinterest board in case you've missed any.
Yes, I will miss this stamp and the wonderfully uplifting and encouraging sentiments that go with it - I 'm not too sad though, a new catalogue always provides opportunities for new favourites to come along!
Enjoy your day and I'll be back tomorrow with another project. Until then, happy stampin'!
Stampin' Up! Supplies Used:
c6fbaffa-12c9-4a99-af64-b522bb71c60f|0|.0|96d5b379-7e1d-4dac-a6ba-1e50db561b04
Tags: Shop Stampin' Up! Online, Stamping Shop Stampin' Up online, Shop online, Stampin' Up, Stampin' Up Card ideas, Stampin' Up Supplies, Stampin' Up Card, You've Got This, Retiring Lists, retiring stamps, Stampin Blends
Cards | Shop Online | Shop Stampin' Up! Online | Stamping
by Joanne James15. July 2016 07:00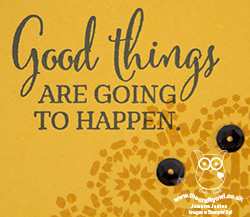
Today I'm sharing the second of the cards from my recent technique class featuring the Moroccan Suite of products. Each of the ladies received a share of the products in the suite - designer series papers, ribbon and twine as well as the Moroccan Nights stamp set and the aim was to create a trio of cards that showcased each of the elements.
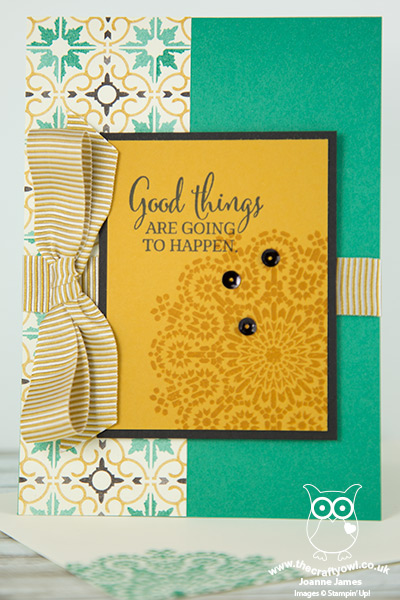
This card was about making the most of the large mosaic patterned stamp in the Moroccan Nights stamp set - take a look:
Here's the low-down on today's card:
Moroccan Nights - The stamps in this set contain some traditional Moroccan-inspired mosaic patterns, including one large tile design. This stamp is quite large and may appear intimidating, however there are lot of ways this stamp can be used in your projects. For this card, I've gone with one of the simplest and created a tone-on-tone pattern behind my sentiment, that adds detail without obstruction and doesn't overwhelm the other elements of my card. We also stamped this pattern in Emerald Envy on the inside of the card liner and the front and rear flap of the co-ordinating envelope - no naked envelopes here!
A Jewel Of A Colour Combination - The colours for this card were drawn from the piece of Moroccan Designer Series Paper featured on this card - feel free to hover and save this colour combination if it's one that appeals to you too:
Mustard Gold - Lastly, the simple panels on this card allowed for a 'show bow' in one of my new favourite ribbons, the Delightful Dijon 5/8" Mini Striped Ribbon. As my regular readers will know, I'm not a huge fan of Delightful Dijon unless paired with the 'right' colours, however this ribbon looks more gold that mustard and I can see me buying it by the bucketload for use on all kinds of projects - it ties the most wonderful bows too.
Here is the visual summary of the key products used on today's project for you to pin for easy reference:

You can see all of my 'How To' summaries on my 'How To - Tips and Techniques' Pinterest board in case you've missed any.
Enjoy your day and I'll be back tomorrow with another project; until then, happy stampin'!
Stampin' Up! Supplies Used:
by Joanne James22. June 2016 07:00
Today I have a card using this week's CAS(E) This Sketch and the colours over at The Global Design Project as inspiration:


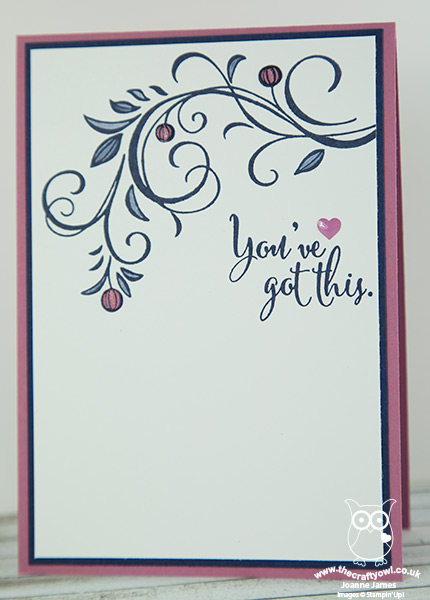
For my card today I decided to break out another new set and create an understated card with my new Falling Flowers stamp set:
Here's the low-down on today's card:
Falling Flowers Flourish - Every stamper needs a good floral flourish in their collection (it's the law, didn't you know? ;-) ) For some it has been Everything Eleanor, for others such as me it was Flowering Flourishes. Both of these sets now sadly retired, however I am doing a happy dance as this flourish in the new 'Falling Flowers' stamp set totally ticks my box - thank you Stampin' Up! The flourish looks beautiful on its own, but is also accompanied by other florals and a co-ordinating framelit set, May Flowers, to boot, for limitless creative possibilities. Here I've stamped it in Night of Navy and added a little extra colour with my blender pen to some of the leaves.
The Importance of White Space - Whilst I love this colour combo, I think I'm having a love-hate relationship with the new In Colour, Sweet Sugarplum. It is a bold, strong purple and needs to be used in small doses if it isn't to overwhelm. On my card today I restricted it to my card base and the buds/berries on my flourish (I stamped them in Navy onto Sweet Sugarplum cardstock, fussy cut them and paper-pieced them together). I also added a touch of clear Wink of Stella to the buds for a little shimmer.
An Enamel Shape for Balance - My flourish is definitely the star of the show on today's card and I paired it with one of my favourite sentiments from the 'You've Got This' stamp set as I was making this card with a special friend in mind. It needed one last thing to balance it out - I added a tiny Sweet Sugarplum In Colour Enamel Shape heart to make my card complete.
Here is the visual summary of the key products used on today's project for you to pin for easy reference:

You can see all of my 'How To' summaries on my 'How To - Tips and Techniques' Pinterest board in case you've missed any.
Do visit the other Design Team members to see what they did with this week's sketch; there's lots of inspiration over on their blogs too!
I'm off to Bells this morning for my fortnightly Coffee and Card Session and have lots of errands to run today. Enjoy your day and I'll be back tomorrow with another project; until then, happy stampin'!
Stampin' Up! Supplies Used:
by Joanne James28. July 2015 08:00Good morning everyone! Today I have another of the cards from my July technique lass featuring the stamp set 'You've Got This':
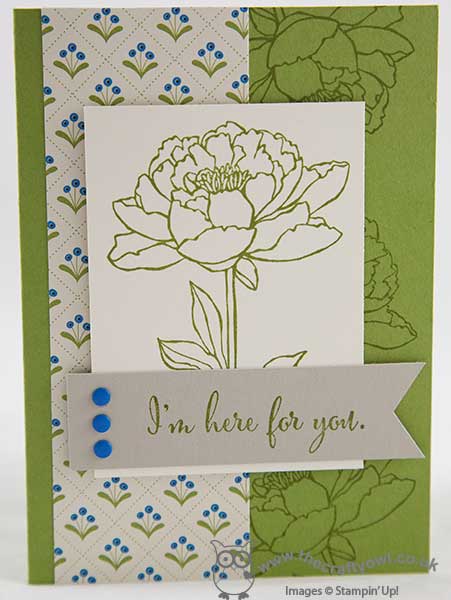
I was inspired by this card of Patsy Waggoner's and wanted to create a similar card showing how the focal flower could also be used as a background stamp to create an alternative effect. Of course I had to pair mine with my most favourite Pretty Petals DSP with that cute Pacific Point flower, which I then used in the candy dots of the same colour to bring focus to the sentiment banner - a cinch to create with my Triple Banner punch. Pacific Point and Old Olive seem an unlikely colour combo, yet the Pretty Petals DSP shows how they work so perfectly together, especially when teamed with Very Vanilla as the neutral.
This card was another success with the ladies at my technique class; combined with the third card (this one - the card that started it all!) which was the most complicated of the three, we managed to make three cards to be proud of.
Back tomorrow with a new set of Wednesday Weekly Deals - don't forget you still have one more day to take advantage of my Weekly Deals Giveaway this week - to remind yourself of the offer, please click here! Until tomorrow, happy stampin'!
Stampin' Up! Supplies Used:
by Joanne James27. July 2015 08:00It's the start of the working week (for some!) and today I'm sharing one of the cards I made at last month's technique classes featuring the stamp set 'You've Got This':
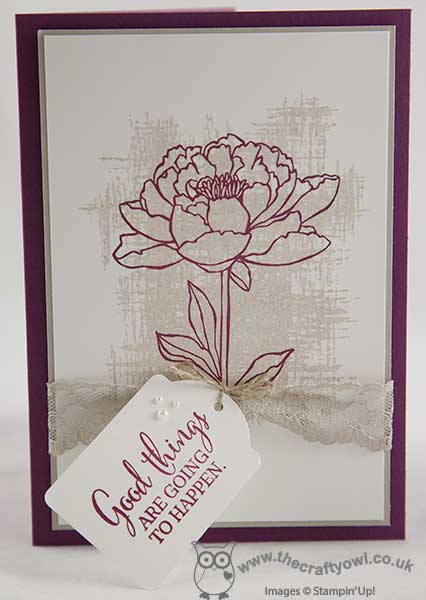
The layout for this card is inspired by the one in the annual catalogue that features this stamp set. For my card I chose a base of Rich Razzleberry and a mat of Sahara Sand, then stamped the hatched background stamp image onto a piece of Whisper White in Sahara Sand, having stamped off once first, and then overlaid this with the outline of the flower in Rich Razzleberry. This is a really versatile set - there is so much you can do with the flower stamp in terms of colouring (or not), fussy cutting (or not!) and the background stamp is one of those that will be useful for all kinds of projects. I wrapped a piece of Sahara Sand trim tightly around my layers before adhering to my base card and stamped my sentiment and punched it out with the note tag punch and tying it to the lace with some linen thread. I added a few pearls and my card was finished. The ladies in my class loved the simplicity of this card and how it could be recreated in lots of alternative colourways to achieve a different look.
My card was made with a specific friend of mine in mind. The lovely Pip Todman, of Queen Pip Cards, is a fellow SU! demonstrator who I presented with at Stampin' Up!'s European Convention in Brussels last October and has been working very hard to achieving some goals in her SU! business this year. She still has a little way to go but I wanted to send her this card to let her know I was thinking of her and send a few words of encouragement - I do believe 'good things are going to happen' for Pip this year and I am looking forward to celebrating with her when I see her in Brussels again in November. Do pop over to Pip's blog via the above link and leave her some Stampin' love, or better still if you live in or around Ash Vale or the surrounding Hampshire area, do check out Pip's classes - she would love to welcome you along!
On the other hand, if you live in or around Northampton or just across the border into Leicestershire or Buckinghamshire, I would love to see you at one of my papercraft classes sometime soon. I run a variety of classes, from technique-based, to stamp-a-stack, 3D home decor and project-based classes, as well as Project Life memory keeping. My current schedule of classes can be found here or sign up to my newsletter for reminders and other news and information. My next technique classes for August feature the RMHC Sprinkles of Life stamp set and will be held on Tuesday 4th and 11th August - do get in touch if you would like to join me.
That's all from me today; I have another of the class cards using this stamp set tomorrow, so do pop back to see another take on this gorgeous set. Until then, happy stampin'!
Stampin' Up! Supplies Used:
by Joanne James2. July 2015 08:05Good morning everyone! It's Thursday and time for a new challenge at Create with Connie and Mary where we have a great colour challenge for you this week:

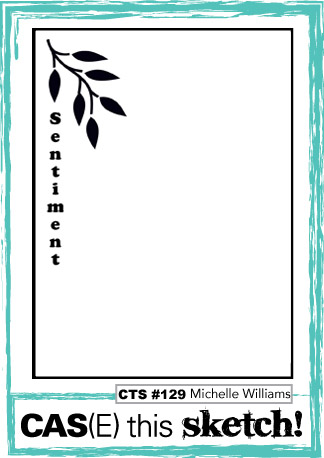
I chose to use this week's layout over at CAS(E) This Sketch for my card this week and went for some bold pops of colour against my neutral background:
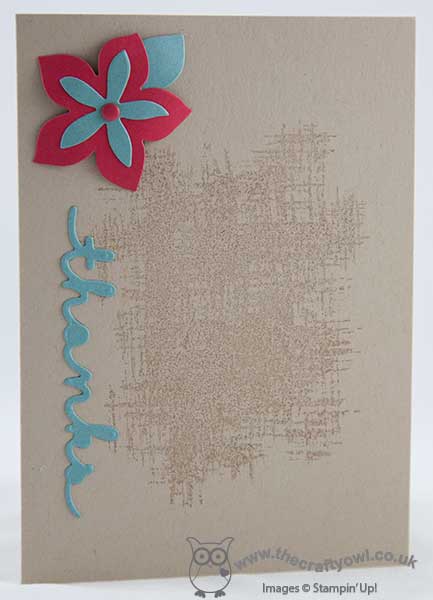
I used Crumb Cake for my card base, and instead of leaving it completely plain, I stamped the hatched background stamp from 'You've Got This' in Crumb Cake to add a little interest to the main body of the panel. This is such a useful stamp and can be used in so many ways, not just with the flower in the set with it. I then added a layered flower cut with the Flower Fair framelits and finished with a Real Red candy dot (I get through these faster than any other colour!) and my die cut sentiment. Super simple and very easy to recreate and would work in lots of other colourways too.
Short and sweet from me today - do check out what the rest of the DT have been up to and I look forward to visiting your gallery creations this week. I'll be back tomorrow with another project; until then, happy stampin'!
Stampin' Up! Supplies Used:
- Greetings Thinlits Dies
- Flower Fair Framelits Dies
- You've Got This Stamp Set
- Crumb Cake A4 Cardstock
- Real Red A4 Cardstock
- Lost Lagoon A4 Cardstock
- Crumb Cake Classic Stampin' Pad
- Brights Candy Dots
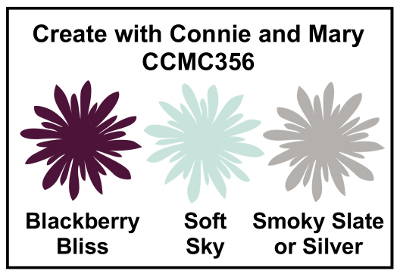
by Joanne James21. May 2015 08:00It's Thursday and time for a new challenge over at Create With Connie and Mary and this week we have a colour challenge for you:
I also have a sneak peek for you today as I made my card with a new set from the 2015-16 Annual Catalogue called 'You've Got This' - take a look:
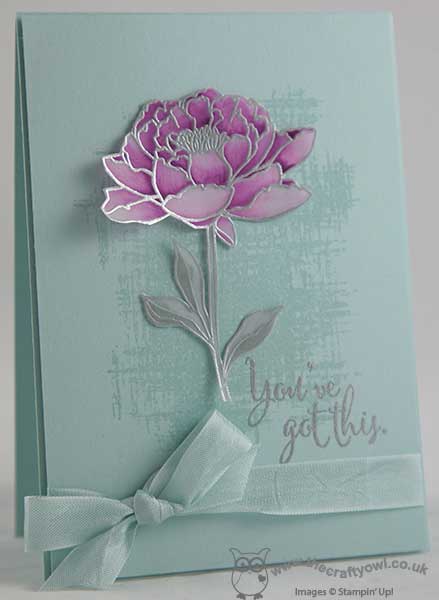
This gorgeous stamp comes in two parts with a very useful hatched pattern background stamp that I stamped in Soft Sky on my Soft Sky panel, a few sentiments and beautiful large flower bloom. I stamped my flower in Versamark on vellum and heat embossed it in silver then I coloured the stem with Smoky Slate and the petals with Blackberry Bliss ink and used a blender pen to achieve the detail. I then fussy cut my flower and adhered it to my card front using glue dots, allowing the edges to lift away from the card. The sentiment was also heat embossed in silver directly to the card front and I finished my card with a piece of Soft Sky seam binding ribbon tied in a bow.
I just love this flower stamp and know that this is one I will be getting lots of use out of, so you can definitely expect to see more of it. I'm looking forward to seeing what you do with this colour combination this week - do check out how the other designers have used this colour combination too, as there are some great and varied cards to inspire you.
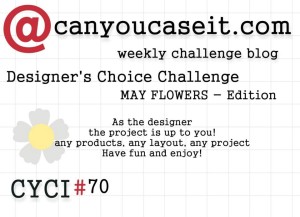
I'm also linking today's card up with this week's challenge over at Can You Case It? where their theme is 'May Flowers' - I think my card certainly qualifies as one of those!
I'll be back tomorrow with another sneak peek project, so stay tuned for that. Unitl then, happy stampin'!
Stampin' Up! Supplies Used:
- Embossing Buddy
- Versamark Pad
- Silver Stampin' Emboss Powder
- Heat Tool - Uk Plug
- Soft Sky 1/2" Seam Binding Ribbon
- Soft Sky Classic Stampin' Pad
- Card Stock A4 Soft Sky
- Blackberry Bliss Classic Stampin' Pad
- Smoky Slate Classic Stampin' Pad
- Blender Pens
- White Vellum A4 Card Stock