Frosted Medallions New Year Card in Two Colourways

by Joanne James2. January 2017 07:00

I had a fun family day yesterday, full of laughs and the last of the Christmas crackers. I'm back today with another couple of cards to welcome in the new year for the current challenge over at Freshly Made Sketches:


I made two identical cards, one in each of two colourways. Here's the first one, in white and silver:


And here's the second one in black and gold:


Here's the low-down on today's cards:

A Frosted Medallion - For today's card I've used both the large medallion and the sentiment from the 'Frosted Medallions' stamp set as intended for a new year's card. I stamped both in Versamark and heat embossed them in silver on the white version. I debated about whether or not I should obscure that gorgeous medallion shape with the sentiment, but in the end decided that the card looked a little naked without the sentiment and besides, I like the way the edges frame the centred oval, giving just a hint of the design beneath. The Frosted Medallions stamp set is still available as part of the 'Year End Closeouts' for just a couple more days before retiring to make way for a new range of seasonal products, so if this set appeals to you, snap it up now before it's gone for good.

Fabulous Foil Designer Acetate Panel - My vertical background panel is courtesy of the Fabulous Foil Designer Acetate - I just love this for adding layering detail to cards without bulk. Easy for a two-way card too - I just cut two pieces and flipped one (don't forget to remove the protective seal from the silver-patterned side to see it shine in all its glory).

Stitched Shape Framelits Are Returning - I finished my card with a sentiment from the Frosted Medallions set framed in a simple stitched oval. I know these have been unavailable to order due to unprecedented demand when first introduced, however good news - those who did manage to order them before they were put on hold and had theirs on backorder will be receiving them any day now and for those who still want to get their hands on them, stocks are likely to have been fully replenished by mid-January so they will once again be available to purchase - and in time for Sale-A-Bration too, wahoo! These stitched shapes just finish off a sentiment beautifully and I guarantee one you have them you won't be able to stop using them!

So which one of these colourways do you prefer? I gave the gold and black one to my mother-in-law yesterday as I know she is partial to this colour combo, but I think I prefer the silver and white one myself - so crisp and fresh. I would love to know what you think - do feel free to leave me a comment below, I read them all and love it when you share your views with me.

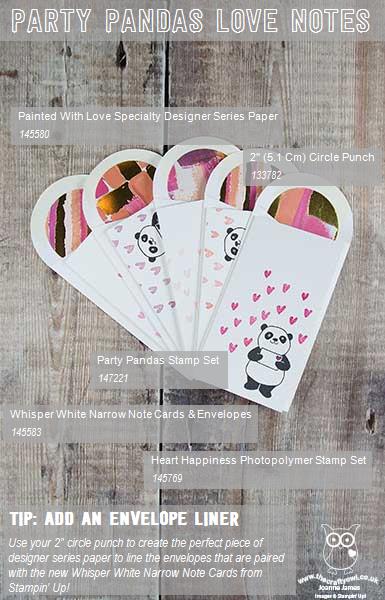
Here is the visual summary of the key products used on today's project for you to pin for easy reference:
 

You can see all of my Product and 'How To' summaries on my 'How To - Tips and Techniques' Pinterest board in case you've missed any. 

That's all from me; back tomorrow with another project; until then, happy stampin'!


Stampin' Up! Supplies Used: 

Table built using Product Table Builder by The Crafty Owl - Independent Stampin' Up! Demonstrator.

It's A 2017 Celebration With The Crafty Owl

by Joanne James1. January 2017 07:00

Well hello! Have you missed me? I hope you've all enjoyed a wonderful Christmas and best wishes for a very happy new year! I had a very busy Christmas season and had to take an extended blogging break; sometimes some things just have to give and for me my blog was one of them this past few weeks. Anyway, now I'm back and here with a card to welcome in the new year. I'm also entering a couple of challenges: the Paper Craft Crew are looking for a black-tie gala inspired card and the peeps over at CAS-ual Fridays are working with the theme of 'Celebrations':

Join me for a Black Tie Gala event with the Paper Craft Crew and play along with Challenge 224. #pcc2016 #themechallenge #blacktie www.papercraftcrew.com   

I decided that today the owl should return in more ways than one - take a look at my card to see what I mean:


Here's the low-down on today's card:

A Dapper Owl - The star of today's card is the super-sparkly, rather dapper Fred Astaire-esque owl that is tripping the light fantastic as he welcomes in the new year! The Owl Builder Punch was one of my first Stampin' Up! purchases and I love how versatile it is. I used the owl punch to make the very first new year card that I blogged way back in 2013 when I first began blogging (you can see that card here) so it seemed fitting that I should use an altogether more elegant owl to kick start 2017. This card also heralds the start of a new weekly feature of mine: each week I will be creating a card that features a different owl or character made with the Owl Builder Punch. This is a fun way to demonstrate the versatility of this popular Stampin' Up! punch, so be sure to tune in each week for your owl inspiration. Today's owl sports a gold glimmer waistcoat and a top hat and bow tie courtesy of the Snow Friends Framelits. The walking cane is a simple strip of glimmer paper and a circle punched with the owl builder punch. Along with my Large Number Framelit numbers, today's owl is seriously sparkly!

It's A Celebration - My starry background is courtesy of the fireworks in the 'It's a Celebration' stamp set in the current seasonal catalogue; I stamped them in Versamark and heat embossed in silver and gold for a dramatic background reminiscent of the night sky.

Yes, Let's Celebrate 2017! - I finished my card with a sentiment from the 'Confetti Celebration' stamp set - ot just for birthdays, this set works for lots of other kinds of celebration too.

Here is the visual summary of the key products used on today's project for you to pin for easy reference:


You can see all of my Product and 'How To' summaries on my 'How To - Tips and Techniques' Pinterest board in case you've missed any. 

That's all from me; I'm off to spend the day with the extended James family to welcome in the new year. Back tomorrow with another project; until then, happy stampin'!


Stampin' Up! Supplies Used: 

Table built using Product Table Builder by The Crafty Owl - Independent Stampin' Up! Demonstrator.

Softly Falling And Hang Your Stocking - A Perfect Pair

by Joanne James11. December 2016 09:00

It's Sunday and time for a new challenge over at The Paper Players! Before I get into my post, I must just give a shout out to the lovely Linda, Hannelie and Colleen who have been the most awesome guest designers with us for the last six months; these ladies have done a fabulous job and I will miss your contributions and do hope you continue to play along with us from time to time. Thank you for sharing your designs and creativity with us! Whilst we are sad to see these ladies leave, it also means we will have some new guest designers joining us too; watch out for more news on this with my mid-week reminder post on Wednesday to see who will be joining us to kick off 2017!

Meanwhile, it's the turn of the lovely Jaydee to host this week and she has a glamorous colour challenge for us to work with:


All the sparkle of silver and gold, paired with brilliant white! I decided that a glamorous stocking was going to be my focal point today and I also used Amy's sketch over at Freshly Made Sketches for my layout - here's my card:


My card today is another one with lots of layers and a variety of foil and glimmer paper to add lots of sparkle: my diecut stocking is gold foil layered with gold glimmer and a white glimmer top with embossed holly decoration, I layered a silver foil doily behind and added a piece of silver foil acetate between my white cardbase and mat, which I embossed with my favourite embossing folder of all time, Softly Falling, for added detail. I used my Stitched Shape Framelits for my sentiment square (you will be pleased to know theses will be available to order again early January in time for Sale-A-Bration - yay!) and chose a sentiment from the Christmas Pines stamp set to complete my card as this seemed the most appropriate, which I also heat embossed in gold.

This is the kind of stocking I imagine someone like Joan Collins to own (or maybe Donald Trump, since he seems to be a fan of all things glitzy and gold!) - either way, definitely all about the luxury! I'm more of a traditional red and white girl myself :-)

Here is the visual summary of the key products used on today's project for you to pin for easy reference:


You can see all of my Product and 'How To' summaries on my 'How To - Tips and Techniques' Pinterest board in case you've missed any. 

Before you reach for your ink and papers, check out what our amazing team has created to inspire you this week:

The Paper Players Design Team
 
 
Here's a quick recap of our challenge rules:
 
1.  Create a new paper project
2.  Upload your creation to your blog with a link back to us and provide a direct link to the post featuring your challenge submission.
3.  Please link your card to no more than four challenges, TOTAL.
4.  Have FUN! 


I look forward to seeing what you create with this colour palette this week. This morning I will be recovering from a Christmas night out yesterday and this afternoon we are officially decorating the James household for Christmas. My wreath is made and hanging proudly on my front door already, so with the tree up and the rest of the decorations in place, I'm sure it will start to feel like Christmas is well and truly on its way!

Enjoy the rest of your weekend as it will be over all too quickly; I'll be back tomorrow with another project; until then, happy stampin'!


Stampin' Up! Supplies Used:

Table built using Product Table Builder by The Crafty Owl - Independent Stampin' Up! Demonstrator.

Christmas Tree Warmth and Cheer Washi Tape Card

by Joanne James5. December 2016 19:27

Happy Monday everyone! I've had a busy start to my week with deliveries and appointments but did manage to catch up with a couple of friends for a festive afternoon tea, which was lovely. I have a quick card to share with you today  - this one is from one of last month's classes where we were using the Santa's Sleigh bundle. This was our warm up card and features the traditional colours that the Paper Craft Crew are challenging us to use this week:

Visit the Paper Craft Crew and play along with Color Challenge 221. www.papercraftcrew.com

I got out the washi tape and set to work - here's my card:


Here's the low-down on today's card:

O Christmas Tree -  The tree framelit in the Santa's Sleigh Thinlits set makes for an elegant Christmas tree, and does double duty when the negative space is used creatively too. On this card the focal point is the absence of the actual tree, as opposed to the tree itself. 

Warmth and Cheer Washi - Here the tree is decorated with Warmth and Cheer washi tape, simple strips of colour onto the Crumb Cake card base. Perfect within the Garden Green top layer, to add to the feeling of foliage.

And A Star - I finished my card with a stamped sentiment, tied twine bow and a metallic gold star.

A great simple card, easy for mass production - and don't we all need those at this time of year!

Here is the visual summary of the key products used on today's project for you to pin for easy reference:


You can see all of my 'How To' summaries on my 'How To - Tips and Techniques' Pinterest board in case you've missed any. 

That's all from me; I'll be back soon with another project; until then, happy stampin'!


Stampin' Up! Supplies Used:

Table built using Product Table Builder by The Crafty Owl - Independent Stampin' Up! Demonstrator.

Frosted Medallions Snowflake

by Joanne James4. December 2016 09:00

It's Sunday and time for a new challenge over at The Paper Players! It's the turn of our fearless leader the wonderful Nance to host this week and she has a fun wintery theme to get your creative juices flowing:


Use a snowflake (or two!) on your card. I decided that I wanted to feature the large frosted medallion snowflake from the stamp set of the same name on my card this week and this week's Mojo Monday sketch gave me the perfect layout - here's my card:


Here's the low-down on today's card:

All About The Layers - My card this week has 9 layers in total, rather a lot even by my standards! Can you spot them all? They are, in order: Pool Party card base, Sugarplum square panel, vellum square, Fabulous Foil Designer Acetate, silver foil, Fancy Frost Specialty DSP, Sweet Sugarplum circle, a vellum circle with the frosted medallion stamped in Versamark and heat embossed in white and lastly the word 'joy' cut out of silver glimmer paper with my Wonderful Wreath framelits. A lot of layers indeed, yet I think they all play a part in contributing to the balance of the card design.

Glitter, Glitter - I used lots of elements to add sparkle to my card, from the Fabulous Foil Acetate, to the glimmer paper and sprinkle of Fancy Frost sequins, along with a rather fancy bow in silver (current) and Pool Party (retired) glitter ribbon beneath my snowflake. This card is definitely not practical for posting, but will make a nice special one to be hand delivered. The snowflake/glitter combination means I am linking up with CAS-ual Fridays too where these are both the order of the day!

A Contemporary Colour Combination - you may recognise my colour combination this week as the one our very own lovely Nance used for her pines card last week - you can see her card here. This isn't a colour combination I would ordinarily choose for a Christmas card, and I did start out using just white, silver and Sweet Sugarplum, but I felt it needed something more. I decided to add in the Pool Party as it looked so great on Nance's card and voila - an altogether brighter card, so thank you Nance! If you like this colour combination, feel free to save it:


So only one main snowflake on my card, but it is a big one! That said, I did use the snowflake background stamp from the Pretty Pines stamp set on my card base to add a little background decoration, so there are lots more there too!

Here is the visual summary of the key products used on today's project for you to pin for easy reference:


You can see all of my 'How To' summaries on my 'How To - Tips and Techniques' Pinterest board in case you've missed any. 

Before you reach for your ink and papers, check out what our amazing team has created to inspire you this week:

The Paper Players Design Team
 
 
Here's a quick recap of our challenge rules:
 
1.  Create a new paper project
2.  Upload your creation to your blog with a link back to us and provide a direct link to the post featuring your challenge submission.
3.  Please link your card to no more than four challenges, TOTAL.
4.  Have FUN! 


I look forward to seeing what you create with our theme this week. We are off for our usual Sunday morning of sport, followed by a spot of lunch and then we are going to watch a basketball game this afternoon - go Northampton Neptunes!

Enjoy the rest of your weekend as it will be over all too quickly; I'll be back soon with another project; until then, happy stampin'!


Stampin' Up! Supplies Used:

Table built using Product Table Builder by The Crafty Owl - Independent Stampin' Up! Demonstrator.

Stampin' Up! End of Year Closeout Sale is Here!

by Joanne James1. December 2016 18:00


I've been busy with my Spring-Summer pre-order and my Daily December memory keeping class today. More about that tomorrow, but for today I just want to make sure you're aware that Stampin' Up! has today launched its year end closeouts, with a combination of clearance rack, retiring and current products, some available at as much as 60% off. There are lots of bargains to be had, so why not pop across to my online store and treat yourself - don't forget to support my business by using this month's hostess code YMY44Q6R when you place your order.

Back tomorrow with Daily December news - untile then, happy shopping!

Tags: , , , , , ,

Promotions | Shop Online | Shop Stampin' Up! Online | Stamping

Last Day of Stampin' Up!'s Online Extravaganza

by Joanne James28. November 2016 06:00

A reminder that today is the last day of Stampin' Up!'s Online Extravaganza! Ending tonight at 10.50pm GMT, you can save up to 40% on select products. Today is also the second and final 24-hour sale featuring special offers available for today only:


Select items (those marked with an asterisk), including those that will be on the future autumn/winter catalogue retiring list, are available only while supplies last.

The all-important details for the promotion are as follows:
• You must use the bundle item codes provided. Discounts will not be applied if individual item numbers are entered separately. 
• Some bundles are exclusive to Online Extravaganza and will not be available after the promotion ends. 
• There is no minimum purchase required in order to receive the discounted price. 
• Additional products from current catalogues may be purchased on the same order.

Here is the full list of deals this week:

Page 1

Page 2

Page 3

Page 4


You can download a PDF version of the deals list by clicking here.

Today's specials include the ever-useful Magnetic Platform - if you own a Big Shot and don't have one, i would definitely recommend it, I use mine daily - the Flurry of Wishes bundle and the bell punch, which has 40% off and is a bargain at just £9.60.

You can see some of my favourite Flurry of Wishes cards in previous posts here and here - but for today I wanted to share a card with a difference that I made with the bell punch, also on offer today. Inspired by this card made by Amanda Bates, I just had to make my own clean and simple version of a gingerbread topiary - take a look:


What no bells? Did you spot it - the upturned bell with the end trimmed makes the perfect plant pot! My sentiment and candy cane stick was stamped with the border stamp in the 'Candy Cane Christmas' set and the bow punched with the Holly Builder Punch. The house I fussy cut from the Candy Cane Lane Designer Series Paper and brushed the snow on the roof with my clear Wink of Stella for added sparkle - and the best bit? There are 56 whole houses in a pack of Candy Cane paper - that's a lot of cards!  

Some great deals there - don't miss out!

Happy shopping everyone!


Stampin' Up! Supplies Used on Today's Card:

Table built using Product Table Builder by The Crafty Owl - Independent Stampin' Up! Demonstrator.

Wrapped in Warmth Cable Knit Christmas Card

by Joanne James27. November 2016 05:00

It's Sunday and time for a new challenge over at The Paper Players! It's the turn of the talented Sandy to host this week and she has a fun sketch challenge for you to work with:


 You all know me well enough by now to know how much I love a good sketch and this one is no exception - so many possibilities! I could have stamped the offset panel or featured a designer series paper; unusually for me though, I decided to showcase an embossing folder. Take a look:


Doesn't that look all warm and cosy and remind you of nights in by the fire?!  Here's the low-down on today's card:

Create An Impression With Cable Knit -  For my central panel I embossed a rectangle of Cherry Cobbler cardstock with the Cable Knit Dynamic Textured Impressions Embossing Folder. This is one of Stampin' Up!'s new Dynamic folders, made to create deep, dimensional embossed impressions and it really does - you can almost feel the knitted stitches in that would-be sweater, the grooves are so deep.

Stitched Wrapped in Warmth - I inked my sentiment, from the Wrapped in Warmth stamp set, using Cherry Cobbler, Delightful Dijon and Basic Black Stampin' Write Markers and added a stitched border using the new Stitched Shape Framelit Dies, before adding a little enamel heart embellishment too. I just love the stitched edging, so effective. 

Warmth and Cheer Colour Combo - The colour combination for my card came right out of the plaid background paper from the Warmth and Cheer paper stack, with its warm red, mustard yellow and basic black. Feel free to save it if it's a favourite of yours too:


A little ribbon and burlap to finish completes my festive, warm and cosy Christmas card.

Here is the visual summary of the key products used on today's project for you to pin for easy reference:


You can see all of my 'How To' summaries on my 'How To - Tips and Techniques' Pinterest board in case you've missed any. 

Before you reach for your ink and papers, check out what our amazing team has created to inspire you this week:

The Paper Players Design Team
 
 
Here's a quick recap of our challenge rules:
 
1.  Create a new paper project
2.  Upload your creation to your blog with a link back to us and provide a direct link to the post featuring your challenge submission.
3.  Please link your card to no more than four challenges, TOTAL.
4.  Have FUN! 


I look forward to seeing what you create with Sandy's sketch this week. We are off for our usual Sunday morning of sport, followed by an afternoon of Christmas crafting preparations.

Enjoy the rest of your weekend as it will be over all too quickly; I'll be back soon with another project; until then, happy stampin'!


Stampin' Up! Supplies Used:

Table built using Product Table Builder by The Crafty Owl - Independent Stampin' Up! Demonstrator.

Forever Evergreen Christmas Tree Home Decor Wall Art - Free Tutorial

by Joanne James26. November 2016 16:08

Another week over! Mine has been a busy one, with two full days of classes, Christmas preparations and not a minute to spare, hence the lack of blog posts. So I hope you have all been making the most of this week's Online Extravaganza; I know that Monday's flash sale was popular with my customers and I am already receiving orders for the second one, to take place next Monday.

Today I have another 3D home decor project for you and it uses items from the Forever Evergreen Project Kit on page 35 of the seasonal catalogue - one of the products that is available at a 10% discount during this week's sale and the co-ordinating Forever Evergreen stamp set is also available at a 20% discount. This project is a CASE of one that was included in our Demonstrator-only quarterly magazine and it's a great way to get more mileage from the stamp set if you've invested in it to complete your trees and use up lots of leftover bits and pieces from the kit. Here's a reminder of what those fabulous Christmas trees look like (you can read my previous blog post on those here):


Using one of the tree sections, some leftover sequins, card and by adding a few other supplies, I created this lovely piece of wall art:


It's shown here without its frame as it was easier to photograph and has some lovely detail. Here's a close up of the white holly berries (liberally coated in clear Wink of Stella for a wonderful sparkle) with the pinecone embellishment:


There are also a number of paper-toled gold heat embossed ornaments:


Lastly, check out the Noel sentiment from the Christmas Pines set (this could be substituted with one of those in the Forever Evergreen set) - stamped in Versamark and heat embossed in gold, then fussy cut, layered and finished with gold ribbon:


Making cards or additional home decor projects such as this one is a great way to extend the usefulness of both the kit and co-ordinating stamp set.

Now for the good news! Would you like to make this project? Every customer who purchases a Forever Evergreen Project Kit and a co-ordinating Forever Evergreen stamp set from me either in person or through my online store will receive a written tutorial from me FOR FREE with complete instructions on how to make the above piece of Christmas Tree Home Decor Wall Art, along with an extra piece of green tree so that you don't have to use one from your kit. Isn't that just something?!

This offer will last until the end of the current seasonal catalogue, but since both the kit and stamp set have 10% and 20% respectively off before 10.50pm GMT on Monday (28th November 2016) and are now available only while stock lasts, I wouldn't leave it too long before placing your order if this is an offer that you would like to take advantage of. Tutorials will be sent separately by me directly to you once your order has been shipped - please note if you are ordering online you will need to ensure you have not ticked the 'no contact' box in order for me to be able to access your details.

Here is the visual summary of the key products used on today's project for you to pin for easy reference:

You can see all of my 'How To' summaries on my 'How To - Tips and Techniques' Pinterest board in case you've missed any. 

Right I'm off to a swimming gala (helping not participating of course!); I'll be back tomorrow with a card (or two!) for this week's new challenge from the lovely Sandy over at The Paper Players. Until then, happy stampin'!


Stampin' Up! Supplies Used:

Table built using Product Table Builder by The Crafty Owl - Independent Stampin' Up! Demonstrator.

Delicate Ornament Embossed Impression Christmas Card

by Joanne James24. November 2016 08:05

Today it's time for a new challenge over at Create With Connie and Mary and this week we have a colour combination for you:


So I toyed with going with a thank you card today, as it is Thanksgiving in the USA - happy Thanksgiving to my fellow team members and any other US followers today! In the end I decided to go with something a little different from me; I watched this video here by Jennifer McGuire recently and have been keen to try the embossed impressions technique; these colours were perfect for what I had in mind. Here's my card:


Here's the low-down on today's card:

Rich Red Watercolour - I created a watercolour background for my central panel using Delightful Dijon and Cherry Cobbler inks and my aquapainter. I also spritzed my card with a mix of alcohol and clear Wink of Stella to give an all-over subtle shimmer and allowed it to dry thoroughly before moving on the next step.

Embossed Impression - To create my ornament feature, I used the round bauble from my Delicate Ornament Thinlits, inked it with Versamark then placed the thinlit onto the watercolour paper and rolled it carefully through my Big Shot. The Big Shot sandwich here is key: multi purpose platform open to Tab 2, acrylic plate, silicon mat, watercolour paper, thinlit die then lastly the final acrylic plate. This allows the die to create an inked impression on the watercolour paper, without it cutting. I then heat embossed this with gold embossing powder to give a fine line of gold detailing. I then used my gold Wink of Stella pen to highlight each of the detailed sections on the bauble for added sparkle - the close up below does show some of the detail, but I can assure you in real life it's gorgeous (even if I say so myself!):


Touches of Gold - I finished my card with a gold foil mat and a gold foil bauble hook, hung by a piece of gold thread with bow detail along with a gold foil 'merry' sentiment cut with my Christmas Greetings Thinlits and mounted on a few additional layers to add some depth. As for the kraft - I used it for my cardbase; the neutral tone really allowed my watercoloured shimmery panel to take centre stage.

Here is the visual summary of the key products used on today's project for you to pin for easy reference:


I did manage to get myself very inky making this card, however I'm quite pleased with the results and am looking forward to trying this technique with other thinlits dies.

You can see all of my 'How To' summaries on my 'How To - Tips and Techniques' Pinterest board in case you've missed any. 

Do visit the other Design Team members to see what they did with this week's colours; there's lots of inspiration over on their blogs too! This will be my last week as a designer on the Connie and Mary Thursday team; family demands have led me to have to scale back my commitments and as such I am stepping down. I have enjoyed my time with the team; this has always been one of my favourite challenges and will still play along when I can.

That's all from me; I'll be back tomorrow with another project. Until then, happy stampin'!


Stampin' Up! Supplies Used:

Table built using Product Table Builder by The Crafty Owl - Independent Stampin' Up! Demonstrator.

Current Promotions

Stampin Cut and Emboss

Save up to 30% off on all your favourite kits from 1 to 31 October! 

Click here to see the current kits available and order yours online today.

Join My Team

It's always a great time to join Stampin’ Up! During October you can get even more in your starter kit! New team members can get £160 worth of products for only £99 + free business supplies + free shipping + all the fun being a part of Stampin’ Up! Stampin' Up! has something for everyone: join my growing team and benefit from my support to enjoy Stampin' Up! however you choose.

If you're interested, call me for a chat to understand how I can help you realise your goals. Alternatively, if you have already decided to sign up and you just can't wait, please click here for the link to the online form where you can sign up and order your starter kit right away! 

Shop Online

Access my online shop 24 x 7, 365 days of the year:

Current October hostess code:

4XPEYCB9

Shop Online

Scrapbooking

Stampin' Up! has introduced a new range of 12x12" scrapbooking product and kit - the full range is now available to purchase online. To download a copy of the new digital Scrapbooking Catalogue click here.

Mini Catalogue

BROWSE THE CATALOGUE

'Tis The Season - the new Stampin' Up! Mini Catalogue is here! For more details and to download your copy click here

2024-25 Annual Catalogue

BROWSE THE CATALOGUE

Click on the image to download your copy of the 2024-25 annual catalogue. For a full list of current SU! supplies, go to my online store. If you would like any help or advice, please drop me a line at joanne@thecraftyowl.co.uk or give me a call on 07773 421446 - I'd be happy to help.

Latest Kits!

Stampin Cut and Emboss

The Christmas Ornaments Kit and Card Keeper Kit are the latest kits in the online store - get yours here!

New Online Exclusives

There are new products available exclusively in the online store from 5 November - check them out here.

About Me

Hi I'm Joanne and live in Northampton and when I'm not looking after my husband and two beautiful children, am an avid crafter with a passion for all things Stampin' Up!

I must confess that I have never been a big rubber stamper - until I discovered Stampin' Up! that is. I love the fact that I can get such great results with co-ordinating stamps, inks, papers and punches - the possibilities are endless! Join me on my stamping journey as I share the things I love and be inspired to create amazing things yourself!

Follow Me

Monthly Newsletter

Box Builder

Click the button above to use Box Buster to create your custom box design using the Envelope Punch Board!

Kits Collection Now Available!

Stampin Cut and Emboss

The new Kits Collection from Stampin' Up! is now available!

Click here to see the current kits available and order yours online today.

I Design For


Stampin' Up Stuff

This is my personal blog and is not endorsed by Stampin’ Up! I hope you find it a plentiful source of ideas and personal inspiration but please don't copy my designs for contest submission or use for classes, publication or sale without express permission.