Bird Banter Toucan Thank You

by Joanne James29. January 2018 18:00

I've had a busy but hugely productive day today (love days like those!) and am popping in with a quick post from me with a card I made yesterday to squeeze in for this week's challenge over at Freshly Made Sketches


This is such a lovely little sketch from Jen, it seemed a shame not to use it (although I did flip it and use the mirror image so that my bird would be pointing towards my sentiment rather than away from it). I had so much fun with Saturday's Bird Banter card (you can see that card here if you missed it) that I thought I would use the set again this time featuring the colourful toucan - take a look:


Here's the low-down on today's card:

Bird Banter - Today it's the turn of the toucan and his accompanying punny sentiment - these funnies just crack me up! I searched up some images of toucans online before deciding on my colours and then used my Blends to colour him, with the exception of his eye and the top of his beak - I used my Lemon-Lime Twist Stampin' Write marker for that as I wanted to get a real zing of green. I stamped him twice: once directly onto my banner, then again on some scrap cardstock and fussy cut this out. This way I was able to fussy cut out his body only and pop it up onto dimensionals aligned with the banner image, without needing to fussy cut his legs.

A Time-Saving Tip  - Now I love a bit of fussy cutting, but I know that it's not for everyone. Whilst I was happy to fussy cut my toucan and the larger flowers, the tiny ones were too fiddly. Instead I used a small circle punch (my circle punch from the retired Itty Bitty Shapes Punch Pack) and punched them out; much easier and I don't think it loses anything in terms of detail - what do you think?

A Tone-On-Tone Thankyou - I could have stopped there, but instead decided to add a little tone-on-tone stamping to my background panel by stamping the 'thank you so much' stamp from Thankful Thoughts repeatedly to create a customised background that reinforces the sentiment of my card. 

I remembered to stamp and colour my envelope (yay!) and that completes my card. I just love that this set really lends itself to bright colours and fun cards - another one for my stash!

Here is the visual summary of the key products used on today's project for you to pin for easy reference:


You can see all of my 'How To' summaries on my 'How To - Tips and Techniques' Pinterest board in case you've missed any. 

I'll be back tomorrow with another project. Until then, happy stampin'!


Stampin' Up! Supplies Used:

Table built using Product Table Builder by The Crafty Owl - Independent Stampin' Up! Demonstrator.

Get Retiring Products Before They're Gone!

by Joanne James10. April 2017 19:00

I have a card to share today but first things first - the list of products that will be retiring from this year's annual and Spring-Summer seasonal catalogues has been announced! You can read the full list by clicking here; there are some tremendous bargains to be had - I will have a review of the things I am going to miss most tomorrow, however if you want to stock up on any of the retiring in-colour items, especially re-inkers, I would urge you to do that sooner rather than later as they are always the first things to sell out. Click on the links below to take you directly to my online shop to purchase any of the in-colour items that are still in stock at time of posting:

Table built using Product Table Builder by The Crafty Owl - Independent Stampin' Up! Demonstrator.

Today I'm sharing a card that uses these departing in-colours - take a look:


I used Stampin' Up!'s Whisper White notelets and a bold sentiment from the 'Thankful Thoughts' stamp set, cut out using my square Stitched Shape Framelits to create an elongated rectangular panel, along with a variety of combinations of the in-colour designer series paper stacks, along with some white ribbon for a finishing touch. I made a whole collection of them in each of the retiring colours and decorated the envelope flaps to co-ordinate too. Here's a glimpse of one in each colour:


You can see all of my 'How To' summaries on my 'How To - Tips and Techniques' Pinterest board in case you've missed any. 

Enjoy your day and I'll be back tomorrow with another project. Until then, happy stampin'!


Stampin' Up! Supplies Used:

  • Thankful Thoughts stamp set
  • Whisper White Notelets and Envelopes

Thankful Thoughts Meets Succulent Garden

by Joanne James12. March 2017 09:00

It's Sunday and time for this week's new challenge over at The Paper Players! It's the turn of the wonderful Jaydee to host this week and she has a fun colour challenge for us to work with:


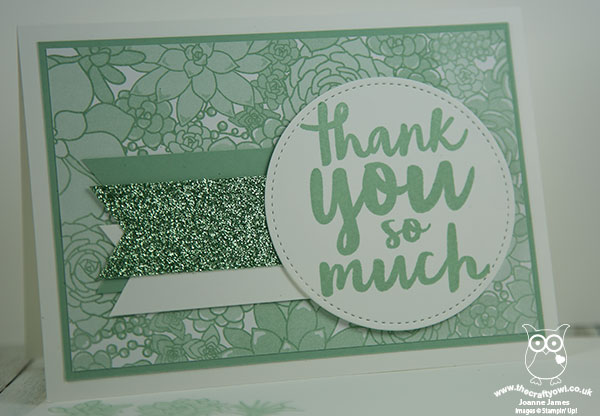
I love green, especially bright greens - Cucumber Crush is one of my all time favourites! - but for today's challenge I decided to go with an altogether more subtle green in Mint Macaron - take a look:


Here's the low-down on today's card:

Succulent Garden - I chose to use a 'tricky' piece of designer series paper on my card today from the Succulent Garden pack. I have been at a loss as to how I should use some of the papers and patterns in this pack and I felt that this sheet in particular lent itself to a monochromatic card in green and white, so used is to cover my entire card front.

A Bold Sentiment - With such a busy paper pattern, I needed a simple, bold sentiment so I chose this bold thank you from the 'Thankful Thoughts' stamp set. I stamped in Mint Macaron onto Whisper White and I used my Stitched Shape Framelits to add a little interest to my otherwise plain circle. With the exception of my row of stamped cacti inside my card and on the front of my co-ordinating envelope, this is all the stamping to feature on my card.

Triple Banners That Sparkle - I added a trio of banners to anchor my sentiment circle, one each in green and white and the third in Mint Macaron glimmer paper, the latest in the Sale-A-Bration free product offering. The sparkle and texture of the glimmer paper introduces another element yet is still in keeping with the overall monochromatic feel of my card.

Here is the visual summary of the key products used on today's project for you to pin for easy reference:


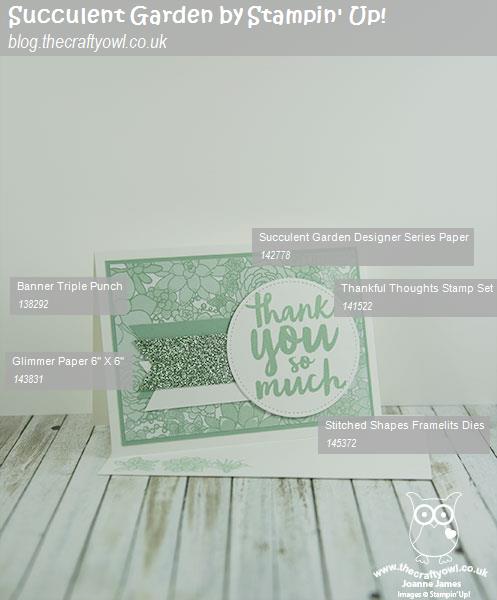
You can see all of my Product and 'How To' summaries on my 'How To - Tips and Techniques' Pinterest board in case you've missed any. 

So a super simple card today, but one with a very calming colour scheme that I hope Jaydee will appreciate.

Before you reach for your ink and papers, check out what our amazing team has created to inspire you this week:

The Paper Players Design Team
 
 
Here's a quick recap of our challenge rules:
 
1.  Create a new paper project
2.  Upload your creation to your blog with a link back to us and provide a direct link to the post featuring your challenge submission.
3.  Please link your card to no more than four challenges, TOTAL.
4.  Have FUN! 


I look forward to seeing what you create with this week's colour palette. Enjoy the rest of your weekend as it will be over all too quickly; I'll be back tomorrow with another project; until then, happy stampin'!


Stampin' Up! Supplies Used: 

Table built using Product Table Builder by The Crafty Owl - Independent Stampin' Up! Demonstrator.

Mini Catalogue

BROWSE THE CATALOGUE

The mini catalogue is now live! Read and download your copy here.

Shop Online

Access my online shop 24 x 7, 365 days of the year:

Current April hostess code:

VDKNV7BH

Shop Online

Join My Team

It's always a great time to join Stampin’ Up! New team members can get £130 worth of products for only £99 + free business supplies + free shipping + all the fun being a part of Stampin’ Up! Stampin' Up! has something for everyone: join my growing team and benefit from my support to enjoy Stampin' Up! however you choose.

If you're interested, call me for a chat to understand how I can help you realise your goals. Alternatively, if you have already decided to sign up and you just can't wait, please click here for the link to the online form where you can sign up and order your starter kit right away! 

Latest Kit!

Stampin Cut and Emboss

The Rock Legend Kit has all you need to make 8 cards with coordinating envelopes. Along with the new Panda Friends Kit, both are available from January 4th for just £14 each - get yours here!

2023-24 Annual Catalogue

BROWSE THE CATALOGUE

Click on the catalogue for a full list of current SU! supplies - if you would like to order any of the items featured, please drop me a line at [email protected] or give me a call on 07773 421446 - I'd be happy to help.

New Online Exclusives

There are new products available exclusively in the online store from 5 March - check them out here.

About Me

Hi I'm Joanne and live in Northampton and when I'm not looking after my husband and two beautiful children, am an avid crafter with a passion for all things Stampin' Up!

I must confess that I have never been a big rubber stamper - until I discovered Stampin' Up! that is. I love the fact that I can get such great results with co-ordinating stamps, inks, papers and punches - the possibilities are endless! Join me on my stamping journey as I share the things I love and be inspired to create amazing things yourself!

Follow Me

Monthly Newsletter

Box Builder

Click the button above to use Box Buster to create your custom box design using the Envelope Punch Board!

Kits Collection Now Available!

Stampin Cut and Emboss

The new Kits Collection from Stampin' Up! is now available!

Click here to see the current kits available and order yours online today.

I Design For


Stampin' Up Stuff

This is my personal blog and is not endorsed by Stampin’ Up! I hope you find it a plentiful source of ideas and personal inspiration but please don't copy my designs for contest submission or use for classes, publication or sale without express permission.