Hey Chick, Happy Chinese New Year 2017

by Joanne James27. January 2017 11:12

Happy Friday everyone! Tomorrow is officially the start of the Chinese New Year, so whilst celebrations traditionally begin the day before with New Year's Eve I thought today would be a good day to share the Chinese New Year card I made for one of my husband's colleagues. I've made cards for this celebration previously and it can sometimes be a challenge as I don't have many oriental stamps or images,  but this year one of the Sale-A-Bration sets gave me the perfect focal point  - take a look:


 Here's the low-down on today's card:

Hey Chick, It's A Rooster - Each year in the Chinese calendar also follows the Chinese zodiac and is represented by a different animal: 2017 is the year of the (fire) rooster. I thought the fabulous large chicken, with its exaggerated features from the 'Hey Chick' Sale-A-Bration stamp set (yours free with a purchase of £45 or more) would pass as a rooster for the purposes of my card - isn't he grand?

Oriental Colour Combination - Red and gold is a popular colour combination in Chinese culture as it is seen to represent good luck and prosperity and the colour red in particular is said to ward away evil. A Chinese New Year tradition is the giving of red envelopes containing money, called lai see, usually from parents to children, or bosses to employees and is said to bring good wishes and luck, and it is the giving of the red envelope, rather than the money it contains, that is the most significant.

Happy New Year - Lastly, are you wondering which set my gold 'happy new year' stamp came from? I actually imported the Chinese characters into my Silhouette Cameo E-Cutter, but instead of cutting them out used a gold pen to write them onto my piece of red card and them filled in the outline with a gold marker. I'm not sure my lettering skills would have enabled such a faithful reproduction!

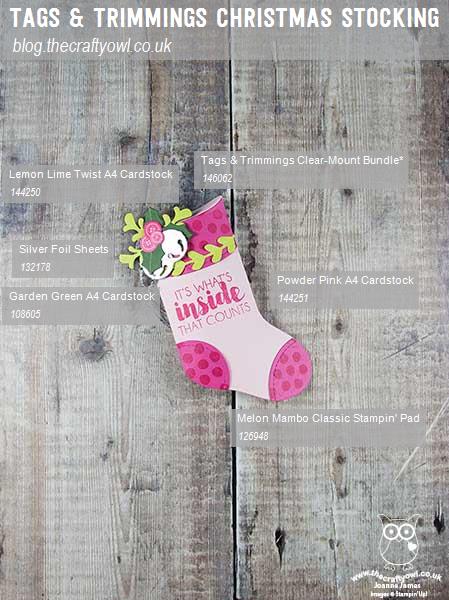
Here is the visual summary of the key products used on today's project for you to pin for easy reference:
 

You can see all of my 'How To' summaries on my 'How To - Tips and Techniques' Pinterest board in case you've missed any. 

There are some really fun stamps in this set; I've lots of projects that feature them in a slightly more traditional away to share during the coming weeks, so stay tuned if they're your thing.

Enjoy your day and I'll be back tomorrow with another project. Until then, happy stampin'!


Stampin' Up! Supplies Used:

Table built using Product Table Builder by The Crafty Owl - Independent Stampin' Up! Demonstrator.

Red and White Sending Love Two Ways

by Joanne James26. January 2017 09:00

Today I'm sharing two quick and easy cards using the Sealed With Love bundle that use the same layout for two different looks. The first one was inspired by this card by Mary Fish - but I wanted both my cards to be about 'sending love' rather than Valentine's Day specifically, to show just how versatile this bundle is. Here's my first card, where I simply switched out the sentiment for one from the Designer Tin of Cards stamp set:


For my second card I reversed the colour palette to 'red on white' as opposed to 'white on red' and paired the sentiment on the outside of the card from the 'Sealed With Love Set' with the words 'On Your Birthday' from the Popcorn stamp set on the inside:


 Here's the low-down on today's card:

Hearts To DIE For - On both of these cards, the heart edging die totally steals the show! It creates the perfect border for the strips of Sending Love designer series paper and is sized perfectly to border an A6 size card front. 

Sending Love - As I mentioned in Wednesday's post, the Sending Love designer series paper stack has some great paper patterns and designs that work for birthdays and general 'love' themed cards too, not just for Valentines. This design is great for using leftover strips of paper; 'waste not, want not' as the old saying goes! 

Not Just For Valentine's - The variety of images and sentiments in the Sealed With Love stamp set will take this set through February and beyond; who doesn't like to receive a little love note every once in a while?

Here is the visual summary of the key products used on today's projects for you to pin for easy reference:


And the 'red on white' version:


You can see all of my 'How To' summaries on my 'How To - Tips and Techniques' Pinterest board in case you've missed any. 

Enjoy your day and I'll be back tomorrow with another project. Until then, happy stampin'!


Stampin' Up! Supplies Used:

Table built using Product Table Builder by The Crafty Owl - Independent Stampin' Up! Demonstrator.

Celebrate Every Day With Project Life by Stampin' Up!

by Joanne James25. January 2017 07:00

It's Wednesday already - happy hump day! Today I'm sharing a card that I made for a little challenge that I'm currently having with my team.

My team consists of people from all walks of life and each of them wants something different from their Stampin' Up! demonstratorship: whether they are actively running a business and using it as their main source of income, sellling to friends and family to provide family 'extras' or simply enjoying their hobby and enjoying a discount on their Stampin' Up! purchases, there is one thing that unites us all - a shared love of crafting! I like to set them challenges from time to time and one of our current ones is using the new 'Celebrate Every Day' Project Life memory keeping collection from Stampin' Up!

Each of my team were given a selection of cards in various sizes from the Celebrate Every Day card collection and one of the pockets from the 6" x 8" variety pocket pack and asked to come up with one or more projects that could be shared with the group, adding whatever additional accessories they had to hand. I love the bright, summery colours of this particular collection and so I couldn't wait to use some of mine to make a cheery card for a friend of mine who is going through a rough patch - take a look:


 Here's the low-down on today's card:

Celebrate The Every Day with Project Life - The Celebrate The Every Day Project Life set has some great sentiments to illustrate your Project Life pages and record those special times with loved ones. They can also work as the focal point for a card too: I've used one of the 3" x 4" cards that I cropped to focus on the sentiment, which is perfect for someone going through a rough patch to let them know you are thinking of them. I then backed this with one of the bright floral 3" x 4" cards for a burst of summer flowers and pop of colour. The final element to my card was a Watermelon Wonder Heart embellishment that I cropped out of one of my lined Project Life journalling cards with my circle Stitched Shape Framelit Dies. I love how these framelits add just the right amount of detail to frame a sentiment or image.

Co-ordinating Accessories - One of the great things about the Stampin' Up! project Life range is that it exclusively features Stampin' Up! colours. This makes it so easy to go to your craft supplies and instantly find other items that will co-ordinate. The colour palette for the Celebrate Every Day range looks like this, along with the addition of Basic Black and Whisper White as neutrals:

I chose to use some A4 Daffodil Delight cardstock for my base and mat, along with a punched circle of Watermelon Wonder and two pieces of Emerald Envy 1/8" Taffeta Ribbon on my card. Effortless co-ordination - one of the many reasons I love to craft with Stampin' Up! products!

I'm A Hoot And You Can Be Too - The Hoots are the lovely bunch that make up my Stampin' Up! team (The Crafty Owl - Hoots - get it?! ;-) ) and I would love to welcome you too. If you've ever thought about joining Stampin' Up!, now is a great time time to do so. During Sale-A-Bration, your starter kit is extra special as not only do you get your choice of £130/175 Euros worth of product for £99/129 Euros, but you get to choose an additional 2 stamp sets FOR FREE - that could be worth as much as an extra £93/126 Euros. There are so many ways in which you can benefit from being a Stampin' Up! demonstrator- please do give me a call on 07773 421446 or email me if you'd like to discuss further.

Here is the visual summary of the key products used on today's project for you to pin for easy reference:


You can see all of my 'How To' summaries on my 'How To - Tips and Techniques' Pinterest board in case you've missed any. 

Enjoy your day and I'll be back tomorrow with another project. Until then, happy stampin'!


Stampin' Up! Supplies Used:

Table built using Product Table Builder by The Crafty Owl - Independent Stampin' Up! Demonstrator.

Twisted Pop Up Panel Sending Love Card

by Joanne James24. January 2017 07:00

Today I'm sharing a fancy fold card that I made for my first technique class of the year that is also perfect for a couple of challenges this week:


The ladies over at TGIF Challenges are working with a love theme and the gals over at Just Add Ink have a blog hope this week featuring Pop Up and Interactive Cards. I urge you to check it out and the wonderful entries into this week's challenge, there are some fabulous examples of interactive cards on show.

I have been wanting to have a go at the Twisted Pop Up Panel card that has been appearing everywhere over the internet in recent weeks, so having watched a few tutorials I got down to business. On the outside a fairly straightforward looking envelope-style card:


It's when you open it up that the magic happens and the pop-up is revealed:


And here it is fully opened so that you can see the fun fold out panels in all their glory:


 Here's the low-down on today's card:

Twisted Pop Up Panel Card - I looked at several different versions of this card in order to work out how to create my pop-up panel card and in true Crafty Owl fashion didn't follow any one set of instructions, rather combined a number of 'learns' to create my card. I may well shoot my own video tutorial on this later this week, so if you'd like to find out how I did it, then pop back and check it out. One things for sure, the ladies at my technique class loved it and have definitely got the bug for creating more of them now!

Sending Love in Red and White - My technique class featured the Sealed With Love product bundle - used for the 'Sealed with a kiss' button on the front of my card and that fabulous stamped and diecut heart that adorns the 'O' of the word LOVE. For me this card was a real opportunity to showcase the Sending Love Designer Series Paper Stack, with five different patterns on show. The real challenge was which five of the twelve red and white patterns in the DSP stack to choose - check them out:

My team laugh at me as they think I have an unhealthy obsession with designer series paper and to be honest, they are probably right! I'm not one of those to keep it and stroke it though - I do cut into it and use it and am always looking for ways to incorporate it into my designs. I particularly like the 6" x 6" stacks, which are incredibly good value for money.

Large Letters, Big Impact - I've said it before and I'll say it again - the Large Letter Framelits are great and well worth the investment! They are great for a sentiment with impact; I've paired mine with the 'you' from the 'Hello You Thinlits' to complete my Valentine's message. If you are considering purchasing the Large Letter Framelits, now is an even better time to pop them in your shopping basket - add a little something to them and earn two free Sale-A-Bration items or alternatively why not include them in a starter kit? 

Here is the visual summary of the key products used on today's project for you to pin for easy reference:


You can see all of my 'How To' summaries on my 'How To - Tips and Techniques' Pinterest board in case you've missed any. 

Enjoy your day and I'll be back tomorrow with another project. Until then, happy stampin'!


Stampin' Up! Supplies Used:

Table built using Product Table Builder by The Crafty Owl - Independent Stampin' Up! Demonstrator.

A Special Reason to Rock And Roll

by Joanne James23. January 2017 09:00

Happy Monday everyone! As promised yesterday, I have another card for you using the Special Reason bundle and this week's colour palette over at Fab Friday:


In the process of making my card for our challenge over at The Paper Players this week, I had lots of bits and pieces left over, including the very piece I started out with that included a stamped flower. So often these end up in my scrapbox never to see the light of day again; to avoid this happening, I set about making another card right away - here it is:


Here's the low-down on today's card:

A Special Reason to Rock 'n' Roll - As I mentioned yesterday, I love how the pale blue and warm vanilla tone down the Sweet Sugarplum in the above colour combination, as I sometimes find this purpley-pink a little stark when paired with stronger colours. I thought I'd use the rock and roll technique to add a little plum to the tips of the petals of my blue inked flower taken from the Special Reason stamp set; I also used a cotton bud (aka 'cue tip' for my USA friends!) to add a little to the inner petals too; I love how this gives subtle added definition to the form of the flower itself.

Ways With Stylish Stems Framelits - In addition to my large diecut flower and leaf, I also used my Stylish Stems Framelits to add some subtle detail to my stamped flower: if you look closely, you will see I partially die cut the mat in order to have my flower hang over that lovely piece of Fabulous Foil Designer Acetate and the metallic ribbon. It adds dimension without bulk and the need for an extra layer.

Fancy Some Free Metallics? - In addition to the strip of gold scallop pattern Fabulous Foil Designer Acetate (I just love this stuff!) I added a strip of ribbon and a bow to my card, using the gorgeous vanilla and gold ribbon from the Sale-A-Bration Metallic Ribbon Combo Pack (the other ribbon in the pack is white and woven with silver). This ribbon has a soft, almost velvety feel and ties the most beautiful bows - check out this fabulous gift packaging too:

This is one of the items that can be yours free during Sale-A-Bration with a £45 order - you are definitely going to want some!

I also used one of the two-part sentiments from the Special Reason stamp set - the inside of my card reads "...except to let you know how special you are!" How lovely is that?! Perfect to send to a friend of mine 'just because'.

Here is the visual summary of the key products used on today's project for you to pin for easy reference:


You can see all of my Product and 'How To' summaries on my 'How To - Tips and Techniques' Pinterest board in case you've missed any. 

I'll be back tomorrow with another project; I'm finally getting back into the swing of things here in blog land! Until then, happy stampin'!


Stampin' Up! Supplies Used: 

Table built using Product Table Builder by The Crafty Owl - Independent Stampin' Up! Demonstrator.

Stylish Stems Layered Negative Space Friendship Card

by Joanne James22. January 2017 09:00

It's Sunday and time for this week's new challenge over at The Paper Players! It's the turn of the lovely Jaydee to host this week and she has a clean and simple challenge for us to work with:


I decided that for today's card I was going to try and come up with a CAS card that featured a single flower. I originally started out stamping and played around with lots of different combinations before settling on a card using the negative space created using the Stylish Stems Framelits Dies. Here's my final card:


Here's the low-down on today's card:

Unorthodox Floral Colour Combination - I took my colour combination from this week's challenge over at Fab Friday. I love how the pale blue and warm vanilla tone down the Sweet Sugarplum, which I sometimes find a little stark when paired with stronger colours. For the original card I was making, it worked perfectly (I'll share that card with you tomorrow and explain more then!) It does look slightly unorthodox here granted, given the simplicity of the design - what flower has a blue stem?! - yet I decided that since I love the colour combination and the card has a clean and contemporary feel, I would go with it. Who knows, maybe I'll start a new trend!

Layered Negative Space - When I first saw the Stylish Stems Framelits Dies in the Spring-Summer catalogue, I thought - do I really need another set of flower framelits? The answer though on closer inspection was a definite 'yes'; I'm a big fan of using the negative space created when using framelits and dies this set is actually designed with that in mind; the flowers and stem can be used both to cut a positive shape, by layering the outline with the inside shape together, but the inner piece can be used alone to make the negative space itself the focal point. So many creative possibilities! Using the layers of this week's sketch over at CAS(E) This Sketch for inspiration, I cut through a single layer of Very Vanilla cardstock to reveal my Sweet Sugarplum flower, then cut the stem through both the Very Vanilla and Sweet Sugarplum layers to reveal the Soft Sky cardstock layer below. All that cutting makes this CAS card great for the challenge over at CASology this week too.


For A Good Friend - Lastly, I added a sentiment from the co-ordinating 'Special Reason' stamp set that is perfect for a special friend. My placement is not strictly as per the sketch, as I needed it to have more prominence so stamped it on the Very Vanilla top layer. My card is destined for one of my very best friends to say thank you for entertaining the James family for dinner yesterday evening.

A super-simple clean and simple card with minimal supplies - I just love this set!

Here is the visual summary of the key products used on today's project for you to pin for easy reference:


You can see all of my Product and 'How To' summaries on my 'How To - Tips and Techniques' Pinterest board in case you've missed any. 

Before you reach for your ink and papers, check out what our amazing team has created to inspire you this week:

The Paper Players Design Team
 
 
Here's a quick recap of our challenge rules:
 
1.  Create a new paper project
2.  Upload your creation to your blog with a link back to us and provide a direct link to the post featuring your challenge submission.
3.  Please link your card to no more than four challenges, TOTAL.
4.  Have FUN! 


I look forward to seeing your clean and simple creations in the gallery this week. Enjoy the rest of your weekend as it will be over all too quickly; I'll be back tomorrow with another project; until then, happy stampin'!


Stampin' Up! Supplies Used: 

Table built using Product Table Builder by The Crafty Owl - Independent Stampin' Up! Demonstrator.

Celebrating A Happy Birthday

by Joanne James18. January 2017 17:00

I've had my first classes of the new year this week and a team meeting today, so I'm finally getting back into the swing of things and it's been busy busy! I'll share some of my class cards another time, Today I have a card I made using one of the new Celebrations Duo Textured Impressions Embossing Folder - take a look:


Here's the low-down on today's card:

Deboss Happy - For a great letterpress look, this embossing folder creates a great bold, debossed sentiment. Use with the swishes of the co-ordinating stampset or 'naked' as I have here for a sentiment that is subtle at the same time.

Vintage Bunting - The vintage bunting flags on the slim piece of Cupcakes and Carousels Designer Series Paper tucked behind my debossed sentiment are just enough to provide a flutter of colour without detracting from the overall clean feel of my card. 

A Happy Colour Combo - I took my colour inspiration from the Cupcakes and Carousels Paper and went with a subtle colour scheme with some pops of bright turquoise - here's the colour swatch if you would like to use it for future colour inspiration:


Here is the visual summary of the key products used on today's project for you to pin for easy reference:


You can see all of my Product and 'How To' summaries on my 'How To - Tips and Techniques' Pinterest board in case you've missed any. 

I'm linking up today's card with the current challenge over at SUO Challenges where they are looking for embossing - wet or dry - on your project.

I'll be back tomorrow with another project; until then, happy stampin'!


Stampin' Up! Supplies Used: 

Table built using Product Table Builder by The Crafty Owl - Independent Stampin' Up! Demonstrator.

Beautiful You And A Pop Of Pink

by Joanne James15. January 2017 09:00

It's Sunday and time for this week's new challenge over at The Paper Players! It's the turn of the talented Sandy to host this week and she has a fun colour challenge for us to work with:


I haven't been getting as much time to get in my office and craft as much as I'd like lately, so decided that today I was going to make a card using a set that was at the top of my wish list as soon as I set eyes on the Spring-Summer catalogue, along with the Fusion sketch for my layout - take a look:


Here's the low-down on today's card:

Beautiful You - I loved this set the moment I saw it! Sketched outlines of the female form and some great sentiments in fonts that combine script and print; now who wouldn't want to receive a card with the sentiment 'Happy birthday, Gorgeous'? That's guaranteed to raise a smile. Here I stamped the elegant lady in the hat in Archival Black in watercolour paper and coloured her in with Melon Mambo ink and my aquapainter. This set has so many creative possibilities, I'm really looking forward to using it in lots of other ways too.

A Pop of Pink - Having chosen pink as my 'colour', I spent some time experimenting with different layouts and pattern combinations and decided on a plain Melon Mambo central panel with a piece of Pop of Pink Specialty Designer Series Paper beneath it.

Stitched Framelits are back! - I chose to cut out my elegant lady with my Layered Oval Framelits and frame it with a simple stitched oval in mat black. Why am I teasing you with something you can't get hold of, I hear you cry? Well, fear not - as of tomorrow, 16th January, Stitched Framelits are back in stock and available to order - woohoo! These are the perfect way to add the finishing touch to a border or frame. Order yours tomorrow!

Here is the visual summary of the key products used on today's project for you to pin for easy reference:


You can see all of my Product and 'How To' summaries on my 'How To - Tips and Techniques' Pinterest board in case you've missed any. 

I'm also linking my card up with the challenge over at Stamp, Ink Paper where this week the challenge is also black, white and one colour; what are the odds?!

Before you reach for your ink and papers, check out what our amazing team has created to inspire you this week:

The Paper Players Design Team
 
 
Here's a quick recap of our challenge rules:
 
1.  Create a new paper project
2.  Upload your creation to your blog with a link back to us and provide a direct link to the post featuring your challenge submission.
3.  Please link your card to no more than four challenges, TOTAL.
4.  Have FUN! 


I look forward to seeing what you create with this week's colour palette. Enjoy the rest of your weekend as it will be over all too quickly; we are off to watch the National League basketball finals today - the tickets were one of Ben's Christmas presents. I'll be back tomorrow with another project; until then, happy stampin'!


Stampin' Up! Supplies Used: 

Table built using Product Table Builder by The Crafty Owl - Independent Stampin' Up! Demonstrator.

Colouring Inside The Lines And Recycling Christmas Gifts Already!

by Joanne James8. January 2017 09:00

It's Sunday and time for the first challenge of 2017 over at The Paper Players! Did you spot our new look? Our fearless leader, the lovely Nance, has given us a refresh and makeover over the Christmas break and we are returning bright-eyed and bushy-tailed and raring to go! Our new guest designers are joining us too; a warm PP welcome to Crystal, Valentyna and Deanne - we are so happy to have you join us for the first part of 2017! 

To kick off the new year, it's the turn of my good friend LeAnne to host this week and she has a timely theme challenge for us to work with:


If your house is anything like mine, the festive season has generated much packaging waste and many opportunities for recycling. So this week's challenge is perfect! I took the opportunity to recycle a Christmas gift on my card today and used the sketch over at Fab Friday for my layout. Recycling Christmas gifts already?! It's not quite as bad as it sounds - take a look:


Here's the low-down on today's card:

Join The Colouring Craze - One of my Christmas gifts was a page-a-day colouring calendar. Well, to be truthful I bought one for Rebecca and loved it so much I treated myself to one! The calendar comes in a pretty box that can be used to display our coloured pieces once completed. I decided that by recycling my pages, I could easily use them to create a birthday card. Here's my day one finished page before I trimmed it to fit my card:

Effortless Blending - I coloured my page using Stampin' Up!'s new watercolour pencils and used a blender pen to seamlessly blend the colours and give a smooth finish as the paper was too thin to blend using an aquapainter. I also adhered my coloured piece to a piece of extra thick Whisper White for extra rigidity. I love that these pencils can be used in a number of different ways and am looking forward to trying other techniques with them too.

A Fiesta of Colour - I chose to inject some bright summer colour into my card today, using a card base of Daffodil Delight and a selection of papers from the Festive Birthday Designer Series Paper set for my layers behind the coloured-in panel. I love these clashing brights - here are my main colours in case you would like to save them for future project inspiration too:

Here is the visual summary of the key products used on today's project for you to pin for easy reference:


You can see all of my Product and 'How To' summaries on my 'How To - Tips and Techniques' Pinterest board in case you've missed any. 

I hope you like today's card; you could create the same effect using the new 'Inside The Lines' Designer Series Paper Sale-A-Bration gift (free with a purchase of £45 or more) - I will have a fun project for you using this paper later this week, so be sure to pop by and check it out.

Before you reach for your ink and papers, check out what our amazing team has created to inspire you this week:

The Paper Players Design Team
 
 
Here's a quick recap of our challenge rules:
 
1.  Create a new paper project
2.  Upload your creation to your blog with a link back to us and provide a direct link to the post featuring your challenge submission.
3.  Please link your card to no more than four challenges, TOTAL.
4.  Have FUN! 


I look forward to seeing what you create with our fun theme this week. Enjoy the rest of your weekend as it will be over all too quickly; I'll be back tomorrow with another project; until then, happy stampin'!


Stampin' Up! Supplies Used: 

Table built using Product Table Builder by The Crafty Owl - Independent Stampin' Up! Demonstrator.

Carried Up And Away Birthday Card

by Joanne James5. January 2017 20:35

Hello lovely readers! I hope you've all enjoyed browsing the new Spring-Summer Stampin' Up! catalogue and this year's Sale-A-Bration offering and are busy making wishlists and buying those must-have items. Today I'm sharing a card I made with my pre-order goodies back in December for my team Christmas outing. Instead of our usual team meeting, we decided in December to have our very own festive Crafternoon Tea. In addition to enjoying a lovely afternoon tea, we spent the afternoon doing a shoebox swap with each of us creating the cards cards that the others had designed, some using new pre-order items from the spring-Summer and SAB catalogues, thus providing us with lots of new samples. I am loving the new hot air balloons so I just had to feature them on my card:


Here's the low-down on today's card:

Up & Away Balloon - The star of today's card is most definitely the layered diecut hot air balloon - isn't it gorgeous? It's made using the new Up & Away Thinlits Dies. This is a great set with three different balloon sizes, clouds and lots of basket and layering options along with this lovely detailed large balloon. 

Your Smiles Lift Me Up - What's better than a great die set? Well, a great die set with a co-ordinating stamp set! the 'Lift me Up' stamp set has some great stamped balloon images, clouds and accessories as well as five varied sentiments for everything from birthdays to congratulations and sending smiles. 

Carried Away For Free - The paper on today's card is from the Carried Away Designer Series Paper pack that can be yours for FREE with a £45 purchase. It co-ordinates perfectly with the Lift Me Up bundle - a selection of pretty balloons, skyscapes and maps in bold, bright colours. Love it!

Here is the visual summary of the key products used on today's project for you to pin for easy reference:


You can see all of my Product and 'How To' summaries on my 'How To - Tips and Techniques' Pinterest board in case you've missed any. 

Here's a picture of some of my lovely team members at our festive gathering - what a great bunch:


I love these ladies, none of whom would I have met but for our shared love of crafting and some of whom joined during previous Sale-A-Brations. Sale-A-Bration is a great time to join Stampin' Up! with one of the best recruitment offers; if you would like to know more about the benefits of joining my team, please do get in touch for a no-obligation chat - we would love you to join us!

That's all from me; back tomorrow with another project; until then, happy stampin'!


Stampin' Up! Supplies Used: 

Table built using Product Table Builder by The Crafty Owl - Independent Stampin' Up! Demonstrator.

New Online Exclusives

There are new products available exclusively in the online store from 5 November - check them out here.

Latest Kits!

Stampin Cut and Emboss

The Layered Landscapes Kit and Nature's Paintings Kit are the latest kits in the online store - get yours here!

Shop Online

Access my online shop 24 x 7, 365 days of the year:

Current November hostess code:

9NKXDTTR

Shop Online

Mini Catalogue

BROWSE THE CATALOGUE

'Tis The Season - the new Stampin' Up! Mini Catalogue is here! For more details and to download your copy click here

Scrapbooking

Stampin' Up! has introduced a new range of 12x12" scrapbooking product and kit - the full range is now available to purchase online. To download a copy of the new digital Scrapbooking Catalogue click here.

2024-25 Annual Catalogue

BROWSE THE CATALOGUE

Click on the image to download your copy of the 2024-25 annual catalogue. For a full list of current SU! supplies, go to my online store. If you would like any help or advice, please drop me a line at joanne@thecraftyowl.co.uk or give me a call on 07773 421446 - I'd be happy to help.

Join My Team

It's always a great time to join Stampin’ Up! New team members can get £130 worth of products for only £99 + free business supplies + free shipping + all the fun being a part of Stampin’ Up! Stampin' Up! has something for everyone: join my growing team and benefit from my support to enjoy Stampin' Up! however you choose.

If you're interested, call me for a chat to understand how I can help you realise your goals. Alternatively, if you have already decided to sign up and you just can't wait, please click here for the link to the online form where you can sign up and order your starter kit right away! 

About Me

Hi I'm Joanne and live in Northampton and when I'm not looking after my husband and two beautiful children, am an avid crafter with a passion for all things Stampin' Up!

I must confess that I have never been a big rubber stamper - until I discovered Stampin' Up! that is. I love the fact that I can get such great results with co-ordinating stamps, inks, papers and punches - the possibilities are endless! Join me on my stamping journey as I share the things I love and be inspired to create amazing things yourself!

Follow Me

Monthly Newsletter

Box Builder

Click the button above to use Box Buster to create your custom box design using the Envelope Punch Board!

Kits Collection Now Available!

Stampin Cut and Emboss

The new Kits Collection from Stampin' Up! is now available!

Click here to see the current kits available and order yours online today.

I Design For


Stampin' Up Stuff

This is my personal blog and is not endorsed by Stampin’ Up! I hope you find it a plentiful source of ideas and personal inspiration but please don't copy my designs for contest submission or use for classes, publication or sale without express permission.