Confetti Celebration Shaker Card

by Joanne James23. May 2016 16:05

Happy Monday everyone! I've spent a busy day doing housework today, with the result that 'Chez James' now looks as neat as a pin and the ironing basket is completely empty, so I am writing my blog post before collecting Rebecca from school. I am collecting her from her rounders practice a little earlier than usual today as her singing lesson this week has been rescheduled; she is off on a school trip to Harry Potter world at Elstree Studios on Wednesday - lucky girl! 

So today's card uses yesterday's Paper Players sketch again, but this time to make a shaker card for this week's challenge over at Pals Paper Arts:

   Pals Paper Arts PPA301

I loved this bright and cheery colour combo and there are some lovely Design Team cards this week. My fellow Paper Players designer Linda Callahan also used them on her Paper Players card yesterday (you can see Linda's card here) with some gorgeous florals. I decided to go with a shaker card for my entry - take a look:

For today's card the colours may well be familiar to you, but there are some fabulous 'sneak peeks' of new catalogue product:

Time to Party With Confetti Celebration - Confetti Celebration is a fun new stamp set with all the making of a good party: decorations (check out the string of lights that I used on the front of my card), stars, balloons and some great sentiments. Both of the sentiments on my card are in this new set and I love that the 'Hooray' is framed perfectly in the shaker window.

Lots of Sprinkles - The sprinkles for today's shaker were created with a new punch of the same name. The Sprinkles Punch will be perfect for creating table confetti or the insides for shakers in a range of colours and glimmer papers. I colour-co-ordinated mine with the challenge colours and added a few gold star sequins too for good measure.

A Hidden Shaker 'Gem' - The best thing about today's shaker card is the one thing you can't see! A strange thing to say I know, but the new catalogue has a new supply item that will revolutionise shaker card construction: foam adhesive strips! Just like the ones in the Christmas shaker card kits in the last Autumn-Winter seasonal catalogue, they are a little deeper than Dimensionals and give just the right height for a good shaker card. I am going to get so much use out of these!

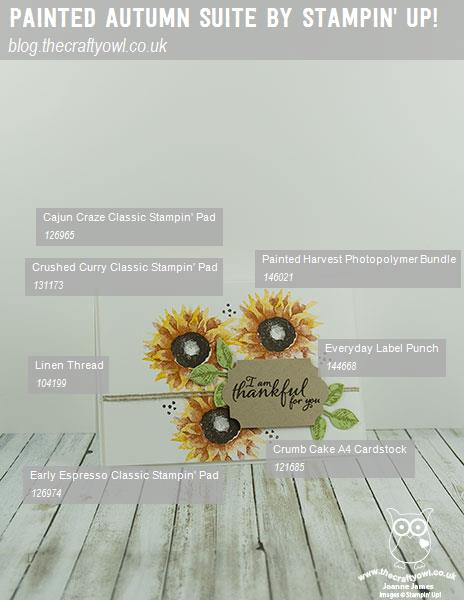
Here is the visual summary of the key products used on today's project for you to pin for easy reference:
 

You can see all of my 'How To' summaries on my 'How To - Tips and Techniques' Pinterest board in case you've missed any. 

Enjoy your day and I'll be back tomorrow with another project; until then, happy stampin'!


Swirly Scribbles Bird's Nest Baby Card

by Joanne James22. May 2016 09:00


It's Sunday and time for a new challenge over at The Paper Players! It's the turn of the queen of diecuts, the lovely Laurie, to host our challenge this week and she has a fun sketch for you to play along with:


As you know, I love a good sketch and for my card this week I had so many ideas! I will be using this sketch for my card tomorrow too; today I decided to feature a die from one of my favourite sets from the new catalogue called the Swirly Scribbles Thinlits and make not one, but two, new baby cards featuring two of the new in-colours. 

Here is the first one, a baby boy card featuring the new blue, Dapper Denim:


Here is the second baby card, featuring the new pink, Flirty Flamingo: 


Now I know I'm biased, but aren't they just the cutest?! Here is the low-down on today's card:

Swirly Scribbles Thinlits - There are some great swirl, flower and leaf dies in this set - the one that I used here makes the cutest bird's nest backdrop for the cute birdie ready to welcome her babies to the world.

Swirly Bird Masking and Kissing - I did some masking and kissing of the stamps to create my little bird in her nest: first, I stamped the nest twice in Soft Suede, and cut one of them out and used it as a mask so that I could stamp my bird and eggs in the nest. I also created some light speckling on my eggs by inking the 'grunge' stamp in the set in Soft Suede, inking the eggs in Sahara Sand, then 'kissing' the two together before stamping them into the nest. You can get a closer look at this on these close up images below:


Perfectly Wrapped Border - I used a mat of each of the new in-colours that I featured on my cards to accentuate the colour and decided to add an additional border detail as per the stitched detail on the sketch. I used one of the border stamps from the 'Perfectly Wrapped' stamp set; this set is photopolymer which makes lining up a breeze. 

Hello Baby Bear - I couldn't finish today's write-up without a nod to the sentiment on today's card. This is one from an adorable set called 'Baby Bear' that also features in the new catalogue and is finished on the inside of the card with '...welcome to the world!'. Perfect for today's card.

I love these dies and the co-ordinating stamp set; you can be sure you'll be seeing lots more projects with them. 

Here is the visual summary of the key products used on today's project for you to pin for easy reference:

Baby Boy Dapper Denim card, with a masking tip:

Flirty Flamingo baby girl card, with a kissing technique tip:


You can see all of my 'How To' summaries on my 'How To - Tips and Techniques' Pinterest board in case you've missed any. 

We do rather have birds on the brain in our house at the moment; the baby blue tits in our nesting box hatched about 10 days ago and we are watching the bird cam with interest on a daily basis. There are seven healthy babies and the mum and dad spend many hours each day flying in and out with caterpillars and bugs to feed the young chicks. Here is a photo of them waiting to be fed:


Apologies for the poor photo - the quality isn't great - but I can honestly say watching these little chicks grow is the best tv drama ever, they are so entertaining! Hopefully I'll be able to get some photos of them as they leave the nest when they are grown and share those at a later date.

Before you reach for your ink and papers, check out what our amazing team has created to inspire you this week:

The Paper Players Design Team
 
 
Here's a quick recap of our challenge rules:
 
1.  Create a new paper project
2.  Upload your creation to your blog with a link back to us and provide a direct link to the post featuring your challenge submission.
3.  Please link your card to no more than four challenges, TOTAL.
4.  Have FUN! 


I look forward to seeing how you interpret this week's sketch. We are off to basketball today and are then looking forward to a restful afternoon, with either some time in the garden weather-permitting or indoors watching a movie and the antics of our own baby bird family!

Back tomorrow with another card that also uses this sketch, but is quite different in terms of execution; until then, happy stampin'!


Shine On Rose Wonder Thank You Card

by Joanne James19. May 2016 08:05

Today it's time for a new challenge over at Create With Connie and Mary and this week we have a sketch for you:


For my card today I decided on a bold injection of colour and went for a kraft and Watermelon Wonder colour combination - take a look:


Here's the low-down on today's card:

Shine On - This Shine On Specialty Designer Series Paper is great for boxes and bags as it's so sturdy but also works really well on cards. I love the way that one side is foiled and the other side features bold patterns in bright colours, like the Watermelon Wonder pattern that I chose to feature for the horizontal panels on my card today. The colour really 'pops' against the kraft cardstock and looks even more vibrant than usual and is accentuated by a thin mat in the same colour. 

Rose Garden Thinlit Flower - I stayed true to the sketch and added a flower using the thinlits from the Rose Garden set. This little flower head can be overshadowed by the larger rose thinlits in this set, but is equally attractive and works well when offset slightly with the leaf stem and popped up on some dimensionals.

Rose Wonder Sentiment - This is almost a no-stamping card today - save for my thank you sentiment, from the co-ordinating Rose Wonder stamp set, which has some lovely scripts and wording. Whilst the stamp set and thinlits are carrying over to the new catalogue, the current 15% off bundle price isn't. So if this set is on your wish list, you have until the end of May to take full advantage of the additional saving.

Here is the visual summary of the key products used on today's project for you to pin for easy reference:


You can see all of my 'How To' summaries on my 'How To - Tips and Techniques' Pinterest board in case you've missed any. 

Do visit the other Design Team members to see what they did with this week's sketch; there's lots of inspiration over on their blogs too!

I have a day of housework and chores planned today; not exciting but necessary! Enjoy your day and I'll be back tomorrow with another project; until then, happy stampin'!


Stampin' Up! Supplies Used:

  • Rose Wonder Photopolymer Bundle
  • Shine On Specialty Designer Series Paper
  • Watermelon Wonder A4 Cardstock
  • Kraft 12" X 12" Cardstock
  • Cucumber Crush A4 Cardstock
  • Basic Black Archival Stampin’ Pad
  • Rhinestone Basic Jewels

Tags: , , , , , ,

Cards | Shop Online | Stamping

Affectionately Yours Suite Sneak Peek

by Joanne James18. May 2016 21:31

Good evening everyone! I hope you've had a good day; I spent some time this afternoon getting to know a lovely group of young mums and their babies in my Memory Keeping Taster Session and was thrilled to see everyone leave with a completed page. More about that later in the week; today I have a quick sneak peek card for you, featuring a number of products from the new annual catalogue: 

I made this card at last month's On Stage event in Telford and it features three new co-ordinating products from the 'Affectionately Yours' product suite:

Affectionately Yours Specialty Designer Series Paper - Bold and bright DSP with copper embossing on some of the designs.

Love & Affection Stamp Set - A collection of 16 photopolymer stamps including flowers, leaves and sentiments.

Floral Affection Textured Impressions Embossing Folder - This set includes two folders - this card uses one of the designs and as you can see it give a lovely deep impression into the cardstock.

Isn't that pretty? The suite also includes striped ribbon, washi tape, copper metallic thread and copper embossing powder. No product table today as these items can't be purchased until June 1st, but not long to wait now. I do still have a labelled image for you though so that you can pin those all-important details should you wish to CASE this card in the future:


I'll be back tomorrow with a card for this week's new challenge over at Create With Connie and Mary. Until then, happy stampin'!

Sea Street Nautical Colour Block Card

by Joanne James17. May 2016 07:30

A quick post from me today with a great clean and simple card for the man in your life! My card today was inspired by the inspiration photo over at Fusion and the sketch over at CAS Colours and Sketches:


I love the nautical-themed inspiration photo and knew just the thing to make it work with the sketch - take a look:

Here's the low-down on today's card:

Blocks of Primary Colour - To keep a 'clean and simple' feel to my card, I restricted myself to a red, white and blue colour palette. These three colours also reinforce the nautical feel of my card. I popped these coloured pieces up on dimensionals to emphasise the diagonal channel. Here's my colour palette if you'd like to save it:


A Diagonal Slant - The diagonals on the sketch were perfect to showcase two rows of nautical flags from the 'Sea Street' stamp set that I still had out n my desk after making yesterday's project.

A Big, Bold Happy Birthday - I finished my card with a big 'Happy Birthday' from the retiring hostess set 'Happy Birthday Everyone'. Such a great sentiment set - I'll be sorry to see this one go!

Here is the visual summary of the key products used on today's project for you to pin for easy reference:


You can see all of my 'How To' summaries on my 'How To - Tips and Techniques' Pinterest board in case you've missed any. 

That's all from me today; I have another busy day planned with a team meeting and networking event on the cards. back tomorrow with another project. Until then, happy stampin'!


Stampin' Up! Supplies Used:

Table built using Product Table Builder by The Crafty Owl - Independent Stampin' Up! Demonstrator.

From Land To Sea Marlin

by Joanne James16. May 2016 18:52

Good evening lovely readers! I've had a super-productive day at my desk today, with meetings, phone calls and admin tasks a-plenty; I love it when I get such a productive start to my week!

Today I have another card for you that uses another of the animal stamps from the 'From Land To Sea' stamp set. This was the card that I originally made for our challenge this week over at The Paper Players, before I remembered the 'clean and simple' part of the brief :-) This card also involves some masking so I'm linking up with Just Add Ink and the colours were inspired by the colour palette over at The Color Throwdown:


I also used last week's sketch over at Mojo Monday - I'm too late to enter this challenge, but have included the sketch for reference. Lots of layers on this one - take a look:

Here's the low-down on today's card:

A Majestic Marlin - The marlin is another 'From Land To Sea' stamp. I wasn't sure I would ever use this stamp as I couldn't visualise it on a card, but after some browsing the internet for inspiration I decided that an abstract effect with the marlin front and centre was the way to go. I stamped him on Whisper White in Archival Basic Black and again onto a post-it note. I cut the second one out and used it as a mask to cover the one on my card base, whilst I sponged in the sea behind, graduating the colour to emulate light shining through the water from above. I also added some Gorgeous Grunge splatters to the bottom of the panel in the same Pacific Point ink I used for the sponging before removing my mask and colouring my marlin with my So Saffron and Night of Navy markers, leaving the bottom portion a crisp white.

Neutrals Designer Series Paper - I love the scripted pattern that is one of the four designs in each of the Stampin' Up! 12" x 12" colour collection stacks, however I'm never quite sure how to use it on a card. Whilst you can only see a little of the paper on my card, it's enough to add interest without detracting from my focal image. It also allows me to leave my card sentiment-free on the front at least - very handy! - and co-ordinates well with the corrugated card and embossed fish in the background.

I Spy Sea Street - To complete my card, I called on an old favourite, Sea Street, and stamped two shoals of fish on opposing corners of my card base mat and heat embossed them in silver. They remind me of the shoals of fish that marlins are often photographed pursuing in the open sea and add a little texture and shimmer to the finished card.I also carried this element of the design over onto the inside of my card:


Here is the visual summary of the key products used on today's project for you to pin for easy reference:


You can see all of my 'How To' summaries on my 'How To - Tips and Techniques' Pinterest board in case you've missed any. 

That's all from me today - back tomorrow with a lovely clean and simple card for you, so be sure to pop by! Until then, happy stampin'!


Stampin' Up! Supplies Used:

Table built using Product Table Builder by The Crafty Owl - Independent Stampin' Up! Demonstrator.

Tags: , , , , , , ,

Cards | Shop Online | Stamping

From Land To Sea Turtle One Layer Card

by Joanne James15. May 2016 09:00

It's Sunday and time for a new challenge over at The Paper Players! It's the turn of my good friend LeAnne to host our challenge this week and she has a fun clean-and-simple theme for you to play along with:


For my card this week I wanted to use my 'From Land To Sea' stamp set. I bought this set for the turtle - I love turtles! - but to date have only used the lighthouse stamp, so this week's challenge gave me the opportunity to change that. The ladies over at Less is More have a one layer challenge with the theme 'At Sea' so I'm linking my card with them too, along with the challenge over at Just Add Ink where the theme is 'masking'. I've a new product 'sneak peek' for you today as well! Without further ado, here is my card:


This isn't the first card I made for this week's challenge: I remembered 'wild animal' but forgot 'clean and simple' on my original card, so I will share that one with you later. As far as this card goes though, I just love it! Here's the low-down on how I created my card:

Sea-faring Turtle - Turtles are the one species of sea creature that has always captivated me. I have spent many hours BC (before children!) scuba diving in the warm waters of the Caribbean and nothing ever thrilled me more than to come across a turtle in its natural habitat. They really are so graceful and fascinating to observe. I stamped my turtle in Archival Black ink, once directly onto my extra-thick Whisper White card base, and again onto a post-it note. I cut the second one out and used it as a mask to cover the one on my card base, whilst I sponged in the sea behind. 

Swirly Scribbles Stencil - Secondly, the 'sneak peek'! I made a stencil with the wavy die in the new Swirly Scribbles Thinlits set from the forthcoming new annual catalogue by cutting one and then placing across a masked rectangle behind my turtle. With my turtle masked, I sponged through the stencil with Pool Party, Bermuda Bay and Island Indigo inks to create the seascape and then removed both the stencil and turtle mask and coloured my turtle with inks and a blender pen.

A Teeny Tiny Sentiment - To finish my card, I added a sentiment from the Teeny Tiny Sentiments set. This stamp set has a great variety of sentiments for each and every occasion that are suitably small and work perfectly with this layout. I chose my sentiment with the recipient of my card in mind; we haven't had a diving holiday with our good friends Cathy and Andy in such a long time, so this card is perfect to send to them to remind them that one day we will all dive together again!

Here is the visual summary of the key products used on today's project for you to pin for easy reference:


You can see all of my 'How To' summaries on my 'How To - Tips and Techniques' Pinterest board in case you've missed any. 

Before you reach for your ink and papers, check out what our amazing team has created to inspire you this week:

The Paper Players Design Team
 
 
Here's a quick recap of our challenge rules:
 
1.  Create a new paper project
2.  Upload your creation to your blog with a link back to us and provide a direct link to the post featuring your challenge submission.
3.  Please link your card to no more than four challenges, TOTAL.
4.  Have FUN! 


I look forward to seeing your wild animal CAS creations this week. We have double basketball today: training this morning them both James Juniors are playing at a tournament this afternoon - on opposing teams! One is playing for school and the other for club, so that should be interesting!!

Back tomorrow with another project; until then, happy stampin'!


Stampin' Up! Supplies Used:

Table built using Product Table Builder by The Crafty Owl - Independent Stampin' Up! Demonstrator.

Just a Note Music Note Thank You Card and Box Frame

by Joanne James14. May 2016 21:45

Well after an incredibly busy week I've finally managed to squeeze in another blog post! What's more, I also had a few hours at my desk this afternoon and instead of tidying up or sorting out retiring stock, I decided to get making - I've not put ink to a stamp in a whole week myself! I'm sat watching the annual music fest that is Eurovision as a type, so it seemed like a good day to share a couple of music-themed projects with you.

As my regular readers will know, we are something of a musical family: three pianists, a guitarist and we all like to sing (some of us better than others, it has to be said!) Rebecca recently sat her Grade 3 singing exam and subsequently wanted to make a little something for her vocal coach to say thank you for all her teaching and support. We don't have much in the way of musical stamp supplies, so armed with a suitable sentiment from the 'Watercolour Wishes' stamp set, some retired designer series paper and my Silhouette Cameo e-cutter, we set to work to create two projects. We created both a card and a boxed dimensional frame. Here is the frame, complete with layered treble clef:

Rebecca was so pleased with this, we then downloaded a second cut file and created this co-ordinating thank you card:

I love both of these projects and they definitely made me want to use my e-cutter more. Rebecca and I certainly had a lot of fun putting them together and her singing teacher loved them. Rebecca also got a merit for her exam performance too, so all in all a great result all round. Let's hope the United Kingdom Eurovision entry achieves similar success tonight!

I'll be back tomorrow with this week's new challenge over at The Paper Players; until then, happy stampin'!


Miss Ewe Playful Pals

by Joanne James12. May 2016 08:05

Today it's time for a new challenge over at Create With Connie and Mary and this week we have a colour combination for you:


This colour combination was rather a challenge this week - all neutrals and not a 'colour' to be seen! After much pondering, I decided to create something fun with my Playful Pals stamp set:


Here's the low-down on today's card:

Baa Baa White Sheep - My sheep is courtesy of the the Playful Pals stamp set: I stamped his wool in Versamark and heat embossed in white, which adds a subtle texture and shine against the Crumb Cake background, before stamping his face separately onto Smoky Slate cardstock and popping it onto a dimensional.

Alphabet Rotary Stamp For a Play on Words I couldn't resist a punny sentiment for the front of my card and the Alphabet Rotary Stamp is the perfect tool for this. I will sure miss this stamp, which is so useful when you need to customise your message. 

Neutral Embellishments - I decided to use the Basic Grey as my accent colour to bring some definition to my card and added a small strip of designer series paper from the Neutrals DSP stack, along with some linen thread and a silver metallic button to the bottom of my central panel.

Here is the visual summary of the key products used on today's project for you to pin for easy reference:


You can see all of my 'How To' summaries on my 'How To - Tips and Techniques' Pinterest board in case you've missed any. 

This card is headed to the lovely Gail who is currently on sabatical and we missed at our technique class this week, with love and best wishes from myself and the other ladies that were present. Do visit the other Design Team members to see what they did with this week's colours; there's lots of inspiration over on their blogs too!

Enjoy your day and I'll be back tomorrow with another project; until then, happy stampin'!


Stampin' Up! Supplies Used:

  • Playful Pals Photopolymer Stamp Set
  • Neutrals Designer Series Paper Stack
  • Linen Thread
  • Silver Basic Metal Buttons
  • Crumb Cake A4 Cardstock
  • Basic Gray A4 Cardstock
  • Smoky Slate A4 Cardstock
  • Embossing Buddy
  • Versamark Pad
  • White Stampin' Emboss Powder
  • Heat Tool (Uk)
  • Smoky Slate Classic Stampin' Pad
  • Basic Gray Archival Stampin’ Pad

Tags: , , , , , ,

Cards | Shop Online | Stamping

Hot Pink Picture Perfect Hummingbird Card

by Joanne James10. May 2016 22:00

Good evening everyone! I hope your week has started well. I've had my first technique class of the month yesterday along with both a rounders and cricket match (observing not participating, and both wins!), and a second technique class and this month's Project Life Memory Keeping class today so it's been a busy couple of days. Just time to pop in this evening and share the first of the cards from this month's technique class, featuring the Hummingbird in the 'Picture Perfect' stamp set. I used this week's sketch over at As You See It for my layout:

AYSIChallenge134   SIP One Element Wonder 47 800

I'm also linking up with Stamp Ink Paper again this week, as their challenge is to feature one main element on your project and make it really stand out. The hummingbird is the most tricky stamp in the set to align, but when you get it right is so worth it in terms of the result. Here is my finished card:

Here's the low-down on today's card:

Picture Perfect Hummingbird - 'Picture Perfect' is a multi-step image stamp set, with each of the stamps having two, three or four layers. The hummingbird comes in four pieces; for my bird I stamped my first layer in Bermuda Bay, I stamped the second stamp in Melon Mambo, the third layer in Pacific Point and the fourth and final one in Night of Navy. Whilst it sounds complicated, this set is made from photopolymer which makes lining up the images really straightforward. I find it helpful to use the eye to align the images and use a piercing mat or similar foam pad as a base for your stamping for an even image. I do prefer to stamp my bird in the order that the stamps are numbered and if all else fails, a stamp-a-ma-jig will help you to align the images perfectly.  It is definitely a stamp where positioning improves with practice and I must say my ladies today stamped with amazing results, each producing four perfectly stamped hummingbirds on the first attempt!

Partial Die Cutting using Circle Framelits - I stamped my bird onto a piece of Whisper White and having fussy cut his wing tip by hand, I then cut a partial circle up to the diagonal before adhering behind so that it aligned with my cut away circle on my card base. Circle Framelits are invaluable for this kind of partial diecutting, as you simply roll through the Big Shot to the desired point without cutting the whole way through. I've used this technique with this stamp before here; it adds an interesting detail to an otherwise clean and simple card.

Pop of Pink - Melon Mambo is one of my favourite pinks in the Stampin' Up! colour collections and whilst there is only the smallest amount featured on the throat of my bird, I picked up this colour in both my card base and satin knotted ribbon to give a real pop of colour to my otherwise blue card.

Here's today's visual summary of the key things needed to make today's card for easy reference:


You can see all of my 'How To' summaries on my 'How To - Tips and Techniques' Pinterest board in case you've missed any. 

That's all from me today; I have another busy day tomorrow, with my Coffee and Card Drop In Session at Bell of Northampton in Kingsthorpe and I'll also be at the in-store Spring Open Evening at Bells too. you can find full details on the latter here

Hopefully I'll squeeze in time for a quick blog post with another of my Picture Perfect class cards. Until then, happy stampin'!


Stampin' Up! Supplies Used:

Table built using Product Table Builder by The Crafty Owl - Independent Stampin' Up! Demonstrator.

Mini Catalogue

BROWSE THE CATALOGUE

The mini catalogue is now live! Read and download your copy here.

Shop Online

Access my online shop 24 x 7, 365 days of the year:

Current March hostess code:

S9F2XJJW

Shop Online

Join My Team

It's always a great time to join Stampin’ Up! New team members can get £130 worth of products for only £99 + free business supplies + free shipping + all the fun being a part of Stampin’ Up! Stampin' Up! has something for everyone: join my growing team and benefit from my support to enjoy Stampin' Up! however you choose.

If you're interested, call me for a chat to understand how I can help you realise your goals. Alternatively, if you have already decided to sign up and you just can't wait, please click here for the link to the online form where you can sign up and order your starter kit right away! 

Latest Kit!

Stampin Cut and Emboss

The Rock Legend Kit has all you need to make 8 cards with coordinating envelopes. Along with the new Panda Friends Kit, both are available from January 4th for just £14 each - get yours here!

2023-24 Annual Catalogue

BROWSE THE CATALOGUE

Click on the catalogue for a full list of current SU! supplies - if you would like to order any of the items featured, please drop me a line at [email protected] or give me a call on 07773 421446 - I'd be happy to help.

New Online Exclusives

There will be new products available exclusively in the online store from 5 March - check them out here.

About Me

Hi I'm Joanne and live in Northampton and when I'm not looking after my husband and two beautiful children, am an avid crafter with a passion for all things Stampin' Up!

I must confess that I have never been a big rubber stamper - until I discovered Stampin' Up! that is. I love the fact that I can get such great results with co-ordinating stamps, inks, papers and punches - the possibilities are endless! Join me on my stamping journey as I share the things I love and be inspired to create amazing things yourself!

Follow Me

Monthly Newsletter

Box Builder

Click the button above to use Box Buster to create your custom box design using the Envelope Punch Board!

Kits Collection Now Available!

Stampin Cut and Emboss

The new Kits Collection from Stampin' Up! is now available!

Click here to see the current kits available and order yours online today.

I Design For


Stampin' Up Stuff

This is my personal blog and is not endorsed by Stampin’ Up! I hope you find it a plentiful source of ideas and personal inspiration but please don't copy my designs for contest submission or use for classes, publication or sale without express permission.