I've had a busy week which has necessitated a few days off from blogging, however since today is Sunday it's time for this week's new challenge over at The Paper Players! It's the turn of my sweet friend Claire to host this week and she has my favourite kind of challenge, a sketch, for us to work with:
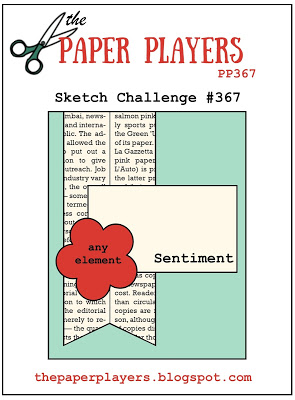

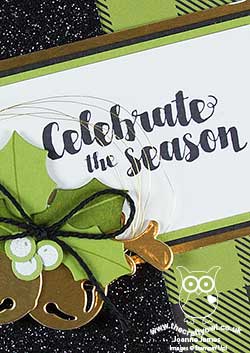
I love this sketch - so many creative possibilities! I took the opportunity to combine with this week's colour challenge over at Global Design Project and create a Christmas card using one of my favourite Merry Little Christmas papers - take a look:

Here's the low-down on today's card:
Merry Little Christmas - I love a gingham pattern, and this Merry Little Christmas paper pack has two gorgeous ones. This modern, festive black and olive combination was the starting point for my card today. I paired with a banner of retired black glimmer paper for some added understated festive sparkle.
Tags & Trimmings - I decided to make the sentiment the focal point of my simple layered panel, so that I could make the holly and bells embellishment really stand out. I stamped two of the holly leaves and added a simple line with a marker pen to the other two and embossed three berries in white onto Old Olive cardstock for some co-ordinating holly berries.
Trim Your Stocking Jingle Bells - I cut out my stamped pieces along with two gold foil jingle bells with the Trim your Stocking Thinlits Dies. These are perfect for embellishing the stockings that you can make with the dies in this set, but are also useful as card embellishments too. Finally I added a little gold thread to finish my card.
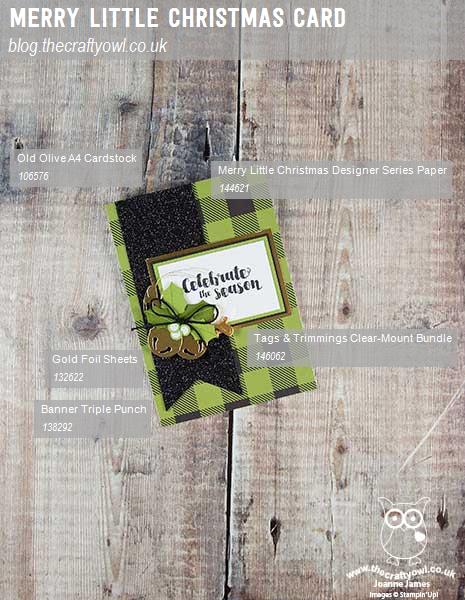
Here is the visual summary of the key products used on today's project for you to pin for easy reference:
You can see all of my Product and 'How To' summaries on my 'How To - Tips and Techniques' Pinterest board in case you've missed any.
Before you reach for your ink and papers, check out what our amazing team has created to inspire you this week:
The Paper Players Design Team
Here's a quick recap of our challenge rules:
1. Create a new paper project
2. Upload your creation to your blog with a link back to us and provide a direct link to the post featuring your challenge submission.
3. Please link your card to no more than four challenges, TOTAL.
4. Have FUN!
I look forward to seeing your interpretations of our sketch in the gallery this week. Enjoy the rest of your weekend as it will be over all too quickly; we are at the start of a week's half-term school holiday for both James Juniors so our weekend is an unusually restful one - bliss! I'll be back tomorrow with another project that also uses today's sketch; until then, happy stampin'!
Stampin' Up! Supplies Used: