Quilted Christmas Star Quick and Easy Card

by Joanne James24. October 2017 21:00

I've had a busy day with the last of this month's technique classes - I'll share these cards later this week - and a couple of hours of garden tidying ready for the winter. Today I'm sharing another card using our sketch this week over at The Paper Players. Here's a reminder of the sketch:

You can see my original card here; I liked this sketch so much I made a second card too - take a look:


Here's the low-down on today's card:

Quilted Christmas - I used two of the Quilted Christmas patterned papers on today's card. The festive papers and colours in this pack make co-ordination easy and I love this traditional red and green colour combination. 

Add A Banner - The simple banner on my card is 2" wide and was punched with the Triple Banner Punch. This is one of my most useful and most used punches and whilst it gets lots of love I don't often give it a shout-out in my blog write-ups as it's one of those punches that I almost take for granted and there always seems to be something more exciting to talk about. Well, not today - three cheers for the Triple Banner Punch!

All About The Stitching - There is a common thread (pardon the pun!) running through today's card design and that is 'stitching'. From the patterns of my paper, to the stitched border that I used for my sentiment panel, along with the baker's twine bow and that pretty stitched felt star embellishment, stitching links them all and results in a clean and simple card with a seamless design. 

A simpler version of Sunday's card using the same layout, yet I love it - might have to knock a few more of these out to boost my Christmas card stocks! 

Here is the visual summary of the key products used on today's project for you to pin for easy reference:


You can see all of my 'How To' summaries on my 'How To - Tips and Techniques' Pinterest board in case you've missed any. 

Enjoy your day and I'll be back tomorrow with another project. Until then, happy stampin'!


Stampin' Up! Supplies Used:

Table built using Product Table Builder by The Crafty Owl - Independent Stampin' Up! Demonstrator.

Painted Harvest Christmas Wreath Card

by Joanne James9. October 2017 13:00


Happy Monday everyone! Today I'm sharing a card that is actually a Christmas card but uses the Painted Harvest stamp set - take a look:


Here's the low-down on today's card:

A Christmas Wreath - The Painted Harvest stamp set really is so versatile: stamped in festive green, either singly or using both stamps, it's easy to change the look from a sunflower to a Christmas wreath. You can then either use the small dot stamp to stamp your berries or a few Real Red enamel dots as I've done here; finish with a bow of Quilted Christmas ribbon and there you have it - a simple Christmas wreath. I am featuring the Painted Harvest bundle at my monthly stamp class on Monday 6th November; this is a popular class with space now limited. If you would like to join me to explore this stamp set, do get in touch and book your place before it's too late!

Gorgeous Gingham - I backed my stitched square with a panel of Gardden Green gingham, one of the patterns in the Quilted Christmas designer series paper. This 6" x 6" paper stack has some fabulous designs both for Christmas and beyond. I also backed my DSP with a piece of extra thick Whisper White for added stability. I'm partial to a nice gingham to add a classic touch to my projects and the stack includes a Real Red gingham too - gorgeous!

Merry Christmas - My teeny-tiny sentiment is stamped in red onto Whisper White so that the words are in relief - can you tell what stamp set it comes from though? You might be surprised - I cropped it from one of the banner stamps in the Brightly Lit Christmas stamp set. I've circled it on the image below:


This stamp set is one of those reduced by 15% to for World Card Making Day until tomorrow and will also feature in its bundle at my Brightly Lit Christmas class on Tuesday 24th October. You can find full details of my classes on my Facebook page or on my website here. The important thing is to always look at all the stamps in your collection - you may find the perfect sentiment in the most unexpected if places!

Here is the visual summary of the key products used on today's project for you to pin for easy reference:


You can see all of my 'How To' summaries on my 'How To - Tips and Techniques' Pinterest board in case you've missed any. 

Enjoy the rest of your day and I'll be back tomorrow with another project. Until then, happy stampin'!


Stampin' Up! Supplies Used:

Table built using Product Table Builder by The Crafty Owl - Independent Stampin' Up! Demonstrator.

Traditional Iconic Christmas Tree Card for World Card Making Day

by Joanne James7. October 2017 19:00

Happy World Card Making Day everyone! I hope you all managed to get some time in your craft rooms to make a card or two today. I spent the morning running errands and working with a client to finalise the design of their wedding stationery (always exciting!) but did manage to get a couple of hours in my craft room this afternoon to make a couple of cards; here's one of them that I'm entering for this week's challenge over at Merry Monday where the challenge is to feature a Christmas tree on your card and at Stamps Ink Paper where it's card maker's choice:


I immediately knew where I was going with this one - I chose my favourite Christmas tree of the season and this is what I came up with:


Here's the low-down on today's card:

Iconic Christmas - This Christmas tree from the Iconic Christmas set stands on its own and has so much interest and detail, it doesn't need much else. I stamped the tree once onto Whisper White then again onto Garden Green and cut out the second tree, so that the images beneath would show through. I heat embossed the sentiment in gold onto a strip of vellum so that it wouldn't obscure the tree and simply wrapped this around my central panel.

Make the Most of Minis - I cut out my green Christmas tree using the Ornamental Christmas Framelits and used a whole bunch of mini Stampin' dimensionals on the solid sections to pop up my tree for added dimension. These really are so useful and their smaller size compared to our standard dimensionals makes them perfect for getting into small spaces. Nice things come in small packages as the saying goes and these are a great example of that!

Festive Colour Combo - Whilst the teeny, tiny images can be coloured with marker pens, I decided to keep things simple on today's card and instead stamped the co-ordinating images (the ones that look very strange in the catalogue, because you can't see how they come together until you stamp all three layers!) each in Real Red and Garden Green in keeping with my festive colour combination. I coloured a couple of additional images with my Crumb Cake marker pen, added a panel of Quilted Christmas paper with the simple stitched Christmas tree design behind to complete my card. Here is my trio of festive colours - feel free to save it for your future inspiration:

Here is the visual summary of the key products used on today's project for you to pin for easy reference:


You can see all of my 'How To' summaries on my 'How To - Tips and Techniques' Pinterest board in case you've missed any. 

Before I go, just a reminder that the World Card Making Day offers from Stampin' Up! have a few more days to run until the 10th of the month; get the full details here. I have an order going in tomorrow; if you are local to me and would like to add on to it to save P&P just give me a call. 

That's all from me today I'll be back tomorrow with another project for this week's new challenge over at The Paper Players where I am the hostess. Until then, happy stampin'!


Stampin' Up! Supplies Used:

Table built using Product Table Builder by The Crafty Owl - Independent Stampin' Up! Demonstrator.

Iconic Christmas Square Card For The Paper Players #PP363

by Joanne James24. September 2017 09:00

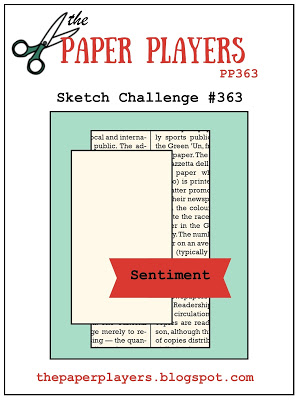
It's Sunday and time for this week's new challenge over at The Paper Players! Our superstar leader the lovely Nance is the hostess this week and she has a sketch for us to work with:


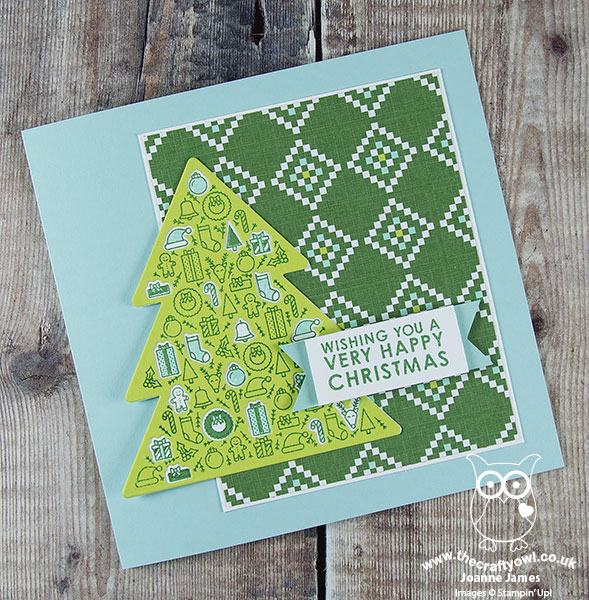
I took the opportunity to make another Christmas card today, this time in a rather unusual colour scheme - take a look:


Here's the low-down on today's card:

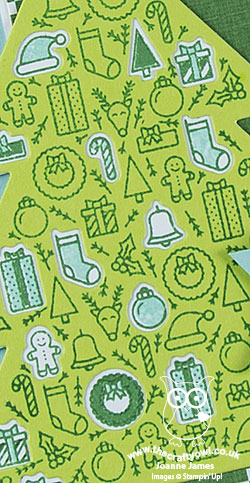
Iconic Christmas - I decided to feature the tree from the Iconic Christmas set on my card today. Now I think this set is a little like Marmite - you either love it or you hate it! With all those teeny tiny iconic festive images I loved it the moment I saw it; you can stamp just the outlines, or you can use one or both of the infill stamps and a little two-step stamping to colour them in. You also have the option to use the co-ordinating Ornamental Christmas Framelits Dies to cut out some of them so that you can see the detail on a second layer below, as I've done on my card today. I honestly think the biggest hurdle with this set is that it's difficult to see it's true potential in the catalogue - you need to play with it to see how it all comes together. The set itself is more versatile than it looks - I'll be back to share more makes with it in coming weeks I'm sure. I tweaked the base of Nance's sketch to a 6" x 6" square rather than a rectangle, as the tree is a little too large for this layout to work comfortably on a standard A6 card, but all of the main elements are there so it works.

A Quilted Christmas - I used a piece of the Quilted Christmas 6" x 6" Designer Series Paper for my background panel, making sure to cut the pattern so that it was even and centralised within the panel. I matted it in white - not something I do often, but it really helps define the edge of this patterned paper and makes it stand out from the Pool Party card base.

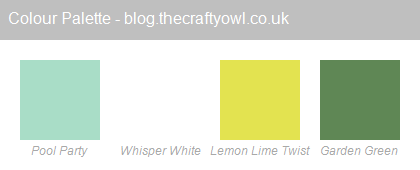
Unorthodox Christmas Colours - When I initially sat down to make today's card, I knew exactly how I was going to work with the sketch, however I hadn't decided which patterned paper I wanted to use for the right-hand panel. I flicked through my swatches and decided on this one from the Quilted Christmas set and it inspired my PoolParty base and Lemon-Lime Twist Christmas tree. Not the most traditional of Christmas colour combinations although I love the bright and zingy Christmas tree. Here's my swatch in case you would like to use it as inspiration for your festive projects:


Here is the visual summary of the key products used on today's project for you to pin for easy reference:


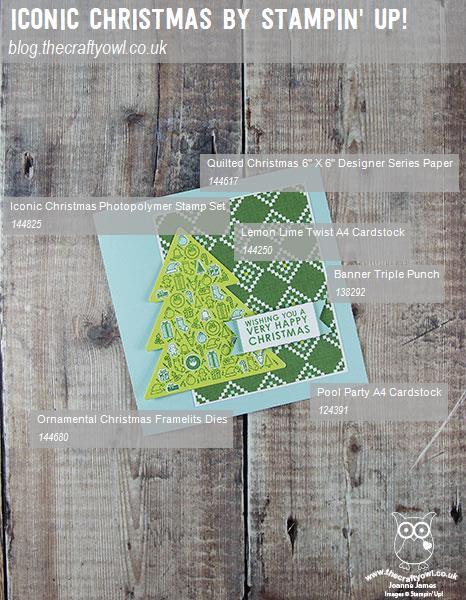
You can see all of my Product and 'How To' summaries on my 'How To - Tips and Techniques' Pinterest board in case you've missed any. 

So what do you think? Do these colours work or are they are little too non-traditional for the festive season? I'd love to hear your thoughts. 

Before you reach for your ink and papers, check out what our amazing team has created to inspire you this week:

The Paper Players Design Team
 
 
Here's a quick recap of our challenge rules:
 
1.  Create a new paper project
2.  Upload your creation to your blog with a link back to us and provide a direct link to the post featuring your challenge submission.
3.  Please link your card to no more than four challenges, TOTAL.
4.  Have FUN! 

I look forward to seeing what you create with our sketch this week. Enjoy the rest of your weekend as it will be over all too quickly; we had our usual day of sport yesterday so today is about finishing our homework and then we have a change of sport this afternoon, with Ben going sailing with friends. Let's hope it stays fine, although I guess he will get wet whatever the weather! I'll be back tomorrow with another project; until then, happy stampin'!


Stampin' Up! Supplies Used:

Table built using Product Table Builder by The Crafty Owl - Independent Stampin' Up! Demonstrator.

Sneak Peek Quilted Christmas CAS Christmas Card

by Joanne James17. August 2017 09:40

My week has been whizzing by as usual, but I've had a few snatched opportunities to create with my pre-order goodies and managed to whip up a quick card using this week's CAS(E) This Sketch using some new products:


I used a new stamp set called Christmas Quilt and some new co-ordinating designer series paper called Quilted Christmas for my border for my clean and simple Christmas card:


Such a versatile set with a wonderful homespun feel that will be useful for Christmas and beyond and is sure to appeal to the seamstresses out there. A lovely sentiment for the inside too:


Here is the visual summary of the key products used on today's project for you to pin for easy reference:


You can see all of my 'How To' summaries on my 'How To - Tips and Techniques' Pinterest board in case you've missed any. 

The items used on today's card will be available to purchase when the new seasonal catalogue goes live on 1st September; if you're not already on my mailing list and don't already have a Stampin' Up! demonstrator of your own and would like me to send you a catalogue, please get in touch with your details and I will pop one in the post to you when mine go out within the next week or so. 

Enjoy your day and I'll be back tomorrow with another project. Until then, happy stampin'!


Stampin' Up! Supplies Used:

Table built using Product Table Builder by The Crafty Owl - Independent Stampin' Up! Demonstrator.

Mini Catalogue

BROWSE THE CATALOGUE

The mini catalogue is now live! Read and download your copy here.

Shop Online

Access my online shop 24 x 7, 365 days of the year:

Current March hostess code:

S9F2XJJW

Shop Online

Join My Team

It's always a great time to join Stampin’ Up! New team members can get £130 worth of products for only £99 + free business supplies + free shipping + all the fun being a part of Stampin’ Up! Stampin' Up! has something for everyone: join my growing team and benefit from my support to enjoy Stampin' Up! however you choose.

If you're interested, call me for a chat to understand how I can help you realise your goals. Alternatively, if you have already decided to sign up and you just can't wait, please click here for the link to the online form where you can sign up and order your starter kit right away! 

Latest Kit!

Stampin Cut and Emboss

The Rock Legend Kit has all you need to make 8 cards with coordinating envelopes. Along with the new Panda Friends Kit, both are available from January 4th for just £14 each - get yours here!

2023-24 Annual Catalogue

BROWSE THE CATALOGUE

Click on the catalogue for a full list of current SU! supplies - if you would like to order any of the items featured, please drop me a line at [email protected] or give me a call on 07773 421446 - I'd be happy to help.

New Online Exclusives

There will be new products available exclusively in the online store from 5 March - check them out here.

About Me

Hi I'm Joanne and live in Northampton and when I'm not looking after my husband and two beautiful children, am an avid crafter with a passion for all things Stampin' Up!

I must confess that I have never been a big rubber stamper - until I discovered Stampin' Up! that is. I love the fact that I can get such great results with co-ordinating stamps, inks, papers and punches - the possibilities are endless! Join me on my stamping journey as I share the things I love and be inspired to create amazing things yourself!

Follow Me

Monthly Newsletter

Box Builder

Click the button above to use Box Buster to create your custom box design using the Envelope Punch Board!

Kits Collection Now Available!

Stampin Cut and Emboss

The new Kits Collection from Stampin' Up! is now available!

Click here to see the current kits available and order yours online today.

I Design For


Stampin' Up Stuff

This is my personal blog and is not endorsed by Stampin’ Up! I hope you find it a plentiful source of ideas and personal inspiration but please don't copy my designs for contest submission or use for classes, publication or sale without express permission.