Needle and Thread Florals for PP424

by Joanne James13. January 2019 09:00

Today it's Sunday and time for this week's new challenge over at The Paper Players! It's the turn of the fabulous Anne-Marie to host this week and she has a fresh colour challenge for you to work with that is perfect for Spring:


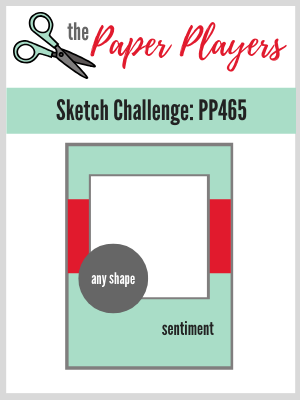
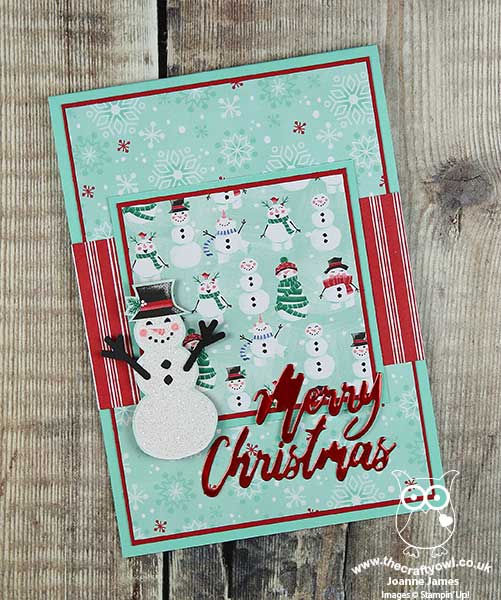
I decided some fresh spring florals were in order and using this week's Paper Craft Crew Sketch as inspiration, I decided to have a play with my new Needle and Thread bundle - take a look:


Here's the low-down on today's card:

Pins and Needles - The new Needlepoint Nook Suite is perfect for creating the look of handcrafted embroidery with much less effort and has stamps, papers, accessories and framelits that fit the theme. My favourite aspect of this suite is definitely the Needlepoint Elements Framelits Dies - I used the largest of the needlepoint patterns for the background element of my design and added the needlepoint border to a vellum piece that co-ordinates with the Pretty Label Punch. Such a pretty touch! 

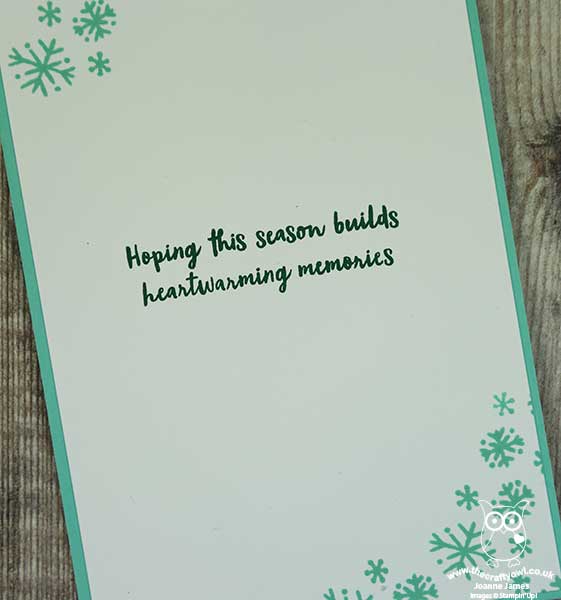
Hand-Stitched Stamping - The floral elements in the Needle & Thread set are distinctive stamps that have the almost photographic appearance of embroidered flowers, as they appear on the Needlepoint nook designer series paper that can also be found in this suite. I used my yellow and grapefuit grove to create a bright spray of flowers and added in a few additional diecut pieces too. I used a simple heat embossed sentiment in white onto Night of Navy - my chosen fourth colour - on the front of my card and used one of my favourite sentiments from this set on the inside:


I also added some of the new gingham gala sequins and a few loops of the lovely Grapefruit Grove Organdy Ribbon to finish the front of my card; this is one of the items you can receive free with a Sale-A-Bration order of £45 or more - and who doesn't love a free gift?!

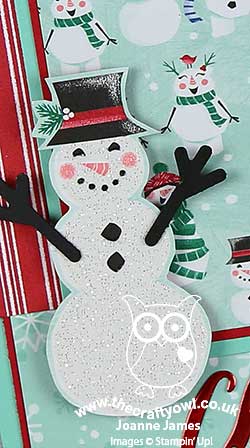
A Well Written Tag Too - I often cut multiples of flowers or other elements when I'm making this kind of card as I decide on my finished design and this year I'm on a mission in my crafting to use up all the bits and pieces I get left over from a project as I craft, rather than putting them in my bits and bobs box to linger for months on end or eventually end up in the bin when I have a mad craft room tidy up! Today I made a tag with my leftovers, and added the word 'friend' from the Well Written Framelits set:


 This will make a great co-ordinating tag for a gift to go along with my card - and everything used up too! Here's one last photo of both items together:


Here is the visual summary of the key products used on today's project for you to pin for easy reference:
 

You can see all of my Product and 'How To' summaries on my 'How To - Tips and Techniques' Pinterest board in case you've missed any. 

Before you reach for your ink and papers, check out what our amazing team has created to inspire you this week:

Here's a quick recap of our challenge rules:
 
1.  Create a new paper project
2.  Upload your creation to your blog with a link back to us and provide a direct link to the post featuring your challenge submission.
3.  Please link your card to no more than four challenges, TOTAL.
4.  Have FUN!

You can see all of my 'How To' summaries on my 'How To - Tips and Techniques' Pinterest board in case you've missed any. 

Enjoy your day; I am hoping for a quiet day with maybe a little crafting too! I'll be back tomorrow with another project. Until then, happy stampin'!


Stampin' Up! Supplies Used: 

Table built using Product Table Builder by The Crafty Owl - Independent Stampin' Up! Demonstrator.

Let It Ride Watercolour CAS Card

by Joanne James8. January 2019 20:00

We are still enjoying the tail end of the Christmas holidays for the youngest of the James Juniors so today we've been making the most of the fine and sunny day with a long walk and catching up with a movie that we've both wanted to see for some time - there will be time for crafting later in the week! Luckily I got a couple made at the weekend and am on a bit of an animal theme this week inspired by this week's challenge that we have over at The Paper Players and today I'm sharing a card using the sketch for this week's challenge over at CAS(E) This Sketch:


I went for a clean and simple card and a little watercolouring, with one of my favourite new stamp sets from the new Spring-Summer catalogue along with a new 'must have' staple  - take a look:


Here's the low-down on today's card:

Let It Ride - The galloping horse on the front of today's card is courtesy of the new 'Let It Ride' set. You might be surprised that I like this set so much, as no-one in our family rides or owns horses (although Rebecca did have lessons for a while and made many requests for her own pony until she discovered hockey - phew!) I do have lots of friends that ride though and know I will get lots of use out of this set. I especially like the inspirational phrases that accompany these sketched images - I mean, 'Live life as if someone left the gate open' - what a great quote to live by!

Easy Watercolouring - I stamped my image onto watercolour paper and used my aquapainter to colour my horse, adding a little green to ground him. The sketchy nature of the images in this set really lend themselves to a watercoloured finish, without the need to be too precise. I layered the colour gradually until I was happy with the intensity, allowing each layer to dry briefly before adding more colour.

A New Craft Cupboard Staple - I cropped my main image with that perennial staple of my tool cupboard, my Stitched Circle Framelits.  My regular readers know how much I love these stitched shapes - they are great for adding an extra detail to a simple shape. Stitching generally is very on-trend in the craft world right now, and the new Spring-Summer catalogue debuts a new kid on the block though that is going to come a close second on my 'top 10 framelits' list I think: the new Rectangle Stitched Framelits Dies set includes 13 dies, each of which feature stitching both inside and outside the frame and offer lots more ways to expand your creative options. I used them here to crop my sentiment panel, before heat-embossing my sentiment onto it. 

Here is the visual summary of the key products used on today's project for you to pin for easy reference:


You can see all of my 'How To' summaries on my 'How To - Tips and Techniques' Pinterest board in case you've missed any. 

Enjoy your evening; tomorrow is the last day of the school holidays (finally!) and following my open house in the morning we will be spending the afternoon with friends. I'll be back soon with another project. Until then, happy stampin'!


Stampin' Up! Supplies Used:

Table built using Product Table Builder by The Crafty Owl - Independent Stampin' Up! Demonstrator.

Happy Tails Card and Treat Box for PP423

by Joanne James6. January 2019 09:00

Woohoo! Today it's Sunday and it's time for the first challenge of the year over at The Paper Players! We have all enjoyed the Christmas break and are back with a fresh new blog header and some snazzy challenge badges courtesy of Nance and two amazing guest designers: Su Mohr and Wanda Cullen. If you missed my introductory post over at The Paper Players earlier this week you can read all about these lovely ladies here. We are thrilled that they are going to be sharing their creative talents with us and you in 2019 - a big Paper Players welcome to both of you! 

For our first challenge of 2019 it's the turn of the fabulous Ann to host this week and she has a fun theme challenge for you to work with:


I had so many choices for today's card; in fact, I ended up making not one, not two - but four different cards for this week's theme, and then couldn't decide which one to use! I blogged one of them featuring a sweet little bumble bee yesterday - if you missed it, you can see that card here - and decided today to go with something old and something new with a card and matching treat box that is a tribute to all four-legged friends. First up, here's my card:


Now I must confess I almost didn't blog this card today, as my fellow teamie LeAnne also used the sketch layout from Global Design Project for her layout this week and used the new 'Nine Lives' stamp set that is the feline equivalent of the 'Happy Tails' set I chose to use and so there is a distinctly similar look and feel to our cards this week as a result. I figured though that whether you are a cat or dog lover, between us we have you covered so I decided to go ahead! You can check out LeAnne's card on the Paper Players blog post and read more about the detail of her card over on her blog WeeInklings which is well worth a follow. 

In the meantime, here's the low-down on today's card:

Happy Tails - The 'Happy Tails' bundle is one of my favourite bundles in the new Spring-Summer catalogue. The stamp set has a realistic dog with a collection of fun sentiments and decorative bits and pieces - a kennel, heart, collar and bone and a great selection of sentiments for all kinds of cards for the dog-lovers amongst us. The #GDP170 sketch was perfect to highlight lots of these co-ordinating words and images - and I chose to use this sentiment on the inside of my card too, with a few more pawprints for good measure:


Dalmation Dog - I created a dalmation with my black-on-white spots and added a red background so that he would really stand out. As if the stamp set wasn't great enough, it has a co-ordinating Dog Builder Punch too so that you can punch your puppy dog straight out with ease - no fussy cutting required!

A Kennel Treat Box - The minute I saw the dog builder punch I just knew I would need to create a little dog kennel for him using my retired Home Sweet Home thinlits - the box is the perfect size! I actually made this first and then took the embossed striped panels of my kennel and bright Poppy Parade red roof and incorporated the same texture and colour into my co-ordinating card. The roof of my box opens to hold a few chocolates or maybe even some doggy treats - I added a tag using another sentiment from the Happy Tails set, along with a punched heart, also courtesy of the Dog Builder Punch:


I hope you like my pair of projects today - they were fun to make! 

Here is the visual summary of the key products used on today's project for you to pin for easy reference:


You can see all of my Product and 'How To' summaries on my 'How To - Tips and Techniques' Pinterest board in case you've missed any. 

Before you reach for your ink and papers, check out what our amazing team has created to inspire you this week:

Here's a quick recap of our challenge rules:
 
1.  Create a new paper project
2.  Upload your creation to your blog with a link back to us and provide a direct link to the post featuring your challenge submission.
3.  Please link your card to no more than four challenges, TOTAL.
4.  Have FUN!

You can see all of my 'How To' summaries on my 'How To - Tips and Techniques' Pinterest board in case you've missed any. 

Enjoy your day; I'm hoping to get a little more time in my craft room and have some quality family time since our sporting commitments don't ramp up fully until next week. Either way, enjoy your Sunday and I'll be back tomorrow with another project. Until then, happy stampin'!


Stampin' Up! Supplies Used: 

Table built using Product Table Builder by The Crafty Owl - Independent Stampin' Up! Demonstrator.

Bee Thankful Simple Stamped Thank You Notelets

by Joanne James5. January 2019 20:00

I've been back in my craft room for a few hours today and yes, it felt good! I have some new makes to share with you this week as a result too. This evening I'm just popping in with a quick post to share a couple of super simple thank you cards that are perfect for the current challenge over at StampInkPaper:

Here's a close up of my card - I did a little basic ombre colouring on the lettering using two shades of the same colour Blend marker:


I made these with the James Juniors over the Christmas period - they make great thank you cards to send for gifts received. I encourage my children to keep up this polite tradition and they are not always that accommodating, however they had fun with this set and whilst they didn't write reams, it's the thought that counts and I'm sure the gesture will be appreciated.

These cards are also great examples of #SimpleStamping - a pack of notelets, a single stamped image courtesy of the 'Bee Thankful' stamp set in the annual catalogue and some Stampin' Blends and a little time for some colouring and done!


Here is the visual summary of the key products used on today's project for you to pin for easy reference:


You can see all of my 'How To' summaries on my 'How To - Tips and Techniques' Pinterest board in case you've missed any. 

I'll be back tomorrow with another project for the first challenge of the year over at The Paper Players - don't miss it! Until then, happy stampin'!


Stampin' Up! Supplies Used:

Table built using Product Table Builder by The Crafty Owl - Independent Stampin' Up! Demonstrator.

Peaceful Poinsettia Christmas Card Two Ways PP422

by Joanne James9. December 2018 09:00


It's Sunday and time for this week's new challenge over at The Paper Players! It's my turn to host this week and for our final challenge this year I have a festive colour challenge for you to work with:


Red, green and a colour of your choice - to retain the festive theme! I have not one but two Christmas cards to share with you this week both of which feature a traditional flower for this time of year. My cards are identical, I simply used Shaded Spruce for the base of one and Real Red for the base of the other. Take a look at the first one on the base of Shaded Spruce:


And here's the second one, on a Real Red base:


Here's the low-down on today's cards:

Peaceful Poinsettia - I'm not sure whether my colour scheme inspired my choice of poinsettia for today's card, or the other way around - maybe a bit of both! Either way I thought that the two were a perfect match, so used an inverted pair of the festive boughs from the Peaceful Poinsettia stamp set to frame this sentiment from the same set which seemed fitting for our final Paper Players challenge of the year. 

Detailed Poinsettia Embossing - I used the Detailed Poinsettia Thinlits Dies to cut out my floral boughs but also used the corner pieces and smaller detailed dies to create an embossed panel for the base of my card by using the Big Shot embossing mat to emboss using the thinlits rather than diecut with them. I love the effect this gives and the subtle detail it adds.

Added Floral Sparkle - For added sparkle to my poinsettias, I chose silver as my additional colour of choice and used the same technique that I used on this card here where you stamp onto a piece of acetate window sheet using Stazon ink and flip it over and colour the reverse with Stampin' Blends. This is then backed with silver glimmer paper for a sparkly coloured effect. This is such a fun technique and really very pretty in real life.

I'm not sure which of these cards I prefer - that's why I shared both; I'd love to know which one is your favourite. 

Here is the visual summary of the key products used on today's projects for you to pin for easy reference:


You can see all of my Product and 'How To' summaries on my 'How To - Tips and Techniques' Pinterest board in case you've missed any. 

Whilst I've included the link to the bundle below, the Peaceful Poinsettia  stamp set is currently available at 20% off and the dies at a whopping 30% off as part of the year-end closeouts, so if they are on your wish list, now is the time to snap them up at a bargain price before they retire for good. You can access the complete Year-End Closeouts list here

Before you reach for your ink and papers, check out what our amazing team has created to inspire you this week:

Here's a quick recap of our challenge rules:
 
1.  Create a new paper project
2.  Upload your creation to your blog with a link back to us and provide a direct link to the post featuring your challenge submission.
3.  Please link your card to no more than four challenges, TOTAL.
4.  Have FUN!

I can't wait to see what you create with this week's colours and look forward to visiting your blogs this week. This is our last challenge before we take a two-week break to celebrate the Christmas period with our families, so we hope you'll find the time to join us! We will be taking a two week break before returning with a fresh new set of challenges for 2019 starting on Sunday 6th January 2019. Thanks to everyone who plays along each week, to this year's guest designers Jan, Elizabeth and Annie, and everyone of you who visits our blogs and leaves us encouraging comments each week - it's great to know that you enjoy our creations! 

Enjoy the rest of your weekend as it will be over all too quickly. I am hoping to decorate the house for the holidays today and put the Christmas tree up. I made a wreath for the front door yesterday however at the moment due to family and sports commitments that is the extent of the decorations, so it's about time we rectified that! I'll be back tomorrow with another project; until then, happy stampin'!


Stampin' Up! Supplies Used: 

Table built using Product Table Builder by The Crafty Owl - Independent Stampin' Up! Demonstrator.

Textured Beautiful Blizzard Christmas Card

by Joanne James6. December 2018 22:00

Well it's taken me a few days as I've had a couple of classes and am knee-deep in all that comes with the preparations for the festive season, but today I'm here and sharing the last of the three cards that I designed for a recent technique class using the Beautiful Blizzard bundle - take a look:


Here's the low-down on today's card:

A Swirly Snowflake Blizzard - This card has the simplest of stamped backgrounds. I used a variety of the swirls and snowflake stamps in the set in both blues to create a stamped swirly snowflake blizzard. This is one of those very forgiving, easy stamped projects, perfect for a beginner and would work on a single layer card too.

Shimmery White Textured Snowflakes - The real 'wow' on this card is very difficult to see on the above photo: I made a mask using the Blizzard Thinlits and added a layer of textured snowflakes using shimmery white embossing paste. This looks so sparkly in real life and adds real texture and interest to the card design. I finished with some diecut snowflakes and a simple heat embossed sentiment.

A Sweet Sentiment - The sentiment on the inside of my card is one that just makes me go all warm and fuzzy inside:

Isn't that just so sweet?!

Here is the visual summary of the key products used on today's project for you to pin for easy reference:


You can see all of my 'How To' summaries on my 'How To - Tips and Techniques' Pinterest board in case you've missed any. 

Enjoy your evening and I'll be back soon with another project. Until then, happy stampin'!


Stampin' Up! Supplies Used: 

Table built using Product Table Builder by The Crafty Owl - Independent Stampin' Up! Demonstrator.

A Z-Fold Blizzard of Snowflakes for PP421

by Joanne James2. December 2018 09:00

Today it's Sunday and time for this week's new challenge over at The Paper Players - yay! It's the turn of the queen of florals, the lovely Jaydee,  to host this week and she has a festive theme challenge for you to work with:


Jaydee has been kind to us with a broad theme this week - pretty much anything festive goes! I decided that I would take my inspiration from the snow in our badge picture this week and share a card that I made at a recent technique class using the Beautiful Blizzard bundle - take a look:


Here's the low-down on today's card:

An Embossed Blizzard - On this card I used the Blizzard Thinlits Die to create an embossed (as opposed to a diecut) panel to add interest to the fold behind my sentiment panel. I then sponged this liberally with Frost White Shimmer Paint for a subtle snowy sparkle. I love that the Big Shot Embossing Mats make this really easy and make our dies go further, opening up a whole new range of creative possibilities.

A Fancy Fold - This card uses a fancy fold that is quite simple to recreate - a z-fold - it's a great way to allow for overhanging diecuts without having to increase the overall size of the card and shows just a hint of the decoration inside too. Here's a picture of my card opened out so that you can see the inside fully:


A Drop of Frost - The stamping on my card is a random combination of the stamps in this set, with a few of the snowflakes left over from this card added for dimension. I finished one of these with a frosted droplet - these make perfect centres for a wintery snowflake.

I'm a little pressed for time with all that is going on in the James household during the holiday season, so no the visual summary of the key products used on today's project today although the table at the bottom of this post will of course take you directly to my online store if you would like to purchase any of the items featured on today's card. 

Before you reach for your ink and papers, check out what our amazing team has created to inspire you this week:

Here's a quick recap of our challenge rules:
 
1.  Create a new paper project
2.  Upload your creation to your blog with a link back to us and provide a direct link to the post featuring your challenge submission.
3.  Please link your card to no more than four challenges, TOTAL.
4.  Have FUN!

You can see all of my 'How To' summaries on my 'How To - Tips and Techniques' Pinterest board in case you've missed any. 

Enjoy your day - I shall be recovering from my first Christmas party yesterday and tacking a mountain of ironing today but I'll be back tomorrow with another project. Until then, happy stampin'!


Stampin' Up! Supplies Used: 

Table built using Product Table Builder by The Crafty Owl - Independent Stampin' Up! Demonstrator.

Beautiful Blizzard Panel Card

by Joanne James1. December 2018 16:00

Today I'm sharing the first of three cards that I designed for a recent technique class using the Beautiful Blizzard bundle - take a look:


Here's the low-down on today's card:

A Snowflake Blizzard - On this card I used the Blizzard Thinlits Die to cut a full panel of snowflakes. I used a piece of Whisper White cardstock that I first covered with an adhesive sheet on the reverse, then sponged the whole of the front liberally with Frost White Shimmer Paint for a subtle snowy sparkle. The use of a multi-purpose adhesive sheet is key for making this an easy project, as it means that the snowflakes and the surround can be used by simply peeling them off the backing paper. No fiddling around trying to add liquid adhesives to the narrow snowflake stems! This card features the 'negative' of the diecut; I'll be sharing the other two cards that use the rest of the snowflakes tomorrow and later in the week.

A Stitched Label - The label that features the sentiment on the front of my card is from the Stitched Labels Framelits; so pretty and perfect for the first part of my sentiment, along with a few stamped snowflakes too. 

A Sweet Sentiment - I love the sentiment on this card, which carries over from the front of the card to complete on the inside:

Without the 'season's greetings', this sentiment would be lovely for someone celebrating a winter birthday too. 

I'm a little pressed for time with all that is going on in the James household during the holiday season, so no the visual summary of the key products used on today's project today although the table at the bottom of this post will of course take you directly to my online store if you would like to purchase any of the items featured on today's card. 

Enjoy your evening - I am out at my first Christmas party this evening but I'll be back tomorrow with my card for this week's Paper Players challenge which will also feature snowflakes! Until then, happy stampin'!


Stampin' Up! Supplies Used: 

Table built using Product Table Builder by The Crafty Owl - Independent Stampin' Up! Demonstrator.

All Is Bright Quadriptych Christmas Card #AYSI189

by Joanne James28. November 2018 20:00

Today I'm squeezing in a card  for the current challenge over at As You See It where they have this fun sketch to work with:

The layout features a quadriptych: four panels behind the sentiment element. For a lover of designer paper like me, I was spoilt for choice! So I challenged myself to use a pattern that I hadn't before - take a look:


 Here's the low-down on today's card:

Shine On - The All Is Bright designer papers feature lots of photographic prints that whilst beautiful in their own right, I often struggle to use this type of print on cards. I've been using them to make crackers and they look really festive, but thought a combination of colourful tree light bulbs and stars in a repeating pattern would work for today's card.  

A Top 10 Product - I cropped my sentiment with one of the Stitched Ovals from the Stitched Shapes Framelits. This framelit set is one of my most used tools and would definitely feature in my personal Product Top 10. Unfortunately they aren't available today as they are part of the last of the 10% off Online Extravaganza sales and the allocate stock on this popular item ran out yesterday. They should be back in the store tomorrow at their usual price, so my advice would be to pick them up then - they are worth waiting for. 

Making Spirits Bright - I love the sentiment I featured on the front of today's card which comes from the Making Christmas Bright set - these words ring so true for me! Once all the hard work and preparations are done, one of the things I enjoy most about the festive season is spending quality time with friends. I added a twist of Real Red mixed satin ribbon, an All Is Bright star paper clip and a two-tone sentiment on the inside of my card to finish: 

Here is the visual summary of the key products used on today's project for you to pin for easy reference:


You can see all of my 'How To' summaries on my 'How To - Tips and Techniques' Pinterest board in case you've missed any. 

I'll be back tomorrow with another project. Until then, happy stampin'!


Stampin' Up! Supplies Used:

Table built using Product Table Builder by The Crafty Owl - Independent Stampin' Up! Demonstrator.

Sending Christmas Wishes With The Christmas Traditions Punch Box

by Joanne James27. November 2018 16:00


Back today with a card that is inspired by the wintery woodland photo inspiration over at Just Add Ink and this week's CAS(E) This Sketch:


I went with a clean and modern graphic interpretation of the JAI theme - take a look:


Here's the low-down on today's card:

Wintery Woodland Inspiration - Inspiration comes in many ways and forms; I didn't have a suitable Christmas tree stamp to hand, so decided to take a different route and feature these snowy trees from the Santa's workshop Designer Series Paper that I still had out on my desk from making yesterday's card. I love the subtle green diagonal stripe pattern of this paper too, which looks almost textured in appearance. More of a graphical design, yet still inspired by the photo.

Christmas Traditions - Today's sentiment is another from the Christmas Traditions Punch Box that I used yesterday and is featured on pages 2-3 of the Autumn/Winter catalogue: 


This festive-themed tin is choc-full of crafting goodies for creating through the festive season: with a block, two ink spots, set of 6 stamps and a Christmas Traditions Punch, all you need is to add some cardstock and adhesives and you are all set for some festive fun! Perfect for tags, cards and embellishments for your home-baked goodies, this set would make a lovely seasonal gift for a crafter or someone who likes to add a personal touch to their packages during the festive season. I stamped the sentiment with the line of trees to echo my DSP pattern in Versamark and heat-embossed in white embossing powder.

Winter Colour Duo - My card features only two colours today: Garden Green and Whisper White. Garden Green is the major contributor however the white has more than a passing role to play: In addition to the trees,which are echoed in the heat embossed sentiment, its use to mat the DSP and the short banner behind the punched sentiment shape gives definition to those elements, which might otherwise be lost without it. I also added a strip of retired sparkly white ribbon for the vertical element in the sketch - for a little sparkle and texture. 

Here is the visual summary of the key products used on today's project for you to pin for easy reference:


You can see all of my 'How To' summaries on my 'How To - Tips and Techniques' Pinterest board in case you've missed any. 

I hope you like today's card; I have another one featuring another of the stamps in the Christmas Traditions Punch Box in the coming week or so, so be sure to come back and check it out. I have a few more errands before I get back into my painting and decorating - it's a long job! Enjoy your day and I'll be back tomorrow with another project. Until then, happy stampin'!


Stampin' Up! Supplies Used:

Table built using Product Table Builder by The Crafty Owl - Independent Stampin' Up! Demonstrator.

New Online Exclusives

There are new products available exclusively in the online store from 5 November - check them out here.

Latest Kits!

Stampin Cut and Emboss

The Layered Landscapes Kit and Nature's Paintings Kit are the latest kits in the online store - get yours here!

Shop Online

Access my online shop 24 x 7, 365 days of the year:

Current November hostess code:

9NKXDTTR

Shop Online

Mini Catalogue

BROWSE THE CATALOGUE

'Tis The Season - the new Stampin' Up! Mini Catalogue is here! For more details and to download your copy click here

Scrapbooking

Stampin' Up! has introduced a new range of 12x12" scrapbooking product and kit - the full range is now available to purchase online. To download a copy of the new digital Scrapbooking Catalogue click here.

2024-25 Annual Catalogue

BROWSE THE CATALOGUE

Click on the image to download your copy of the 2024-25 annual catalogue. For a full list of current SU! supplies, go to my online store. If you would like any help or advice, please drop me a line at joanne@thecraftyowl.co.uk or give me a call on 07773 421446 - I'd be happy to help.

Join My Team

It's always a great time to join Stampin’ Up! New team members can get £130 worth of products for only £99 + free business supplies + free shipping + all the fun being a part of Stampin’ Up! Stampin' Up! has something for everyone: join my growing team and benefit from my support to enjoy Stampin' Up! however you choose.

If you're interested, call me for a chat to understand how I can help you realise your goals. Alternatively, if you have already decided to sign up and you just can't wait, please click here for the link to the online form where you can sign up and order your starter kit right away! 

About Me

Hi I'm Joanne and live in Northampton and when I'm not looking after my husband and two beautiful children, am an avid crafter with a passion for all things Stampin' Up!

I must confess that I have never been a big rubber stamper - until I discovered Stampin' Up! that is. I love the fact that I can get such great results with co-ordinating stamps, inks, papers and punches - the possibilities are endless! Join me on my stamping journey as I share the things I love and be inspired to create amazing things yourself!

Follow Me

Monthly Newsletter

Box Builder

Click the button above to use Box Buster to create your custom box design using the Envelope Punch Board!

Kits Collection Now Available!

Stampin Cut and Emboss

The new Kits Collection from Stampin' Up! is now available!

Click here to see the current kits available and order yours online today.

I Design For


Stampin' Up Stuff

This is my personal blog and is not endorsed by Stampin’ Up! I hope you find it a plentiful source of ideas and personal inspiration but please don't copy my designs for contest submission or use for classes, publication or sale without express permission.