You Make A Difference Rainbow Card

by Joanne James20. April 2023 09:00

Today I'm sharing a card that I made last week when I had my 'Begin With A Dream' stamp set out on my desk making this card

Today's card uses the layout above from Try Stamping on Tuesday and embraces the inspiration of 'rainbow' too - take a look:


Here's the low-down on today's card:

Fairly straightforward here - a diecut rainbow using the retired Rainbow Dies for the curved element and a panel of the repeating image of people holding hands, coloured with my Stampin' Blends and finished with a heat-embossed sentiment: 

I had intended to stick with the colours of my diecut arches but did get a little carried away with colouring the people - there is so much colour on this card it is truly a rainbow! I still love the fun, colourful feel though and I think it would be a great card for someone who needs a little mood boost (a teacher, maybe?) The 'Begin With A Dream' stamp set is really useful for this kind of card - it also features a really useful globe stamp that I've yet to feature on a card (so many stamps, so little time!)

Here is the visual summary of the key products used on today's project for you to pin for easy reference:


You can see all of my 'How To' summaries on my 'How To - Tips and Techniques' Pinterest board in case you've missed any. 

Enjoy your day; I am in the middle of a serious office clear-out so my day will be a busy one; I need to make progress before I can reward myself with some time crafting with my new annual catalogue preorder goodies that finally arrived yesterday! I'll definitely be back tomorrow with another project. Until then, happy stampin'!


Stampin' Up! Supplies Used:

Table built using Product Table Builder by The Crafty Owl - Independent Stampin' Up! Demonstrator.

Rainbow Cottage Wreaths Christmas Card #GDP364

by Joanne James16. October 2022 12:59

Today I'm sharing an extra card that I made earlier this week that was inspired by the fun challenge over at Global Design Project #GDP364 this week:

It's CASE The Designer week featuring the talented Madeleine Mrotzek, who makes the most beautiful cards! Madeleine's cards often feature rainbows of colour, small images and lots of white space. I couldn't resist the opportunity to play along - take a look:


Here's the low-down on today's card:

I kept with the white slimline basic layout and followed her rainbow of colour, but instead of stamped balloons opted for a sprinkling of tiny stamped snowflakes (from the retired 'Snowflake Wishes' stamp set overlaid with a row of rainbow Cottage Wreaths diecuts. I finished with a silver heat-embossed sentiment from 'Christmas Banners' and a sprinkling of iridescent rhinestones - don't you just love how they pick up the colours of everything they reflect:


The larger wreaths fill this Christmas card with a rainbow of festive colour and the slimline design is a great way to showcase these pretty dies.

Here is the visual summary of the key products used on today's project for you to pin for easy reference:


You can see all of my 'How To' summaries on my 'How To - Tips and Techniques' Pinterest board in case you've missed any. 

Enjoy your day and I'll be back tomorrow with another project. Until then, happy stampin'!


Stampin' Up! Supplies Used:

Table built using Product Table Builder by The Crafty Owl - Independent Stampin' Up! Demonstrator.

Nothing's Better Than Coffee And Cocktails AYSI276

by Joanne James3. June 2022 12:00

Today I'm sharing my design team card for our new challenge over at As you See It where it's time for a theme challenge:


I was tempted to do something with lemons, as I love the bright yellow of the lemons against the blue in our inspiration photo today, however I have had a rainbow-themed idea percolating in my head for a little while so decided to try that out instead. As a result, I ended up wtih not one but two cards for you today - take a look:


Here's the low-down on today's cards:

Rainbow Pastels Coffee - I started off with this card that was inspired by the pastel rainbow colours over at Fusion (you can see them on the badge at the bottom of this post). I stamped and diecut a collection of coffee cups using the Nothing's Better Than stamp set and Love You More Than co-ordinating dies, and adhered them across the centre of my slimline card. I added a simple stamped sentiment either side, with the diecut 'coffee' added on top using adhesive foam sheet:


 I carried the sentiment and coffee cup theme through to the inside (and did the same with my second card too):


 I was going for a clean and simple card with lots of white space and could have stopped there, but decided that it would be fun to add a selection of sequins from my stash that co-ordinated with my rainbow colours around the cups for a little extra sparkly detail - it's also a nod to the round plates in the Fusion photo. Check out how pretty they shine:


Rainbow Brights Cocktails - Having completed this card, I thought it would be fun to make another card with the same idea, this time using the cocktail glass in the Nothing's More Than set. I changed up my rainbow of colours from pastels to brights (I was thinking more of a day to night vibe!) for my second card:


The cocktail glasses are larger than the coffee cups, so I went for a more uniform positioning across the centre of the card and placed my stamped sentiments to either side for better balance. I wanted to preserve my white space so didn't add as many sparkles this time; I still couldn't resist a few iridescent rhinestones to add to my cocktail party feel though!


So which are you - Team Coffee of Team Cocktails? Today it's a Bank Holiday here in the UK to celebrate Her Majesty The Queen's Platinum Jubilee - 70 years on the throne, wow! I think this means I'll be doing both as the day progresses; any excuse to raise a glass, ma'am!

Here is the visual summary of the key products used on today's project for you to pin for easy reference:


You can see all of my 'How To' summaries on my 'How To - Tips and Techniques' Pinterest board in case you've missed any. 

Here's a summary of our challenge rules:

  • Create any card, scrapbooking page, 3D project or packaging project that fits the challenge.
  • Please include the challenge graphic and link back to the challenge in your blog post. Turn off word verification so we can leave you lots of lovely comments. Make sure you link the post not the whole blog to the Linky. Use #AYSIXXX when uploading to a public gallery.
  • If you’re unsure about ‘the rules’, check the details under the Challenge Guidelines tab on the As You See It Challenge homepage.
We look forward to seeing your creations in the AYSI gallery.

Enjoy your day and I'll be back tomorrow with another project. Until then, happy stampin'!


Stampin' Up! Supplies Used:

Table built using Product Table Builder by The Crafty Owl - Independent Stampin' Up! Demonstrator.


In The Moment And A Quick Rainbow For AYSI271

by Joanne James25. March 2022 12:00

Today I'm sharing my design team card for our new challenge over at As you See It where the lovely Heather H had a speed stamping challenge for us:
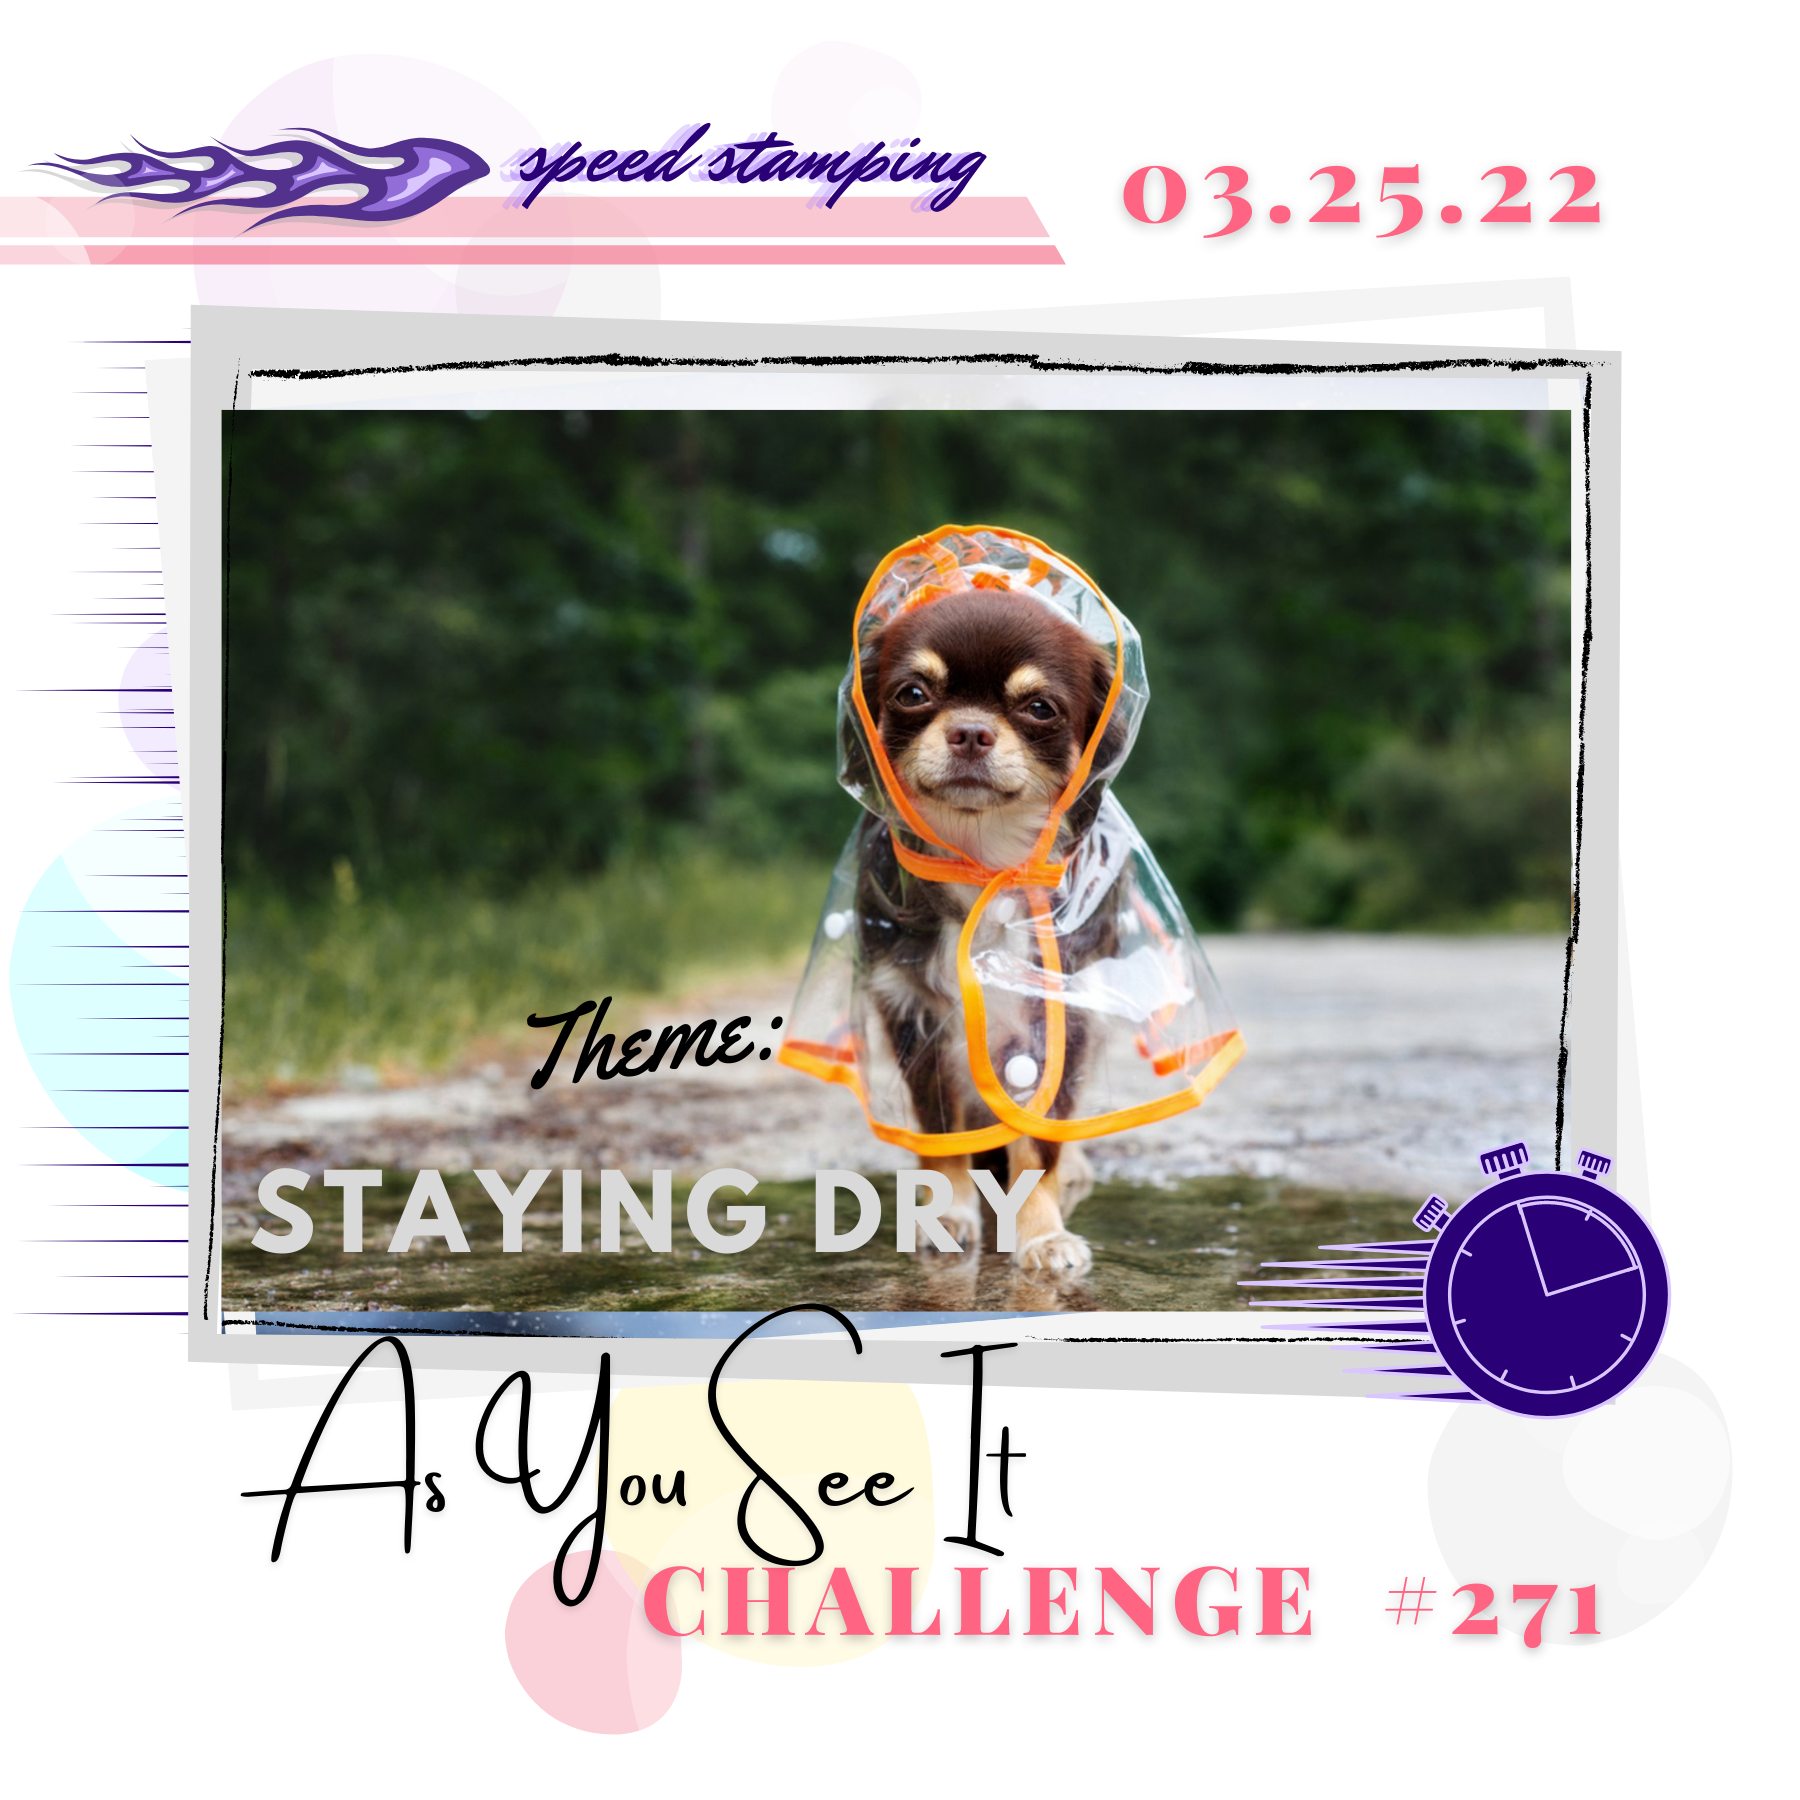
 

Heather's theme initially had me scratching my head this week, as I have no current stamps that are wellington boots or umbrellas; then I suddenly realised 'staying dry' can be as simple as taking the outside in! That thought led to another and I was away - take a look at what I came up with:
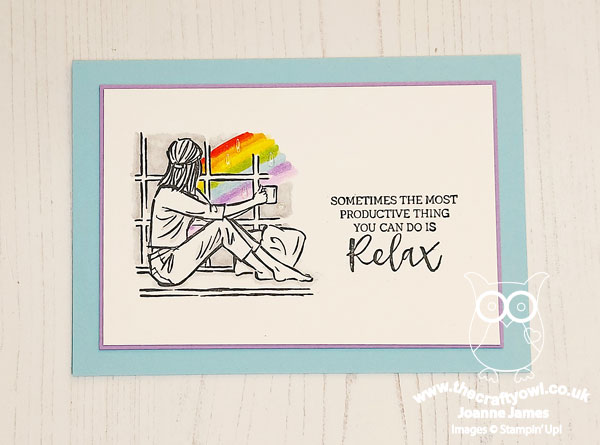
 

Here's the low-down on today's card:

Yes, another rainbow for you today! I still had the 'In The Moment' stamp set out on my desk having prepped for my class using this set earlier this week. In my class, we looked not only at how to colour with Stampin' Blends, along with pencils, Stampin' Write markers and blending tips for each medium, but also different ways in which you can use line drawn images, including ways of colouring beyond the obvious. This card is a 'bonus' for the ladies that attended my class as it looks at another way to colour an image that might not be immediately obvious: here I've focused less on the inside and more on the outside - what can be seen beyond the scene, which in this case is the stormy grey sky and a beautiful rainbow through the window itself.

I used all 10 minutes of my allotted time for this week's speed challenge, first cutting my card base, mat and white pieces and stamping the image and sentiment in Memento Black, using my Stamparatus to get a nice solid image, then I used the remainder of the time to colour my image. I went with a traditional rainbow and coloured it with my Blends, simply drawing in the arch of colour and blending between each to get a smooth-ish finish. I added some clear Wink of Stella to give my rainbow some sparkle and a few clear enamel raindrops to add to the effect:
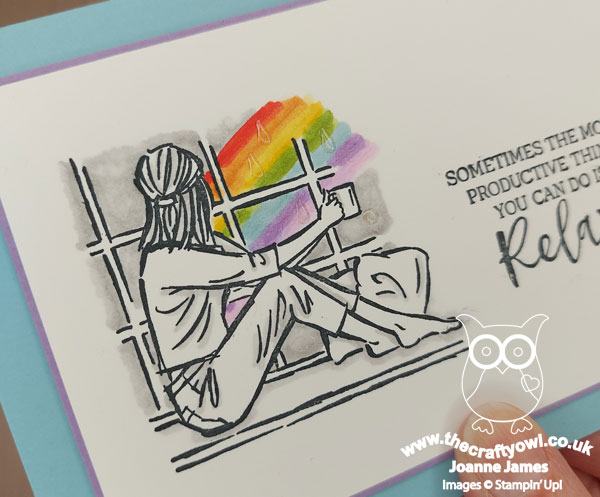
In the interests of time, I coloured the rest of my sky in Smoky Slate and added a few grey highlights to the image of lady, but that was all. I really like the effect - the lack of colour on the main image really draws the eye to the rainbow outside and the pop of colour it adds. 

Here is the visual summary of the key products used on today's project for you to pin for easy reference:
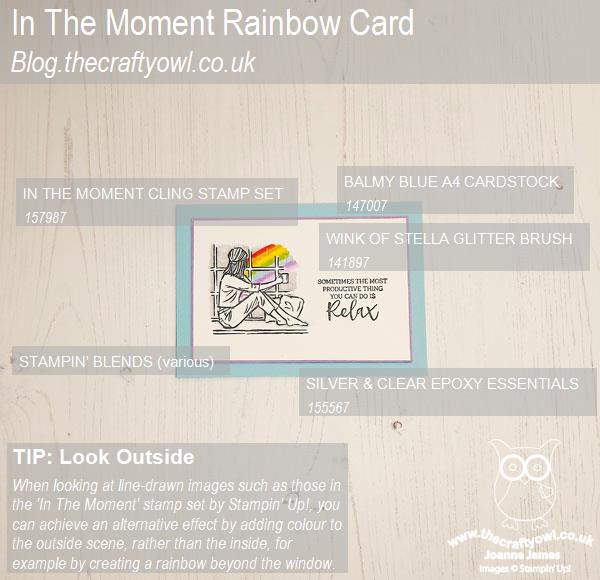
 

You can see all of my 'How To' summaries on my 'How To - Tips and Techniques' Pinterest board in case you've missed any. 

This is my second entry over at The Paper Craft Crew's rainbow colour challenge this week - traditional rainbow colours this time - and another entry for the rain/rainbow challenge over at Global Design Project #GDP335.


Here's a summary of our challenge rules:

  • Create any card, scrapbooking page, 3D project or packaging project that fits the challenge.
  • Please include the challenge graphic and link back to the challenge in your blog post. Turn off word verification so we can leave you lots of lovely comments. Make sure you link the post not the whole blog to the Linky. Use #AYSIXXX when uploading to a public gallery.
  • If you’re unsure about ‘the rules’, check the details under the Challenge Guidelines tab on the As You See It Challenge homepage.
  • In a speed stamping challenge, please time yourself and say in your post how long your card took to complete. 
We look forward to seeing your creations in the AYSI gallery.

I hope you're enjoying my rainbows in all of their various guises this week because - spoiler alert! - I have another rainbow card for you tomorrow! Enjoy your day and I'll be back tomorrow with another project. Until then, happy stampin'!


Stampin' Up! Supplies Used:

Table built using Product Table Builder by The Crafty Owl - Independent Stampin' Up! Demonstrator.

Under My Umbrella Rainbow Scraps Card CCS417

by Joanne James27. April 2021 13:00

It's Tuesday and time for a new challenge over at CAS Colours & Sketches. This week's challenge is a sketch challenge and Wei has asked that we get creative with diagonals this week:


Feel free to flip or rotate the sketch when making your card - which I did this week! I looked at those diagonals and thought that if I rotated the base through 180 degrees, they would make a rainbow! Take a look to see what I mean:


Here's the low-down on today's card:

I used a selection of 5mm wide offcuts from my scrapbox in a selection of rainbow colours (see below) and glue them across the diagonal of my Balmy Blue card base. I extended the Highland Heather piece across the card front, then took a piece of Basic White and cut an angled border with my clouds die from the retiring Happy Dies set for my top panel:

A simple sentiment from the also retiring 'Under My Umbrella' stamp set in Pacific Point finished my card - and not an umbrella in sight!

Our lovely DT member Vicky is also the hostess over at Addicted to CAS this week where she has chosen the code word 'sky' so I'm linking up there too - with sky, rainbow and clouds, my card today doesn't have anything else!!

Here is the visual summary of the key products used on today's project for you to pin for easy reference:


You can see all of my 'How To' summaries on my 'How To - Tips and Techniques' Pinterest board in case you've missed any. 

As a reminder, for our colour challenges, you must use all of the stated challenge colours. You may also use neutral colours; however, the challenge colours should be the most noticeable ones featured on your card. We use Stampin' Up! color names for reference, but you are welcome to use any other companies' products as long as you match the challenge colours as closely as possible.

Enjoy your day and I'll be back tomorrow with another project. Until then, happy stampin'!


Stampin' Up! Supplies Used:

Table built using Product Table Builder by The Crafty Owl - Independent Stampin' Up! Demonstrator.

Hey Rainbow Birthday Chick CCS 408

by Joanne James23. February 2021 13:00

It's Tuesday and time for a new challenge over at CAS Colours & Sketches. This week's challenge is a sketch challenge and Julie has asked that we use the following layout:


Feel free to flip or rotate the sketch when making your card. For my card today I am excited to use a new stamp set that I've been waiting for an age to arrive - take a look:


Here's the low-down on today's card:

Hey Birthday Chick - Remember the 'Hey Chick' stamp set that was a Sale-A-Bration stamp set in 2017? Well, you may have noticed a set in the current mini catalogue called 'Hey Birthday Chick' featuring the same group of feathered friends, this time all ready to celebrate a birthday, complete with cake, balloon and party hat! I used that crazy chicken with the mad hair on my card today, featuring both the old one from the 'Hey Chick' set and the one with the birthday cake from the 'Hey Birthday Chick' set. 

Chick and Birthday Chick Dies Exclusive - Not only are there the two chick stamps available, they are also available as part of exclusive bundles that will be available until 30 June. In addition to some great standalone dies, such as a fence, hen house, eggs, corn and a trellis, to name but a few, there are also dies to make cutting out any of the chicken shapes with ease. I used them to cut out one of my chickens to add a little dimension to my pair:


I am doing very well at meeting the CAS brief this week even if I say so myself, although I did take a small liberty with the sketch since my shapes are not identical. They would have been, but the temptation of the cupcake proved too much for chicken number one!!

Playing With Patterns - The colours for the rainbow colouring on my card today comes from the Playing With Patterns designer paper (Blends colours detailed below). Those subtle stripes were just enough to add interest to the base of my card. 

My rainbow stripes and funky rainbow-feathered chicks are perfect for the colour theme of 'rainbow colours' over at Just Us Girls this week and I'm also playing along with my gal pals over at TicTacToe where Team O are in charge this week and I went down the first column of Jeanne's board with Cute Critter/Celebrate/Coloured. 

Here is the visual summary of the key products used on today's project for you to pin for easy reference:


You can see all of my 'How To' summaries on my 'How To - Tips and Techniques' Pinterest board in case you've missed any. 

Enjoy your day; the sun is shining here so since one of the James Juniors is officially on a Games lesson this afternoon, it looks like I am going to have company for a nice long walk. Following yesterday's announcement, we are officially on a two-week countdown to a return to school, so I think I need to make the most of it! I'll be back tomorrow with another project. Until then, happy stampin'!


Stampin' Up! Supplies Used:

Table built using Product Table Builder by The Crafty Owl - Independent Stampin' Up! Demonstrator.

Rainbow Feathers Just For You

by Joanne James9. April 2020 21:22

I've been busy making, photographing and video editing the past couple of days and I've just got time to squeeze in a card for the current challenge over at Just Us Girls where their challenge this week is 'feathers':


I recently purchased the 'Positive Thoughts' stamp set and took advantage of the limited edition co-ordination release to pick up the co-ordinating dies too. As well as a die to cut out the feather stamped image, I discovered it also had a slightly larger embossed feather die so I chose to use this on my card:


I went for a rainbow of overlapping feathers and a simple embossed sentiment with a little baker's twine to finish - simple!

Here is the visual summary of the key products used on today's project for you to pin for easy reference:


You can see all of my 'How To' summaries on my 'How To - Tips and Techniques' Pinterest board in case you've missed any. 

Enjoy your evening and I'll be back tomorrow with another rainbow project - I think I've had rainbows on the brain today! Until then, happy stampin'!


Stampin' Up! Supplies Used:

Table built using Product Table Builder by The Crafty Owl - Independent Stampin' Up! Demonstrator.

Rainbow Be Mine Stitched Die Stack for #GDP224

by Joanne James25. January 2020 16:00

As promised, here's the second of the cards I made for this week's challenge over at the Global Design Project inspired by Steffi Helmschrott's pretty rainbow card:


This time I used the same basic colours but decided to incorporate my rainbow in a stack of hearts diecuts from the Stitched Be Mine Dies:


This time I used the 'Love You Lots' sentiment from the 'Heartfelt' stampset for my greeting, heat embossing it in white onto Basic Black and fussy cutting it out. I stamped a few small black hearts but didn't like the shape, so covered them up with some black diecut ones (ssh - don't tell ;-)) I took another picture so that you could see the depth created by the stacked hearts:


Isn't that cool?

Here is the visual summary of the key products used on today's project for you to pin for easy reference:


You can see all of my 'How To' summaries on my 'How To - Tips and Techniques' Pinterest board in case you've missed any. 

I think I prefer this card to my earlier one - if you missed it you can see that card here. I like the fact that the more generic sentiment means this card could be used for a ton of different occasions, not just Valentine's - after all, you can only send so many Valentine's, right?! What do you think? Do you have a favourite? Leave me a comment below - I'd love to hear your thoughts!  I'll be back tomorrow with my project for the latest challenge over at The Paper Players and this week I'm the hostess. Until then, happy stampin'!


Stampin' Up! Supplies Used:

Table built using Product Table Builder by The Crafty Owl - Independent Stampin' Up! Demonstrator.

Heartfelt Rainbow Valentines for #GDP224 and #FF0051

by Joanne James25. January 2020 10:00

Hello blog friends! Did you miss me? This has been a great week for crafting, but not so for blogging I'm afraid. I had an unscheduled service outage that meant my Wednesday and Thursday posts didn't happen unfortunately. We are though back online and today I'm sharing one of the cards I made for this week's challenge over at the Global Design Project that is also perfect for the current challenge over at Festive Friday:


I found myself inspired by Steffi's rainbow card this week over at GDP and armed with hearts, arrows and red (and some glitter sparkle from the rhinestones) from the Festive Friday inspo list, I created this rather unconventional Valentine's Day card:


Here's the low-down on today's card:

I stayed true to the layout and rainbow colours of Steffi's card with my arrows and neutral card base, but decided to feature a bold heart-shaped Valentine sentiment. also from the 'Heartfelt' stampset, that I heat-embossed in black onto Whisper White and punched out using the co-ordinating heart punch. I added a sprinkling of black hearts that I centred with some retired epoxy hearts to echo the rainbow theme. I took another picture so that you could see the lovely shine on the heart:


Here is the visual summary of the key products used on today's project for you to pin for easy reference:


You can see all of my 'How To' summaries on my 'How To - Tips and Techniques' Pinterest board in case you've missed any. 

Rebecca took one look at this card and declared it should be her Valentine - high praise indeed and clearly demonstrating she is past the 'pink and girly' phase!

Enjoy your day; we have a hockey league match this afternoon then are off to the theatre to see JB Priestley's 'An Inspector Calls'. I remember studying this play for GCSE English some 30+ years ago, so imagine my surprise to find it's still on the syllabus - clearly an 'oldie but goodie' from an examination perspective! If I can find the time I might be back later with another GDP entry, otherwise I'll double-up tomorrow; either way and I'll be back tomorrow with another project for the latest challenge over at The Paper Players. Until then, happy stampin'!


Stampin' Up! Supplies Used:

Table built using Product Table Builder by The Crafty Owl - Independent Stampin' Up! Demonstrator.

Tags: , , , , , , ,

Cards | Shop Online | Shop Stampin' Up! Online | Stamping

Mini Catalogue

BROWSE THE CATALOGUE

The mini catalogue is now live! Read and download your copy here.

Shop Online

Access my online shop 24 x 7, 365 days of the year:

Current April hostess code:

VDKNV7BH

Shop Online

Join My Team

It's always a great time to join Stampin’ Up! New team members can get £130 worth of products for only £99 + free business supplies + free shipping + all the fun being a part of Stampin’ Up! Stampin' Up! has something for everyone: join my growing team and benefit from my support to enjoy Stampin' Up! however you choose.

If you're interested, call me for a chat to understand how I can help you realise your goals. Alternatively, if you have already decided to sign up and you just can't wait, please click here for the link to the online form where you can sign up and order your starter kit right away! 

Latest Kit!

Stampin Cut and Emboss

The Rock Legend Kit has all you need to make 8 cards with coordinating envelopes. Along with the new Panda Friends Kit, both are available from January 4th for just £14 each - get yours here!

2023-24 Annual Catalogue

BROWSE THE CATALOGUE

Click on the catalogue for a full list of current SU! supplies - if you would like to order any of the items featured, please drop me a line at [email protected] or give me a call on 07773 421446 - I'd be happy to help.

New Online Exclusives

There are new products available exclusively in the online store from 5 March - check them out here.

About Me

Hi I'm Joanne and live in Northampton and when I'm not looking after my husband and two beautiful children, am an avid crafter with a passion for all things Stampin' Up!

I must confess that I have never been a big rubber stamper - until I discovered Stampin' Up! that is. I love the fact that I can get such great results with co-ordinating stamps, inks, papers and punches - the possibilities are endless! Join me on my stamping journey as I share the things I love and be inspired to create amazing things yourself!

Follow Me

Monthly Newsletter

Box Builder

Click the button above to use Box Buster to create your custom box design using the Envelope Punch Board!

Kits Collection Now Available!

Stampin Cut and Emboss

The new Kits Collection from Stampin' Up! is now available!

Click here to see the current kits available and order yours online today.

I Design For


Stampin' Up Stuff

This is my personal blog and is not endorsed by Stampin’ Up! I hope you find it a plentiful source of ideas and personal inspiration but please don't copy my designs for contest submission or use for classes, publication or sale without express permission.