Christmas and Halloween In The Pink

by Joanne James18. October 2023 19:38

I was feeling a little under the weather today, so I retreated to my craft room to play along with a couple of challenges that enabled me to use up some of my retired bits and pieces!

First up a pink Christmas card to play along with the ladies over at Jingle Belles that uses the current Try Stampin' On Tuesday layout:


The retired Whimsy and Wonder designer paper was perfect for a pink Christmas card and a couple of stitched snowflakes and sentiment from the 'Merry Snowflakes' stamp set, which I heat embossed in silver - you can see that a bit better on the photo below:


My second card is a 'dies only' card for the current challenge over at Addicted to CAS that uses three of the four colours on the Color Dare board (all except Glacier) that is also for the 'Anything Spooky' theme over at AA Cards:


I made my ghost using the retired Boo To You and Fall Fun Framelits; it's for my daughter, hence the pink card base and I added the 'Boo!' with foam for a little added depth:


I added googly eyes and a flower for a feminine touch, although I think this makes my ghost rather more sweet than spooky!

A couple of cards that used up some of my retired stash, so no supplies list today. It is really dark and stormy here today too with the arrival of Storm Babet, so it made photographs a little trickier too - hopefully still a few creative ideas for you though! 

Enjoy your day and I'll be back on Friday with another project. Until then, happy stampin'!

Card 1:    


Card 2:       

Whimsy and Wonder Holly Christmas Card CCS 446

by Joanne James16. November 2021 12:00

It's Tuesday and time for a new challenge over at CAS Colours & Sketches. I am your host for the month of November and this week I have another colour challenge for you: 


 I am also playing along with Sue's challenge over at Addicted To CAS where the code word is 'circle' as I've used circles on my card today as part of my layout and design - take a look:


Here's the low-down on today's card:

The colour scheme for my challenge this week was taken straight from the oh-so-pretty Whimsy and Wonder designer paper. Mossy Meadow and Polished Pink is not a colour combination that shouts 'festive' particularly, but I do rather like it - especially with the addition of metallic silver. I chose one of the non-foiled patterns that has a tiny holly pattern on it and diecut a bunch of circles and added them in a vertically aligned column on my cardfront. I used a solid colour card base as I wanted them to blend in more than stand out against a brighter white, then overlaid them with a contrasting pink banner with my silver heat embossed sentiment, that I anchored with a piece of holly that I stamped, heat embossed, coloured and diecut with a stamp that is rather overlooked in the Whimsical Trees bundle I think:

I also added a simple silver twine bow (maybe a bit too blingy for a CAS card but it's Christmas - that's my excuse and I'm sticking to it!), before finishing off the inside of my card with a sentiment greeting from the same set and a leftover partial circle- waste not, want not and all that!

I rather like this simple card and I think these colours work surprisingly well together. What do you think? I'd love you to leave me a comment below with your thoughts, or better still play along - I can't wait to see what you create!  

Here is the visual summary of the key products used on today's project for you to pin for easy reference:


You can see all of my 'How To' summaries on my 'How To - Tips and Techniques' Pinterest board in case you've missed any. 

As a reminder, for our colour challenges, you must use all of the stated challenge colours. You may also use neutral colours; however, the challenge colours should be the most noticeable ones featured on your card. We use Stampin' Up! color names for reference, but you are welcome to use any other companies' products as long as you match the challenge colours as closely as possible.

Enjoy your day. I have one of the James Juniors home poorly today, so am juggling jobs with nurse duty. Not sure whether I'll manae a creative post tomorrow but will be back for sure on tursday with my TicTacToe post and a reminder that it will be the last day to save in the seasonal sale. Until then, happy stampin'!


Stampin' Up! Supplies Used:

Table built using Product Table Builder by The Crafty Owl - Independent Stampin' Up! Demonstrator.

White Christmas Tree Trio

by Joanne James11. November 2021 08:00

Today I'm sharing a card for the current challenge over at Less Is More where it's lucky dip week and we are being asked to work with Winter Whites:

I decided to use a trio of diecut Christmas trees to showcase my winter whites - take a look:


Here's the low-down on today's card:

I couldn't resist another outing for my Whimsy and Wonder skinny trees, but this time I did at least include one of the other diecut trees in the set so that it didn't feel left out! I find the best way to create an all-white card is to concentrate on adding different elements of texture and/or pattern. To this end, I diecut two trees from (retired) white glimmer paper and diecut the larger tree in white and popped it up on dimensionals with the glimmer paper layered beneath:

I added a silver heat-embossed sentiment that fitted with my sparkly trees to complete my card.

Here is the visual summary of the key products used on today's project for you to pin for easy reference:


You can see all of my 'How To' summaries on my 'How To - Tips and Techniques' Pinterest board in case you've missed any. 

So does today's card have you dreaming of a white Christmas? I read in the press yesterday that we are in for a hard Winter here in the UK, with heavy snow forecast before the end of this month. I'm hoping that's fake news - a white Christmas is one thing, but heavy snow in November - no thank you!!

Enjoy your day and I'll be back tomorrow with another project. Until then, happy stampin'!


Stampin' Up! Supplies Used:

Table built using Product Table Builder by The Crafty Owl - Independent Stampin' Up! Demonstrator.

Well Defined And The Meaning Of Christmas AYSI262

by Joanne James29. October 2021 13:00

I'm back with my second card of the day: this time I'm sharing my design team card for our new challenge over at As you See It where it's time for a festive 'fill in the blank' challenge:


I used the sketch over at Try Stamping on Tuesday for my layout and I knew exactly which stamp I needed for today's 'fill in the blank' - take a look:


Here's the low-down on today's card:

Well Defined - This sentiment from the 'Well Defined' stamp set sums up perfectly what Christmas means to me: family. Christmas is the one time of the year when my immediate family is always able to be together - no work, no school, no sport, simply the opportunity to spend quality time which each other and enjoy each other's company. We are often hosting extended family during the festive season, so it tends to be a busy family time and not an especially restful one (not for me, anyway!). Last year's 'lockdown Christmas' was unusually quiet for us, but I didn't enjoy it any less; if anything, I personally enjoyed it even more as I was freed from many of the hostess duties that normally fall to me. That said, a return to normality this year will be welcomed - there is nothing like the presence of family to sum up all that is good about Christmas, for sure.

A Play On Words - I paired my sentiment with some Whimsy and Wonder designer paper featuring gifts - it seemed appropriate given the play on the words 'presence' and 'presents' in the sentiment. i love the non-traditional colour combination of this paper and the iridescent foil detailing - so pretty! 

Scalloped border Detail - I backed my designer paper with a panel of Misty Moonlight that I added a scalloped border to one edge, cut using the Scalloped Contour Dies; it has a subtle pierced edge detail that I love. I also added a sparkly ribbon bow to complete my card:

So what does Christmas mean to you? I would love you to leave me a comment below - better still, make a card and link it up to our gallery during the next 2 weeks!

Here is the visual summary of the key products used on today's project for you to pin for easy reference:


You can see all of my 'How To' summaries on my 'How To - Tips and Techniques' Pinterest board in case you've missed any. 

Here's a summary of our challenge rules:

  • Create any card, scrapbooking page, 3D project or packaging project that fits the challenge.
  • Please include the challenge graphic and link back to the challenge in your blog post. Turn off word verification so we can leave you lots of lovely comments. Make sure you link the post not the whole blog to the Linky. Use #AYSIXXX when uploading to a public gallery.
  • If you’re unsure about ‘the rules’, check the details under the Challenge Guidelines tab on the As You See It Challenge homepage.
  • In a Fill in the Blank challenge, complete the sentence in the Challenge Banner with the phrase that is true for you and create your project using the words you used. Tell us what you said in your blog or on your site.
We look forward to seeing your creations in the AYSI gallery.

Enjoy your day; we have haircuts, lunch out and shopping on the cards today as we continue to enjoy the half-term school break. I'll be back tomorrow with another project. Until then, happy stampin'!


Stampin' Up! Supplies Used:

Table built using Product Table Builder by The Crafty Owl - Independent Stampin' Up! Demonstrator.

Whimsy and Wonder Stitched Snowflakes in Pink PP564

by Joanne James24. October 2021 08:00


Today it's Sunday and time for this week's new challenge over at The Paper Players! It's the turn of the fabulous LeAnne to host this week and she has my favourite, a sketch challenge for you to work with:


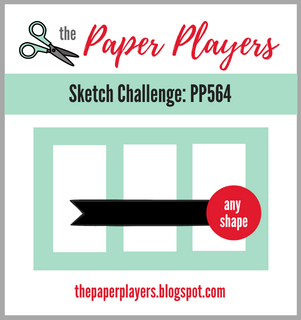
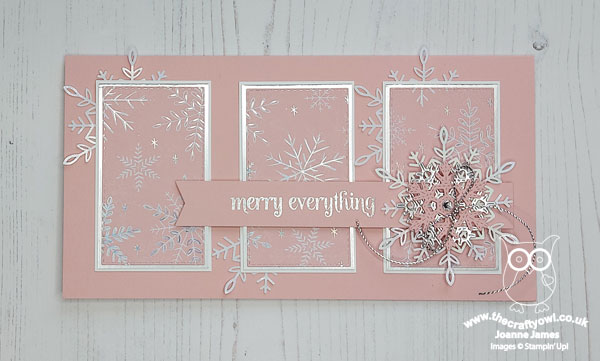
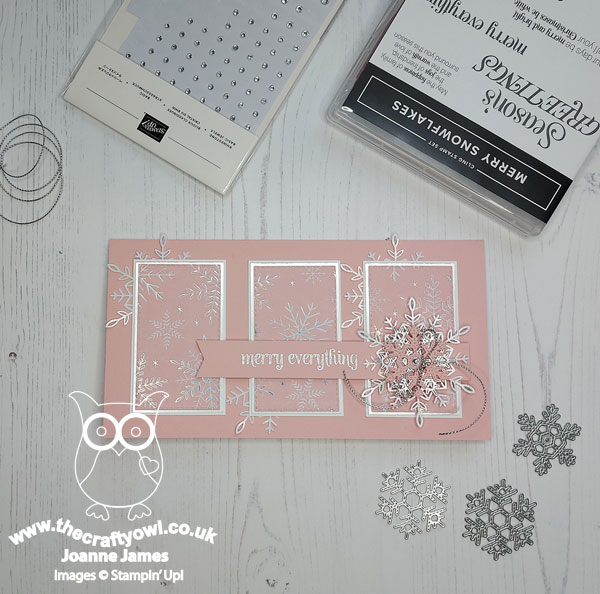
So many ways to use this sketch! I decided to go with a larger slimline card and showcase one of my favourite paper designs in the current mini catalogue - take a look:


Here's the low-down on today's card:

Whimsy and Wonder - I love the rather less traditional colours of the Whimsy and Wonder specialty designer series paper and I particularly love the iridescent foiling on some of the sheets, such as the snowflakes on the paper I am featuring on today's card. I cut three rectangular panels of DSP using my stitched rectangle dies and matted each with some brushed silver foil cardstock and a layer of basic white too.

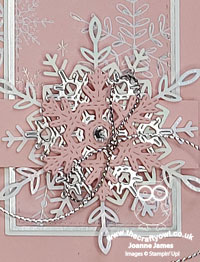
Stitched Snowflakes - For the focal point to anchor my banner, I decided to create a large layered snowflake, using two snowflakes cut using my Stitched Snowflakes Dies and backed this with an additional iridescent snowflake. I added a large rhinestone and silver trim bow - here's a close up so that you can see just how pretty it is:


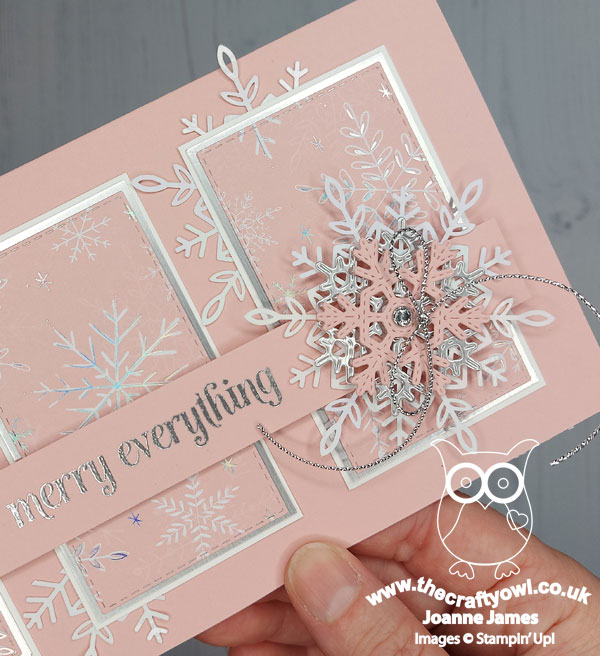
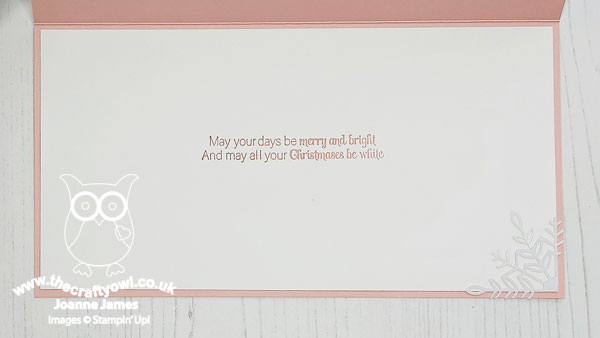
Finishing Touches - I heat embossed my sentiment from the 'Merry Snowflakes' stamp set in silver onto a banner of Blushing Bride on the front of my card, and stamped another sentiment from the same set onto the inside panel:


I added snippets of snowflakes both to the inside and beneath the panels on the outside of my card to complete the look - you can never have too many snowflakes, right?! I just love this card - so gloriously feminine, yet festive too!

Here is the visual summary of the key products used on today's project for you to pin for easy reference:


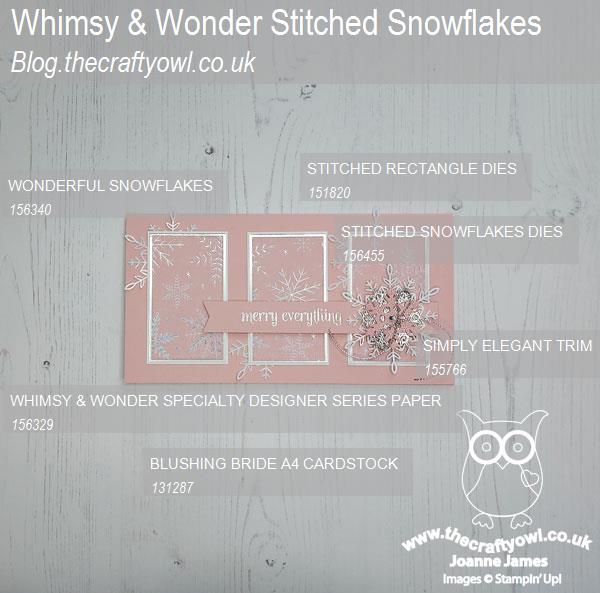
You can see all of my Product and 'How To' summaries on my 'How To - Tips and Techniques' Pinterest board in case you've missed any. 

Before you reach for your ink and papers, check out what our amazing team has created to inspire you this week:

Here's a quick recap of our challenge rules:
 
1.  Create a new paper project
2.  Upload your creation to your blog with a link back to us and provide a direct link to the post featuring your challenge submission.
3.  Please link your card to no more than four challenges, TOTAL.
4.  Have FUN!

You can see all of my 'How To' summaries on my 'How To - Tips and Techniques' Pinterest board in case you've missed any. 

Enjoy your day; we are enjoying a restful day at home. If it stays fine we might go for a long walk this afternoon, and since it's the start of half term I may see if I can cajole the rest of the James family into completing a jigsaw with me on our return! I'll be back tomorrow with another project. Until then, happy stampin'!


Stampin' Up! Supplies Used: 

Table built using Product Table Builder by The Crafty Owl - Independent Stampin' Up! Demonstrator.


Whimsy And Wonder Christmas Tree Trio For Color Throwdown

by Joanne James20. October 2021 07:00

Today I'm sharing a very special card as it was made for this week’s new challenge over at Color Throwdown, where I am delighted to be the featured designer this week!

This is the colour palette we are working with:


How pretty is that trio of pastels?! I am in a real groove with Christmas card making at the moment, so no ghosts for me! I decided on a trio of Christmas trees instead - take a look:


Here's the low-down on today's card:

Christmas Tree Dies - These skinny Christmas trees are from the Christmas Tree Dies and I think they are my absolute favourites in the set! They can be used in traditional and less conventional colours and still look great. I cut a tree in each colour and also used a piece of watercolour-effect designer paper that was from last year‘s winter mini catalogue that featured the same heather and aqua tones.

Texture and Pines - I used this week’s Global Design Project layout #GDP314 for my card today and for square element used some shimmer white cardstock embossed with the Evergreen embossing folder. This adds a lovely sheen and great texture and dimension as a background detail. 

Seasonal Swirls - I decided to use the star wreath piece from the Seasonal Swirls Dies for the round element of the design, cut from retired white glimmer paper for a full-on winter sparkle. I also added a few sequins and flicked my background with my clear Wink of Stella pen for added shimmer.


I added a sentiment from the 'Sparkle of The Season' stamp set, anchored with a pink enamel heart to complete my card.

Here is the visual summary of the key products used on today's project for you to pin for easy reference:


You can see all of my 'How To' summaries on my 'How To - Tips and Techniques' Pinterest board in case you've missed any. 

Enjoy your day; you should definitely check out the Color Throwdown design team creations to see what they made of this sugared-almond inspired colour palette this week.


Remember too that the 24 hour stamp sale is now in full swing - full details on yesterday’s post here. You have until 10.50pm this evening to snap up a bargain!

I'll be back tomorrow with another project. Until then, happy stampin'!


Stampin' Up! Supplies Used:

Table built using Product Table Builder by The Crafty Owl - Independent Stampin' Up! Demonstrator.

Bright Whimsical Christmas Tree Trio For CCS 435

by Joanne James31. August 2021 12:00

It's time for this week's new challenge over at CAS Colours & Sketches and since it's the 5th Tuesday of the month it's time for the double: a combination of an old sketch and colour palette, combined. Bhavya has chosen the following combination:


I struggled a little with this week's challenge! I don't have any of those retired colours, so went with my closest current match and after going through a ton of stamp sets and dies, I finally decided to go with an unconventionally coloured Christmas card featuring a trio of skinny trees for my shapes:


Here's the low-down on today's card:

These tree dies are from the Christmas Trees Dies set in the Whimsy and Wonder suite and are the trees that caused me to invest in this set - I love the textured, skinny design. I layered them into the corner of my panel and used a greeting from the Whimsical Trees stamp set in the same bundle, having coloured it with my Stampin' Write Markers so that I could highlight the scripted words in Magenta Madness pink:


Super simple with only four products needed. I quite like the unconventional colour scheme for Christmas, but if you're more of a traditionalist it would work in reds and greens too!

Here is the visual summary of the key products used on today's project for you to pin for easy reference:


You can see all of my 'How To' summaries on my 'How To - Tips and Techniques' Pinterest board in case you've missed any. 

As a reminder, for our colour challenges, you must use all of the stated challenge colours. You may also use neutral colours; however, the challenge colours should be the most noticeable ones featured on your card. We use Stampin' Up! color names for reference, but you are welcome to use any other companies' products as long as you match the challenge colours as closely as possible.

Enjoy your day; we are going swimming and are making meatballs today amongst other things! I'll be back tomorrow with another project. Until then, happy stampin'!


Stampin' Up! Supplies Used:

Table built using Product Table Builder by The Crafty Owl - Independent Stampin' Up! Demonstrator.

Whimsy and Wonder Mint Macaron Christmas Tree for FMS500

by Joanne James26. August 2021 10:00

Today will be a two post day! I will be back later with my TicTacToe inspiration for our new challenge, but first I'm sharing a card that I made for a very special occasion: the fabulous team over at Freshly Made Sketches are celebrating their 500th challenge and a decade of sketch inspiration - how amazing is that?! These wonderful ladies are a constant source of challenge and inspiration and I play along whenever I can and certainly couldn't miss out on the opportunity to play with Linda's fabulous sketch this week!


I decided to pair with the new mini catalogue inspiration over at TGIF Challenges, which I had been mulling over as I have been playing with a CASE of one of the cards in their inspiration photo. It wasn't really working for me so instead I decided to take that vertical panel of the FMS sketch and instead take my inspiration from the featured Whimsy & Wonder Suite - take a look at what I came up with:


Here's the low-down on today's card:

All About The Layers - Linda's card has five layers, one for each of the decades the challenge team are celebrating. I wanted to feature the beautiful tree print in the Whimsy & Wonder specialty designer paper for my third layer, but didn't want to obscure it completely with layer 4, as I wanted the tree that is layer 5 to feel 'part' of it. So I used vellum to create my layer 4 panel, cut with one of the Ornate Layers Dies. It provides a distinct background for my focal point diecut tree, but ensures my background whilst softened can still be seen.

Trimming The Tree - I diecut the largest tree in the Christmas Tree Dies set in Mint Macaron, then added a garland cut from (retired) sparkly white glimmer paper and added tiny baubles cut from the silver holographic striped paper in the Whimsy & Wonder pack, to tie in with the holographic stars on the background paper design. I almost didn't add the baubles, but the tree definitely looks better with than without! 


Finishing Touches - I added a simple 'joy' sentiment and underpinned this with a piece of white glittered organdy ribbon tied with some silver twine. I love the addition of the subtle sparkle to complete the final element of my design.

This is my first outing with the Whimsy and Wonder Suite but I think I'll be using it again very soon!

Here is the visual summary of the key products used on today's project for you to pin for easy reference:


You can see all of my 'How To' summaries on my 'How To - Tips and Techniques' Pinterest board in case you've missed any. 

Enjoy your day and I'll be back tomorrow with another project. Until then, happy stampin'!


Stampin' Up! Supplies Used:

Table built using Product Table Builder by The Crafty Owl - Independent Stampin' Up! Demonstrator.

Shop Online

Access my online shop 24 x 7, 365 days of the year:

Current May hostess code:

VDKNV7BH

Shop Online

2024-25 Annual Catalogue

BROWSE THE CATALOGUE

Click on the image to download your copy of the 2024-25 annual catalogue. For a full list of current SU! supplies, go to my online store. If you would like any help or advice, please drop me a line at [email protected] or give me a call on 07773 421446 - I'd be happy to help.

Join My Team

It's always a great time to join Stampin’ Up but during May it's even better! New team members can get £78.25 of new In Color products for FREE! That's in addition to another £130 worth of products of your choice for only £99 + free business supplies + free shipping + all the fun being a part of Stampin’ Up! Stampin' Up! has something for everyone: join my growing team and benefit from my support to enjoy Stampin' Up! however you choose.

If you're interested, call me for a chat to understand how I can help you realise your goals. Alternatively, if you have already decided to sign up and you just can't wait, please click here for the link to the online form where you can sign up and order your starter kit right away! 

Latest Kits!

Stampin Cut and Emboss

The City Sights Kit has all you need to make 8 cards with coordinating envelopes for £20. Along with the new Happy Hollyhocks Kit, a no stamping kit including 9 cards for just £14, both are available from May 1st - get yours here!

New Online Exclusives

There are new products available exclusively in the online store from 5 March - check them out here.

About Me

Hi I'm Joanne and live in Northampton and when I'm not looking after my husband and two beautiful children, am an avid crafter with a passion for all things Stampin' Up!

I must confess that I have never been a big rubber stamper - until I discovered Stampin' Up! that is. I love the fact that I can get such great results with co-ordinating stamps, inks, papers and punches - the possibilities are endless! Join me on my stamping journey as I share the things I love and be inspired to create amazing things yourself!

Follow Me

Monthly Newsletter

Box Builder

Click the button above to use Box Buster to create your custom box design using the Envelope Punch Board!

Kits Collection Now Available!

Stampin Cut and Emboss

The new Kits Collection from Stampin' Up! is now available!

Click here to see the current kits available and order yours online today.

I Design For


Mini Catalogue


The next mini catalogue will be live in September! 

Stampin' Up Stuff

This is my personal blog and is not endorsed by Stampin’ Up! I hope you find it a plentiful source of ideas and personal inspiration but please don't copy my designs for contest submission or use for classes, publication or sale without express permission.