15% Off Designer Series Paper and New Halloween and Christmas Craft Kits

by Joanne James6. August 2024 18:00


It's August and there are some important promotions to bring to your attention! Firstly, we all love gorgeous Designer Series Paper, me especially, and during the month of August you can enjoy a 15% discount on select papers from the current annual catalogue. Now is a great time to stock up and save on some of our most popular paper designs! The papers included in the promotion are detailed below:

A reminder too that August is the month to redeem the Bonus Days coupons you earned in July:

The designer series paper sale is perfectly timed for redeeming those Bonus Days coupons earned; remember the must be redeemed before August 31st, so the sooner the better.

Also this month - we have two new great kit collections that have been released. The first of these is the Haunted Home Kit:


Get your Halloween crafting on with the Haunted Home Kit! This kit costs £17 and comes with all the paper pieces you need to assemble your very own haunted paper house. You’ll start with cardboard walls, pre-cut vellum, and other paper pieces for accessorising. Assemble the house following the instructions then add your own ghostly touch to it. It’s the perfect paper crafting activity for any gathering with fellow crafters, friends, and family during the spooky season!

The second kit is the Christmas Wishes Christmas card kit:

Keep your Christmas card crafting easy AND elegant with the Christmas Wishes Kit! This kit comes with 8 bright red card bases detailed with gold foil and coordinating gold, shimmer envelopes. Create your own Christmas cards using the pre-cut paper pieces, the stamp set, and Stampin’ Spot. Use the included address labels to send your cards to your recipients! This kit costs £22.

All of the above items can be found in my online store by clicking the links below. Happy shopping!

Table built using Product Table Builder by The Crafty Owl - Independent Stampin' Up! Demonstrator.

Christmas and Halloween In The Pink

by Joanne James18. October 2023 19:38

I was feeling a little under the weather today, so I retreated to my craft room to play along with a couple of challenges that enabled me to use up some of my retired bits and pieces!

First up a pink Christmas card to play along with the ladies over at Jingle Belles that uses the current Try Stampin' On Tuesday layout:


The retired Whimsy and Wonder designer paper was perfect for a pink Christmas card and a couple of stitched snowflakes and sentiment from the 'Merry Snowflakes' stamp set, which I heat embossed in silver - you can see that a bit better on the photo below:


My second card is a 'dies only' card for the current challenge over at Addicted to CAS that uses three of the four colours on the Color Dare board (all except Glacier) that is also for the 'Anything Spooky' theme over at AA Cards:


I made my ghost using the retired Boo To You and Fall Fun Framelits; it's for my daughter, hence the pink card base and I added the 'Boo!' with foam for a little added depth:


I added googly eyes and a flower for a feminine touch, although I think this makes my ghost rather more sweet than spooky!

A couple of cards that used up some of my retired stash, so no supplies list today. It is really dark and stormy here today too with the arrival of Storm Babet, so it made photographs a little trickier too - hopefully still a few creative ideas for you though! 

Enjoy your day and I'll be back on Friday with another project. Until then, happy stampin'!

Card 1:    


Card 2:       

Because you're FaBOOlous FF0145

by Joanne James13. October 2023 09:00

Today I have my card for the new challenge over at Festive Friday Card Making and Paper Crafting Challenge


The challenge that we are celebrating this week is 'Halloween' which is on October 31st. Remember the fun thing is that at Festive Friday you do not need to actually celebrate the occasion; your goal is to simply use three or more items from the inspiration list on your project. This week I used black, silver, spooky sentiment and ghosts and this is what I came up with:


Here's the low-down on today's card:

I have no current Halloween product, so delved into my retired box of favourites for this one! I decided to create a card that has a distinctly Halloween feel, so used some retired silver-foiled black paper and added that to my card base, then added a black strip, onto which I heat-embossed my 'faBOOlous' sentiment in silver from the retired 'Six Sayings' stamp set, bordering this with some silver glimmer paper. To add the fun, spooky feel, I heat embossed a trio of ghosts in white (from the retired 'Holiday Home stamp set) onto vellum, fussy get these and added them to my card 'floating' out of the OO:


How fun! My sentiment was inspired by the famous advertising strapline that the L'Oreal cosmetic brand uses: because you're worth it (cue Jennifer Anniston hair flick!) I will be sending this to my daughter with a few Halloween treats at university - because she is afterall, faBOOlous!

I am also sharing this card over at Inspire.Create Challenges where their current theme challenge is Autumn/Halloween.

How does our board inspire you? I can’t wait to see what YOU create! For more inspiration, be sure to visit the rest of the Festive Friday Card Making and Paper Crafting Challenge Design team:

Enjoy your day; if you're superstitious about Friday 13th, wishing you a lucky one; I'll be back tomorrow with another project. Until then, happy stampin'!


Stampin' Up! Supplies Used (current product only):

Table built using Product Table Builder by The Crafty Owl - Independent Stampin' Up! Demonstrator.

Halloween Boo To You FF120

by Joanne James14. October 2022 08:00

Today I have my card for the new challenge over at Festive Friday. 


The challenge that we are celebrating this week is 'Halloween' which is on October 31st. Remember the fun thing is that at Festive Friday you do not need to actually celebrate the occasion; your goal is to simply use three or more items from the inspiration list on your project. This week I bowed to the theme and used pumpkin, orange, stars, black and ghost and using the sketch layout over at Try Stamping on Tuesday this is what I came up with:


 Here's the low-down on today's card:

My card started out with the starry and pumpkin/ghost patterned paper from the 'Celebrate Everything' hostess designer series paper pack - these papers really are the pack that keeps on giving with a pattern for every occasion! Normally I wouldn't mix two such bold papers, but the yellow stars on the pumpkin/ghost sheet mean the two work together perfectly. I used my Pumpkin Pie Stampin' Blends markers to colour the pumpkins on the designer paper instead of leaving the whole design white - I love that you can do this! - and I added these papers to my cardbase, then used a strip of black glimmer paper and a collection of diecuts (all retired - Boo to You, Harvest Hellos, Apple Punch and Stitched Stars Dies) to create a focal point that picked out the detail of the papers:


Cute, right?! I really wanted to stamp 'trick or treat' on the orange banner, but could I find a retired stamp anywhere in my collection with those words? Nope. I'm sure there's one here somewhere ... I just have to find it!

I am also linking this card up with the lovely ladies over at SUO Challenges where their theme is 'Halloween' currently too. 

Here is the visual summary of the key products used on today's project for you to pin for easy reference:


You can see all of my 'How To' summaries on my 'How To - Tips and Techniques' Pinterest board in case you've missed any. 

How does our board inspire you? I can’t wait to see what YOU create! For more inspiration, be sure to visit the rest of the Festive Friday Challenge Design team:

Ann Schach
Beth McCullough
Sharon Hashimoto Burkert - off this week
Melanie Hungerford
Helen Jennings
Melva Peters
Jaydee
Diane Evans
Joanne James

Enjoy your day and I'll be back tomorrow with another project. Until then, happy stampin'!


Stampin' Up! Supplies Used:

Table built using Product Table Builder by The Crafty Owl - Independent Stampin' Up! Demonstrator.


Have A Hoot Peek A Boo Clean and Simple Halloween Card

by Joanne James16. October 2021 09:00

Today I'm sharing a clean and simple card for the current challenge over at Addicted to CAS where the code word is 'Spooky':

   RRCB 169   

I'm also linking up with the ladies over at Retro Rubber where the theme is 'anything goes' and at SUO Challenges where the theme is Halloween too. Whilst digging around in my retired stamp collection the other week, since this is where most of my Halloween stamps are to be found, I remembered there were three different Halloween owls in last year's 'Have A Hoot' stamp set from September 2020 and decided to use it to try a really easy fun fold Peek-A-Boo style card that I had seen Jennifer McGuire make ages ago that I wanted to have a go at. Here's what the card looks like closed:


Then as you open the card, it reveals either another image or message - I went with a 'boo' courtesy of the owl hiding behind the pumpkin:


Perfect for the challenge over at Just Add Ink this week where they are all about moving parts too. Here's a short video clip so that you can actually see how the peek-a-boo mechanism works:

Isn't that fun?! I embossed the front of my card with my retired cobweb embossing folder to add to the spooky vibe; I'm hoping this doesn't take away too much from the CAS aspect of my card and my 'white space'. Here's a close-up of that mischievous owl:


No visual summary of the key products used on today's project since they are all retired; it was fun to take a trip into the retired box to create this super simple card to share with you today.

Enjoy your day; I'm off to the hockey pitch side lines! I'll be back tomorrow with my card for our new challenge at the Paper Players. Until then, happy stampin'!


Stampin' Up! Supplies Used:

  • Have-A-Hoot stamp set (retired)
  • Cobweb Embossing Folder (retired)
  • Stampin' Blends - various

Seasons Of Fun Roller Skating Pumpkin FF0095

by Joanne James15. October 2021 09:00

This is my first post of a two-post Friday and I'm here with my card for the new challenge over at Festive Friday. 


The challenge that we are celebrating this week is 'National Cat Day' which is on October 27th. Remember the fun thing is that at Festive Friday you do not need to actually celebrate the occasion; your goal is to simply use three or more items from the inspiration list on your project. This week I used cat, orange and texture from the inspo list along with the sketch layout over at Hand Stamped Sentiments to create a Halloween-inspired birthday card, perfect for a late October birthday - take a look:


I'm also linking up over at SUO Challenges where they are sharing all things Halloween for their current challenge too.

Here's the low-down on today's card:

Seasons of Fun - I thought the trick-or-treat roller skater in the 'Seasons of Fun' host set would make for a fun Halloween-inspired birthday card for someone celebrating a late October birthday, so stamped and coloured my image with Blends and added a combination of sentiments on the inside of my card for a play on the idea of 'trick or treat' that the image suggests to fit my birthday greeting:


I used up a whole bunch of retired Halloween DSP and a background panel embossed with a retired cobweb embossing folder for texture for the remaining details on the front of my card, along with a sprinkling of retired enamel dots.

Spot The Difference - Did you spot the difference between my roller-skating pumpkin and the stamp in the catalogue? I took a leaf out of my creative friend Vicky's book (she is a whizz at combining stamps in unexpected ways to come up with amazing designs!) and coloured and fussy-cut the cat from the image with the boy playing in the leaves that I used on this card here and added him to the little girl's pumpkin treat bucket:


Crafty, eh? Well, I had to get a cat onto my card somehow!

My Little Pumpkin - I realised when I went over to grab the link for Hand Stamped Sentiments to add my card to the gallery, that one of their design team, Ange McKay, also used this image on her card so mine does naturally look very similar. I hadn't seen her card before I made my own though; this cute image reminds me of a little pumpkin of my very own:


My children loved to dress up when they were little and this photo of Rebecca was her first Halloween photo when she could walk - check out those pink shoes! This photo is now more than 14 years old - but is still makes me smile!

Here is the visual summary of the key products used on today's project for you to pin for easy reference:


You can see all of my 'How To' summaries on my 'How To - Tips and Techniques' Pinterest board in case you've missed any. 

How does our board inspire you? I can’t wait to see what YOU create! For more inspiration, be sure to visit the rest of the  Festive Friday Challenge Design team:

Ann Schach

Beth McCullough

Sharon Hashimoto Burkert

Melanie Hungerford

Helen Jennings

Stephanie Lanzalotto

Melva Peters

Jaydee

Diane Evans

Joanne James

Enjoy your morning and I'll be back later with my project for the new challenge over at As You See It. Until then, happy stampin'!


Stampin' Up! Supplies Used:

Table built using Product Table Builder by The Crafty Owl - Independent Stampin' Up! Demonstrator.

Spooky Halloween Wreath With Seasonal Swirls Dies PP561

by Joanne James3. October 2021 08:00

Today it's Sunday and time for this week's new challenge over at The Paper Players! It's the turn of the fabulous Laurie to host this week and she has a fun and seasonal theme challenge for you to work with:


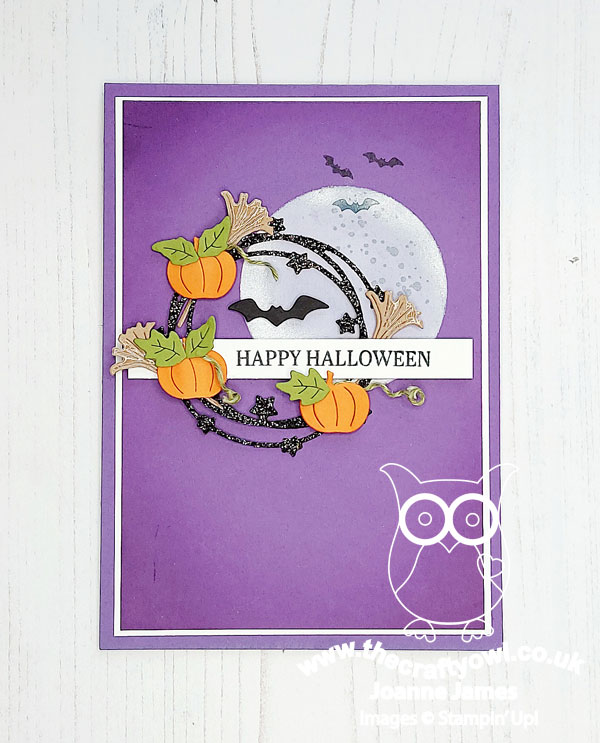
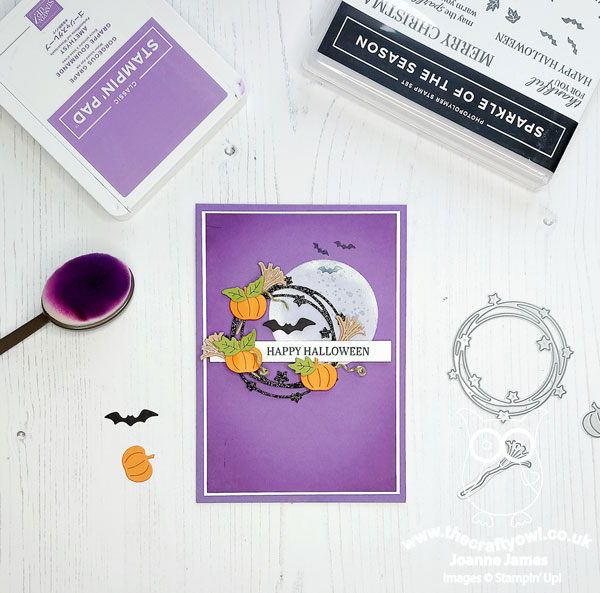
I was initially a little concerned that I would struggle this week; I don't make many Halloween cards as I rarely send them as it isn't a big thing here in the UK and I don't really buy many Halloween sets as a result. I didn't even have any current Halloween paper! What to do?! I decided to take stock of all current sets and pull out anything that had something Halloween-related in it, whilst also taking inspiration from a few other challenges too, and ended up making a card really easily. Take a look at what I came up with:
 

Here's the low-down on today's card:

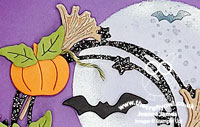
Halloween Seasonal Swirls - The star of today's card is most definitely the Seasonal Swirls Dies. They have this fun star wreath (which along with my bat silhouettes fulfilled my 'Just Choose 2' for Just Add Ink this week) which I cut out of sparkly black glitter paper, then embellished with a trio of pumpkins and witches' brooms cut from some retired textured kraft paper I had, which along with my purple background uses this week's Color Throwdown colours which are perfect for Halloween.

Sparkle of The Season and A Wish For Everything - Alongside my diecut wreath, there isn't much stamping on my card: the sentiment on the front comes from the 'Sparkle of the Season' stamp set that is bundles with the dies; I also found this fun Halloween sentiment in the 'A Wish For Everything' stamp set that I used on the inside of my card:
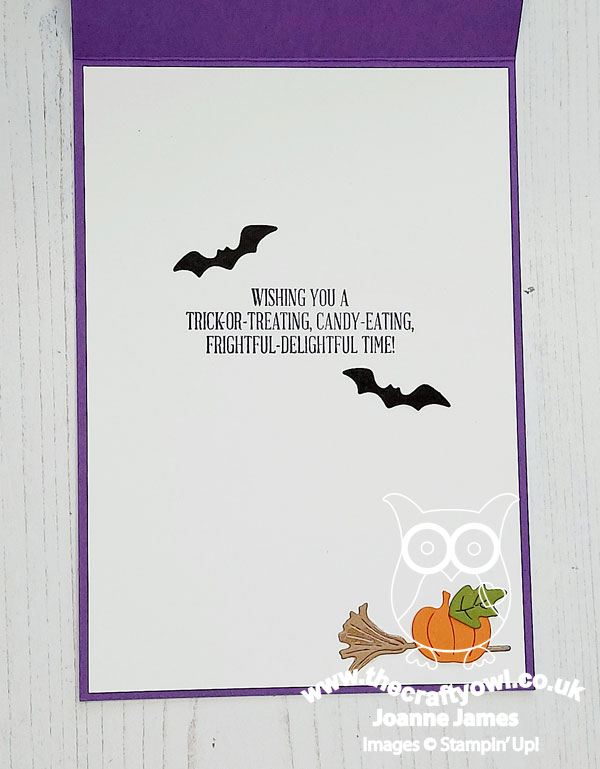
 

Perfect for the inside of my card!

Spooky? - I wasn't sure that my sparkly wreath alone could truly be considered 'spooky', but luckily Narelle's layout over at Freshly Made Sketches this week came to my rescue on that front: I took that second circle shape behind, masked off and sponged in a moon with white craft and a little  silver metallic ink for shading, along with the splatter stamp in the 'Quiet Meadow' stamp set for crate-like detail and a trio of black bats from 'Sparkle of The Season' for added spooky:
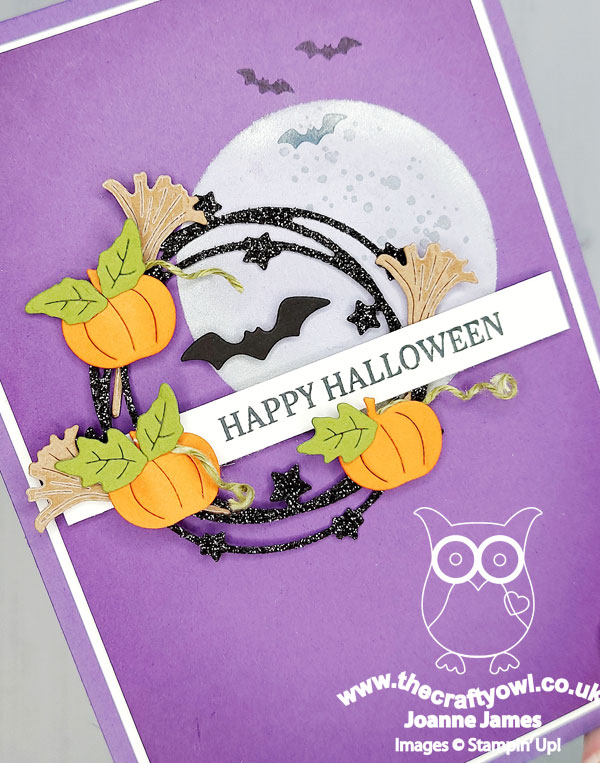
 

A final diecut bat, along with some blended tone-on-tone colour around the edge of my purple layer, complete my suitably spooky card.

I felt like I needed a lot of help to get me going with my card this week, but I'm really pleased with how it turned out. Even more impressive is that it didn't include a single Halloween-specific stamp set! So if you are looking at this week's theme and thinking you don't 'do Halloween', check out the stamp sets on your shelf or get creative with some punch art - like me, you might be surprised at what you'll find!

Here is the visual summary of the key products used on today's project for you to pin for easy reference:
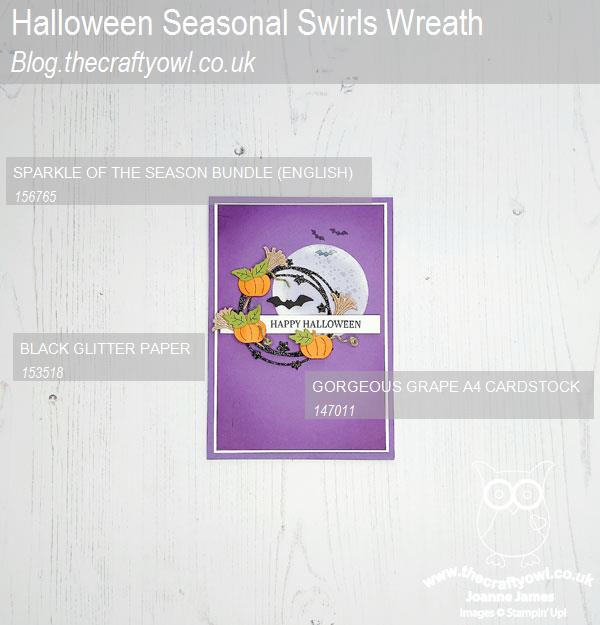
 

You can see all of my Product and 'How To' summaries on my 'How To - Tips and Techniques' Pinterest board in case you've missed any. 

Before you reach for your ink and papers, check out what our amazing team has created to inspire you this week:

Here's a quick recap of our challenge rules:
 
1.  Create a new paper project
2.  Upload your creation to your blog with a link back to us and provide a direct link to the post featuring your challenge submission.
3.  Please link your card to no more than four challenges, TOTAL.
4.  Have FUN!

You can see all of my 'How To' summaries on my 'How To - Tips and Techniques' Pinterest board in case you've missed any. 

Enjoy your day; today is a very special day in the James household! Tomorrow is a milestone birthday for my 'significant other' ( also known as the first Mr James! - if you missed his card, I already shared that here); since his birthday falls on a day that is filled with work, school and sport for pretty much everyone in the James household, we are celebrating today. We have cake, balloons, fizz, presents and more so whilst he is not one to make a fuss, the children and I are ready to celebrate his half-century in style!  I'll be back tomorrow with another project. Until then, happy stampin'!
 

Stampin' Up! Supplies Used: 

Table built using Product Table Builder by The Crafty Owl - Independent Stampin' Up! Demonstrator.

Have A Hoot Halloween Card

by Joanne James27. October 2020 08:00

Today I'm sharing a card inspired by the photo inspiration over at Fusion that is also well timed for the last-minute Halloween crafting over at TGIF Challenges:


I couldn't get to grips with the angled line of the sketch, but I love that inspiration photo and whilst I don't really send Halloween cards, I wanted to get some use out of the Halloween owls in the 'Have A Hoot' stamp set so set to work:


Here's the low-down on today's card:

I decided to have a go at another sponged background, so took a variety of purple inks and gradually built up the layers to create my spooky night sky. I splattered it with water and then white frosted shimmer paint to complete. I used the tree from the  'Life is Beautiful' for my woods, stamping from both sides, then stamped my owl onto a partial circle and aligned the trees so that it looks as if the owl is in the trees, highlighted by the moon.

A heat embossed 'boo!' completes the outside of my card, with a further greeting on the inside:


So what do you think of today's card? Even if Halloween isn't your thing, I'd love to hear what you think of my sponged background. 


Here is the visual summary of the key products used on today's project for you to pin for easy reference:


You can see all of my 'How To' summaries on my 'How To - Tips and Techniques' Pinterest board in case you've missed any. 

Enjoy your day and I'll be back tomorrow with another project. Until then, happy stampin'!


Stampin' Up! Supplies Used:

Table built using Product Table Builder by The Crafty Owl - Independent Stampin' Up! Demonstrator.

Spooky Fun Halloween Notelets

by Joanne James27. October 2016 08:05

Today it's time for a new challenge over at Create With Connie and Mary and this week we have a colour combination for you:


It would be fair to say I struggled big time with these colours this week! I couldn't get away from the idea of Halloween, yet making them work was definitely a challenge! I ended up making two cards and I must confess I'm not completely happy with either of them! That said, I'm sharing my notelets with you anyway - here's the first one:


And here's the second one:


Both use a combination of the challenge colours and the Spooky Fun stamp set and co-ordinating Halloween Scenes Edgelits Dies. The second one also includes a sentiment from the 'Suite Seasons' stamp set and a background created with the spots stamp in the 'Perpetual Calendar' set, along with a sentiment banner on each. Each would be quick and easy to create, although first time around they took me longer than I would have liked!

Here is the visual summary of the key products used on today's project for you to pin for easy reference:

You can see all of my 'How To' summaries on my 'How To - Tips and Techniques' Pinterest board in case you've missed any. 

Do visit the other Design Team members to see what they did with this week's colours; there's lots of inspiration over on their blogs too!

Enjoy your day - we are off to Brick Live to play Lego all day, a James family passion! Hope you enjoy your day too and I'll be back tomorrow with another project. Until then, happy stampin'!


Stampin' Up! Supplies Used:

Table built using Product Table Builder by The Crafty Owl - Independent Stampin' Up! Demonstrator.

Halloween Night Card and Treat Box

by Joanne James26. October 2016 10:00

Today I have more Halloween fun for you, with a card and some co-ordinating Halloween treats that are again perfect for this week's TGIF Challenge where treats are most definitely the order of the day:


So I've made both a treat box and a matching card today using one of the gorgeous foil specialty sheets in my Halloween Night DSP pack. Here's my treat box, which holds a stack of chocolate coins adorned with spiders and filled with popping candy:


So much shine with all that foil! Here's a close up of my treat box:

My treat box measures 4 1/2" x 1 1/2" finished size, and is made from a piece of designer series paper measuring 7 1/2" x 6". I added a little trick or treat banner tag and a silver mini tassle tied on with black baker's twine. Instructions to make if you'd like to have a go are as follows:

  • Score paper on short side at 1 3/8", 2 6/8", 4 1/8" and 5 1/2"
  • Score paper on long side at 1/2", 1 1/2", 6" and 7"
  • Cut an aperture in one of the long central sections using your Big Shot and Project Life Cards and Labels Framelits
  • Fold on the score lines on the short side to make a long thin box, then pinch the ends and glue/staple one end, fill with chocolate then pinch and glue/staple the other end closed.
  • Add tag and twine to complete.

 Finally, here's my card featuring those large Letter Framelits again: 


Check out the cute dangling spider in the 'O' - isn't he just so fun?! I stamped him in Versamark and heat embossed him in silver then coloured him in with my black Stampin' Write marker. 

Here is the visual summary of the key products used on today's projects for you to pin for easy reference:


You can see all of my 'How To' summaries on my 'How To - Tips and Techniques' Pinterest board in case you've missed any. 

Enjoy your day and I'll be back tomorrow with a card (or two!) for this week's Connie and Mary Challenge. Until then, happy stampin'!


Stampin' Up! Supplies Used:

Table built using Product Table Builder by The Crafty Owl - Independent Stampin' Up! Demonstrator.

Current Promotions

Stampin Cut and Emboss

Save up to 30% off on all your favourite kits from 1 to 31 October! 

Click here to see the current kits available and order yours online today.

Join My Team

It's always a great time to join Stampin’ Up! During October you can get even more in your starter kit! New team members can get £160 worth of products for only £99 + free business supplies + free shipping + all the fun being a part of Stampin’ Up! Stampin' Up! has something for everyone: join my growing team and benefit from my support to enjoy Stampin' Up! however you choose.

If you're interested, call me for a chat to understand how I can help you realise your goals. Alternatively, if you have already decided to sign up and you just can't wait, please click here for the link to the online form where you can sign up and order your starter kit right away! 

Shop Online

Access my online shop 24 x 7, 365 days of the year:

Current October hostess code:

4XPEYCB9

Shop Online

Scrapbooking

Stampin' Up! has introduced a new range of 12x12" scrapbooking product and kit - the full range is now available to purchase online. To download a copy of the new digital Scrapbooking Catalogue click here.

Mini Catalogue

BROWSE THE CATALOGUE

'Tis The Season - the new Stampin' Up! Mini Catalogue is here! For more details and to download your copy click here

2024-25 Annual Catalogue

BROWSE THE CATALOGUE

Click on the image to download your copy of the 2024-25 annual catalogue. For a full list of current SU! supplies, go to my online store. If you would like any help or advice, please drop me a line at joanne@thecraftyowl.co.uk or give me a call on 07773 421446 - I'd be happy to help.

Latest Kits!

Stampin Cut and Emboss

The Christmas Ornaments Kit and Card Keeper Kit are the latest kits in the online store - get yours here!

New Online Exclusives

There are new products available exclusively in the online store from 5 November - check them out here.

About Me

Hi I'm Joanne and live in Northampton and when I'm not looking after my husband and two beautiful children, am an avid crafter with a passion for all things Stampin' Up!

I must confess that I have never been a big rubber stamper - until I discovered Stampin' Up! that is. I love the fact that I can get such great results with co-ordinating stamps, inks, papers and punches - the possibilities are endless! Join me on my stamping journey as I share the things I love and be inspired to create amazing things yourself!

Follow Me

Monthly Newsletter

Box Builder

Click the button above to use Box Buster to create your custom box design using the Envelope Punch Board!

Kits Collection Now Available!

Stampin Cut and Emboss

The new Kits Collection from Stampin' Up! is now available!

Click here to see the current kits available and order yours online today.

I Design For


Stampin' Up Stuff

This is my personal blog and is not endorsed by Stampin’ Up! I hope you find it a plentiful source of ideas and personal inspiration but please don't copy my designs for contest submission or use for classes, publication or sale without express permission.