Color And Contour You Are Amazing

by Joanne James11. April 2024 20:00

Today I'm sharing a card that used the sketch layout over at Sunday Stamps and the colour palette over at TGIF Challenges:


I love bright colours and thought this palette would work well for some unconventionally coloured retiring florals - take a look:


Here's the low-down on today's card:

I paired a couple of stems from the Color and Contour stamp set with a vibrant background using a piece of Masterfully Made designer series paper and a fancy shredded bow beneath my sentiment:


The sentiment is from the same stamp set, but I tweaked the positioning to suit the sketch design better. A trio of tinsel gems complete my card.

I feel like 'Color and Contour' is an underused set, but I will miss the co-ordinating Scalloped Contour Dies so much - the labels and borders in this set have been used on so many projects! If you don't have them in your collection, you should definitely consider picking up a set before they retire if they are still available in your market. 

Here is the visual summary of the key products used on today's project for you to pin for easy reference:


You can see all of my 'How To' summaries on my 'How To - Tips and Techniques' Pinterest board in case you've missed any. 

Enjoy your day and I'll be back tomorrow with another project. Until then, happy stampin'!


Stampin' Up! Supplies Used:

Table built using Product Table Builder by The Crafty Owl - Independent Stampin' Up! Demonstrator.

Just My Type Key To My Heart Valentine Card

by Joanne James14. February 2024 21:00

Happy Valentine's lovely readers! It seems only right that I should share a Valentine's card today; actually I made this card to send to the DH to celebrate our wedding anniversary, which is next week, but it would work for either. I made my card with a couple of challenges in mind:


Inkspirational have a word prompt of 'heart' and the theme over at Inspire.Create is 'All About Love'. I went for a relatively clean and simple card with lots of fun details that focuses on the sentiment - take a look:


Here's the low-down on today's card:

The sentiment comes from the 'Just My Type' stamp set and I found a tiny vintage key trinket in my embellishment stash that I thought paired with it perfectly. A Bee Builder Punch heart and a selection of designer paper snippets, diecuts and gems complete my card:


Pretty yet not overly feminine - I really like the finished result and hope that the Hubby will too. 

Here is the visual summary of the key products used on today's project for you to pin for easy reference:


You can see all of my 'How To' summaries on my 'How To - Tips and Techniques' Pinterest board in case you've missed any. 

I have enjoyed a pleasant Valentine's dinner with the youngest of the James Juniors, catching up on the events of the day, the highlight of which was a hockey 2nd XI win, which is always worth celebrating! I'll be back on Friday with another project. Until then, happy stampin'!


Stampin' Up! Supplies Used:

Table built using Product Table Builder by The Crafty Owl - Independent Stampin' Up! Demonstrator.

Joy To You Sparkle and Shine Christmas AYSI 312

by Joanne James17. November 2023 12:00

Today I'm sharing my design team card for our new challenge over at As you See It where it's time for a festive theme challenge chosen by me:


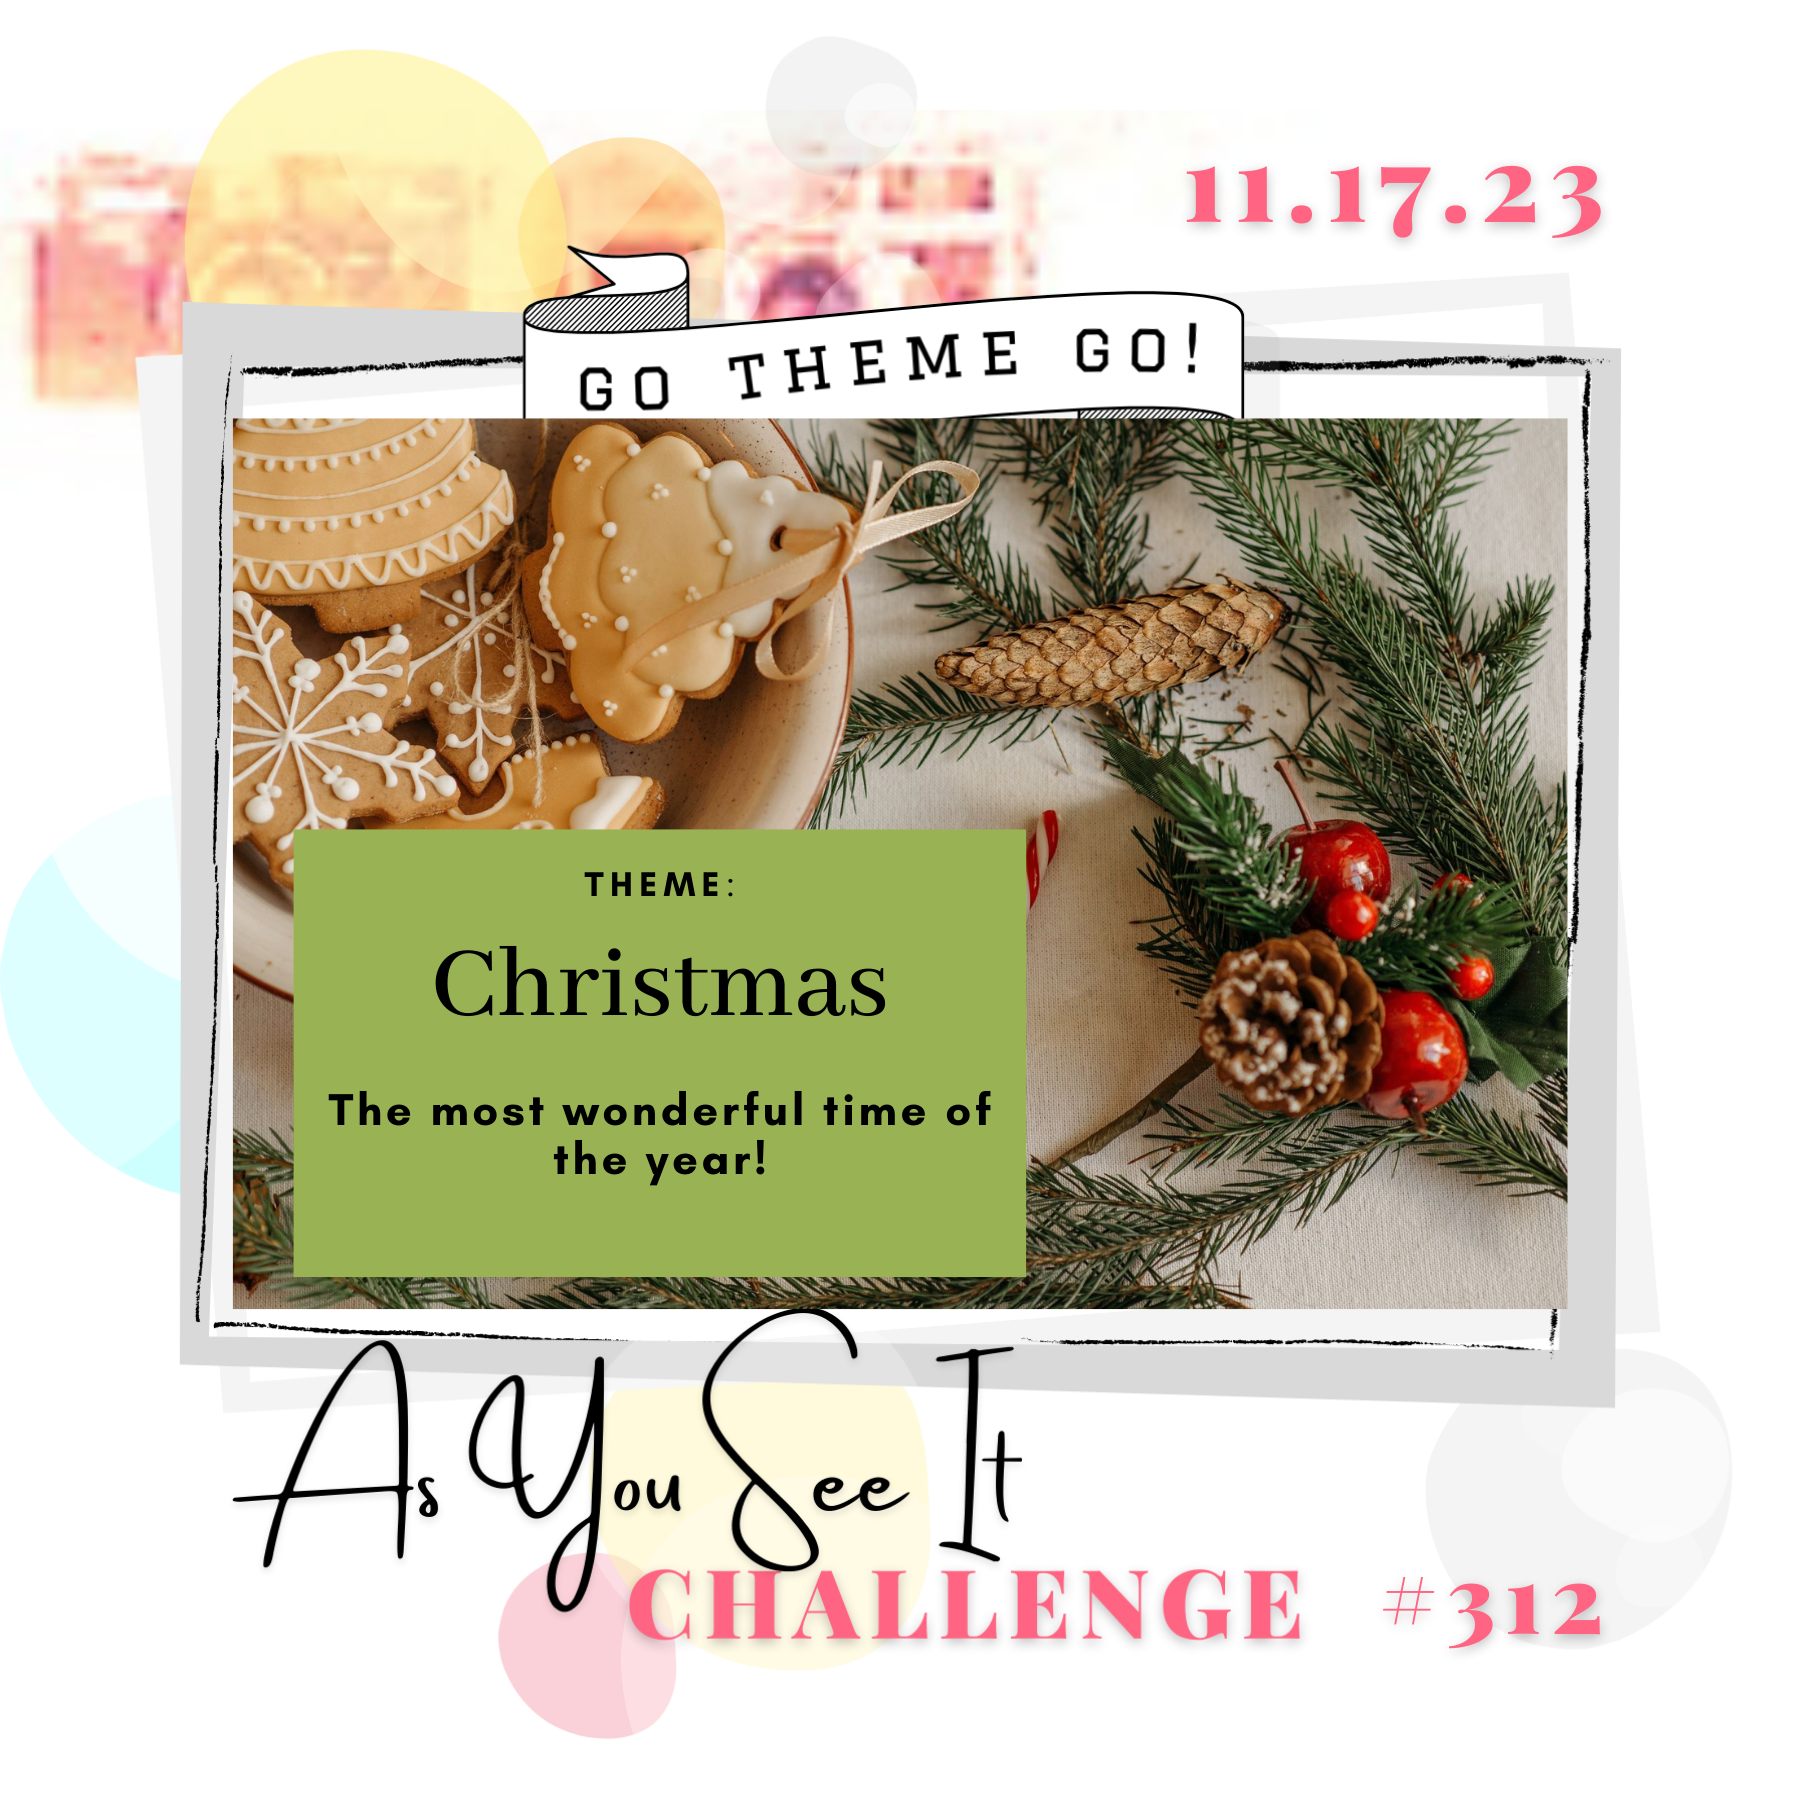
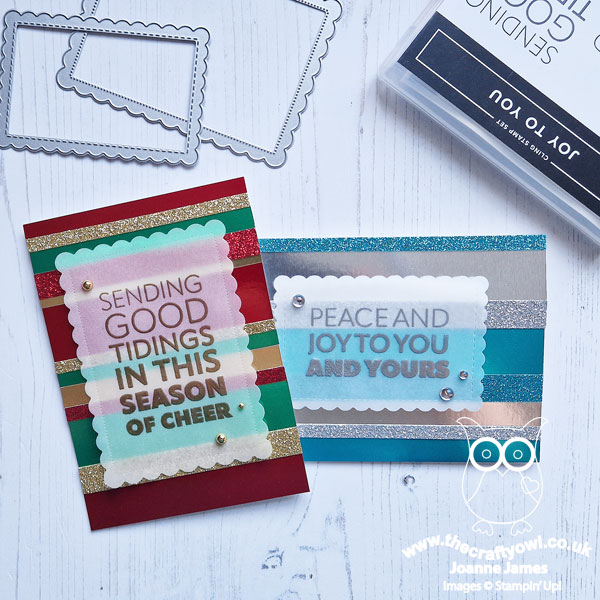
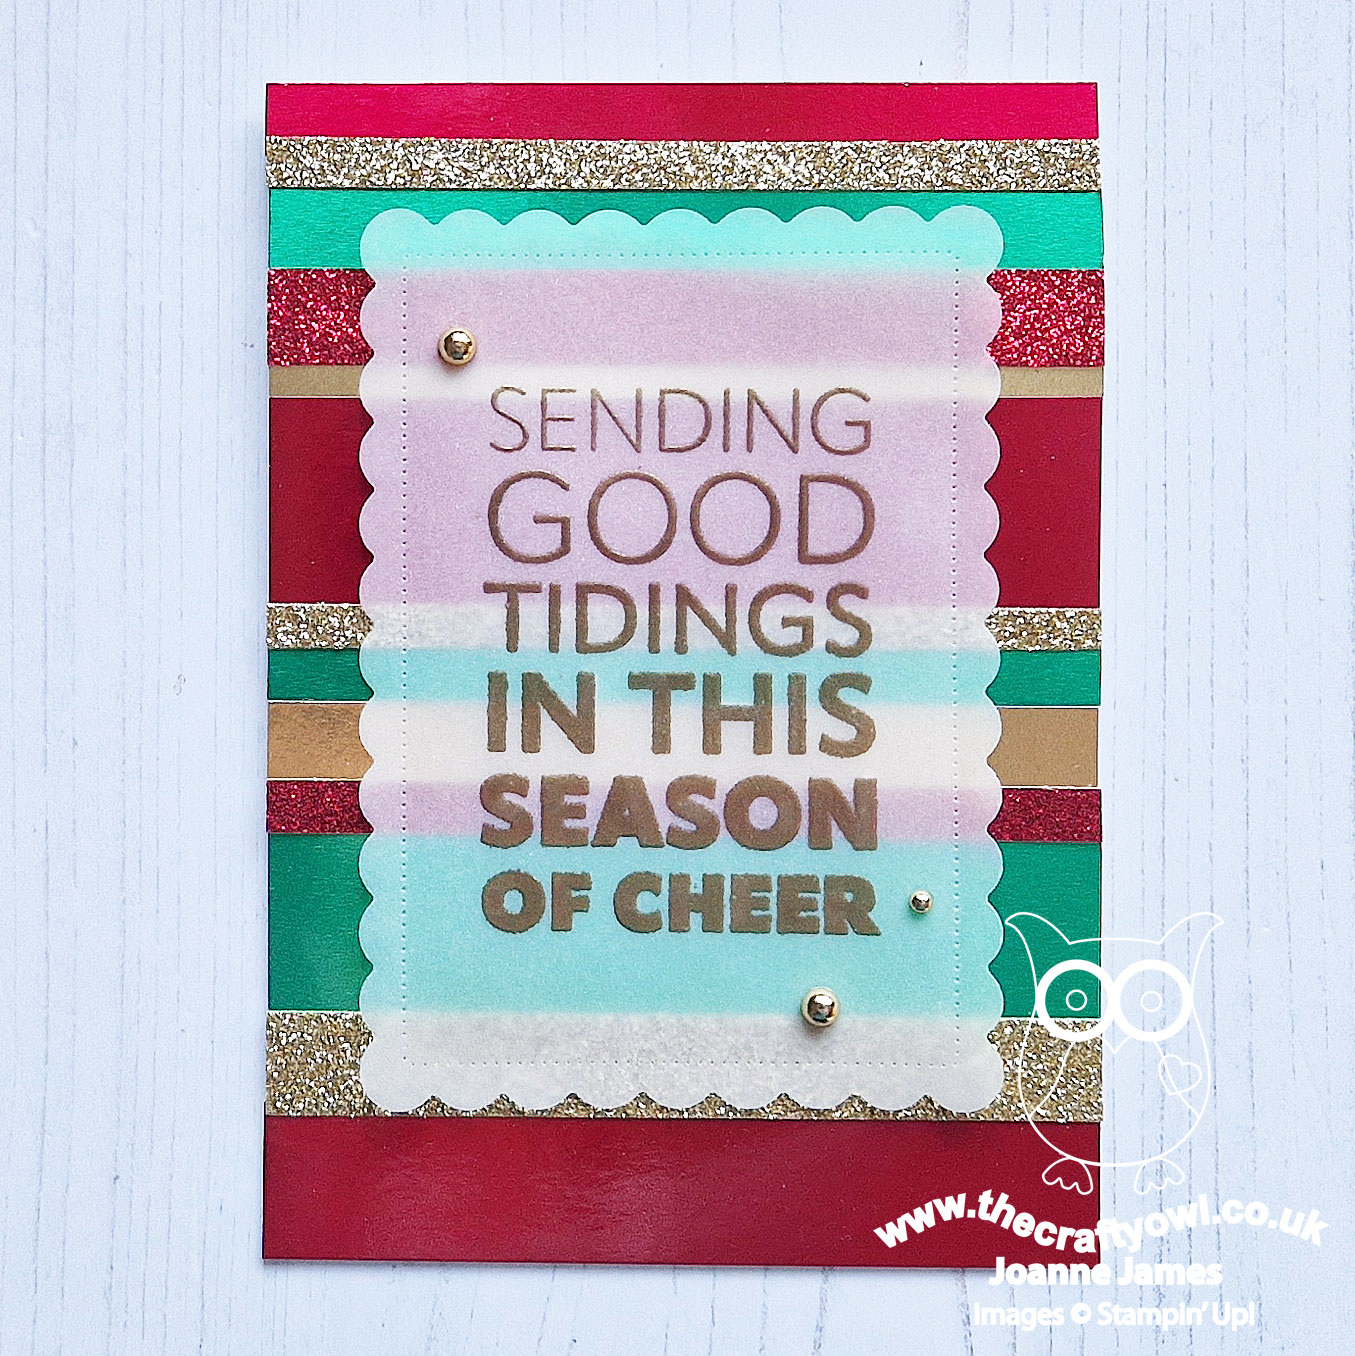
Christmas! Yes, with 38 days until the big day, I am in full-on festive card making mode so I thought it would make the perfect for theme for our challenge this week. I created two versions of the same card for this week's challenge - take a look at the first one:


 Here's the low-down on today's card:

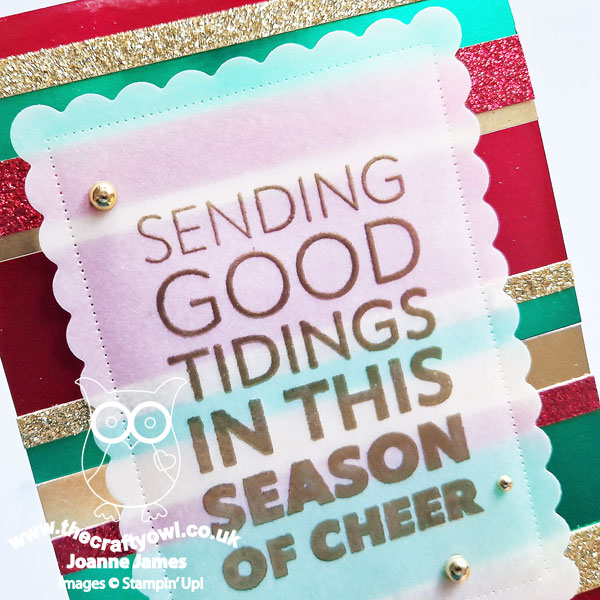
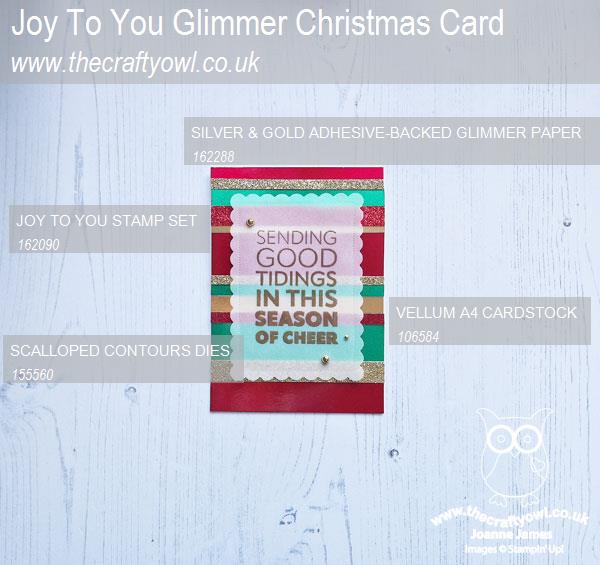
Following our vellum challenge here at As You See It a little while ago, I've found myself experimenting more and more with vellum. I had the idea to use a vellum diecut panel to showcase the bold sentiments in the 'Joy To You' stamp set, overlaid onto a super shiny, sparkly background in festive colours, that allowed the background to remain visible. I stamped the largest sentiment and heat-embossed it in gold on a panel cut with the Scalloped Contour Dies, and added this to a base onto which I glued strips of red, green and gold foil and red and gold glimmer paper. I adhered the vellum panel with dimensionals strategically placed behind the widest letters and a trio of gold pearls. Check out the sparkle:


I liked this card so much, I created a second, landscaped version using another of the sentiments in the set, in a silver and blue colourway:


This version uses a slightly smaller sentiment and scalloped die but the principles are them same - and still so sparkly!

I used some retired coloured foils that I had in my stash and paired them with the adhesive-backed gold and silver glimmer paper - did you know that this is available as an online exclusive product? So useful for your festive projects - there is also a three pack of coloured glimmer papers available online. YA design that's great for using up scraps and strips leftover from other projects, you could also make a less traditional version using the pink and green foils that are featured in the current mini catalogue. 

Here is the visual summary of the key products used on today's project for you to pin for easy reference:


You can see all of my 'How To' summaries on my 'How To - Tips and Techniques' Pinterest board in case you've missed any. 

What do think - does this simple design pack a festive punch? Do leave me a comment below - I'd love to hear your thoughts.

Here's a summary of our challenge rules:

  • Create any card, scrapbooking page, 3D project or packaging project that fits the challenge.
  • Please include the challenge graphic and link back to the challenge in your blog post. Turn off word verification so we can leave you lots of lovely comments. Make sure you link the post not the whole blog to the Linky. Use #AYSIXXX when uploading to a public gallery.
  • If you’re unsure about ‘the rules’, check the details under the Challenge Guidelines tab on the As You See It Challenge homepage.
We look forward to seeing your creations in the AYSI gallery.

Enjoy your day and I'll be back tomorrow with another project. Until then, happy stampin'!


Stampin' Up! Supplies Used:

Table built using Product Table Builder by The Crafty Owl - Independent Stampin' Up! Demonstrator.

Christmas Joy To You PP666

by Joanne James12. November 2023 08:00

Today it's Sunday and time for this week's new challenge over at The Paper Players! It's my turn to host this week and I have a festive colour challenge for us to work with:


Red, green and gold is one of my favourite festive colour combinations so I wanted to see what you would all make with it this week. You can add any other colour of your choice; for today's card I added a little Old Olive and using Jen M's square layout over at Freshly Made Sketches made a traditional Christmas card to add to my growing stash - take a look:


Here's the low-down on today's card:

The sketch layout was perfect to showcase a large panel of designer series paper, so I chose a vibrant holly pattern from the Joy of Christmas paper pack. I used the slanted panel to feature my bold sentiment from the 'Joy To You' stamp set, which I stamped in Real Red onto a white panel cut with one of the Scalloped Contour Dies to which I added a holly and pine diecut embellishment:


I wrapped my panel of DSP with some gold simple elegant trim (great for saving bulk on cards that need to be mailed at this time of year) and added a bow to my foliage to complete my card. This card actually came together quite quickly once I'd decided on my elements; the paper does much of the hard work with such a busy pattern, it really doesn't need much else. So what will you make with this week's colour combination? Whilst these colours are my festive favourites, you don't have to make a Christmas project with them - the choice is yours!

Here is the visual summary of the key products used on today's project for you to pin for easy reference:


You can see all of my Product and 'How To' summaries on my 'How To - Tips and Techniques' Pinterest board in case you've missed any. 

Before you reach for your ink and papers, check out what our amazing team has created to inspire you this week:

Here's a quick recap of our challenge rules:
 
1.  Create a new paper project
2.  Upload your creation to your blog with a link back to us and provide a direct link to the post featuring your challenge submission.
3.  Please link your card to no more than four challenges, TOTAL.
4.  Have FUN!

Enjoy your day; I had a super busy day yesterday, with a flying overnight visit for my university-loving daughter and a hockey match for the youngest of the James Juniors. My laundry service has gone into overdrive once more, so today will be spent ironing and baking and hopefully squeezing in a little crafting to finish a few projects that are in bits on my desk. I'm usually one of those people that makes one thing at a time, but since I've had to snatch a quick 30 minutes here and there over the last couple of days, I've started several things and am yet to finish a single one! Hopefully I'll be back tomorrow to share one of them. Until then, happy stampin'!


Stampin' Up! Supplies Used: 

Table built using Product Table Builder by The Crafty Owl - Independent Stampin' Up! Demonstrator.

Silly Goose Good Wishes PP647

by Joanne James2. July 2023 08:00

Today it's Sunday and time for this week's new challenge over at The Paper Players! It's the turn of the fabulous LeAnne to host this week and she has a seasonal theme challenge for us to work with:


Having used my Oceanfront stamp set a few times recently, I decided to go with a card that was inspired by the fun inflatables and beach toys on our challenge badge this week and decided to make a card featuring that sweet silly goose from the stamp set of the same name floating on the waves in her inflatable rubber ring with her amphibian friend - take a look:


Here's the low-down on today's card:

I stamped my image and sentiment in Tuxedo Black ink and coloured it with my Stampin' Blends in the Just Add Ink challenge colours (I still have Coastal Cabana markers from when we had Blendabilities markers) and the added it to a Lemon Lolly card base. I used the Sketch Saturday layout for my card, using one of the Scalloped Contour Dies to represent the stripes of the sketch and create a sea of waves. I added a touch of clear Wink of Stella to the edge of the waves and some retired ribbon with a bow to complete my card. How cute is that silly goose?

That's all there is to it! A sweet card to send a gaggle of good wishes to someone special in some summery, fresh colours. So what do trips to the beach mean to you? Is it sandcastles, shell collecting or sun, sea, sand and relaxation? Why not make a card with a beach theme and share it with us over at The Paper Players this week?

Here is the visual summary of the key products used on today's project for you to pin for easy reference:


You can see all of my Product and 'How To' summaries on my 'How To - Tips and Techniques' Pinterest board in case you've missed any. 

Before you reach for your ink and papers, check out what our amazing team has created to inspire you this week:

Here's a quick recap of our challenge rules:
 
1.  Create a new paper project
2.  Upload your creation to your blog with a link back to us and provide a direct link to the post featuring your challenge submission.
3.  Please link your card to no more than four challenges, TOTAL.
4.  Have FUN!

Enjoy your day; we are taking it easy today as the oldest of the James Juniors left for Geneva on a school trip in the early hours of the morning, so we are all feeling slightly jaded. I'll be back tomorrow with another project. Until then, happy stampin'!


Stampin' Up! Supplies Used: 

Table built using Product Table Builder by The Crafty Owl - Independent Stampin' Up! Demonstrator.

Lemon Lolly Cheerful Daisies Hello PP644

by Joanne James11. June 2023 08:00

Today it's Sunday and time for this week's new challenge over at The Paper Players! It's the turn of the fabulous Anne Marie to host this week and she has a pretty colour challenge for us to work with:


Do you ever send a card 'just because'? 'Hello' cards are perfect for an anytime greeting and useful for a quick note or simply to keep in touch with a friend. For my card this week I started with the sketch layout over at TGIF Challenges and grabbed my Cheerful Daisies Dies as these colours seemed the perfect fit. Take a look at what I came up with:


Here's the low-down on today's card:

Cheerful Daisies - I diecut the daisy trio in Basic White then split them apart, adding some Lemon Lolly to the centre of the main flower with a vellum top layer. I added a couple of pairs of diecut leaves and fronds that I watercoloured in Lost Lagoon, before piecing them back together.

Lots of Lemon Lolly - Lemon Lolly is such a lovely, fresh shade of citrus yellow that I knew this needed to be the focus colour of today's card. I used it for my base and added a piece of striped DSP to the centre of the scalloped panel too, as well as a trio of gems - so pretty!

And A Little Lost Lagoon - With white as my neutral this featured as my second colour and I used Lost Lagoon as my accent colour, for my watercolouring, stamped sentiment and a little ribbon detail too.

The only stamping on today's card is my 'hello' sentiment so I'm linking up this week's Just Us Girls challenge too, where that's their codeword. I'm also sharing with the ladies over at SUO Challenges where their current theme is flowers. 

Here is the visual summary of the key products used on today's project for you to pin for easy reference:


You can see all of my Product and 'How To' summaries on my 'How To - Tips and Techniques' Pinterest board in case you've missed any. 

Before you reach for your ink and papers, check out what our amazing team has created to inspire you this week:

Here's a quick recap of our challenge rules:
 
1.  Create a new paper project
2.  Upload your creation to your blog with a link back to us and provide a direct link to the post featuring your challenge submission.
3.  Please link your card to no more than four challenges, TOTAL.
4.  Have FUN!

Enjoy your day; yesterday was absolutely gorgeous here - summer has finally arrived! I am hoping for a repeat today and looking forward to spending a fairly lazy day in the garden. I'll be back tomorrow with another project. Until then, happy stampin'!


Stampin' Up! Supplies Used: 

Table built using Product Table Builder by The Crafty Owl - Independent Stampin' Up! Demonstrator.

Oceanfront Fathers Day Card PP643

by Joanne James4. June 2023 08:00

Today it's Sunday and time for this week's new challenge over at The Paper Players! It's the turn of the fabulous Ann to host this week and she has a fun theme challenge for us to work with:


I decided to use Jen M's layout over at Freshly Made Sketches and was also inspired by the masculine blues and browns of Laurel's Inspired By photo for my Father's Day card this week - take a look:


Here's the low-down on today's card:

Oceanfront - I haven't used the Oceanfront stamp set in ages, so thought today's card was a good opportunity to rectify this! This is such a great stamp for making beautiful beach scenes and is so easy to use. I stamped my scene with a Boho Blue sky, Misty Moonlight ocean and Crumb Cake sand with Copper Clay grasses - done! I also added some birds in Pebble Path from the 'Beside Me' set that I had out on my desk for my sentiment and some retired pebble enamel shapes to add a little extra detail. I wanted to diecut my scene with a stitched rectangle, but since they are now retired I thought I would consider other current options first and what do you know - one of the scalloped rectangles in the Scalloped Contours Dies was the perfect size!

Fresh As A Daisy - I used two pieces of designer paper for my split panel background - do you recognise them? In addition to all of the lovely floral patterns, the Fresh As A Daisy papers have a beautiful wash reverse in each of the new in-colours. I used the Boho Blue and Copper Clay papers to echo the colours of my oceanfront scene, with the diagonal proving a useful way to combine the two.

A Sketch Liberty - Whilst I think it's clear to see how Jen's FMS sketch inspired my layout this week, you will notice I did take a few liberties with it to suit my finished design (I hope she doesn't mind!). The size of my final card is larger than usual (14.9cm x 21cm) as I wanted to be able to accommodate my scene and still have plenty of background on show. I also re-angled the diagonal of my background layer; I wanted the diagonal to follow the diagonal of the shoreline of my ocean scene, so instead of going corner to corner I cut across the the main panel. This way the design still looks cohesive and the diagonal works with my scene, rather than making everything look slightly out of kilter:

A simple heat-embossed sentiment cut out with the label (shortened to fit) from the Cheerful Daisies Dies and a fancy linen thread bow complete my Father's Day card. This one will be headed to my Dad in a couple of weeks time - hope he likes it!

Here is the visual summary of the key products used on today's project for you to pin for easy reference:


You can see all of my Product and 'How To' summaries on my 'How To - Tips and Techniques' Pinterest board in case you've missed any. 

Before you reach for your ink and papers, check out what our amazing team has created to inspire you this week:

Here's a quick recap of our challenge rules:
 
1.  Create a new paper project
2.  Upload your creation to your blog with a link back to us and provide a direct link to the post featuring your challenge submission.
3.  Please link your card to no more than four challenges, TOTAL.
4.  Have FUN!

Enjoy your day; after what has been a decidedly chilly week here in the UK, the sun is finally shining and temperatures are on the up - hurrah! I am looking forward to spending some time in the garden today, hopefully with a good book. I'll be back soon with another project. Until then, happy stampin'!


Stampin' Up! Supplies Used: 

Table built using Product Table Builder by The Crafty Owl - Independent Stampin' Up! Demonstrator.

Crafting With You Embroidered Flowers In Blue AYSI 299

by Joanne James19. May 2023 12:00


Today I'm sharing my design team card for our new challenge over at As you See It where it's time for a recipe challenge chosen by Deborah who is back from her travels this week:


I sometimes struggle with recipe challenges, but I just received some new goodies so grabbed them along with the sketch over at Try Stamping on Tuesday and set to work - take a look:


 Here's the low-down on today's card:

Shades of Blue - I decided for today's card that I wanted to play with the new blue that is part of the Brights colour family, Azure Afternoon, so that's what I chose for my card base (I added some tone-on-tone stamping using a stamped-off flower to create a subtle pattern detail) and the piece of watercolour-effect designer paper from the Bright & Beautiful paper pack that runs across the centre of my card. This is such a lovely shade of blue: not as turquoise as Tahitian Tide, not as dark as the old Pacific Point. I also used this colour to stamp my flowers, adding in a second blue, the returning Blueberry Bushel, to highlight the flower leaves. I also added a strip of this darker blue behind my horizontal panel and added some ribbon and a bow in some retired Blueberry Bushel ribbon that I rescued from my retired box - yay! I love the way these two blue go together.

Diecuts and Frames - There are two sets of diecuts on today's card: the horizontal border and the scallop-edged square are both adapted from the Scalloped Contours Dies, but the dies that ultimately inspired today's card are those that contain this sweet embroidery hoop and centre - the Crafting With You Dies. I thought the embroidery hoop would be a clever 'frame' and perfect way to highlight the emboidered flowers that are part of the co-ordinating stamp set:


A Handmade Hug - I decided to leave the front of my card sentiment-free because it's always useful to have some more general cards to hand, but I couldn't resist adding one of the sweetest sentiments from the 'Crafting With You' stamp set to the inside of my card:


Isn't that just lovely?! I actually managed to tick off the recipe ingredients with relative ease for once. If you are a fan of blues, you should definitely check out the Design Team cards - they really are fabulous!

Here is the visual summary of the key products used on today's project for you to pin for easy reference:


You can see all of my 'How To' summaries on my 'How To - Tips and Techniques' Pinterest board in case you've missed any. 

Here's a summary of our challenge rules:

  • Create any card, scrapbooking page, 3D project or packaging project that fits the challenge.
  • Please include the challenge graphic and link back to the challenge in your blog post. Turn off word verification so we can leave you lots of lovely comments. Make sure you link the post not the whole blog to the Linky. Use #AYSIXXX when uploading to a public gallery.
  • If you’re unsure about ‘the rules’, check the details under the Challenge Guidelines tab on the As You See It Challenge homepage. 
We look forward to seeing your creations in the AYSI gallery.

I am rushing about today, running errands and feeling unusually tired - I definitely have that Friday feeling! Enjoy your day and I'll hopefully be back tomorrow with another project. Until then, happy stampin'!


Stampin' Up! Supplies Used:

Table built using Product Table Builder by The Crafty Owl - Independent Stampin' Up! Demonstrator.

Love Cats Hanging Out For FF127

by Joanne James3. February 2023 09:00

Today I have my card for the new challenge over at Festive Friday Card Making and Paper Crafting Challenge


The challenge that we are celebrating this week is 'Galentine's Day' which is on 13th February. This celebration, falling the day before Valentine's Day, is all about celebrating female friendships. Remember the fun thing is that at Festive Friday you do not need to actually celebrate the occasion; your goal is to simply use three or more items from the inspiration list on your project. This week I really went to town and used a friendship sentiment, hearts, pink, purple, twine and something shiny and this is what I came up with:


Here's the low-down on today's card:

I wanted to use another of the comical felines in the 'Love Cats' stamp set for today's card and chose the one that paired best with the sentiment I wanted to use. I think 'I love hanging out with you' is the perfect sentiment to share some female love and let your bestie know how much you enjoy their company, don't you? 

I had a whole other layout originally planned for this card, until I saw the Try Stamping on Tuesday sketch layout - I rotated it through 90 degrees and thought the curve would be perfect for my acrobatic cat. In order to tuck the banner underneath the front of the cat to preserve the sense of perspective, I stamped the cat twice and carefully fussy cut the top half of one, so that I could adhere the banner and then add the upper portion of the cat over the top If you look closely you can see how I did this below:

I aligned the banner with the wire and stamped the sentiment in one straight line rather than as it is laid out on the original stamp as I wanted a long slim banner. It does make for a long banner, but I love the effect - and the long twine bow that ties my heart trinket follows the same contours, so I think it works. I found this little shiny heart in my retired embellishment stash and it was the exact same size as the stamped one, so was a perfect fit - serendipity indeed!

My colour scheme was inspired by the Dandy Designs designer paper I used on my car base - one of my favourite Sale-A-Bration free items this year - have you earned yours yet? You still have one more month to take advantage of the current Sale-A-Bration promotion. so don't miss out.

Finally, I'm also linking today's card up for a second entry over at Global Design Project #GDP379 where their theme this week is 'love'.

Here is the visual summary of the key products used on today's project for you to pin for easy reference:


You can see all of my 'How To' summaries on my 'How To - Tips and Techniques' Pinterest board in case you've missed any. 

How does our board inspire you? I can’t wait to see what YOU create! For more inspiration, be sure to visit the rest of the Festive Friday Card Making and Paper Crafting Challenge Design team:

 Enjoy your day and I'll be back tomorrow with another project. Until then, happy stampin'!


Stampin' Up! Supplies Used:

Table built using Product Table Builder by The Crafty Owl - Independent Stampin' Up! Demonstrator.

Butterflies and Flowers Clean And Simple One Layer Birthday Card PP596

by Joanne James19. June 2022 08:00

Today it's Sunday and time for this week's new challenge over at The Paper Players! It's the turn of the fabulous Jaydee to host this week and she has a clean and simple challenge for us to work with:


I love one layer cards! had another go with a different colour combo from the palette over at Sunday Stamps (such a great colour palette!) and decided that today I would focus on creating the illusion of layers on my single layer creation using some clever diecut embossing, masking and stencilling - take a look:


Here's the low-down on today's card:

How Many Layers? - I love one layer cards as they are great for clean and simple designs. They can be as simple as a single image and a sentiment; for today's card though, I decided to create the illusion of layers. The first thing I did was use one of my Scalloped Contour Dies to partially emboss the outline of a label. I then stencilled a butterfly on the non-embossed section, then masked it off, along with a second mask to mask off the embossed area before using an alternative stencil to emboss a pattern around the remainder of the card. At this stage the card should look something like this:

When the masks are removed, the finished card front appears to have three separate layers: the butterfly uppermost, followed by the die-embossed label outline and finally the background floral-patterned layer. The photo below shows these in more detail: 


 Finally I added a sentiment to my faux-label to complete my card. I also stamped a sentiment on the inside, with some soft stencilling around the edges - I photographed the inside of the front of my card too so that you can see the partial die-embossed label outline more clearly:


By keeping my central label clear, I've tried to preserve some 'white space' on my one layer card. Along with the absence of embellishments of any kind and the one layer that is the crux of this challenge, I have managed to keep thing clean and simple too. I love these Butterflies & Flowers Layering Decorative Masks stencils and will be so sad when they retire at the end of the month. 

Here is the visual summary of the key products used on today's project for you to pin for easy reference:


You can see all of my Product and 'How To' summaries on my 'How To - Tips and Techniques' Pinterest board in case you've missed any. 

Before you reach for your ink and papers, check out what our amazing team has created to inspire you this week:

Here's a quick recap of our challenge rules:
 
1.  Create a new paper project
2.  Upload your creation to your blog with a link back to us and provide a direct link to the post featuring your challenge submission.
3.  Please link your card to no more than four challenges, TOTAL.
4.  Have FUN!

Enjoy your day; mine will be a quiet one, having been out and about for the past couple of days. I'll be back soon with another project. Until then, happy stampin'!


Stampin' Up! Supplies Used: 

Table built using Product Table Builder by The Crafty Owl - Independent Stampin' Up! Demonstrator.

Mini Catalogue

BROWSE THE CATALOGUE

The mini catalogue is now live! Read and download your copy here.

Shop Online

Access my online shop 24 x 7, 365 days of the year:

Current April hostess code:

VDKNV7BH

Shop Online

Join My Team

It's always a great time to join Stampin’ Up! New team members can get £130 worth of products for only £99 + free business supplies + free shipping + all the fun being a part of Stampin’ Up! Stampin' Up! has something for everyone: join my growing team and benefit from my support to enjoy Stampin' Up! however you choose.

If you're interested, call me for a chat to understand how I can help you realise your goals. Alternatively, if you have already decided to sign up and you just can't wait, please click here for the link to the online form where you can sign up and order your starter kit right away! 

Latest Kit!

Stampin Cut and Emboss

The Rock Legend Kit has all you need to make 8 cards with coordinating envelopes. Along with the new Panda Friends Kit, both are available from January 4th for just £14 each - get yours here!

2023-24 Annual Catalogue

BROWSE THE CATALOGUE

Click on the catalogue for a full list of current SU! supplies - if you would like to order any of the items featured, please drop me a line at [email protected] or give me a call on 07773 421446 - I'd be happy to help.

New Online Exclusives

There are new products available exclusively in the online store from 5 March - check them out here.

About Me

Hi I'm Joanne and live in Northampton and when I'm not looking after my husband and two beautiful children, am an avid crafter with a passion for all things Stampin' Up!

I must confess that I have never been a big rubber stamper - until I discovered Stampin' Up! that is. I love the fact that I can get such great results with co-ordinating stamps, inks, papers and punches - the possibilities are endless! Join me on my stamping journey as I share the things I love and be inspired to create amazing things yourself!

Follow Me

Monthly Newsletter

Box Builder

Click the button above to use Box Buster to create your custom box design using the Envelope Punch Board!

Kits Collection Now Available!

Stampin Cut and Emboss

The new Kits Collection from Stampin' Up! is now available!

Click here to see the current kits available and order yours online today.

I Design For


Stampin' Up Stuff

This is my personal blog and is not endorsed by Stampin’ Up! I hope you find it a plentiful source of ideas and personal inspiration but please don't copy my designs for contest submission or use for classes, publication or sale without express permission.