He's The Man Cheers To The Years TTT208

by Joanne James11. May 2023 17:00

It's Thursday and time for a new challenge over at TicTacToe! It's the turn of Team X to host this week and the lovely Felicita is our featured designer. This is the fun board that we are playing along with: 


I was a little stuck for current sets that fit the bill so decided to dig into my recently retired stash and use up some of my designer series paper. I decided to go across the top row of the board with masculine, diecut and beer or drink and this is what I came up with, using the current sketch over at Sunday Stamps for my layout:


Here's the low-down on today's card:

I used two panels of retired He's The Man designer series paper, rotating the pattern on the smaller one to follow the same diagonal lines as the base one (rather than the horizontal/vertical), added a banner of Mango Melody to pick up on the yellow in the diecut that I used as my focal point. This diecut was one on a pre-printed sheet in the paper pack, and I backed it with a scalloped diecut circle in Sahara Sand to neaten the edge:

I added a trio of Mango Melody resin dots to complete the front of my card and added the only stamping with a sentiment from the current 'Charming Sentiments' stamp set to the inside to finish my card:

No visual summary of the key products used on today's project or supplies list as almost everything I used on today's card - except for the Early Espresso ink and cardstock and the stamp set I used inside - is retired. I hope that it inspires you regardless to keep creating with your retired product or gives you an idea of how you can adapt it to work with the new.

A tictactoe board offers so many creative possibilities - how does this week's board inspire you? Why not have a go? We would love to see you in the gallery and who knows - you might be selected for Designer's Choice and be eligible to be a guest designer on a future challenge. 

Enjoy your day; I am heading out to a champagne reception this evening to celebrate the eldest of the James Juniors final formal week of school - something of a milestone! I'll be back tomorrow with another project for the new challenge over at Festive Friday. Until then, happy stampin'!


Easter Bunny Punch Easter Card PP630

by Joanne James5. March 2023 08:00

Today it's Sunday and time for this week's new challenge over at The Paper Players! It's my turn to host this week I've a theme challenge for us to work with:


We are still some weeks away, but it's always good to be prepared so I thought we could get a start on our Easter cards. I used Karren's super-versatile layout over at Freshly Made Sketches this week and set to work. I ended up making two cards - take a look at the first one:


Here's the low-down on today's card:

Country Lane and a Punched Easter Bunny - I haven't used these papers for a while, but I knew that this pretty floral from the Country Lane designer series paper pack would be the perfect pattern to form the basis of the colour scheme for today's card. I wanted a clean white bunny as my focal point and the darker background sets it off perfectly:

I added a little punched flower to my bunny for a little extra decoration.

A Step Up - Having made my initial card, I decided to create a second one with an extra layer and some tied baker's twine - just a small extra detail but it does add a little something extra:

 The sentiment is from a retired set called 'Welcome Easter' - obviously, any of the current Easter sets could be substituted. Here's a photo of both cards together so that you can compare:

A Little Interior Decoration - Another sentiment and a border of leftover paper decorates the inside of my card:


That's all there is to it - nice and straightforward! I love the Easter Bunny Punch but wasn't so keen on the drawings in the coordinating stamp set but I think this card shows that it works without too.

Here is the visual summary of the key products used on today's project for you to pin for easy reference:


You can see all of my Product and 'How To' summaries on my 'How To - Tips and Techniques' Pinterest board in case you've missed any. 

Before you reach for your ink and papers, check out what our amazing team has created to inspire you this week:

Here's a quick recap of our challenge rules:
 
1.  Create a new paper project
2.  Upload your creation to your blog with a link back to us and provide a direct link to the post featuring your challenge submission.
3.  Please link your card to no more than four challenges, TOTAL.
4.  Have FUN!

Enjoy your day; I'll be back tomorrow with another project. Until then, happy stampin'!


Stampin' Up! Supplies Used: 

Table built using Product Table Builder by The Crafty Owl - Independent Stampin' Up! Demonstrator.


Simply Fabulous Stencilled Slimline Birthday Card AYSI285

by Joanne James7. October 2022 12:00

Today I'm sharing my design team card for our new challenge over at As you See It where it's time for a bold colour challenge:
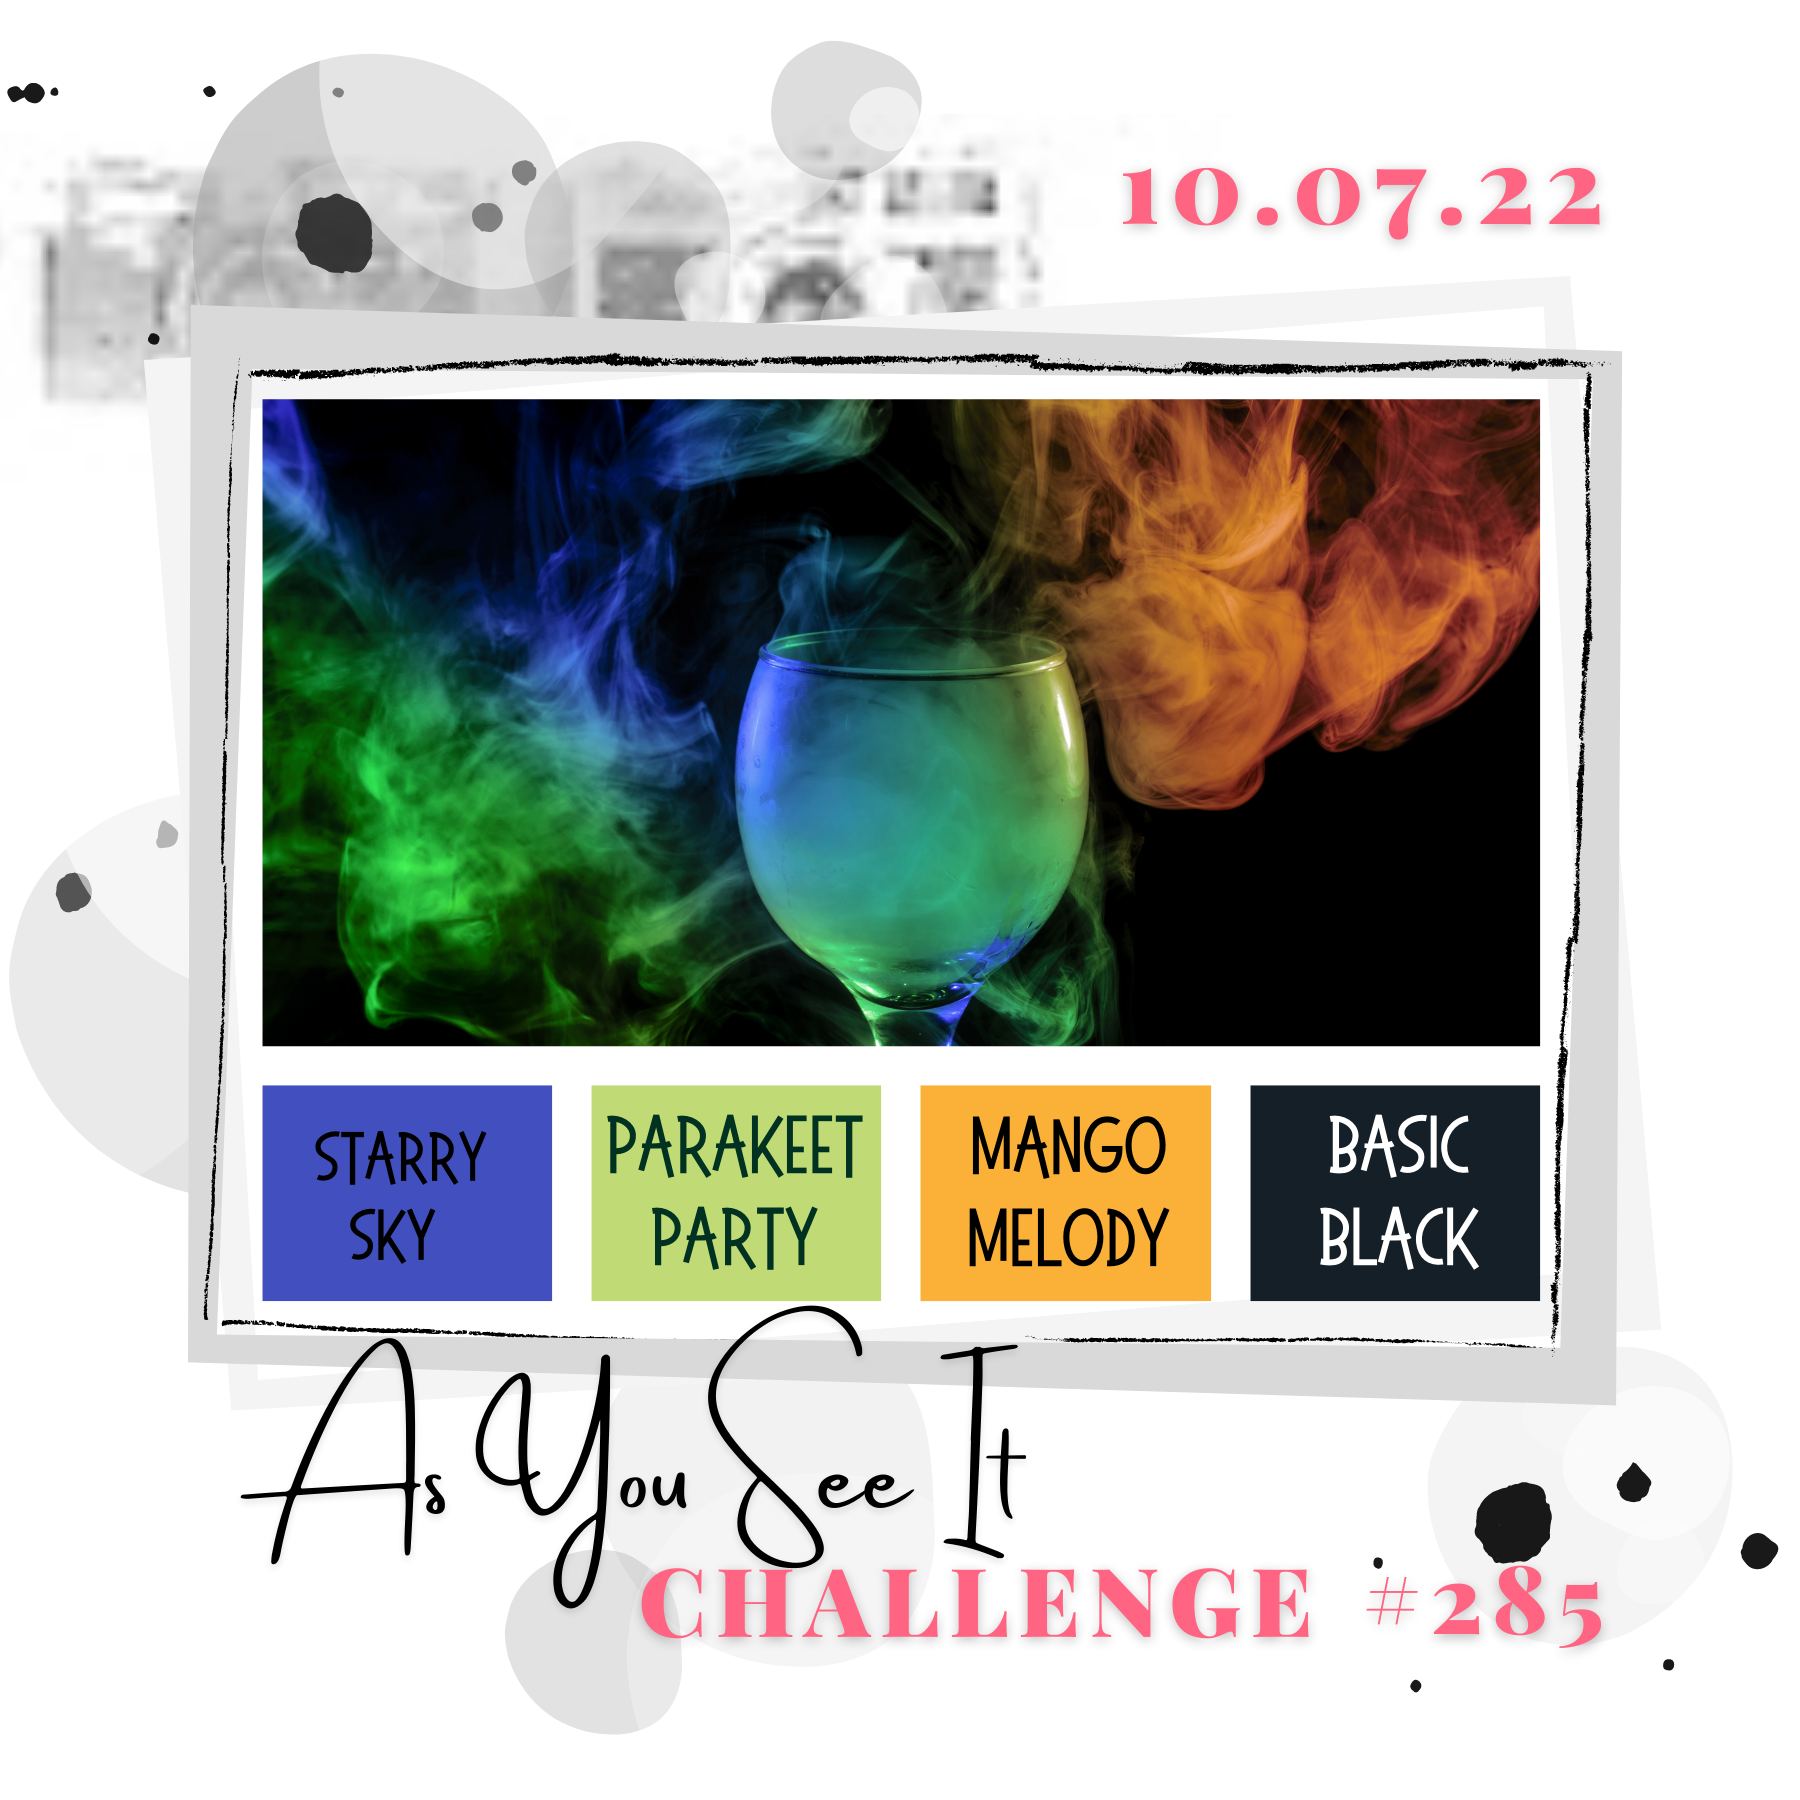
    

I love this week's colour palette, although the bold colours did mean I had to get my thinking cap on. I decided they would be perfect for me to try out an idea I've had buzzing around for a while - take a look:
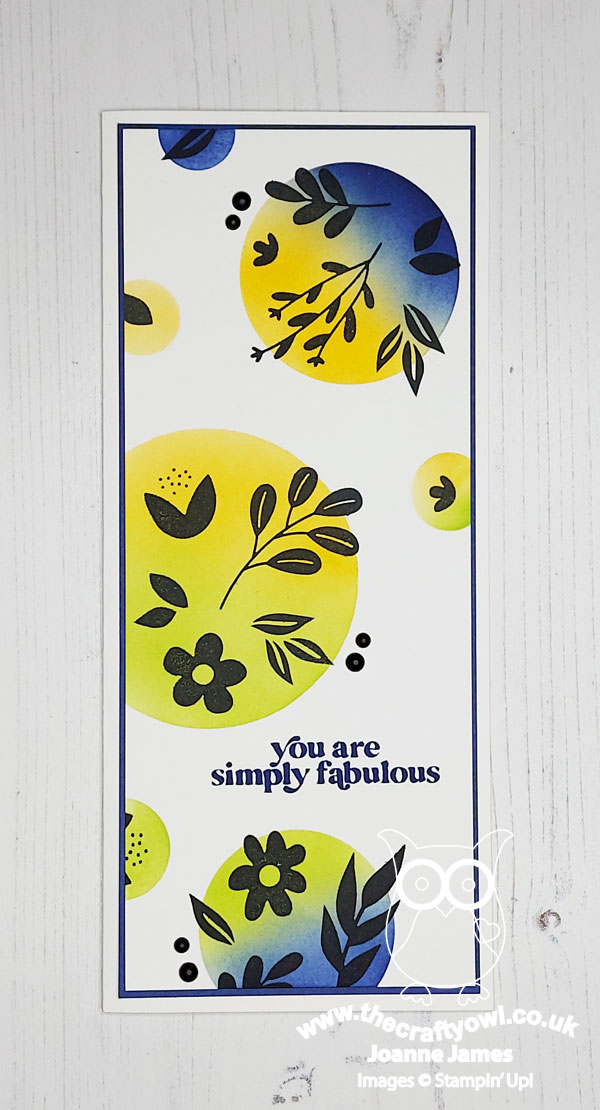
 

Here's the low-down on today's card:

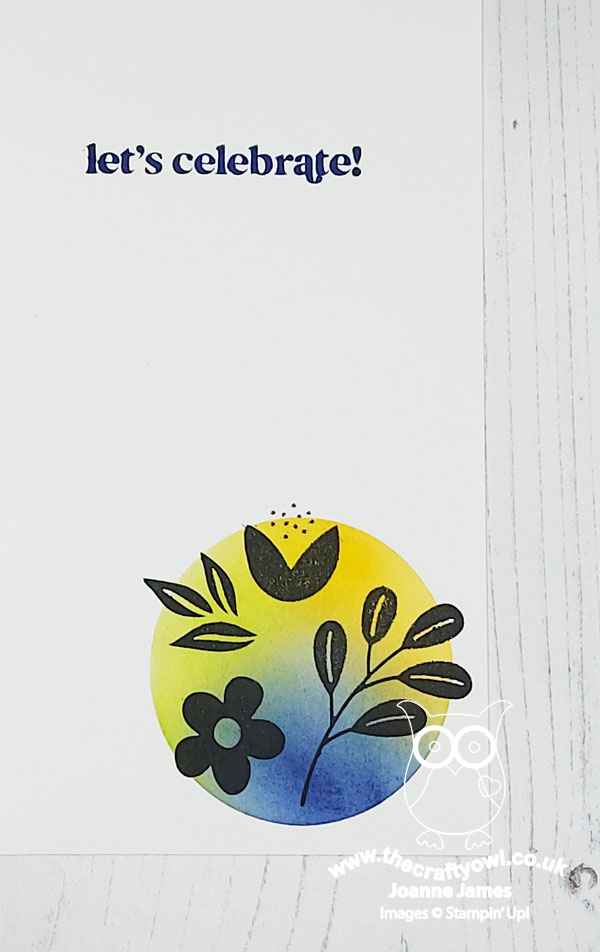
Simply Fabulous - I've made no secret of how much I love the 'Simply fabulous' stamp set - to me, it is just that! So versatile, with great sentiments and fonts and bold floral images, if you do a search you'll find lots of examples of where I've used it on other cards. Instead of stamping in colour, I wanted to see what it would look like stamped in black onto a coloured base. The images are small and easy to combine and the subtle leaf detail on some of the images mean this works really well. I used my Stamparatus to stamp clusters of images at a time, reinking to make sure I had a nice solid black image. I also added a little additional detail on the inside:
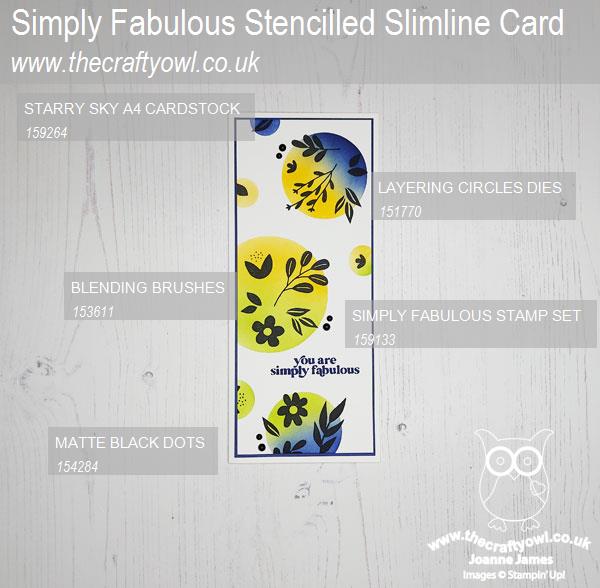
DIY Stencils - I decided that I would use some circle shapes to highlight my clusters of silhouetted images and use a combination of blended colours in each one. I made my own set of circle stencils, using some window sheet and my Layering Circles Dies, so carefully positioned them where I wanted my images, starting with the large ones and adding a few smaller ones around the edge to fill in the gaps. I used my blending brushes to add a combination of two colours to each circle. I love using stencils and don't have many in my collection, but I'm always looking at ways in which I can use my dies to create custom stencils - do you do this too? My stencilling here is simple but I think quite effective; I'm linking up with the challenge over at Inkspirational where they are asking us to use stencils this week - do check out the DT and gallery cards, there are some great examples of the way stencils can be used on your projects.


Finishing Touches - To finish my card, I added a few matte black dots to the outer borders of the larger circles as an accent:
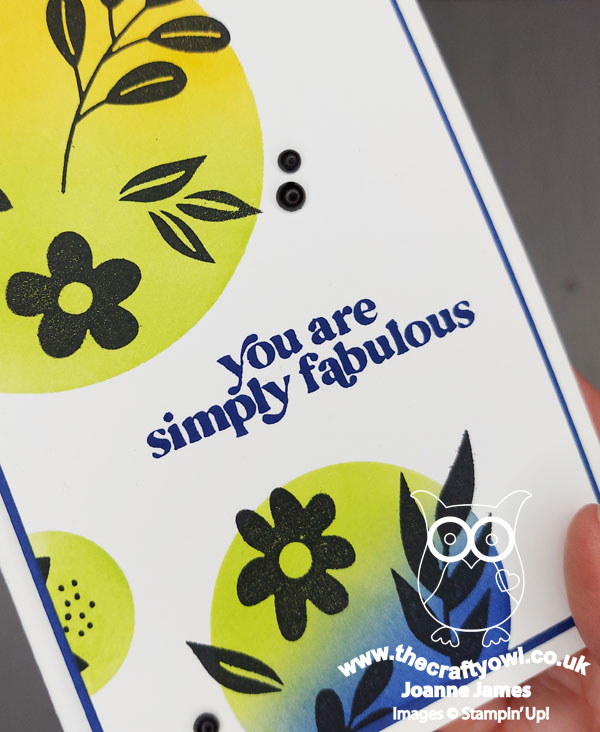
I really love this card and am glad I used a slimline design too as it meant I got more circles onto my card front. If I could change one thing, I think I would stamp my sentiment in black rather than Starry Sky; I wanted to tie it in to the mat layer, but I think black would have given a crisper finish. I'll save that for my next one! 

Here is the visual summary of the key products used on today's project for you to pin for easy reference:
 

You can see all of my 'How To' summaries on my 'How To - Tips and Techniques' Pinterest board in case you've missed any. 

Here's a summary of our challenge rules:

  • Create any card, scrapbooking page, 3D project or packaging project that fits the challenge.
  • Please include the challenge graphic and link back to the challenge in your blog post. Turn off word verification so we can leave you lots of lovely comments. Make sure you link the post not the whole blog to the Linky. Use #AYSIXXX when uploading to a public gallery.
  • If you’re unsure about ‘the rules’, check the details under the Challenge Guidelines tab on the As You See It Challenge homepage.
  • In a colour challenge, black or other neutral can be used in outlines and sentiments but no other colours should be included. Stampin’ Up colours are used for reference but colours that are a close match are welcome.
We look forward to seeing your creations in the AYSI gallery.

Enjoy your day. Mine will be filled with laundry and housework and maybe a little crafting! I am on late pickup this evening, as one of the James Juniors has a social evening and quiz night at school, which after this morning's rush hour I am particularly thankful for: a beer tanker had overturned and completely blocked the dual carriageway that is only minutes into our journey, necessitating a massive diversion and delay - not what you need when you have a 60 mile round trip to embark on at 7.15am! Still, everyone got to school on time and I'm thankful we weren't involved in the incident itself, so all good. I'll be back tomorrow with another project. Until then, happy stampin'!


Stampin' Up! Supplies Used:
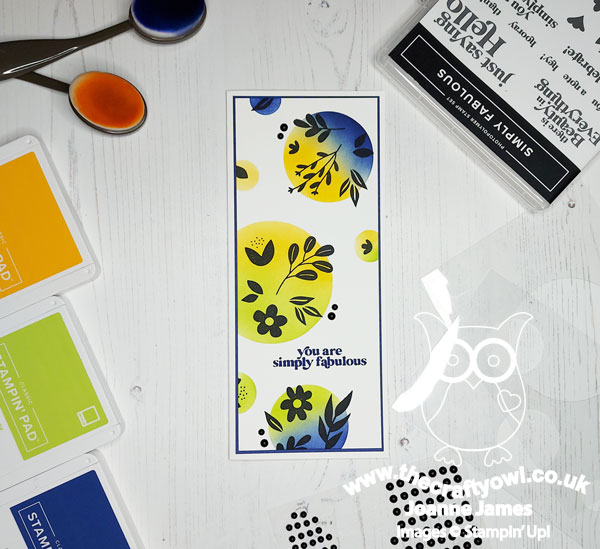
Table built using Product Table Builder by The Crafty Owl - Independent Stampin' Up! Demonstrator.

Hippest Hippos CAS Snorkelling Shaker Card PP602

by Joanne James31. July 2022 08:00

Today it's Sunday and time for this week's new challenge over at The Paper Players! It's the turn of the fabulous Claire to host this week and she has a fun theme challenge for you to work with:


Claire's board has a distinctly beachy theme this week, so I went across the middle with diecut, blue and patterned paper and yes, you've guessed it - I decided to create another shaker card featuring my favourite Sale-A-Bration stamp set, Hippest Hippos - this time a more clean and simple version than the one I shared with you a few days ago (you can see that card here if you missed it). Time to check out today's card:


Here's the low-down on today's card:

For today's challenge I used up a little more of the (retired) Whale of A Time designer series paper to create an underwater paradise for my snorkelling hippo. This time I cut a partial circle for my frame and used the wave die from the Hippo dies to create the 'surface' of the sea for my hippo to swim along, placing my hippo outside my shaker element rather than inside as on my previous card. Once again I added a pair of handcut customised fins, along with snorkel and mask to my hippo - this time in bright Parakeet Party green:


For this card, my shaker element is a flat 'pocket' shaker - a great way to reduce bulk and a great way to introduce a shaker element to an otherwise clean and simple card. Not forgetting the inside, I used the 'Whale Done' stamp set for some co-ordinated stamping and added a strip of left over designer paper:


Today's hippo's underwater apparel was inspired by my own snorkel, mask and fins which are also bright green in colour - just to make sure Jason doesn't lose me as I'm floating around the Caribbean. I've not done that for a while - happy memories!

Here is the visual summary of the key products used on today's project for you to pin for easy reference:


You can see all of my Product and 'How To' summaries on my 'How To - Tips and Techniques' Pinterest board in case you've missed any. 

I'm also linking today's card up over at Sparkles Monthly Challenges for a second entry into their shaker cards challenge and over at Just Add Ink for another 'Under the Sea' card. Finally I'm linking up over at Addicted to CAS where the theme is 'nautical' - I'm pretty sure I've met that brief, I just hope they think my card is sufficiently clean and simple! 

Before you reach for your ink and papers, check out what our amazing team has created to inspire you this week:

Here's a quick recap of our challenge rules:
 
1.  Create a new paper project
2.  Upload your creation to your blog with a link back to us and provide a direct link to the post featuring your challenge submission.
3.  Please link your card to no more than four challenges, TOTAL.
4.  Have FUN!

Enjoy your day; I'll be back tomorrow with another project. Until then, happy stampin'!


Stampin' Up! Supplies Used: 

Table built using Product Table Builder by The Crafty Owl - Independent Stampin' Up! Demonstrator.

Celebrate With Sunshine and Rainbows PP587

by Joanne James17. April 2022 08:00

Today it's Sunday and time for this week's new challenge over at The Paper Players! It's the turn of the fabulous Claire to host this week and she has a timely clean and simple challenge for you to work with:


April showers! None of those here today though as the UK celebrates its warmest days of the year so far for a wonderful Easter bank holiday weekend! My card today does feature raindrops - and sunshine and the best thing to result from both after an April shower: rainbows!  I used the current sketch layout over at CAS on Friday for my clean and simple card today (I was thrilled to be a winner there last week with this stencilled card - look out for my guest spot there soon!):


Here's the low-down on today's card:

I took a piece of retired Sale-A-Bration Sunshine and Rainbows designer series paper and overlaid it with some stitched clouds cut with my Basic Borders Dies and a row of rainbows cut with one of the Brilliant Rainbows Dies. I then stamped a sentiment from the retiring 'Celebrate With Flowers' set twice, once in Magenta Madness onto a circle of So Saffron and a second time in Mango Melody on white and fussy cut the word 'sunshine' and layered the two together. To finish, I added a trio of iridescent rhinestones for a little added sparkle:


I used lots of different bits and pieces on today's card, but my minimising my layers and embellishments and focusing my design into the main square, I preserved my all-important 'white space', a key feature of clean and simple cards.

Here is the visual summary of the key products used on today's project for you to pin for easy reference:


You can see all of my Product and 'How To' summaries on my 'How To - Tips and Techniques' Pinterest board in case you've missed any. 

Before you reach for your ink and papers, check out what our amazing team has created to inspire you this week:

Here's a quick recap of our challenge rules:
 
1.  Create a new paper project
2.  Upload your creation to your blog with a link back to us and provide a direct link to the post featuring your challenge submission.
3.  Please link your card to no more than four challenges, TOTAL.
4.  Have FUN!

Enjoy your day; we spent yesterday at the farm visiting all of the baby animals - bottle feeding the lambs was a definite highlight! - and today we will be Easter egg hunting and enjoying Sunday lunch in the garden - bliss! I hope you are all enjoying a restful weekend break too! I'll be back tomorrow with another project. Until then, happy stampin'!


Stampin' Up! Supplies Used: 

Table built using Product Table Builder by The Crafty Owl - Independent Stampin' Up! Demonstrator.

Hues of Happiness New Catalogue Sneak Peek FF107

by Joanne James15. April 2022 08:00


Today I have my card for the new challenge over at Festive Friday. I used the great sketch over at Sunday Stamps for my layout too:


The challenge that we are celebrating this week is 'International Dance Day' which is on 29th April. Remember the fun thing is that at Festive Friday you do not need to actually celebrate the occasion; your goal is to simply use three or more items from the inspiration list on your project. I received my new annual catalogue pre-order earlier this week and couldn't wait to open it and start creating! So on today's card I used blue, rhinestones, patterned paper and diecuts from the inspo list and I have a sneak peek of new products for you - take a look:


 Here's the low-down on today's card:

Hues of Happiness Suite - Today's card features a number of products from the new 'Hues of Happiness' Suite. Behind my layered circle I used the beautiful trellis patterned diecut from the Blossoming Happiness Dies, but the star of today's card is most definitely the beautiful flowers that were cut from the Hues of Happiness designer series paper. The Blossoming Happiness Dies fit the flowers and leaves on two of the paper patterns perfectly; beautifully coloured flowers that can be cut out with ease - bonus! Here's a close up of these beautiful blooms: 

Aren't they just gorgeous?! I have cut up a whole pack of this paper already and will definitely be needing more of it!!

Happiness Abounds - The sentiment on the front of my card is from the 'Happiness Abounds' set that is also part of this suite; I added another two to the inside of my card. along with some outline floral detail:


This stamp set will be great for colouring too - I am so looking forward to working with it again.

Finishing Touches - A sprinkling of iridescent rhinestones and a couple of strips of retiring Gorgeous Grape glimmer paper complete my card.

If you think you don't need any more florals, the Hues of Happiness Suite will most definitely change your mind! I can't wait to share more new products with you. 

Would you like a copy of the new Stampin' Up! Annual Catalogue? If you have placed an order with me in the last 6 months, then great news - you are already on my mailing list to receive a new annual catalogue. If you haven't and would like one, please do get in touch to request one and I can add you to my list!

Here is the visual summary of the key products used on today's project for you to pin for easy reference:


You can see all of my 'How To' summaries on my 'How To - Tips and Techniques' Pinterest board in case you've missed any. 

How does our board inspire you? I can’t wait to see what YOU create! For more inspiration, be sure to visit the rest of the  Festive Friday Challenge Design team:

Ann Schach
Beth McCullough
Sharon Hashimoto Burkert
Melanie Hungerford
Helen Jennings
Stephanie Lanzalotto
Melva Peters
Jaydee
Diane Evans
Joanne James

Enjoy your day and I'll be back tomorrow with another project. Until then, happy stampin'!


Stampin' Up! Supplies Used:

Table built using Product Table Builder by The Crafty Owl - Independent Stampin' Up! Demonstrator.


Goodbye To Turtle Friends CCS 464

by Joanne James5. April 2022 13:00

It's Tuesday and time for a new challenge over at CAS Colours & Sketches. Bhavya is hosting for the month of April and our first challenge is a colour challenge: 


For my card today I decided to have one last outing with my retiring Turtle Friends bundle for a fun bleated birthday card - I used the current Inspire.Create sketch for my layout:


Here's the low-down on today's card:

I did add a few layers to today's card, including a strip of Pansy patch gingham, but otherwise was very careful to preserve my 'white space' and keep my design simple. A punched turtle, complete with party hat, was simply stamped and some highlights added with tone-on-tone Blends markers, along with a touch of chalk marker to highlight his eye:

It's always good to have a belated birthday card on hand - for a card maker, I seem to need all too many of these! I love the 'Turtle Friends' set and will be sorry to see it go; the turtle punch is already sold out, but the stamp set is still available as part of the Last Chance Products Promotion; as is the retiring Pansy Patch paper and the chalk marker - a super-useful crafting staple. 

Here is the visual summary of the key products used on today's project for you to pin for easy reference:


You can see all of my 'How To' summaries on my 'How To - Tips and Techniques' Pinterest board in case you've missed any. 

As a reminder, for our colour challenges, you must use all of the stated challenge colours. You may also use neutral colours; however, the challenge colours should be the most noticeable ones featured on your card. We use Stampin' Up! colour names for reference, but you are welcome to use any other companies' products as long as you match the challenge colours as closely as possible.

I do have a bonus card for you using today's colours too; I was playing around with the colours and originally made this card, using this week's Paper Craft Crew Sketch and the retired 'Flowering Cactus' bundle:


It is a little more clean and simple than my turtle card to be fair, but I didn't like it as much so moved it to second place - but I thought I'd share it with you anyway! And here's the PPC sketch:


Enjoy your day; I have a mountain of ironing to get through - wish me luck! I'll be back tomorrow with another project. Until then, happy stampin'!


Stampin' Up! Supplies Used:

Table built using Product Table Builder by The Crafty Owl - Independent Stampin' Up! Demonstrator.

Sweet In Symmetry Birthday Card FF105

by Joanne James18. March 2022 08:00

Today I have my card for the new challenge over at Festive Friday. 


The challenge that we are celebrating this week is 'World Party Day' which is on April 3rd. Remember the fun thing is that at Festive Friday you do not need to actually celebrate the occasion; your goal is to simply use three or more items from the inspiration list on your project. This week I used bright colours, twine, a celebratory sentiment and lots of layers, along with the intriguing sketch layout over at Sunday Stamps and this is what I came up with:


Here's the low-down on today's card:

Sweet Symmetry - When I think about bright colours, I am drawn to the Sweet Symmetry papers in the suite of the same name. Full of brights and bold patterns, I knew this would be the set to work with today. I particularly like the navy-based patterns in this pack, so chose one and cut a panel, making sure to centre the pattern to my base and added it to a Just Jade mat and Night of Navy card base.  

In Symmetry Blooms - Those triangles on the Sunday Stamps sketch really got me thinking; I settled on a collection of flowers, roughly placed in a triangular shape, and mirrored and offset around my sentiment and twine-wrapped layered circle base. The symmetrical nature of the stamps in the 'In Symmetry' set are perfect for creating mirror images or structured, stylised designs such as this.

Bold Colour - The eagle-eyed amongst you may have realised that my flowers are not stamped on white cardstock, rather on paler tones of the same colour. I saw a great card by one of the Stampin' Up! UK Artisans, Martin Stone, using this technique and I love the added brightness and intensity it gives the colours. This card is very much a 'go bold or go home' type of card - you can see the detail on the flowers better on the close-up below:

If you're interested in specifics, I listed the colours I used in the supplies table at the bottom of today's post. This might not be a card for everyone, but I really love it!

Here is the visual summary of the key products used on today's project for you to pin for easy reference:


You can see all of my 'How To' summaries on my 'How To - Tips and Techniques' Pinterest board in case you've missed any. 

How does our board inspire you? I can’t wait to see what YOU create! For more inspiration, be sure to visit the rest of the  Festive Friday Challenge Design team:

Ann Schach
Beth McCullough
Sharon Hashimoto Burkert
Melanie Hungerford
Helen Jennings
Stephanie Lanzalotto
Melva Peters
Jaydee
Diane Evans
Joanne James - you are here!

Enjoy your day and I'll be back tomorrow with another project. Until then, happy stampin'!


Stampin' Up! Supplies Used:

Table built using Product Table Builder by The Crafty Owl - Independent Stampin' Up! Demonstrator.


Quiet Meadow Honeybee Home Card FF104

by Joanne James4. March 2022 09:00

Today I have my card for the new challenge over at Festive Friday:


The challenge that we are celebrating this week is 'World Planting Day' which is on 20th March. Remember the fun thing is that at Festive Friday you do not need to actually celebrate the occasion; your goal is to simply use three or more items from the inspiration list on your project. This week I used flowers, green, brick and bugs/insects and this is what I came up with:

Here's the low-down on today's card:

Quiet Meadow Honeybee - This card is something of a departure from my usual style, as I don't tend to go in for collage-style stamping, but I think the images in both the 'Quiet Meadow' and 'Honeybee Home' stamp sets really lend themselves to this style. I used a Bumblebee coloured cardbase and added some tone-on-tone stamping in the same colour, along with some bees and splatter in black and used a blender brush to add colour to the outer edges. I also stamped a single flower on one circle, and for my main focal point I used my markers to add a buttercup in Bumblebee with a Just Jade stem. I also added a little extra collage-style stamping to the inside of my card: 


Layers and Textures - This card is all about textures and layers. In addition to my stamping, I added layered circles and diecut flower stems to build up my design. The circles were a combination of hive embossed gold vellum, some embossed brick and some (retired) Harvest Meadow designer series paper, along with a few in-colour enamel dots. This give lots of visual interest, despite the limited colour palette. 

A Trinket To Finish - Even though I added stamped bees to my background, I couldn't resist adding a gold bumblebee trinket to my stamped circle focal point:

A sentiment from the 'Honeybee Home' set completes my card. So what do you think? Not my usual style, but I had a lot of fun putting it together and stepping outside my comfort zone for a while. I've had a head cold this week and have definitely found myself being drawn to yellow - I think I've subconsciously been cheering myself up! It's also perfect for the current challenge over at The Alphabet Blog, where they are on the letter 'X is for xanthic' - which apparently means 'relating to the colour yellow' - who knew?! I am a bit of a logophile (that means lover of words if it's not a word you are familiar with) so I am delighted to add this one to my collection!

Here is the visual summary of the key products used on today's project for you to pin for easy reference:


You can see all of my 'How To' summaries on my 'How To - Tips and Techniques' Pinterest board in case you've missed any. 

How does our board inspire you? I can’t wait to see what YOU create! For more inspiration, be sure to visit the rest of the  Festive Friday Challenge Design team:

Ann Schach - out this week
Beth McCullough
Sharon Hashimoto Burkert
Melanie Hungerford
Helen Jennings
Stephanie Lanzalotto
Melva Peters
Jaydee
Diane Evans
Joanne James

Enjoy your day and I'll be back tomorrow with another project. Until then, happy stampin'!


Stampin' Up! Supplies Used:

Table built using Product Table Builder by The Crafty Owl - Independent Stampin' Up! Demonstrator.


Nature's Beauty Easter Wishes

by Joanne James2. March 2022 19:14

Today I'm sharing a quick card I made with a few challenges in mind - I used the sketch over at Try Stamping on Tuesday and the option of watercolouring (albeit when I added my banner to my card I inadvertently put it too far to the left - oops!) and used the new Color Throwdown palette along with the Easter bunny inspiration over at Just Us Girls:


I don't have any current Easter sets featuring bunnies, eggs or carrots - but having posted this card a while ago on my social media, one of my customers commented that the bunny from 'Nature's Beauty' would work well for an Easter card too, so I thought I'd give it a try. This is what I came up with:


Here's the low-down on today's card:

I stamped my bunny onto watercolour paper then coloured him in using my waterpainter. When dry I used my Stamparatus to re-stamp the outline again in Crumb Cake over the top to add the definition of the rabbit's fur. I also watercoloured in some sky and grass, adding some stamped tufts of grass and a few hand-drawn orange flowers to tie in to the colour of my card base.


I cut the rabbit out using my Layering Circle Thinlits and added a sentiment from 'A Wish For Everything' before adding to my (retired) Grapefruit Grove card base with gingham banner and crinkle ribbon bow. My watercolouring isn't brilliant, but my customer was right - I think this stamp does make a cute Easter bunny!

Here is the visual summary of the key products used on today's project for you to pin for easy reference:


You can see all of my 'How To' summaries on my 'How To - Tips and Techniques' Pinterest board in case you've missed any. 

I am feeling a little under the weather today as if I am trying to ward off a cold. The dark, grey day with constant drizzle has done nothing to lift my spirits - where oh where are the sunny days of spring?! Nothing to do other than stay in, keep warm and craft! Enjoy your evening and I'll be back tomorrow with another project. Until then, happy stampin'!


Stampin' Up! Supplies Used:

Table built using Product Table Builder by The Crafty Owl - Independent Stampin' Up! Demonstrator.


Current Promotions

Stampin Cut and Emboss

Save up to 30% off on all your favourite kits from 1 to 31 October! 

Click here to see the current kits available and order yours online today.

Join My Team

It's always a great time to join Stampin’ Up! During October you can get even more in your starter kit! New team members can get £160 worth of products for only £99 + free business supplies + free shipping + all the fun being a part of Stampin’ Up! Stampin' Up! has something for everyone: join my growing team and benefit from my support to enjoy Stampin' Up! however you choose.

If you're interested, call me for a chat to understand how I can help you realise your goals. Alternatively, if you have already decided to sign up and you just can't wait, please click here for the link to the online form where you can sign up and order your starter kit right away! 

Shop Online

Access my online shop 24 x 7, 365 days of the year:

Current October hostess code:

9NKXDTTR

Shop Online

Scrapbooking

Stampin' Up! has introduced a new range of 12x12" scrapbooking product and kit - the full range is now available to purchase online. To download a copy of the new digital Scrapbooking Catalogue click here.

Mini Catalogue

BROWSE THE CATALOGUE

'Tis The Season - the new Stampin' Up! Mini Catalogue is here! For more details and to download your copy click here

2024-25 Annual Catalogue

BROWSE THE CATALOGUE

Click on the image to download your copy of the 2024-25 annual catalogue. For a full list of current SU! supplies, go to my online store. If you would like any help or advice, please drop me a line at joanne@thecraftyowl.co.uk or give me a call on 07773 421446 - I'd be happy to help.

Latest Kits!

Stampin Cut and Emboss

The Christmas Ornaments Kit and Card Keeper Kit are the latest kits in the online store - get yours here!

New Online Exclusives

There are new products available exclusively in the online store from 5 November - check them out here.

About Me

Hi I'm Joanne and live in Northampton and when I'm not looking after my husband and two beautiful children, am an avid crafter with a passion for all things Stampin' Up!

I must confess that I have never been a big rubber stamper - until I discovered Stampin' Up! that is. I love the fact that I can get such great results with co-ordinating stamps, inks, papers and punches - the possibilities are endless! Join me on my stamping journey as I share the things I love and be inspired to create amazing things yourself!

Follow Me

Monthly Newsletter

Box Builder

Click the button above to use Box Buster to create your custom box design using the Envelope Punch Board!

Kits Collection Now Available!

Stampin Cut and Emboss

The new Kits Collection from Stampin' Up! is now available!

Click here to see the current kits available and order yours online today.

I Design For


Stampin' Up Stuff

This is my personal blog and is not endorsed by Stampin’ Up! I hope you find it a plentiful source of ideas and personal inspiration but please don't copy my designs for contest submission or use for classes, publication or sale without express permission.