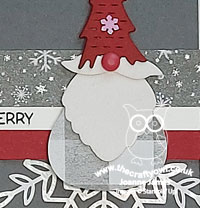
A Wonderful Snowflake With Seasonal Sparkle CCS 450

by Joanne James14. December 2021 13:00

It's Tuesday and time for a new challenge over at CAS Colours & SketchesThis week's challenge is our final challenge of the year and as such Patricia has decided that we can have free reign this week! We can choose any challenge from 2021 and make it seasonal. So whether you decide on a sketch, colour palette or even the double, you can choose whichever you prefer - just make it seasonal! It's also our milestone 450th challenge and there are prizes to be won - yay! - so be sure to play along! I decided to go with challenge 443:


You can see my original card for sketch 443 here along with the sketch itself. For my card today I have definitely gone with a 'less is more' look and kept things simple - take a look:


Here's the low-down on today's card:

I decided to use one of the diecut snowflakes from the Wonderful Snowflakes pack and used that to accent my label, which is stamped and heat-embossed in white with one of the sentiments form the 'Snowflake Wishes' stamp set. It's difficult to see in the photo, but I then overstamped the word 'sparkle' again and sprinkled it with (retired) Dazzling Diamonds glitter before heat-embossing a second time. Along with the opal rounds, it adds such a lovely sparkle:

The white of the sentiment and snowflake really stand out against my bold blue background. I actually used (retired) Blueberry Bushel cardstock for my card, but you could achieve a similar effect with the current Pacific Point (links included below). A verse and simple border decoration using stamps from the same set inside complete my card: 

This is the perfect design for some last-minute festive card making as it would be really easy to put a batch of these together in no time. Definitely the kind of card I need this close to Christmas! 

Here is the visual summary of the key products used on today's project for you to pin for easy reference:


You can see all of my 'How To' summaries on my 'How To - Tips and Techniques' Pinterest board in case you've missed any.

This is our final CAS Colours & Sketches challenge of the year and we are sad to be saying goodbye to several of the team. On a positive note we are also welcoming a number of new members too - full details are over on the CAS Colours & Sketches main blog where you will also see our new members are playing along this week. Following this challenge the team will be taking a short break to enjoy the festivities with our loved ones before we return with a new challenge for the new year on January 4th when I will be hosting again and I will have a fun colour challenge for you!

Enjoy your day and I'll be back at some point with another project; my design commitments for 2021 are complete and I am about to start working with a whole new bunch of products to get ready for 2022. I will undoubtedly have projects to share over the festive break, but will be following a more relaxed schedule as I take time out to regroup and recharge, so watch this space. Until next time, happy stampin'!


Stampin' Up! Supplies Used:

Table built using Product Table Builder by The Crafty Owl - Independent Stampin' Up! Demonstrator.

Giving Gifts Rainbow Ombre Snowflakes

by Joanne James8. December 2021 07:00

Happy Wednesday everyone! First things first - remember today is FREE SHIPPING at Stampin' Up! so the perfect time to pick up those last few Christmas gifts! You have until 11pm this evening UK time, so don't delay!

Now onto today's card, which was inspired by the current sketch over at Just Add Ink and is also perfect for the festive rainbow challenge over at - where else but The Rainbow Challenge:


I can't resist a good sketch and this one gave me the perfect opportunity to go all-out with a clean and simple yet unconventionally coloured Christmas card - take a look:


Here's the low-down on today's card:

Giving Gifts Dies - I used the snowflake die in the Giving Gifts Die set to create my negative aperture border on today's card by cutting one end, then turning the die through 180 degrees and lining up the edges then cutting a second time, to give the single snowflake border panel. This is a great way to use this die on something other than a tag - it's always handy to be able to extend the use of an item. Unfortunately since I wrote today's post the dies are now no longer available in the UK; the lists are changing daily though and there are some things where stock of retiring items is still on route to the warehouse, so if you like them keep checking back.

Wonderful Snowflakes - I balanced my snowflake border with one of the Wonderful Snowflakes pre-diecut pieces that I trimmed to mirror the shape of the sketch element and added a simple 'Let It Snow' sentiment to tie both elements together. I used the snippet of snowflake I cut off to decorate the inside of my card:


Rainbow Ombre - My unconventional colour scheme today is taken from the rainbow ombre glimmer paper I used beneath the negative space of my snowflake border. I picked out the Bermuda Bay for my card base; I love the way the deep turquoise highlights the iridescent shine of the diecut snowflake and white embossed sentiment. I also picked out some of the white iridescent faceted gems from the From My Heart Faceted Gems pot to highlight the centres of the snowflakes in my border and used a (retired) sparkly blue one to centre my white snowflake.


Here is the visual summary of the key products used on today's project for you to pin for easy reference:


You can see all of my 'How To' summaries on my 'How To - Tips and Techniques' Pinterest board in case you've missed any. 

Enjoy your day and I'll be back tomorrow with another project. Until then, happy stampin'!


Stampin' Up! Supplies Used:

Table built using Product Table Builder by The Crafty Owl - Independent Stampin' Up! Demonstrator.

Strawberry Builder Punch Gnome Art PP568

by Joanne James21. November 2021 08:00

Today it's Sunday and time for this week's new challenge over at The Paper Players! It's the turn of the fabulous Laurie to host this week and she has a fun Clean and Simple challenge for you to work with:
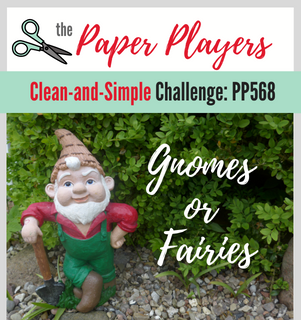
       

I couldn't resist another crack at Kim's fabulous layout over at Freshly Made Sketches this week and paired with the colours over at Color Dare (I added Cherry Cobbler red as my fourth colour) for today's card - take a look:
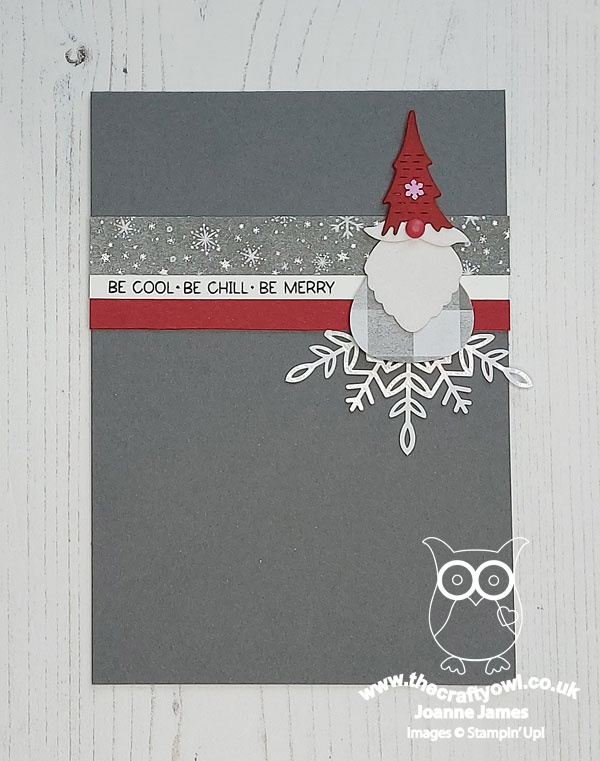
 

Here's the low-down on today's card:

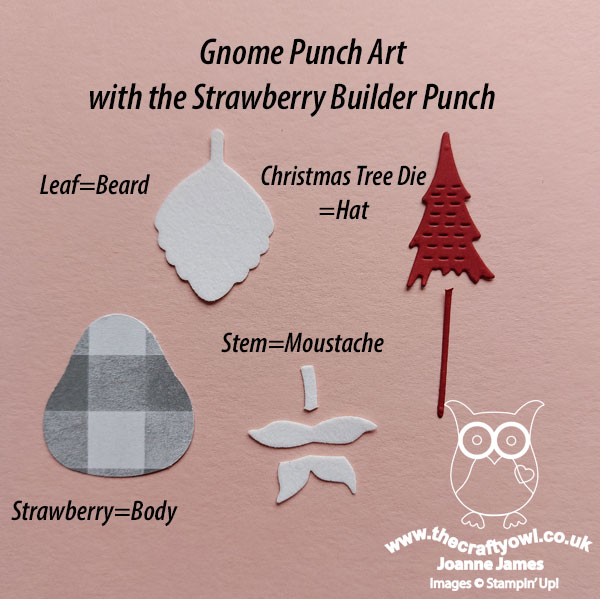
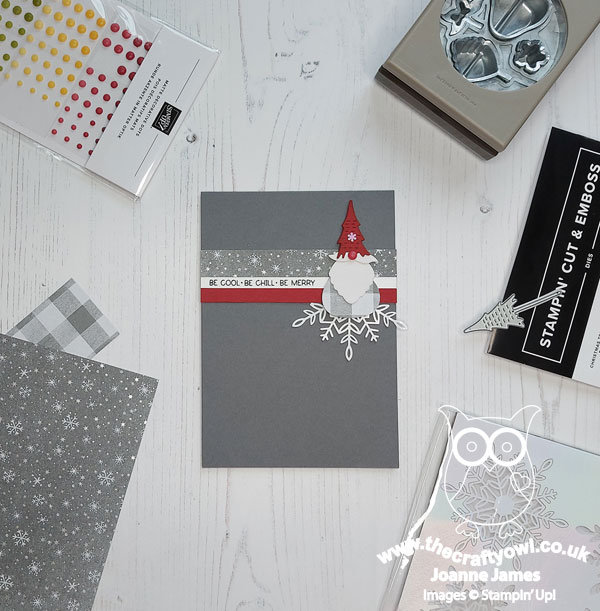
I started out planning today's card with some trepidation; whilst I still have my retired 'Gnome for the Holidays' stamp set, I have no other current gnome stamp sets. I decided though that I would rise to the challenge and embark on trying to create one using some current supplies to fashion some gnome punch art. A quick perusal of Pinterest, I chose a cute cuddly gnome to base my design on, grabbed some current supplies and tools and set to work! I used the largest of the skinny Christmas trees from the Christmas Tree Dies and my Strawberry Builder Punch to make my gnome. I used some offcuts of Peaceful Place designer paper for my gnome body and the top horizontal strip above my sentiment, along with some Snowy White Velvet Paper for his beard and moustache for some subtle texture and a matt dot for his nose. A piece of snowflake behind and a tiny one on his hat, along with a sentiment from 'Penguin Place' complete my clean and simple gnome card:
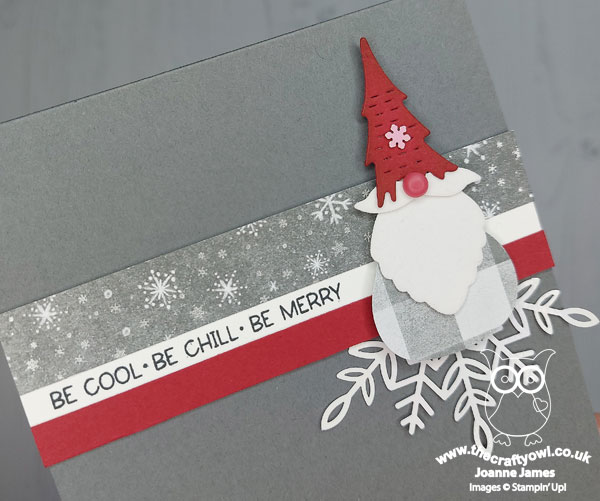
I created a basic crib sheet so that you can see the main elements of my gnome and how I trimmed them, in case you fancy having a go at making one yourself - feel free to save this for future use:
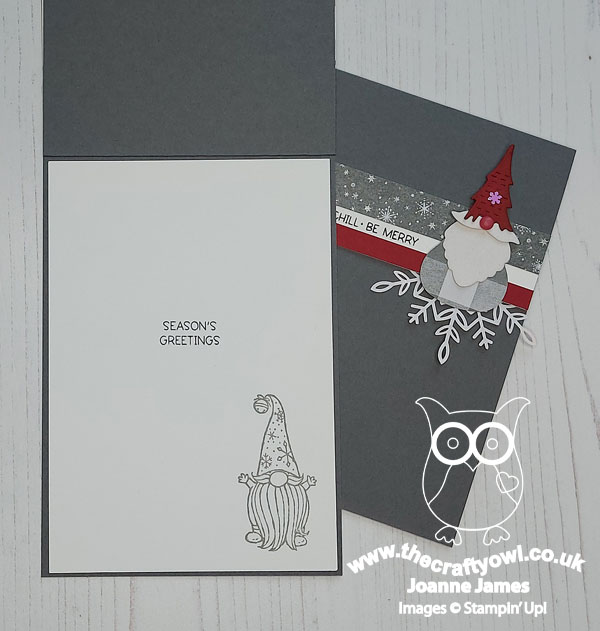
I based the design of my punch art gnome on one of the ones in the retired 'Gnome For The Holidays' stamp set, which I stamped on the inside of my card for added decoration:
 As you can see, I decided I liked this card so much I made another - I think these little gnomes are rather cute, even if I say so myself!
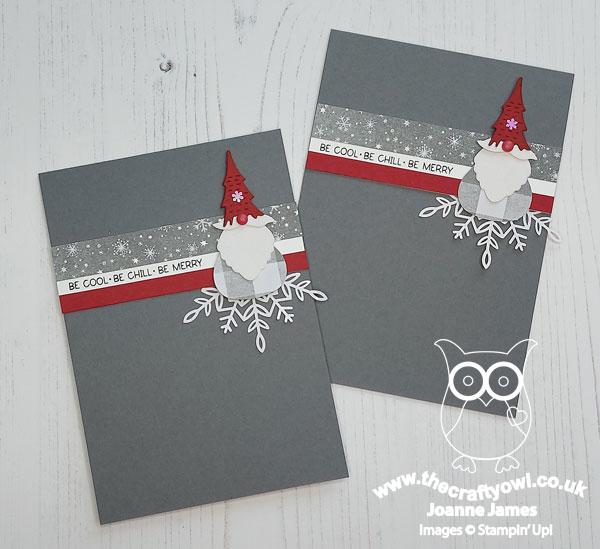
I think I did a pretty good job of meeting the 'clean and simple' brief too - remember in addition to featuring a gnome (or elf, or fairy!) on your card it should also be clean and simple:

  • minimal layers
  • little/no embellishments
  • lots of clean white space (no pattern)
Here is the visual summary of the key products used on today's project for you to pin for easy reference:
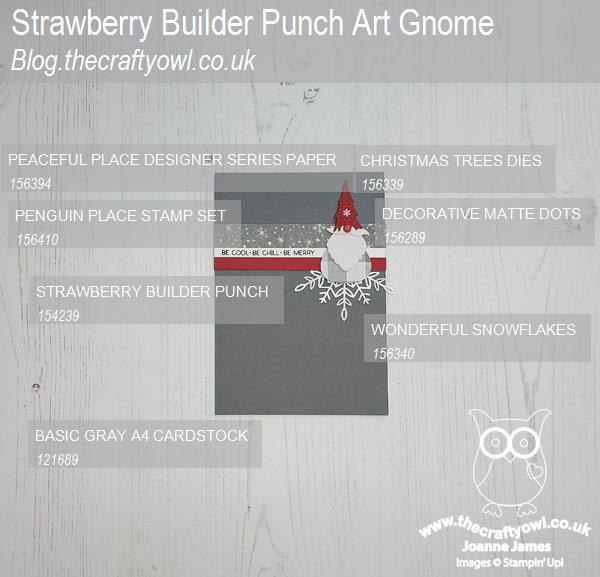
 

You can see all of my Product and 'How To' summaries on my 'How To - Tips and Techniques' Pinterest board in case you've missed any. 

Before you reach for your ink and papers, check out what our amazing team has created to inspire you this week:

Here's a quick recap of our challenge rules:
 
1.  Create a new paper project
2.  Upload your creation to your blog with a link back to us and provide a direct link to the post featuring your challenge submission.
3.  Please link your card to no more than four challenges, TOTAL.
4.  Have FUN!

You can see all of my 'How To' summaries on my 'How To - Tips and Techniques' Pinterest board in case you've missed any. 

Enjoy your day; mine is shaping up to be a rather uneventful one - here's hoping anyway! I'll be back tomorrow with another project. Until then, happy stampin'!
 

Stampin' Up! Supplies Used: 

Table built using Product Table Builder by The Crafty Owl - Independent Stampin' Up! Demonstrator.
 
Edit: This card was a WINNER! Kim chose me as her Queen of Clean for FMS512 - woohoo!
 

Whimsy and Wonder Stitched Snowflakes in Pink PP564

by Joanne James24. October 2021 08:00


Today it's Sunday and time for this week's new challenge over at The Paper Players! It's the turn of the fabulous LeAnne to host this week and she has my favourite, a sketch challenge for you to work with:


So many ways to use this sketch! I decided to go with a larger slimline card and showcase one of my favourite paper designs in the current mini catalogue - take a look:


Here's the low-down on today's card:

Whimsy and Wonder - I love the rather less traditional colours of the Whimsy and Wonder specialty designer series paper and I particularly love the iridescent foiling on some of the sheets, such as the snowflakes on the paper I am featuring on today's card. I cut three rectangular panels of DSP using my stitched rectangle dies and matted each with some brushed silver foil cardstock and a layer of basic white too.

Stitched Snowflakes - For the focal point to anchor my banner, I decided to create a large layered snowflake, using two snowflakes cut using my Stitched Snowflakes Dies and backed this with an additional iridescent snowflake. I added a large rhinestone and silver trim bow - here's a close up so that you can see just how pretty it is:


Finishing Touches - I heat embossed my sentiment from the 'Merry Snowflakes' stamp set in silver onto a banner of Blushing Bride on the front of my card, and stamped another sentiment from the same set onto the inside panel:


I added snippets of snowflakes both to the inside and beneath the panels on the outside of my card to complete the look - you can never have too many snowflakes, right?! I just love this card - so gloriously feminine, yet festive too!

Here is the visual summary of the key products used on today's project for you to pin for easy reference:


You can see all of my Product and 'How To' summaries on my 'How To - Tips and Techniques' Pinterest board in case you've missed any. 

Before you reach for your ink and papers, check out what our amazing team has created to inspire you this week:

Here's a quick recap of our challenge rules:
 
1.  Create a new paper project
2.  Upload your creation to your blog with a link back to us and provide a direct link to the post featuring your challenge submission.
3.  Please link your card to no more than four challenges, TOTAL.
4.  Have FUN!

You can see all of my 'How To' summaries on my 'How To - Tips and Techniques' Pinterest board in case you've missed any. 

Enjoy your day; we are enjoying a restful day at home. If it stays fine we might go for a long walk this afternoon, and since it's the start of half term I may see if I can cajole the rest of the James family into completing a jigsaw with me on our return! I'll be back tomorrow with another project. Until then, happy stampin'!


Stampin' Up! Supplies Used: 

Table built using Product Table Builder by The Crafty Owl - Independent Stampin' Up! Demonstrator.


Scrapbooking

Stampin' Up! has introduced a new range of 12x12" scrapbooking product and kit - the full range is now available to purchase online. To download a copy of the new digital Scrapbooking Catalogue click here.

Mini Catalogue

BROWSE THE CATALOGUE

'Tis The Season - the new Stampin' Up! Mini Catalogue is here! For more details and to download your copy click here

Shop Online

Access my online shop 24 x 7, 365 days of the year:

Current September hostess code:

JQEHTZGK

Shop Online

2024-25 Annual Catalogue

BROWSE THE CATALOGUE

Click on the image to download your copy of the 2024-25 annual catalogue. For a full list of current SU! supplies, go to my online store. If you would like any help or advice, please drop me a line at joanne@thecraftyowl.co.uk or give me a call on 07773 421446 - I'd be happy to help.

Join My Team

It's always a great time to join Stampin’ Up! New team members can get £130 worth of products for only £99 + free business supplies + free shipping + all the fun being a part of Stampin’ Up! Stampin' Up! has something for everyone: join my growing team and benefit from my support to enjoy Stampin' Up! however you choose.

If you're interested, call me for a chat to understand how I can help you realise your goals. Alternatively, if you have already decided to sign up and you just can't wait, please click here for the link to the online form where you can sign up and order your starter kit right away! 

Latest Kits!

Stampin Cut and Emboss

The Christmas Ornaments Kit and Card Keeper Kit are the latest kits that will be arriving in the online store later this month - get yours here!

New Online Exclusives

There are new products available exclusively in the online store from 3 July - check them out here.

About Me

Hi I'm Joanne and live in Northampton and when I'm not looking after my husband and two beautiful children, am an avid crafter with a passion for all things Stampin' Up!

I must confess that I have never been a big rubber stamper - until I discovered Stampin' Up! that is. I love the fact that I can get such great results with co-ordinating stamps, inks, papers and punches - the possibilities are endless! Join me on my stamping journey as I share the things I love and be inspired to create amazing things yourself!

Follow Me

Monthly Newsletter

Box Builder

Click the button above to use Box Buster to create your custom box design using the Envelope Punch Board!

Kits Collection Now Available!

Stampin Cut and Emboss

The new Kits Collection from Stampin' Up! is now available!

Click here to see the current kits available and order yours online today.

I Design For


Stampin' Up Stuff

This is my personal blog and is not endorsed by Stampin’ Up! I hope you find it a plentiful source of ideas and personal inspiration but please don't copy my designs for contest submission or use for classes, publication or sale without express permission.