by Joanne James13. January 2014 21:13A busy day today: key highlights were getting to the bottom of the ironing basket (always worth celebrating!), finding Ben's mislaid PE training shoes at school and completing my card for this week's Pals Paper Arts Challenge. This week it's a colour challenge to incorporate the following colours:
I decided to stick with the Valentine's theme and use the contrasting colours to work up a card design that I've been wanting to have a go at for a while - here's my card:
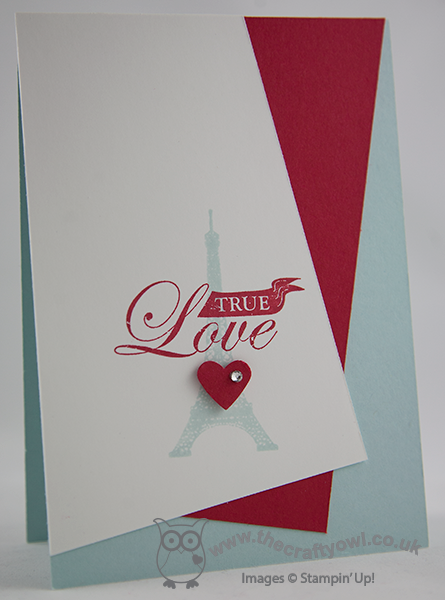
I'm not sure what the term is for this angular layered design (or even if there is one!) but it's the perfect simple layout to highlight both the Eiffel Tower and 'True Love' sentiment from the 'Follow Your Heart' stamp set; I used my Stamp-a-ma-jig to ensure perfect placement. Lastly, I added a small punched red heart with a rhinestone on a dimensional for added interest. I love the simplicity of this card and the statement that the bold red colour makes against the white and soft sky.
I hope you like my card - there's lots more inspiration from the Design Team over at Paper Pal Arts using this colour combination if you fancy having a go.
Back tomorrow with another card; until then, happy stampin'!
Stampin' Up! Supplies Used:
a07e3288-f9df-4767-bc3a-2c5db3e89d2d|0|.0|96d5b379-7e1d-4dac-a6ba-1e50db561b04
Tags: Anniversary, Follow My Heart, Heart Punch, Shop online, Stamp-a-ma-jig, Stampin' Up, Stampin' Up Card, Stampin' Up Card ideas, Stampin' Up Supplies, Valentines, Valentine's
Cards | Stamping
by Joanne James11. January 2014 20:54As promised, I've a change of theme today - I've been having a play with my Sale-A-Bration pre-order and thought I would share one of the cards I made that features a few of the products that will be available free when you spend £45 or more during the Sale-A-Bration 2014 promotion. Here is my card:
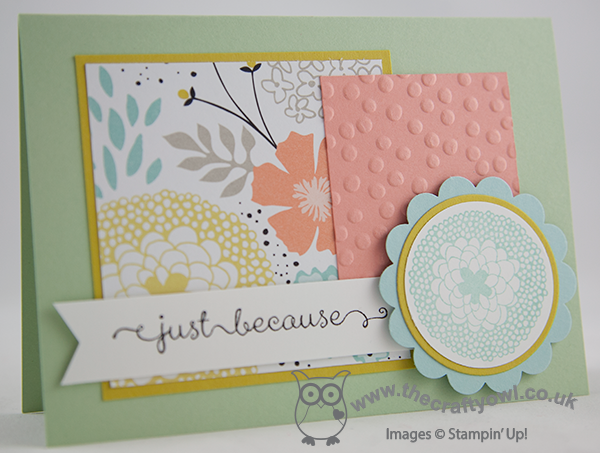
This card features three new products: the lovely Sweet Sorbet Designer Series Paper*, one of the stamps from the 'Petal Parade' stamp set* and the Crisp Cantaloupe cardstock has been embossed with the Decorative Dots Textured Impressions Embossing Folder*. All those layers, teamed with the fresh, pastel colours of the DSP and a simple sentiment, this is a perfect post-Christmas card, 'just because'.
More Sale-A-Bration ideas to come, but for now, start making that wish list! Back tomorrow with another project; until then, happy stampin'!
Stampin' Up! Supplies Used:
* All Sale-A-Bration items - available from 28 January - 31 March 2014
by Joanne James10. January 2014 19:45Evening lovely blog readers! So big news of the day: my voice is (almost) back! Great news for me, not so great for my youngest when he announced he had lost his trainers following his PE lesson just 3 days into the new term - but that's a story for another time!
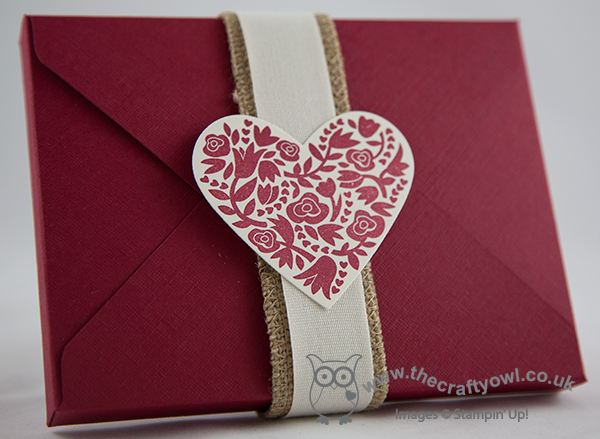
Today I'm going to share the last of this week's class projects: a gift card holder, once again made with the Envelope Punch Board. I've seen a few holders made in this way on the internet, but I adapted mine slightly to enable me to make it from half a sheet of A4, using metric measurements. So here is the finished gift card holder from the outside:

No apologies for once again using the Flowerfull Heart stamp (I still love it!), this time overlaid with 'love' cut from gold foil using the Expressions Thinlits die (don't forget these are only available to purchase until the 1st February). There's also another sneak peek of new product available in the Spring-Summer catalogue that launches on 28th January; did you spot it? Yes, it's the lovely gold washi tape which I paired here with Very Vanilla to make my pocket. There are lots of silver and gold items in the new catalogue, so if this is your thing, stay tuned - there will be more to come. The flap closure for the gift card holder is the bit you need the Envelope Punch Board for - it makes the two notches that enable the holder to stay closed and keep the gift card firmly in place.
When you unclasp the flap, this is what you see inside:
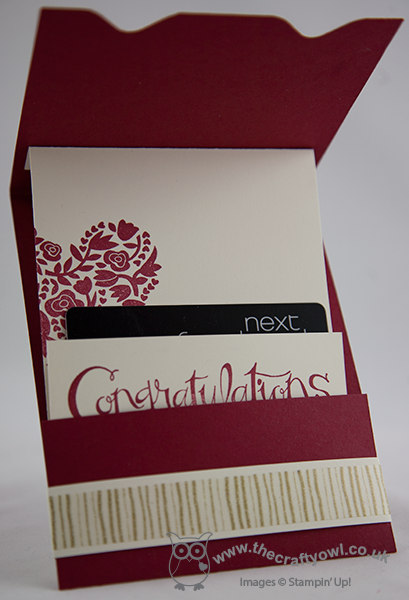
The insert is attached to the opening flap so that it slides out of the pocket as you open it and presents the gift card. I designed my gift card holder with a wedding or engagement gift in mind - vouchers or money seem very popular gifts these days, but you could easily adapt it for a birthday or other occasion. One thing is for sure - when it's as easy to make as this, there's really no excuse for a simply sticking a voucher in an envelope or worse still a carrier bag (believe me, it happens!!)
That's all the projects from my classes this week - I hope they've inspired you to go and be adventurous with your Envelope Punch Board. If you live local to me in Northampton and would like to attend any of my Stampin' Up! papercraft and card classes, you can find the current schedule of my card and project classes on my website here; please contact me for further information regarding location and any equipment you will need to bring. Classes must be booked at least 2 weeks in advance of the class date.
Back tomorrow with a Sale-A-Bration sneak peek; until then, happy stampin'!
Stampin' Up! Supplies Used:
2cbf2591-39f6-471a-9a05-7822cc150877|1|5.0|96d5b379-7e1d-4dac-a6ba-1e50db561b04
Tags: 3D Projects, Classes, Envelope Punch Board, Flowerfull Heart, Gift Voucher, Sassy Salutations, Shop online, Stampin' Up, Stampin' Up Card, Stampin' Up Card ideas, Stampin' Up Supplies, Weddings, Valentines
3D Projects | Cards | Classes | Envelope Punch Board | Stamping
by Joanne James9. January 2014 21:37Today I've another of this month's Envelope Punch Board class projects to share with you - a rectangular box notecard holder and a set of notecards. So here is the box, complete with belly band:
The box is made from Cherry Cobbler textured cardstock, which is great for boxes as it's really thick and has a lovely quality feel. In this photo I've finished with a belly band made from burlap and cotton ribbon; in class, we also made bows from Modern Medley paper using the Envelope Punch Board and created belly bands with bows on. Inside the box, we made a set of simple notelet cards, in co-ordinating vanilla and Cherry Cobbler and paired with Crumb Cake envelopes:
We used the Sweet Essentials sentiment stamps; this is a great set with sentiments to suit a variety of occasions. This set would make a lovely gift for someone and depending on the sentiment, it could be for a birthday or even created as a set of wedding thank you or acceptance cards.
The finished box base measures 5 3/4" x 4 3/8" and was made from a starter piece of 9" x 9" card stock. As with all boxes, whether square or rectangular, the piece of card you start with needs to be perfectly square; it's the points at which you punch and score that determine the finished dimensions of the box. To create this box, we punched and scored at 3 1/2" and 4 1/2".
Back tomorrow with another project; until then, happy stampin'!
Stampin' Up! Supplies Used:
7b96fc59-7eaf-47b6-9c78-2a8c064af419|2|5.0|96d5b379-7e1d-4dac-a6ba-1e50db561b04
Tags: 3D Projects, boxes, Envelope Punch Board, Flowerfull Heart, Hearts Framelits, Shop online, Stampin' Up, Stampin' Up Card, Stampin' Up Card ideas, Stampin' Up Supplies, Sweet Essentials
Boxes | Cards | Classes | Envelope Punch Board | Stamping
by Joanne James8. January 2014 15:26So for my second post today, I wanted to share with you one of the quick makes from my January classes, which are being held this week. This month we are featuring the Envelope Punch Board. Lots of my customers either purchased one or received one as a Christmas gift, but weren't really sure what to do with it other than make basic envelopes. They were truly inspired by my Easiest Ever Envelope Punch Board Cracker Video that I posted before Christmas, so I was keen to show them the full extent of their boards and just what they could do.
We started off by making square boxes - here's my version of the one we made:
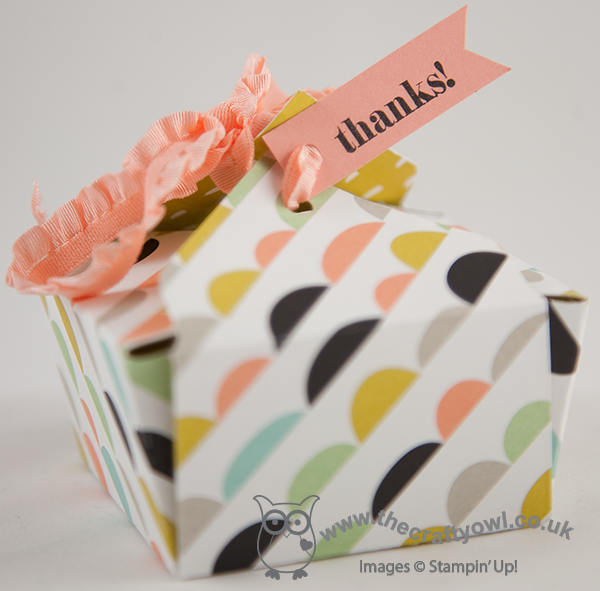
This is a simple 2" square box, made from a 6" x 6" square piece of paper, probably the easiest type of box to make. My class used the Modern Medley DSP for their boxes (there are some pictures over on my Facebook page if you would like to see them), but for my box here I thought I would give you another 'sneak peek' of product that will be available during this year's Sale-A-Bration promotion, starting 28th January. This is a sheet from the 'Sweet Sorbet' DSP collection - lovely fresh, spring colours with black (an unusual, but very workable colour combination). I finished my box with a small 'thanks' tag and some stretch ruffle trim in Crisp Cantaloupe to hold the box closed.
Back tomorrow with another of my class projects. until then, happy stampin'!
Stampin' Up! Supplies Used:
6aa5543d-b2e5-4d14-b8dc-304e99af2e39|0|.0|96d5b379-7e1d-4dac-a6ba-1e50db561b04
Tags: 3D Projects, boxes, Classes, Envelope Punch Board, Sale-a-bration 2014, Shop online, Stampin' Up, Stampin' Up Card, Stampin' Up Card ideas, Stampin' Up Supplies, Sweet Sorbet
3D Projects | Boxes | Envelope Punch Board
by Joanne James7. January 2014 19:49Today I am sticking with the 'love' theme, but no Flowerfull Heart today. I'm taking my colour scheme from the challenge palette over at Create with Connie and Mary this week, which requires a card made with the following colours:
I thought this was a great modern colour combination so decided to create a card with one of my other favourite products, the 'love' from the Expressions Thinlits Dies. Here's my card:
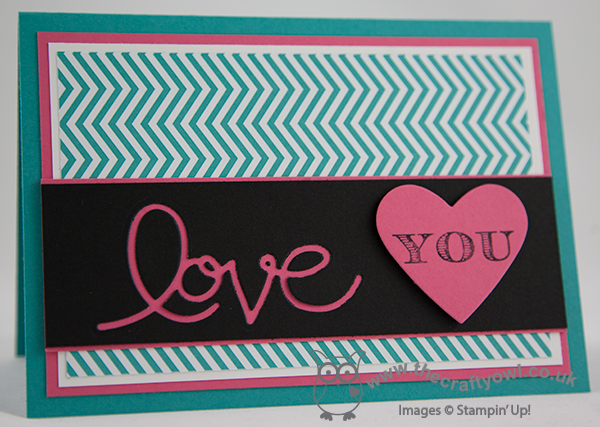
I used the negative space from the thinlit cut out, rather than the word 'love' itself (don't worry, I didn't bin it - if you keep your eye out you'll see it appear on another card someday soon). I've done this before and like this effect almost as mush as the delicate cut out words that you get with these dies. I then contrasted the black top layer with the Strawberry Slush heart which I stamped in black with the word 'you' from the stamp I used on yesterday's card from the 'Follow My Heart' stamp set. Not necessarily the most romantic of colour combinations perhaps, but I think this card would definitely appeal to a trendy teenager. Don't forget, the Expressions Thinlits Dies feature in the Autumn-Winter seasonal catalogue and will only be available to order until the 1st February, so if they're still on your wishlist, don't leave it too late to order them; just click on the product link in the table below and hop on over to my online store.
So, my voice is still absent - the rest of the James household is loving it! It's good preparation for the children's return to school tomorrow, the first few days back always seem really quiet. Don't forget to hop on over to see what the designers at Create With Connie and Mary came up with in response to this week's colour challenge.
Back tomorrow with another card; until then, happy stampin'!
Stampin' Up! Supplies Used:
by Joanne James6. January 2014 21:09Today has been a fun day, with my first class of the year. A fun - if quiet! - time was had by all, with all my ladies being very accommodating of my continued voiceless state. I'll share more on our class makes later in the week, but today I'm sharing a card that I am entering for this week's Pals Paper Arts challenge, PPA186, which is to use the following colours:
With this in mind, I inked up my Flowerfull Heart stamp again but this time made a slider card - take a look:
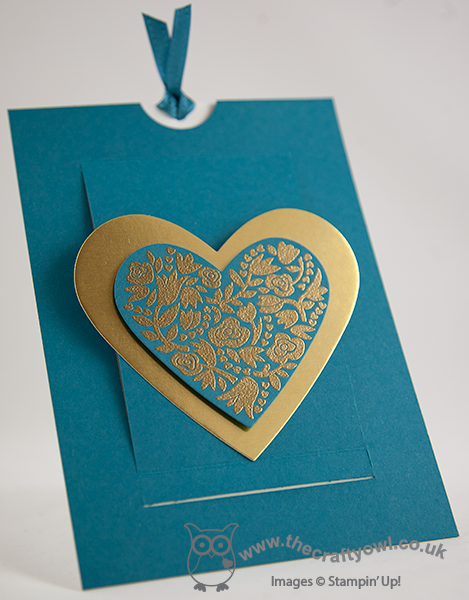
I stamped the heart in Versamark and heat embossed with gold embossing powder, then layered the heart on another one made from gold foil. When the ribbon end is pulled, it reveals the message inside:
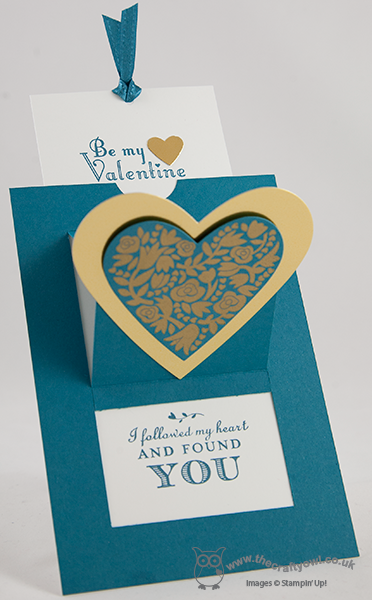
The inside of the slider card is stamped with my favourite stamp from the 'Follow My Heart' set on the lower inside panel, and the valentine stamp from the 'Delightful Dozen' on the extending top section (I replaced the stamped heart with a gold foil one). I think this would make a lovely masculine valentine's card; the gold foil and embossing adds a real luxurious feel.
I will be sharing a video tutorial on how to make this card as soon as my voice returns, so stay tuned. Meanwhile, check out the inspiration from the designers and participants over at Pals Paper Arts here.
Back tomorrow with another card; until then, happy stampin'!
Stampin' Up! Supplies Used:
1aaaf41f-cd5c-4638-ad4c-132b9f354924|0|.0|96d5b379-7e1d-4dac-a6ba-1e50db561b04
Tags: Big Shot, Flowerfull Heart, Heart Punch, Hearts Framelits, Delightful Dozen, Magnetic Platform, Follow My Heart, Embossing, Valentines, Shop online, Stampin' Up, Stampin' Up Card, Stampin' Up Card ideas, Stampin' Up Supplies
Cards | Stamping
by Joanne James5. January 2014 20:39Today I'm sharing another card using my current 'stamp of the moment', the Flowerfull Heart, but this time on a non-romantic card that could be used for a birthday or just to send someone 'happy post'. I've also got a sneak peek of some new product that will be available at the end of the month as part of this year's Sale-A-Bration promotion. Excited? Well, let's take a look! Here's my card:

Aren't those Spring colours so fresh, after the darker winter colours that we've been using so much of in recent months? The base of my card is Crisp Cantaloupe, one of the feature colours of the Designer Series Paper that I've used, which is one of the products that will be available during Sale-A-Bration this year. I used Sahara Sand for my flag, which I embellished with an In-Colour Boutique Detail and some Calypso Coral baker's twine, but the star of the show is once again the Flowerfull Heart. Sale-A-Bration is always a great time to earn additional products and benefits, and is one of the best times of the year to host a party. I am already taking booking for parties during the Sale-A-Bration period, which runs from 28th January - 31st march 2014, so if you'd like to get in on the action, call me on 07773 421446 or email me [email protected] to arrange a party today.
A busy day for me tomorrow, with the first of this month's classes. Likely to be something of a challenge, as I have been completely without voice for the last 2 days, nothing more than a faint whisper. I'll let you know how it goes - I think I might have to take a whistle!
Back tomorrow with another project; until then, happy stampin'!
Stampin' Up! Supplies Used:
041ff602-6e15-440a-a1c1-bc12e6a8cea7|0|.0|96d5b379-7e1d-4dac-a6ba-1e50db561b04
Tags: Flowerfull Heart, In Colours, Sale-a-bration, Sale-a-bration 2014, Hearts Framelits, Big Shot, Magnetic Platform, Shop online, Stampin' Up, Stampin' Up Card, Stampin' Up Card ideas, Stampin' Up Supplies
Cards | Stamping
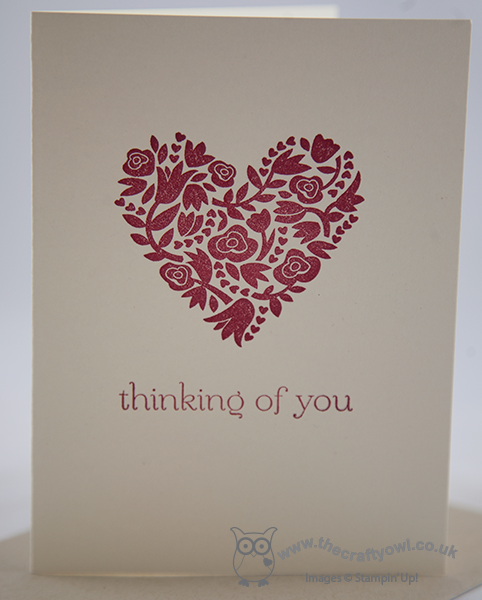
by Joanne James3. January 2014 21:35I've another busy day today, so a quick post from me with another 5" square card made using the Flowerfull Heart stamp. This time paired with Strawberry Slush Core'dinations cardstock. So here is today's card:
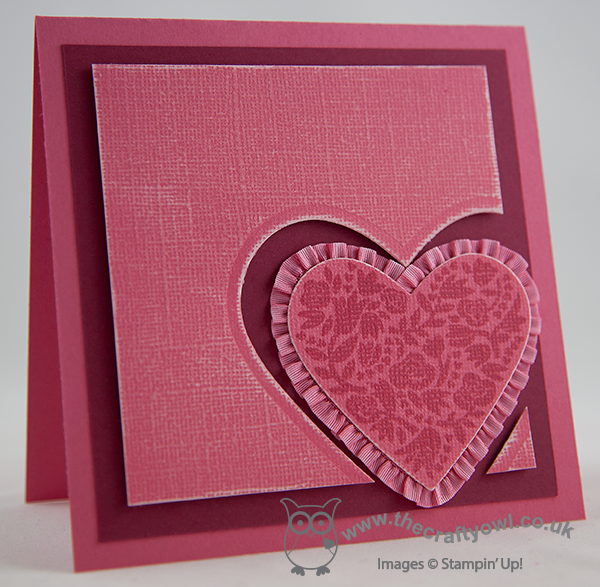
This card has a lovely textured surface and can be sanded to reveal a monochromatic inside layer which can add real interest to a card. I also like the effect you get when you stamp on it as a result of the textured surface. I edged my heart in Strawberry Slush Ruffle Stretch Trim, which gives this card a rather feminine look. I must confess this card is a little pink and frilly for my taste, but as anticipated, when my daughter looked through my recent samples she declared this card her out and out favourite. Knowing her as I do, there are only two things that could be added to improve further: glitter and sequins!! Maybe not this time, but perhaps that should be my starting point for another card ...
Hoping for a quieter day tomorrow that will allow some time for crafting. Either way my blog post is prepared so I will have something lovely to share with you. Until then, happy stampin'!
Stampin' Up! Supplies Used:
a1aa941f-8b98-4201-b71f-708a7ab22f7b|0|.0|96d5b379-7e1d-4dac-a6ba-1e50db561b04
Tags: Big Shot, Hearts Framelits, Flowerfull Heart, Magnetic Platform, Valentine's, Valentines, Core'dinations, Shop online, Stampin' Up, Stampin' Up Card, Stampin' Up Card ideas, Stampin' Up Supplies
Cards | Stamping
by Joanne James3. January 2014 15:55Good day, blog readers! I am sounding cheerier than I am feeling today; having got through Christmas without so much as a sniffle, I'm paying for it now. Since New Year's Eve I have been battling the worst cold I've had in ages - typical. Anyways, not to be deterred, today I have a special announcement - I have a new love in my life! I know you often here me say I love new products, but I an honestly say that I've never had as much fun with a single stamp as I'm having with the 'Flowerfull Heart' stamp that's available as part of the 'Whole Lot of Love' promotion. Along with the other items in this promotion, this stamp is only available until the end of January, but I can assure you I'll be sharing lots of ideas using this stamp this month.
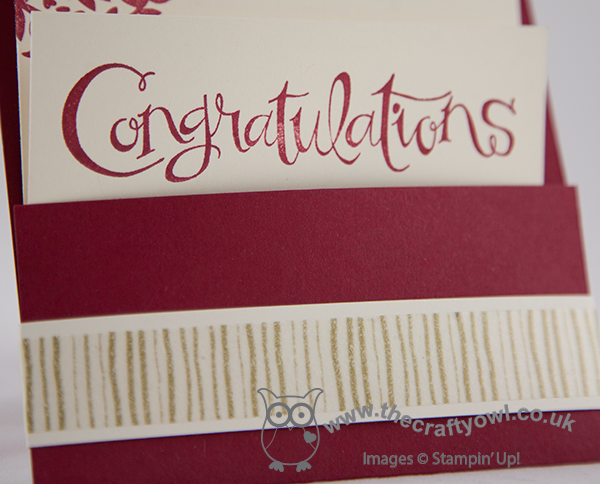
Whilst this stamp is heart-shaped, the flower design means this stamp lends itself to a wide variety of cards, and not all valentine-related. All that said, for my first card I decided upon a classically elegant anniversary card:
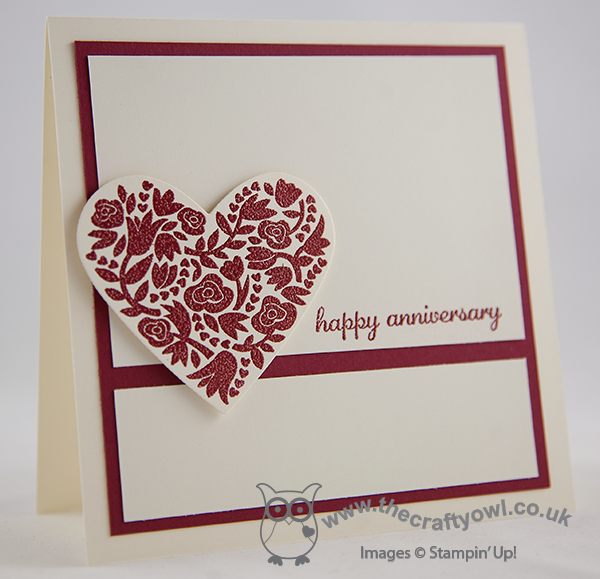
I went with the classic colours of Very Vanilla and Cherry Cobbler and stamped both the image and sentiment in Versamark and heat embossed in Cherry Cobbler embossing powder. You can just see the texture in the photo, but you can't really appreciate the glossy finish which looks beautiful in real life. the other thing I love about this stamp is that it fits inside one of the Hearts Framelits perfectly, so makes cutting out a cinch.
This card is very 'me' and true to my style; I'll be back to share another card I made with this stamp tomorrow. Until then, happy stampin'!
Stampin' Up! Supplies Used: