Pearl Baby Lamb It's A Girl Card

by Joanne James23. February 2016 09:00

Hello everyone! Today I have a card for this week's challenge over at Pals Paper Arts where they have a sketch to work with:

PPA-288-Feb18

I love a good sketch and this one allowed me to get my Easter Lamb stamp out for the first time and try something that I've been wanting to do since I bought it - take a look:

The sketch is perfect for using the circle to create a stunning focal point - and this is where my cute lamb comes in! I decided to stamp it without the 'Happy Easter' sentiment as I wanted to make a card to celebrate the arrival of a baby girl. I stamped the image in Smoky Slate, adding a few touches of Blushing Bride and Mossy Meadow ink with my blender pen, then proceeded to add a pearl to each of the circles of the image to create my pearlescent woolly coat. Two packs of Pearl Basic Jewels and some time later, this was the result! I chose to use Blushing Bride and Mossy Meadow as my feature colours from the delicate spotty Birthday Bouquet designer series paper for my base and mat layers - whilst the green is quite dark for a pastel baby card, I was careful to use it sparingly to frame the paper and image only and to stamp my sentiment from the set 'A Dozen Thoughts'. I love this font but since I wanted a narrow banner, decided to make a feature of the loops and cut around them, which fits quite neatly to my circle too - bonus! Lastly, I decided that a strip of Blushing Bride Glimmer Paper was necessary for the vertical banner - just in case anyone was in any doubt that this is most definitely a card for a little lady! I may well be responsible for a run on packs of pearl jewels from the Stampin' Up! store with this card and I know that this is not the sort of card you would make every day, but for a special one-off to commemorate the addition of one more to the female race, I think it's totally worth it!

Here is today's visual summary for easy reference:


That's all from me today. I have lots to be getting on with, including last minute preparations for my new 'Coffee and Card' drop in class at Bells in Northampton tomorrow. Back tomorrow with another project and this week's new Weekly Deals; until then, happy stampin'!


Stampin' Up! Supplies Used: 

Table built using Product Table Builder by The Crafty Owl - Independent Stampin' Up! Demonstrator.

Beach Hut Punch Art Card For The Paper Players!

by Joanne James16. August 2015 11:00

It's Sunday and you know what that means: time for a new challenge over at The Paper Players! This week it is the turn of my good friend the super-talented LeAnne to host and she has a great clean and simple challenge for you:


With the arrival of my Autumn-Winter seasonal catalogue pre-order goodies last week I have been catapulted forwards into the festive season and this card was a challenge, especially since the weather in the UK has been anything but summery this week! In an effort to bring me back to summer, I got to thinking about what the beach means to me: on the one hand it conjures up memories of warm Carribean seas and scuba diving on coral reefs, but on the other hand where my children are concerned, it's all about paddling in the waves, sandcastles, stripy deckchairs and beach huts, so often found along UK beaches. So whilst my card doesn't feature sun, sand or sea this week, it does feature a couple of beach huts and some stripy paper reminiscent of old fashioned deck chairs. Here's my card, using the challenge sketch over at Fab Friday for my layout:


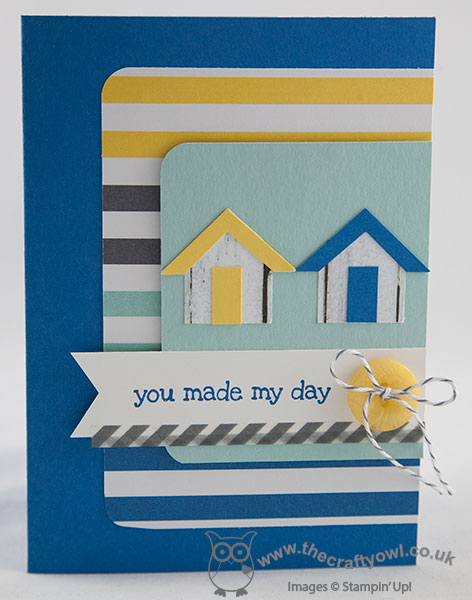
I used Pacific Point for my base, and used a piece of Schoolhouse DSP for my stripy layer (this so reminds me of deckchairs!) I followed this with a panel of Pool Party on which I placed my punch art paper-pieced beach huts: I punched two huts using the now-retired Arrows Punch (you could just as easily cut freehand though or combine square and triangle punch shapes) from the whitewashed woodgrain pattern in the Farmers Market DSP then added brightly coloured roofs and doors. A simple sentiment banner edged with some retired Epic Day washi tape and finished with a Daffodil Delight button and grey baker's twine finishes my card. My card does have a few more layers than I would like for a truly CAS card, but I kept my design simple with minimal embellishments, so I'm hoping I've more or less managed to meet the brief! 

Before you reach for your ink and papers, check out what our amazing team has created to inspire you this week:

The Paper Players Design Team
Anne Marie Hile - on leave
 
 
Here's a quick recap of our challenge rules:
 
1.  Create a new paper project
2.  Upload your creation to your blog with a link back to us and provide a direct link to the post featuring your challenge submission.
3.  Please link your card to no more than three challenges, TOTAL.
4.  Have FUN! 

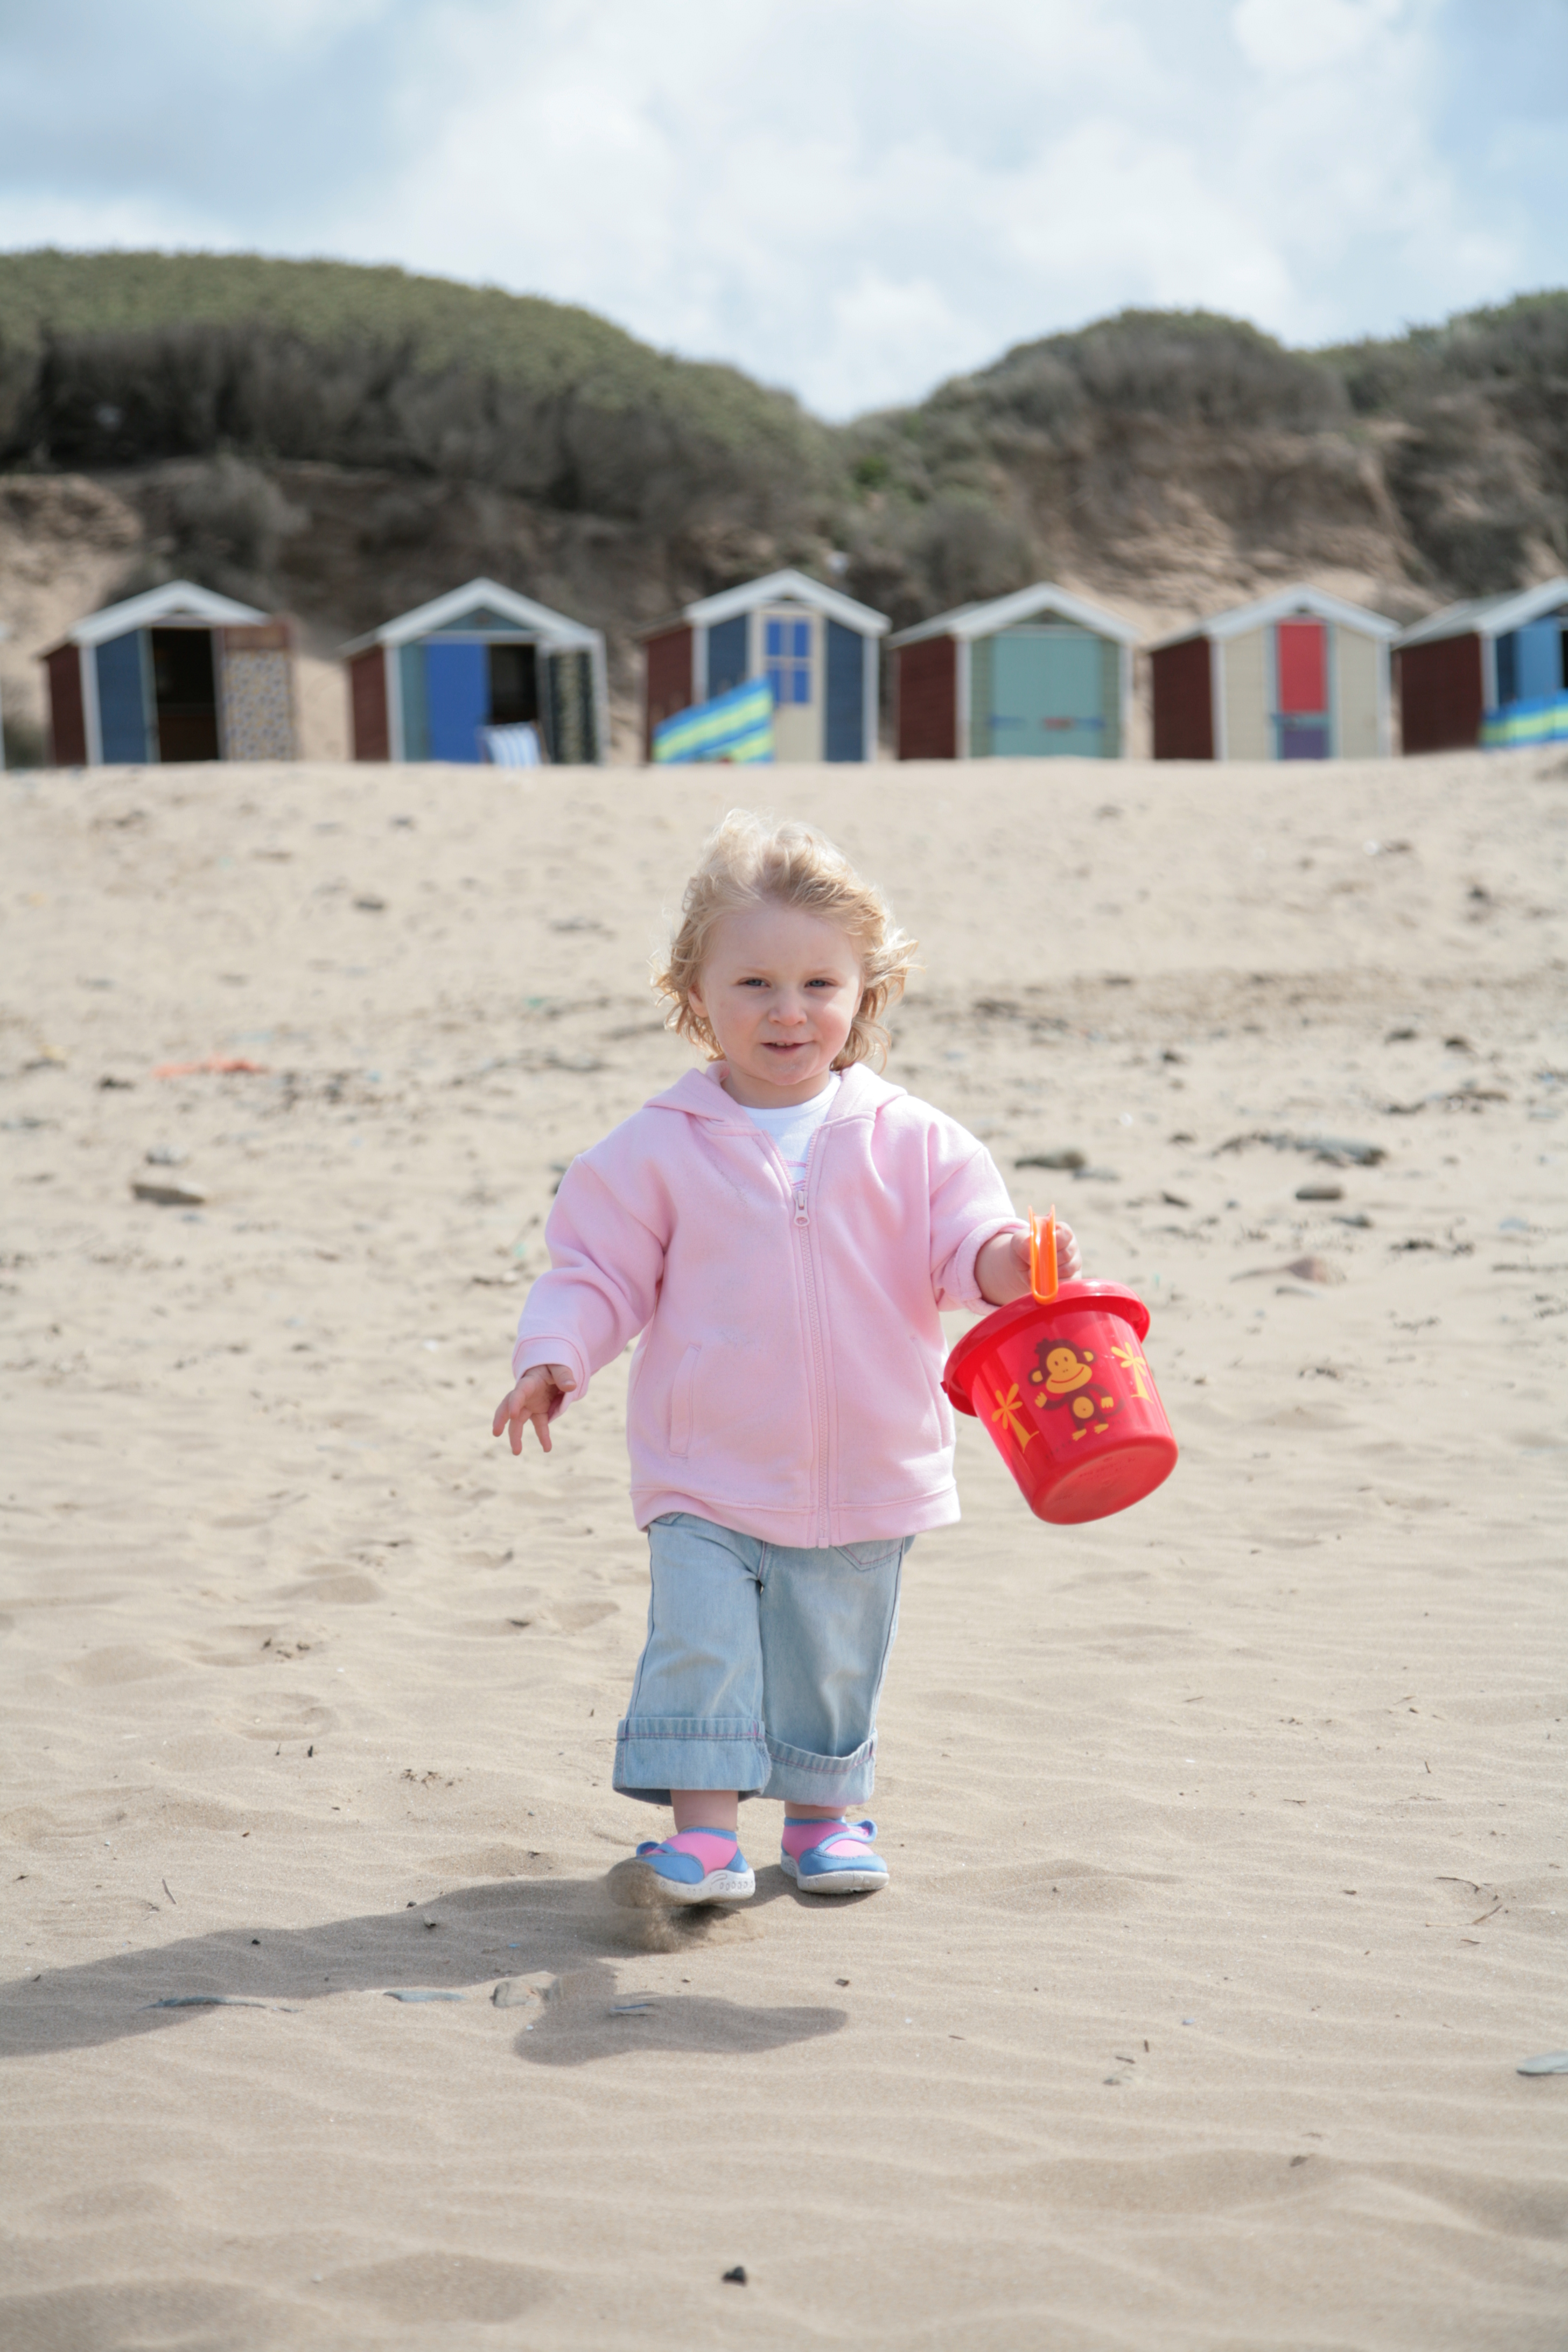
For my international readers who may never have seen beach huts along the UK coast before, here's an old photo of mine at the seaside when my daughter was small - you can see the colourful little beach huts along the edge of the beach in the background:


Happy days! So what images does the beach conjure up for you? I look forward to seeing your clean and simple beach-themed creations in the gallery this week. I'm having a relaxing day at home today with the family. I'll be back tomorrow with another card (or two!). Until then, happy stampin'! 


Stampin' Up! Supplies Used:

Table built using Product Table Builder by The Crafty Owl - Independent Stampin' Up! Demonstrator.


It's A Boy Sweet L'il Things Congratulations Card

by Joanne James10. August 2015 08:00

Happy Monday everyone! I am starting my week with a fun birth congratulations card for the challenges over at Freshly Made Sketches and Pals Paper Arts this week:

   Ppa262

I love the sketch but was initially perplexed when I saw the PPA colours this week as I wasn't sure I could make the Mint Macaron and Pool Party work together; I loved the colour combo though so thought I'd give it a bit more consideration and this is what I came up with:

With both Pool Party and Tip Top Taupe featuring in the Sweet L'il Things Designer Series paper pack, I decided to go with a new baby card - a boy of course! I just love the cloud pattern on the DSP sheet (it comes in the alternate colourway of Pool Party cloud outlines on Very Vanilla too) and whilst this is by no means only of use for a baby card, it provided the perfect backdrop for my little panel of 'zzzzz's' and my Very Vanilla panel with cute Pool Party babygro cut using my Baby's First Framelits. I paper-pierced the babygro to add interest and added a 3/4" Very Vanilla circle with a Mint Macaron punched heart, that I covered with one of the heart-shaped Itty Bitty Accents Epoxy Stickers - this looks so lovely in real life! The heart and banner were just enough Mint Macaron I think with the other two colours and I'm so pleased with my final card. It also made me realise just how much I love Tip Top Taupe - this isn't a colour I've used much at all to date, yet its soft tones work so well with pastels and paler colours, I must try and use it more often.

That's all from me; I am expecting a visit from my parents today, which is making Ben very excited since with his birthday tomorrow he is virtually assured of presents! - and I'm also expecting the arrival of my pre-order of SU! goodies from the new seasonal catalogue. I am beyond excited!!!

Back tomorrow with another project; until then, happy stampin'!


Stampin' Up! Supplies Used:

Table built using Product Table Builder by The Crafty Owl - Independent Stampin' Up! Demonstrator.


Baby 'Gender Reveal' Card - Girl or Boy?

by Joanne James7. July 2014 08:00

It's Monday and the start of a busy week for me, beginning with sports day for both James juniors today. So a nice early post is in order and today I'm sharing a card inspired by the colours over at Color Throwdown this week:

I thought these colour would make a fun baby card, but which way to go - girl or boy? In the end I decided to have some fun and use a little of both - take a look and see what I mean:

I decided to create a fun 'gender reveal' card that could be handed out to guests at a baby shower or similar, when the baby's gender has been kept a secret but it's time for the big reveal. I used Very Vanilla as my card base and created mats in Tempting Turquoise, Strawberry Slush and Very Vanilla, then punched 4 squares using my retired 1 1/4" square punch (you could cut these by hand), 2 blue and 2 pink, and attached one of the cute images from the 'Something for Baby' set, stamped in alternating pink and blue, and cut out with the co-ordinating framelits and mounted on dimensionals on the coloured squares. I then took one of the baby sentiments from the 'A Dozen Thoughts' stamp sets and partially inked it up so that the start of the sentiment was on the front, with the final 'reveal' on the inside. So what did I choose for my card - well, here's the inside where the truth is out:

I made mine for a little girl, adding in the leading dots and the exclamation mark with my Strawberry Slush marker pen. You could just as easily create a similar card with alternate wording for a boy - cute, eh?!

We are making a card similar to this one in my monthly card class which is being held this week, which is featuring lots of products from the new Stampin' Up! 2014-15 Annual Catalogue. If you live in Northampton and are interested in attending card, home decor or Project Life classes, do get in touch - new faces are always welcome!

Right, I'm off to avoid being attacked by a javelin or alternative sporting object! Back tomorrow with another project; until then, happy stampin'!


Stampin' Up! Supplies Used:

Table built using Product Table Builder by The Crafty Owl - Independent Stampin' Up! Demonstrator.


Tags: , , , , , , , ,

Cards | Stamping

The Paper Players Guest Designer - At the Beach

by Joanne James6. July 2014 08:00


Today is a very exciting day - my first official post as a Guest Designer with The Paper Players! I am very pleased to be joining this talented group of ladies for the next three months, along with the other amazing guest designers: Claire Broadwater, Yapha Mason, Andrea Whisman and Mike Funke - I'm really looking forward to working with you all. So today's challenge is from Nance and requires projects with a beach theme:

When I think 'beach' I immediately am drawn to the bold and bright colours of the Caribbean, where, as a keen scuba diver I've spent some of my best beach holidays. However, for today's card I decided to opt for something that shows a more traditional British beach scene and took the opportunity to use one of the new in-colours, Lost Lagoon. I also used this week's Freshly Make Sketches layout (turned through 90 degrees) for my card - take a look:

I took out the seagulls from my recently acquired 'Wetlands' set and with a Sahara Sand card base, stamped them in Basic Grey on a circle of Whisper White cut out with my Big Shot and circles framelits and sponged in the background using Soft Sky, Lost Lagoon, Sahara Sand and a little So Saffron masking the sun using a little punched circle of spare cardstock. I mounted this circle slightly offset onto a larger circle cut from Lost Lagoon and used a piece off paper from the new Moonlight Designer Series paper stack as a partial background - this paper so reminds me of waves! The pattern actually runs across the short side of the stack, so to make it extend along the whole of the long side of my card I simply matched the pattern and created a join, that is hidden behind the circular focal point - clever, eh? I then finished with a strip of Basic Grey cardstock wrapped with a piece of Lost Lagoon stitched satin ribbon, my sentiment stamped on a narrow flag and a basic metal button tied with linen thread to add to the natural feel.

I love the circular elements on this card and the muted colour scheme - it takes me back to my childhood when I lived quite near to some of the best of the British coastline and would often spend warm sunny days building sandcastles and paddling in the sea. I currently live right in the centre of 'middle England' and couldn't be further from any stretch of coastline than anywhere else in the country; I'll have to make do with watching the barges and moorhens on the local canals instead!

I hope you like my card today and that it inspires you to hop on over to the Paper Players challenge blog to join in and upload your challenge creations. The Paper Player challenge takes place weekly, opening on a Sunday at 8am (PST) and closes at noon on Friday (PST). Here's a quick recap of our challenge rules: 

1.  Create a new paper project

2.  Upload your creation to your blog with a link back to us and provide a direct link to the  post featuring your challenge submission.

3.  Please link your card to no more than three challenges, TOTAL.

4.  Have FUN!

We look forward to seeing your seaside-themed creations! We are having a restful family day today, having had a busy day yesterday with a theatre visit and swimming gala and the next two weeks choc full of things going on as the end of the school term draws near. Back tomorrow with another project; until then, happy stampin'!


Stampin' Up! Supplies Used:

Table built using Product Table Builder by The Crafty Owl - Independent Stampin' Up! Demonstrator.


Watercolour Wonder Hello

by Joanne James13. May 2014 21:06

Today I'm sharing a card I made for this week's challenge over at Create with Connie and Mary, where they have a lovely vibrant colour palette to play with; I also used the layout over at CAS(E) This Sketch:

This card gave me the perfect opportunity to make a feature of a lovely piece of Watercolour Wonder paper that I've had in my box for a while and also to try something different with the tab panel. Here is my card:

I used Calypso Coral for the base of my card, topped with a piece of Watercolour Wonder DSP. Now I know that, strictly speaking, the paper pack says that Daffodil Delight and Tangerine Tango are the feature colours in the Watercolour Wonder papers, however the watercolour effects mean that on some of the sheets the blending means that there are also opportunities to match with other colours, such as Calypso Coral for example - I just chose an area of paper that avoided the darkest orange tones so it fits perfectly with the rest of my card. I cut my inverted banner from a piece of Bermuda Bay cardstock and used a 1 1/4" circle and the Label Bracket punch to create the Daffodil Delight aperture to showcase my Petite Petals flower - I've been wanting to use this framing idea ever since I saw it on one of Connie Babbert's cards a while ago (you can see Connie's original card here). I also stamped my 'hello' sentiment in Versamark and heat embossed in Whisper White. Lastly, I stamped my flower in Calypso Coral on some Whisper White cardstock and finished it with a Bermuda Bay candy dot.

I really like how this card turned out; I almost stamped a sentiment onto the DSP instead of the banner, but in hindsight I'm really glad I didn't - I love that the watercoloured panel is on show and uninterrupted by any other stamping or design.

Back tomorrow with another project and this week's new Wednesday weekly deals; until then, happy stampin'!


Stampin' Up! Supplies Used:

Table built using Product Table Builder by The Crafty Owl - Independent Stampin' Up! Demonstrator.


CAS Washi Tape Butterfly

by Joanne James25. April 2014 09:45

Well, I don't know where yesterday went! I was so busy I didn't even manage a blog post; I had my card all ready and just didn't get it photographed. So in the interests of all things quick, here is the card that I had intended to blog yesterday - my second attempt at a CAS washi tape card for Nance's challenge over at The Paper Players this week:

I have now replaced the earlier photograph with one of a better quality! this kind of card is so quick to create: my card is a simple white background with a Night of Navy mat for my image. I then took a rectangle of Whisper White and covered it in diagonal strips of co-ordinating Gingham Garden washi tape. As with my washi tape card earlier this week, you can use the washi tape directly onto coloured card for a diferent effect, but I wanted the colours to remain true here, so needed a white background. I then adhered this to the mat and lastly popped a Melon Mambo rectangle on with dimensionals, having first cut out a butterfly shape using my butterfly die. You could just leave it there, however I decided to add a little 'hello' greeting and a candy dot flower cut from one of my pieces of card scrap just to complete my card.

A quick card for a quick post! Everything is about speed today; I'm off to the hairdressers shortly and have a hundred and one jobs to do before I collect the James Juniors from school today for the weekend. I've already ticked a few off my list though this morning, so am making good progress!

Back tomorrow with another project; until then, happy stampin'!


Stampin' Up! Supplies Used:

Table built using Product Table Builder by The Crafty Owl - Independent Stampin' Up! Demonstrator.


It's A Zoo Baby Boy!

by Joanne James13. March 2014 09:40

Good morning everyone! When I came to make my card for this week's Paper Players challenge, I decided that Anne Marie's colour challenge this week would be perfect for a baby boy card, so using this week's CAS(E) this Sketch layout, I set to work:


After much experimentation, I decided to keep it clean and simple - this is what I came up with:

I stamped the giraffe from the Zoo Babies set in Crushed Curry, then inked up the little toucan bird with my Stampin' Write markers and lined him up with my Stamp-a-ma-jig to look as if he was sitting on the back of the giraffe. I then added a little 'vintage' taffeta ribbon bow in Marina Mist to the giraffe and rounded one corner of the panel for interest. I stamped my sentiment in Marina Mist on a second panel in the same colour and used Smoky Slate as my base. I love this grey; it's so soft and subtle and for this card worked much better than the blue or yellow, which looked too overpowering. I then simply added a few scored lines towards the bottom of the card and rounded the corner to echo the shape of the Whisper White panel.

I made so many variations of this card, with various embossed elements and fancy tags, but in the end I didn't like any as much as this one - why is it sometimes the simplest designs are the most difficult to create? This card is destined for Ben's teacher at school, who has just finished teaching to begin her maternity leave. We don't know what she's expecting, so at some point I need to make a baby girl card too just in case, although Ben is convinced that she is bound to give birth to a boy - the testosterone levels of a class of 21 boys and one girl will have influenced from beyond the womb, he's convinced!

Do check out the challenge pages above for more design inspiration - there are some great examples from both the design teams and in the galleries. I am also linking my card up with Addicted to CAS where the challenge this week is 'Baby' - I'm hoping to find lots of ideas for my 'baby girl' alternative there!

Back tomorrow with another project; until then, happy stampin'!


Stampin' Up! Supplies Used:

Table built using Product Table Builder by The Crafty Owl - Independent Stampin' Up! Demonstrator.


Tags: , , , , , , , ,

Cards | Stamping

It's (Another) Girl!

by Joanne James24. January 2014 20:12

So today I'm sharing a card I made to welcome the latest addition to the family for some friends of mine - their fourth daughter (hence the title of my blog post today!) I decided to steer clear of the pastel pinks that are traditional for baby girl cards and go brighter; after all, when it's your fourth baby girl it's nice to ring the changes, right?! So here's my card:

I used the 'Zoo Babies' stamp set to create my montage of animals and based my colour scheme on the checked DSP from the 'Birthday Basics' set. I used paper piecing to highlight some of the animals' features, as opposed to colouring with marker, so that they would stand out against the bold patterned paper. I smiled to myself as Rebecca came to give my card her seal of approval and said "Are you going to add 'another' with your Raspberry Ripple marker Mum?" As you can see, I resisted the temptation!!

I'm linking today's card up with Less is More where the challenge this week is 'New Baby', the sketch challenge over at CAS(E) this Sketch! and Addicted to CAS, where the challenge is 'New' - well, this card is for a new baby and was created with a new (to me!) stamp set, so I think that qualifies!


Back tomorrow with another project; until then, happy stampin'!


Stampin' Up! Supplies Used:

Table built using Stampin' Up! Product Table Builder from The Crafty Owl.


Petal Parade Pastels - Sale-A-Bration 'Sneak Peeks'

by Joanne James11. January 2014 20:54

As promised, I've a change of theme today - I've been having a play with my Sale-A-Bration pre-order and thought I would share one of the cards I made that features a  few of the products that will be available free when you spend £45 or more during the Sale-A-Bration 2014 promotion. Here is my card:

This card features three new products: the lovely Sweet Sorbet Designer Series Paper*, one of the stamps from the 'Petal Parade' stamp set* and the Crisp Cantaloupe cardstock has been embossed with the Decorative Dots Textured Impressions Embossing Folder*. All those layers, teamed with the fresh, pastel colours of the DSP and a simple sentiment, this is a perfect post-Christmas card, 'just because'.

More Sale-A-Bration ideas to come, but for now, start making that wish list! Back tomorrow with another project; until then, happy stampin'!


Stampin' Up! Supplies Used:

* All Sale-A-Bration items - available from 28 January - 31 March 2014

Table built using Stampin' Up! Product Table Builder from The Crafty Owl.


Mini Catalogue

BROWSE THE CATALOGUE

The mini catalogue is now live! Read and download your copy here.

Shop Online

Access my online shop 24 x 7, 365 days of the year:

Current April hostess code:

VDKNV7BH

Shop Online

Join My Team

It's always a great time to join Stampin’ Up! New team members can get £130 worth of products for only £99 + free business supplies + free shipping + all the fun being a part of Stampin’ Up! Stampin' Up! has something for everyone: join my growing team and benefit from my support to enjoy Stampin' Up! however you choose.

If you're interested, call me for a chat to understand how I can help you realise your goals. Alternatively, if you have already decided to sign up and you just can't wait, please click here for the link to the online form where you can sign up and order your starter kit right away! 

Latest Kit!

Stampin Cut and Emboss

The Rock Legend Kit has all you need to make 8 cards with coordinating envelopes. Along with the new Panda Friends Kit, both are available from January 4th for just £14 each - get yours here!

2023-24 Annual Catalogue

BROWSE THE CATALOGUE

Click on the catalogue for a full list of current SU! supplies - if you would like to order any of the items featured, please drop me a line at [email protected] or give me a call on 07773 421446 - I'd be happy to help.

New Online Exclusives

There are new products available exclusively in the online store from 5 March - check them out here.

About Me

Hi I'm Joanne and live in Northampton and when I'm not looking after my husband and two beautiful children, am an avid crafter with a passion for all things Stampin' Up!

I must confess that I have never been a big rubber stamper - until I discovered Stampin' Up! that is. I love the fact that I can get such great results with co-ordinating stamps, inks, papers and punches - the possibilities are endless! Join me on my stamping journey as I share the things I love and be inspired to create amazing things yourself!

Follow Me

Monthly Newsletter

Box Builder

Click the button above to use Box Buster to create your custom box design using the Envelope Punch Board!

Kits Collection Now Available!

Stampin Cut and Emboss

The new Kits Collection from Stampin' Up! is now available!

Click here to see the current kits available and order yours online today.

I Design For


Stampin' Up Stuff

This is my personal blog and is not endorsed by Stampin’ Up! I hope you find it a plentiful source of ideas and personal inspiration but please don't copy my designs for contest submission or use for classes, publication or sale without express permission.