Christmas Pinecones Peace on Earth

by Joanne James13. November 2023 12:22

Happy Monday everyone! We are another week closer to Christmas, so no surprises that today I'm sharing a card for the occasion! I took my inspiration from the crate of pinecones on the Hand Stamped Sentiments  inspiration photo below:

I diecut some pinecones and greenery using the Christmas Pinecone Dies and snipped a section to frame my sentiment from the 'Christmas Classics' stamp set - take a look:


I used a piece of retired Painted Christmas designer series paper for my background; I love the fresh feel of this paper, and the white background allows the detail of the diecut pinecones to really shine:


A few sparkly gems complete my card. This card took longer to make than it took to write my post; those Christmas Pinecone Dies take a little bit of time to cut and assemble, but I think it was worth it. Plus I've still got enough leftovers to make another 2-3 cards - bonus! I'm also linking today's card up over at the Alphabet Challenge Blog, where they are currently on 'P is for Peace' - the world could definitely do with some of that at the moment, for sure.

Here is the visual summary of the key products used on today's project for you to pin for easy reference:


You can see all of my 'How To' summaries on my 'How To - Tips and Techniques' Pinterest board in case you've missed any. 

Enjoy your day and I'll be back tomorrow with another project. Until then, happy stampin'!


Stampin' Up! Supplies Used:

Table built using Product Table Builder by The Crafty Owl - Independent Stampin' Up! Demonstrator.

Painted Christmas Country Wreaths TTT188

by Joanne James17. November 2022 15:00

It's Thursday and time for a new challenge over at TicTacToe! It's the turn of Team X to host this week and the lovely Felicita is our featured designer this week. This is the fun board that we are playing along with: 


I have been having a lot of fun with my Cottage Wreaths bundle so decided to take the right hand column and use any shape die, wreath and gold foil/glitter for my card today - take a look:


Here's the low-down on today's card:

I love the sketch over at TGIF Challenges this week and decided that it would be perfect for a little of 'something old, something new' - I layered a stamped and diecut wreath from the Cottage Wreaths bundle over a panel of Soft Sea Foam. embossed with the retired but gorgeous Seasonal Wreath embossing folder. This has so much detail and dimension yet makes a pretty, subtle background. I also added some stamped and diecut holly leaves, red rhinestones and an antique gold foiled bow to my Christmassy Cottage Wreath, along with a fussy cut sentiment:

All of this was against a background of the returning favourite, painted Christmas Designer Series Paper, with a couple of red glimmer borders thrown in. The prettiness doesn't stop there though - I also decorated both the inside of my card, and the envelope - no naked envelopes here:

I'll be sharing this with the lovely ladies over at Just Us Girls where it's trend week and this is the trend Lisa has chosen. I love to decorate an envelope and the inside of my card to co-ordinate with the card front; I think it's a great way to add a finishing detail and I like to think that a patterned envelope makes the recipient smile before they've even opened it. 

Here is the visual summary of the key products used on today's project for you to pin for easy reference:


You can see all of my Product and 'How To' summaries on my 'How To - Tips and Techniques' Pinterest board in case you've missed any. 

A tictactoe board offers so many creative possibilities - how does this week's board inspire you? Why not have a go? We would love to see you in the gallery and who knows - you might be selected for Designer's Choice and be eligible to be a guest designer on a future challenge. 

Enjoy your day; I am heading out to Sixth Form Options Evening with the youngest of the James Juniors at school this evening; this does at least mean dinner out, due to the logistics of trying to get everywhere on time - what a treat! I'll be back tomorrow with another project. Until then, happy stampin'!


Stampin' Up! Supplies Used: 

Table built using Product Table Builder by The Crafty Owl - Independent Stampin' Up! Demonstrator.

Painted Christmas Pinecones

by Joanne James9. November 2022 14:55

I had a little extra crafty time yesterday in between completing some design team projects and made a quick card for the current challenge over at Inspired By that I wanted to share today:

Those pinecones totally made me think of the design in the Painted Christmas designer series papers - do you know the one? Check out my card below to see:


Here's the low-down on today's card:

I also used the Inspired by sketch this week and paired my painted pinecone paper with an Evening Evergreen strip with a sentiment that was part heat-embossed with 'merry' from the 'Christmas Banners' stamp set and a 'Christmas' diecut from the now retired Merry Christmas Thinlits Dies. I added a couple of diecut pinecones as a simple embellishment to complete my card:


Quite a simple card but one that packs a big impact - and good to use up some designer series paper too!

Here is the visual summary of the key products used on today's project for you to pin for easy reference:


You can see all of my 'How To' summaries on my 'How To - Tips and Techniques' Pinterest board in case you've missed any. 

Enjoy your day; I need to dash as it's time for the school run! I'll be back tomorrow with another post. Until then, happy stampin'!


Stampin' Up! Supplies Used:

Table built using Product Table Builder by The Crafty Owl - Independent Stampin' Up! Demonstrator.

Painted Christmas PP569

by Joanne James28. November 2021 08:00

Today it's Sunday and time for this week's new challenge over at The Paper Players! It's the turn of the fabulous Anne Marie to host this week and she has my favourite, a sketch challenge for you to work with:


I struggled a little to decide what to do about the split background layer on today's card; I eventually decided to use a single, bright patterned paper from the Painted Christmas pack - take a look:


There are some gorgeous patterns in the Painted Christmas pack, all with a loose watercoloured feel. I love this red and white pattern but it needed an otherwise uncluttered card to show it off to best advantage. So I split the panel into three as per the sketch, then added a red label with a white heat-embossed sentiment, accented with some holly and foliage stamped with the Christmas Season stamp set, some loops of sheer red ribbon and some red sparkly gems to finish:

This card was actually quite straightforward to put together, but I spent ages procrastinating about which paper or papers to feature so seemed to take forever to design!! I really like the pop of red against the white though, with just a little green foliage too. I used one of the sentiments from 'Merriest Moments' - this is most certainly my favourite sentiment set in the current catalogue.

Here is the visual summary of the key products used on today's project for you to pin for easy reference:


You can see all of my Product and 'How To' summaries on my 'How To - Tips and Techniques' Pinterest board in case you've missed any. 

I'm also linking today's card up over at Global Design Project #GDP319 where the theme is 'Christmas'.

Before you reach for your ink and papers, check out what our amazing team has created to inspire you this week:

Here's a quick recap of our challenge rules:
 
1.  Create a new paper project
2.  Upload your creation to your blog with a link back to us and provide a direct link to the post featuring your challenge submission.
3.  Please link your card to no more than four challenges, TOTAL.
4.  Have FUN!

You can see all of my 'How To' summaries on my 'How To - Tips and Techniques' Pinterest board in case you've missed any. 

Enjoy your day; we have had a freezing few days here in the UK so today I will most definitely be staying indoors, keeping warm and might even indulge in a spot of festive baking! I'll be back tomorrow with another project. Until then, happy stampin'!


Stampin' Up! Supplies Used: 

Table built using Product Table Builder by The Crafty Owl - Independent Stampin' Up! Demonstrator.

Happy Holly Days Robin Wreath TTT140

by Joanne James18. November 2021 12:00

It's Thursday and time for a new challenge over at TicTacToe! It's the turn of Team X to host this week and the lovely Vicky is our featured designer this week. This is the fun board that we are playing along with: 


I used the sketch over at TGIF Challenges for my layout today - I thought that circle would be the perfect spot for a festive wreath to frame my colourful robin - and went across our tictactoe grid with layers/wreath/bird for my card today. Take a look:


Here's the low-down on today's card:

I used one of my favourite patterns from the Painted Christmas paper pack for the base of my card, added a couple of diecut wreaths, along with a few extra pieces of diecut holly leaves, a bow of glittered organdy ribbon and my sentiment, which I anchored with a robin from the Happy Holly Days stamp set, stamped and coloured with my Stampin' Blends. I added a few garden gems for a little extra sparkle to finish my card:


When it comes to colouring, I'm no expert but I do love it - so theraputic! A little extra stamping on the inside completes my card:


Here is the visual summary of the key products used on today's project for you to pin for easy reference:


You can see all of my Product and 'How To' summaries on my 'How To - Tips and Techniques' Pinterest board in case you've missed any. 

A tictactoe board offers so many creative possibilities - how does this week's board inspire you? Why not have a go? We would love to see you in the gallery and who knows - you might be selected for Designer's Choice and be eligible to be a guest designer on a future challenge. 

Enjoy your day; a slightly earlier post from me today as I'm going to watch one of the James Juniors play hockey at school this afternoon; not something I get the opportunity to do often, but definitely a benefit of working for yourself that you can flex your hours to enjoy life's simple pleasures! Then the other of my charges is on a late pickup, as he has swim squad training after school. I'll be back tomorrow with another project. Until then, happy stampin'!


Stampin' Up! Supplies Used: 

Table built using Product Table Builder by The Crafty Owl - Independent Stampin' Up! Demonstrator.

Painted Christmas Clean and Simple Holly Card

by Joanne James20. September 2021 15:30

Another Monday, another week! Today I'm sharing a couple of cards that I made using this week's Freshly Made Sketches layout that I'm also linking up over at Addicted to CAS where the codeword is 'leaf':


This week's FMS sketch is courtesy of Cecile Ribon. If you are not a regular follower of Freshly Made Sketches, you should make a point of checking out her cards; I am in awe of her beautifully clean, elegant designs! I didn't get a chance to make a card to play along until today, but couldn't resist the opportunity to channel my 'inner Cecile' and have a go - take a look at what I came up with:


Here's the low-down on today's card:

Painted Christmas - I decided to use designer paper for the trio of squares on the sketch and chose a selection of soft watercoloured patterns from the painted Christmas papers. I went mostly with patterns in greens and white with small designs, with one square that had red in too, which I picked up in my simple 'Joy' sentiment from the 'Merriest moments' stamp set. These papers are so pretty but not too overpowering - perfect in small amount for a clean and simple card.

White Holly - I chose to accent my card with a sprig of diecut holly in white; this was a deliberate move, albeit an unusual one for me. I used the (retired) Sweetest Borders Dies as I wanted to have something that was the right size with a little diecut detail, but there are plenty of current dies that could be adapted to achieve the same effect:

I was aiming for a single leaf for my Addicted to CAS entry, but because I used holly ended up with two; is it just me, but do you ever see holly leaves in ones? I only ever place them in pairs!

Finishing Touches - I added a trio of clear faceted gems and a silver twine bow to my white foliage for some simple finishing touches, along with a simple sentiment on the inside:


I liked this card and sketch so much, I made a second one too, this one with the centre square being the uppermost and popped up on dimensionals, rather than overlapped as per Cecile's original sketch:


I chose a couple of other prints too, with a little more pale green in the print pattern:


So what do you think? I love both of these cards and loved trying to channel my 'inner Cecile' to create my FMS entry this week!

Here is the visual summary of the key products used on today's project for you to pin for easy reference:


You can see all of my 'How To' summaries on my 'How To - Tips and Techniques' Pinterest board in case you've missed any. 

My day has been a topsy-turvy one, with plans upended and rejigged due to changes in school activities such that the restful day of crafting I had planned didn't quite materialise. No matter though - sometimes you have to roll with it and tomorrow may bring less upheaval; here's hoping! Enjoy the rest of your day and I'll be back tomorrow with another project. Until then, happy stampin'!

Stampin' Up! Supplies Used:

Table built using Product Table Builder by The Crafty Owl - Independent Stampin' Up! Demonstrator.

Happy Holly Days Festive Robin AYSI 258

by Joanne James3. September 2021 13:00

I've had a few days break from the blog as I make the most of the last few days of the long summer holiday before the James Juniors head back to school next week. I'm back today though and I'm sharing my design team card for our new challenge over at As you See It where it's time for a theme challenge:


I used the great sketch over at Sunday Stamps for my layout this week. So many options for that central panel but with our theme this week of 'up in the air' I decided to feature a festive feathered friend on mine - take a look:
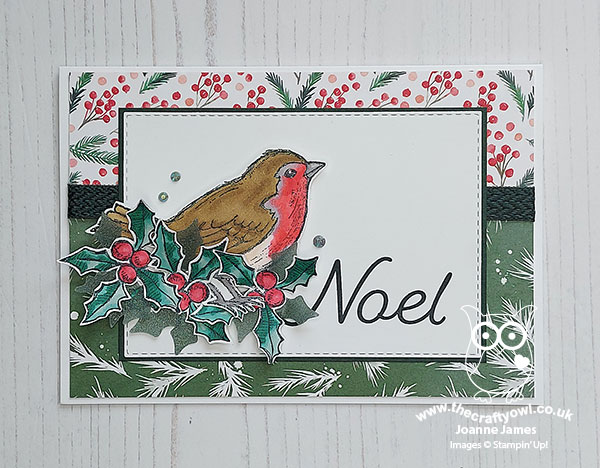
 

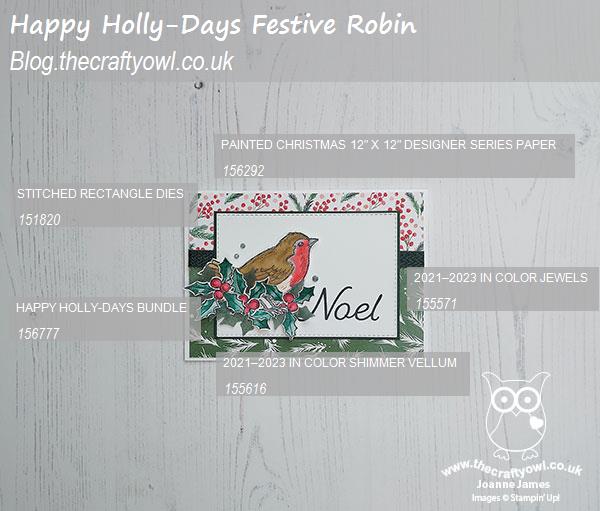
Here's the low-down on today's card:

Happy Holly Days - First up, I have a little story for you! I can't tell you how many UK Leadership training events I've attended over the years where I've been in meetings where we've brainstormed ideas for future catalogues, and if I had a penny for every time the request for a traditional Christmas robin has been made I would be rich by now! The cardinal gets featured frequently in the Stampin' Up! catalogue and whilst he is a common visitor for many in Stampin' Up!'s global markets, the robin is a particularly European bird and doesn't travel as far south as the USA. As such, our requests have often fallen on deaf ears - until now! This year's mini catalogue has a beautiful robin just waiting to be coloured, so I had to scoop him up and I'm so glad to give him his first outing on my card today.

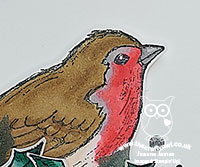
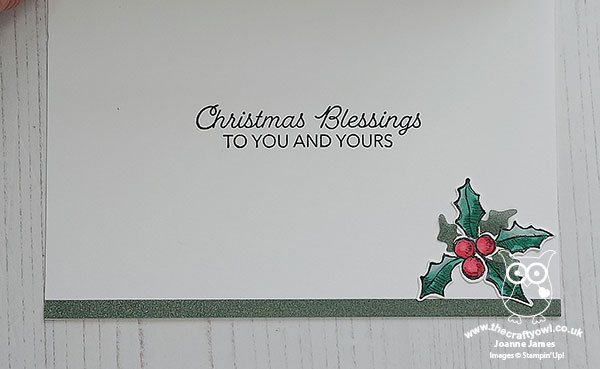
I've seen some interesting colours applied to this bird as I've browsed the internet, but my robin is true to type! His tummy is maybe a little more red than a real-life bird, since they are actually more of an orange-red colour, but I wanted to emphasise the red so went with Poppy Parade Blends and made mine a full-on 'robin red breast'. As for this set, not only does it have this lovely robin and some holly to colour (more on that in a moment) but it has some lovely sentiments for both the outside and inside of your cards. I used a large 'Noel' on the front of my card, then continued on the inside with this one:
 

Shimmer With The Holly Border - In addition to the holly in the stamp set, which I coloured and fussy cut and adhered around the feet of my robin, the stamp set is bundled with a holly border punch. I didn't use the border pattern in my design today, instead I punched it out of some Evening Evergreen vellum and then adhered the leaves in between my stamped ones for some extra sparkly detail:
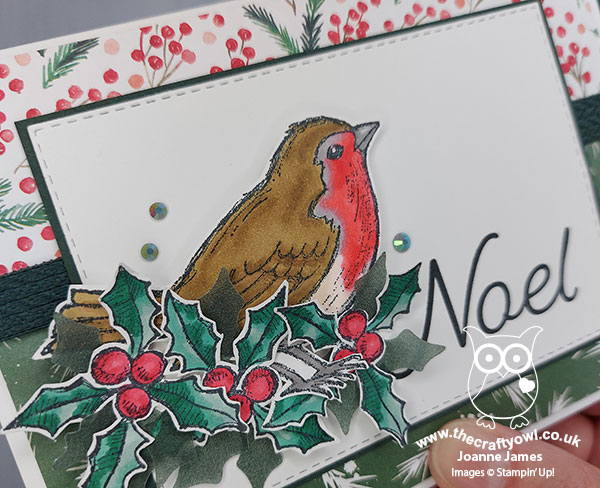
 

 I did wonder if I was a little over-enthusiastic about this, but I do like the little added shimmer it adds to the card. Once complete I also wished I'd splattered my white rectangular panel as I felt it was a little too 'clean' (if there can ever be such a thing!) but I didn't want to remake or deconstruct, so added a trio in in-colour gems to break up the space and add a little more sparkle instead. 

Painted Christmas - For my split background panel, I chose two patterns from the Painted Christmas DSP pack. There are some lovely foliage patterns in this pack and I had a hard time choosing just two. I covered the join with some lovely dark green chevron weaved ribbon to complete my card.

Here is the visual summary of the key products used on today's project for you to pin for easy reference:
 

You can see all of my 'How To' summaries on my 'How To - Tips and Techniques' Pinterest board in case you've missed any. 

 So what do you think? I really love this robin and am on a mission to feature him on lots of cards this season, especially since he has been so longed-for in terms of stamp sets! In the meantime, what will you choose to feature for our 'up in the air' theme this week?

Here's a summary of our challenge rules:

  • Create any card, scrapbooking page, 3D project or packaging project that fits the challenge.
  • Please include the challenge graphic and link back to the challenge in your blog post. Turn off word verification so we can leave you lots of lovely comments. Make sure you link the post not the whole blog to the Linky. Use #AYSIXXX when uploading to a public gallery.
  • If you’re unsure about ‘the rules’, check the details under the Challenge Guidelines tab on the As You See It Challenge homepage.
We look forward to seeing your creations in the AYSI gallery.

Enjoy your day; the James Juniors are off to get pre-school haircuts today and Ben for one needs it - the yeti currently has nothing on him!! Rebecca is actually going in for Sixth Form Induction day this afternoon and she is so excited! I'll be back tomorrow with another project. Until then, happy stampin'!


Stampin' Up! Supplies Used:

Table built using Product Table Builder by The Crafty Owl - Independent Stampin' Up! Demonstrator.

Scrapbooking

Stampin' Up! has introduced a new range of 12x12" scrapbooking product and kit - the full range is now available to purchase online. To download a copy of the new digital Scrapbooking Catalogue click here.

Mini Catalogue

BROWSE THE CATALOGUE

'Tis The Season - the new Stampin' Up! Mini Catalogue is here! For more details and to download your copy click here

Shop Online

Access my online shop 24 x 7, 365 days of the year:

Current September hostess code:

JQEHTZGK

Shop Online

2024-25 Annual Catalogue

BROWSE THE CATALOGUE

Click on the image to download your copy of the 2024-25 annual catalogue. For a full list of current SU! supplies, go to my online store. If you would like any help or advice, please drop me a line at joanne@thecraftyowl.co.uk or give me a call on 07773 421446 - I'd be happy to help.

Join My Team

It's always a great time to join Stampin’ Up! New team members can get £130 worth of products for only £99 + free business supplies + free shipping + all the fun being a part of Stampin’ Up! Stampin' Up! has something for everyone: join my growing team and benefit from my support to enjoy Stampin' Up! however you choose.

If you're interested, call me for a chat to understand how I can help you realise your goals. Alternatively, if you have already decided to sign up and you just can't wait, please click here for the link to the online form where you can sign up and order your starter kit right away! 

Latest Kits!

Stampin Cut and Emboss

The Christmas Ornaments Kit and Card Keeper Kit are the latest kits that will be arriving in the online store later this month - get yours here!

New Online Exclusives

There are new products available exclusively in the online store from 3 July - check them out here.

About Me

Hi I'm Joanne and live in Northampton and when I'm not looking after my husband and two beautiful children, am an avid crafter with a passion for all things Stampin' Up!

I must confess that I have never been a big rubber stamper - until I discovered Stampin' Up! that is. I love the fact that I can get such great results with co-ordinating stamps, inks, papers and punches - the possibilities are endless! Join me on my stamping journey as I share the things I love and be inspired to create amazing things yourself!

Follow Me

Monthly Newsletter

Box Builder

Click the button above to use Box Buster to create your custom box design using the Envelope Punch Board!

Kits Collection Now Available!

Stampin Cut and Emboss

The new Kits Collection from Stampin' Up! is now available!

Click here to see the current kits available and order yours online today.

I Design For


Stampin' Up Stuff

This is my personal blog and is not endorsed by Stampin’ Up! I hope you find it a plentiful source of ideas and personal inspiration but please don't copy my designs for contest submission or use for classes, publication or sale without express permission.