Creative Escapes From The Crafty Owl - October Luxury Crafting Weekend Retreat Booking Offer!

by Joanne James25. August 2018 10:50

Happy Bank Holiday weekend to my UK readers and I hope the rest of you are finding fun (and maybe even crafty!) things to do this weekend. I have managed to squeeze in a little craft time this week so do have lots of new projects to share with you (especially using the items in my Autumn-Winter preorder box, I can't stop creating with them!) but firstly today I want to talk about creative escapes of a different kind!


Further to the successful weekend retreat I held earlier this year with my friend and fellow demonstrator Louise Sims, I have another two sole ventures planned. The same venue, more great projects and most importantly a weekend away, full of crafting and good company. If getting away from everyone and everything and having some ME time appeals, then a luxury weekend of crafting and a Creative Escape with The Crafty Owl sounds just the thing for you.

Where is the retreat held?

The venue for the Craft Retreat is the gorgeous 4 star Macdonald Ansty Hall Hotel, conveniently located just off the M6/M69, near Coventry, Warwickshire.

Set in beautiful grounds it is the perfect destination for a getaway; gorgeous surroundings, good food and your own stylish bedroom for the night.

Its central Midlands location just off junction 2 of the M6 motorway means it has easy access from all parts of the country – making it a perfect destination break for you and your friends from afar.

What is included?

The Creative Escape package includes an overnight stay and all food for the weekend, lunches, snacks, evening meal and breakfast together with unlimited tea and coffee. You have 2 full days of crafting with your own table for the whole weekend – no need to tidy away! Bliss!

A goody bag of Stampin’ Up! crafting supplies is also part of the package and will be more than £100 in value. The supplies will enable you to complete the projects for the classes run throughout the weekend and you'll have lots left over to take home too!

The Classes

The classes offered during the weekend are optional. The weekend is yours, so you can choose to keep with class pace or do your own thing. There is no requirement to complete everything, you can do exactly what you want – chat, craft, chill … the choice is yours. Choose to craft at every possible moment, or take a break for a walk or a drink in the lounge – it’s all up to you. Classes are suitable for both beginner and experienced crafters alike - there really is something for everyone.

2018-19 Craft Retreat Dates

Booking is currently open for the following dates:

Saturday 20th October - Sunday 21st October 2018​   **LIMITED AVAILABILITY** LAST FEW SPACES REMAINING
Saturday 2nd March – Sunday 3rd March 2019

Fully inclusive price for 1 nights accommodation,  with lunch and a 3 course dinner on Saturday, followed by breakfast and buffet lunch on Sunday. It also includes unlimited tea, coffee or hot chocolate & snacks, 4 crafting classes and a goody bag worth more than £100 full of Stampin’ Up! products.

The price of a Creative Escape With The Crafty Owl is as follows:

Single occupancy is £325 per person or
Double occupancy is £305 per person

Early booking discounts for all Creative Escapes apply (£292 pp and £272 pp respectively).

Spaces are limited with booking brisk for next March and only a few spots remaining for this October. I am keen to fill the last few spaces for the October weekend so with this in mind I have a Bank Holiday weekend booking incentive for you: 

Bank Holiday Creative Escapes Booking Offer:


** Book and pay in full for your October Creative Escape before 31st August 2018 and you will receive both a free ink pad and early booking rates for next March too. **


Once you've done one, you won't want to miss the next one!

The October Creative Escape will have a distinctly Christmas theme so why not come along and give yourself a head start on your creative makes for the festive season? 


How do I book?

Sounds like your kind of fun? Email to joanne@thecraftyowl.co.uk and I will contact you to confirm payment details. If you would like to book a place on the March Creative Escape, you are still able to join my payment plan so you can split the cost into monthly payments. Full terms and conditions are available on the Creative Escape Crafting Retreats page on my website.

If you have any further questions or queries, please do get in touch - I would love you to join me!


I'll be back soon with my next creative project; until then, happy stampin'!


Garden Impressions Floral Pocket Card

by Joanne James21. August 2018 10:00

It's Tuesday and I have my third post of the week! Today I'm sharing another of the cards that I made in one of my recent technique classes featuring the Garden Impressions Product Suite that is perfect for the current floral challenge over at Inspire.Create:


I made a pocket card featuring one of my favourite Garden Impressions paper designs with an over-the-top diecut embellishment - take a look: 


Here's the low-down on today's card:

Impressionist Inspiration - You now what a fan of designer series paper I am and the Garden Impressions paper is no exception; I just love these bold bright colours and the Impressionistic style of the patterns and florals in this pack. I like each and every pattern in this pack and this is already my most-used papers. Here I used it to decorate the flaps of my pocket card, which I made from co-ordinating Pacific Point cardstock using my trusty Envelope Punch Board and Envelope Expert tool (my finished card measures 10.5cm x 15cm).

Paper-Pieced Springtime Impressions - Not content with the florals on my basic pocket card sleeve, I decided to add the fabulous corner diecut from the Springtime impressions Thinlits set. I diecut a base in Shaded Spruce, then cut the whole thing again in Melon Mambo and Calypso Coral and snipped out some of the flowers and paper-pieced them onto my base piece. This may seem extravagant, but if you keep the offcuts you can use them to create another one in an alternative colourway, so there is very little waste really. I finished the whole thing with a Mango Melody butterfly. Bold? yes. Bright? Absolutely. Yet I love it! 

Abstract Florals - I added my sentiment to a banner tag on the front of my pocket, so that the whole of my inside card is blank for my message. I couldn't leave this piece 'naked' though, so I added a row of bright pink flowers courtesy of the Abstract Impressions stamp set across the bottom. I love this stamp set - so easy to use as it really is easy to line up the images for the two-step stamping required.

Here is the visual summary of the key products used on today's project for you to pin for easy reference:


You can see all of my 'How To' summaries on my 'How To - Tips and Techniques' Pinterest board in case you've missed any. 

Enjoy your day and I'll be back tomorrow with another project. Until then, happy stampin'!


Stampin' Up! Supplies Used:

Table built using Product Table Builder by The Crafty Owl - Independent Stampin' Up! Demonstrator.

Two Way Embossed Square Seasonal Wreath Christmas Card

by Joanne James20. August 2018 07:00

Happy Monday everyone! It's a new week and I've a few things ready to share with you this week, including a card today for a couple of challenges that is choc-full of sneak peeks:

   Paper Craft Crew Sketch Challenge 303! Play along with the latest challenge by visiting www.papercraftcrew.com #stampinup #papercraftcrew #papercrafts #stamping #sunnygirlscraps #crafting #crafts #craft #creative #creativity #create #sketchchallenge #colorchallenge #inspirationalchallenge #tictactoechallenge

Yes, it's still summer and I'm crafting for Christmas again, but having received my pre-order of goodies from the forthcoming Stampin' Up! Autumn-Winter Seasonal catalogue, I couldn't resist getting stuck in. Take a look:


 Here's the low-down on today's card:

An Embossed Seasonal Wreath - I loved the idea of the challenge over at Just Add Ink this week, which is to choose 2 different types of embossing on your card. It gave me the perfect opportunity to use a new-to-me embossing folder that is actually to be found in the annual catalogue, so available right away! The Seasonal Wreath TIEF attracted my attention as soon as I saw it; great for non-seasonal projects too, this wreath makes a great centrepiece on a card and I can see it being a staple of my Christmas crafting stash. It results in a subtle embossed finish (a little difficult to see the detail on my photo, but I can assure you it's there and it's gorgeous!) The wreath fits on a standard A6 card, but here I decided to make a 6" x 6" square one.

A Merry Christmas - For my second type of embossing, I went with the partial heat embossing of my Merry Merlot diecuts courtesy of the new Merry Christmas Thinlits - LOVE these! I simply sponged the lower portion of the diecut letters with Versamark and heat embossed with copper embossing powder. I took my colour combo for today's project from one of the new designer series paper packs - Joyous Noel - that features in the new catalogue. Whilst it doesn't feature on my card, the combination of Tranquil Tide, Merry Merlot and copper are inspired from these beautiful papers.

The Extra Details - There are a couple of additional 'sneak peeks' on today's card: the copper glimmer paper, the gorgeous Merry Merlot and Copper Reversible Ribbon and the sentiment on the inside of my card, courtesy of the Merry Christmas To All stamp set:


Are you keen to get your hands on some of these new products too? You will have to wait until 5th September to order them, but if you aren't already a customer of mine, don't already have a Stampin' Up! demonstrator and would like a copy of the new catalogue, then just get in touch with me by email with your address details or call me to reserve your copy.

Lastly, the sketch over at Paper Craft Crew inspired the layout for today's card; definitely one I'll use again.

Here is the visual summary of the key products used on today's project for you to pin for easy reference:


You can see all of my 'How To' summaries on my 'How To - Tips and Techniques' Pinterest board in case you've missed any. 

Enjoy your day and I'll be back tomorrow with another, slightly less festive, project. Until then, happy stampin'!


Stampin' Up! Supplies Used:

Table built using Product Table Builder by The Crafty Owl - Independent Stampin' Up! Demonstrator.

Fairies and Cherries For The Paper Players PP406

by Joanne James19. August 2018 09:00

Another week of school summer vacation in the James household this week! Today it's Sunday and time for this week's new challenge over at The Paper Players. It's the first challenge for our returning Paper Players designer, the lovely Anne-Marie Hile, this week so be sure to pop by her blog with a friendly 'hello'. It's the turn of the super-talented Sandy to host this week and she has a clean and simple challenge for us to work with:


Remember in addition to the theme of "fruits and vegetables", this week is a Clean-and-Simple (CAS) challenge!  What do we mean by CAS?

  • Minimal layers and embellishments
  • Plenty of open space, aka "white" space
  • Simple and uncluttered

Having trawled through my collection of current stamps, it turns out I have very few with fruit (or veg!) for that matter, so a little creative stamping was called for. I actually found some fruit 'hidden' in the Fairy Celebration stamp set - take a look:


Here's the low-down on today's card:

This little fairy happens to be hanging from a cherry tree, so a little watercolouring using my new watercolour pencils and an aquapainter (I am so happy that we have more of these now, the new colours in the second pack available exclusively this month extend the variety of colours and allow much greater flexibility - don't leave it too late to get yours!) was all I needed to create a focal point for my card. I added some clear Wink of Stella to the fairy wings and some fine tip glue to the cherries to give them a glossy finish - both of which are difficult to see from the photos, but add subtle detail in real life.

I decided to use the sketch over at CAS(E) This Sketch this week for my layout, and used a couple of pieces cut with my Stitched Labels Framelits then trimmed to add interest behind my main image. I have seen these Stitched Labels Framelits used on some fabulous cards elsewhere on the internet and hold my Paper Player team mate LeAnne responsible for me 'needing' to add them to my own collection (check out her blog for some great examples of how to use them!) so thought I would try something a little different with them. The two blocks of colour mirror the colouring on my cherries and leaves and add detail, without encroaching too much into my white space and maintaining my overall clean and simple feel.

And that's all there is to it: clean and simple - done!

Here is the visual summary of the key products used on today's project for you to pin for easy reference:


You can see all of my Product and 'How To' summaries on my 'How To - Tips and Techniques' Pinterest board in case you've missed any. 

Before you reach for your ink and papers, check out what our amazing team has created to inspire you this week:

Here's a quick recap of our challenge rules:
 
1.  Create a new paper project
2.  Upload your creation to your blog with a link back to us and provide a direct link to the post featuring your challenge submission.
3.  Please link your card to no more than four challenges, TOTAL.
4.  Have FUN!

You can see all of my 'How To' summaries on my 'How To - Tips and Techniques' Pinterest board in case you've missed any. 

Enjoy your day and I'll be back tomorrow with another project: a Christmas card featuring some sneak peeks of some great new products from the forthcoming seasonal catalogue. Do come back then, you won't want to miss it. Until then, happy stampin'!


Stampin' Up! Supplies Used: 

Table built using Product Table Builder by The Crafty Owl - Independent Stampin' Up! Demonstrator.

Enjoy Life And A Million Dollar Sunrise For The Paper Players PP405

by Joanne James12. August 2018 09:00

It's Sunday and time for this week's new challenge over at The Paper Players! It's the turn of my wonderful and talented friend LeAnne to host this week and she has a gorgeous colour challenge for us to work with:


I fell in love with this trio of orange/yellows that LeAnne chose and whilst I was tempted to go floral, I decided instead to use the sketch inspiration over at Fusion for my layout and create a pretty sunrise and silhouette scene using the Enjoy Life stamp set - take a look:


Here's the low-down on today's card:

A Million Dollar Stamp Set - I decided to use a combination of images from the 'Enjoy Life' stamp set on my card today. This stamp set, with its beautiful collection of silhouettes and inspirational sentiments, was designed by Connie Fitzgerald, one of Stampin' Up!'s Million Dollar Sales Achievers, as a celebration of this milestone achievement. I absolutely love this set and it was one of the first on my wishlist when the annual catalogue was launched - thank you Connie for such a great set!

Sunrise, Sunset Made Easy - I wanted to create a vertical panel with a sunrise that featured all three of the challenge colours, so I punched a 3/4" circle and masked off my sun and used a sponge brayer to build up a graduated sunrise, blending each of the colours in turn starting with the lightest colour at the top. Sponge brayers are so great for this; they make light work of the art of ink blending, and can be washed out when you're done. I also brayered the colours on the diagonal of the bottom corner of the inside panel too and added a little interior detail:


Blended Ombre Embossing - My card today is ultra-clean, with minimal layers and detail to allow my inked panel to really shine, but I'd also like to share another great tip with you; did you notice I created a blended ombre of colour on my sentiment that mimics my sunrise? Curious as to how I created it? With a Basic Black card base, I originally heat-embossed the sentiment in white, but this was too stark. I decided to use my Pumpkin Pie Blends to carefully colour the lettering and change its colour. Did you know you can use your Stampin' Blends alcohol markers in this way? This tones down the brightness of the white and adds a co-ordinating pop of colour that wouldn't have been possible with ink alone on such a dark background.

Here is the visual summary of the key products used on today's project for you to pin for easy reference:


You can see all of my Product and 'How To' summaries on my 'How To - Tips and Techniques' Pinterest board in case you've missed any. 

Before you reach for your ink and papers, check out what our amazing team has created to inspire you this week:

Here's a quick recap of our challenge rules:
 
1.  Create a new paper project
2.  Upload your creation to your blog with a link back to us and provide a direct link to the post featuring your challenge submission.
3.  Please link your card to no more than four challenges, TOTAL.
4.  Have FUN!

I usually struggle with colour challenges, but this bright, monotone pallet really spoke to me - so many creative possibilities! I can't wait to see what you create with this week's colours and look forward to visiting your blogs this week. Enjoy the rest of your weekend as it will be over all too quickly. I'll be back tomorrow with another project; until then, happy stampin'!


Stampin' Up! Supplies Used: 

Table built using Product Table Builder by The Crafty Owl - Independent Stampin' Up! Demonstrator.

Never-Ending Garden Impressions and A Designer Paper Obsession!

by Joanne James8. August 2018 07:00

A midweek post for you before I head out on today's activities with the James Juniors! Today I'm sharing a card that is perfect (and just in time!) for the current challenge over at As You See It:

This was an easy one for me! There are lots of things that fall in and out of love with as I craft, but there is one thing that I will always be obsessed with - and that's designer series paper! I have boxes and boxes of the stuff, old and new (about 25 12"x12" storage boxes at the last count!!). I use it - but I hoard it too! One of my team jokingly shared the attached image on our team page recently saying 'I wonder if you know anyone like this?'

Image may contain: text

Of course, she knew it was perfect for me :-) I know that some of you reading this will also share my passion for patterned paper, so if you would like to see a fun project that showcases all those lovely patterns, read on! 

In my recent technique class featuring the Garden Impressions Suite, we made a never-ending card featuring the gorgeous Garden Impressions papers. This is a photo-heavy post, so that you can see each of the sides of these fun-fold cards. So first up, here is the version we made in class:

This is the front:


The card then opens from the centre to reveal the next 'side':


Followed by a third fold:


And then the final 'side', with space above the sentiment to write a personal message:


The next fold then takes you back to the beginning. Whilst the still photos show you each of the sides, they don't really highlight the mechanism; I shot a  short video of one of the ladies at my class demonstrating how hers worked which will give you a much better idea of why it's called a never-ending card -you can see this over on my Facebook page below:.


After the class I also made another one using the same papers in an alternative colourway, and decorated it with some of the diecut pieces from the Springtime Impressions thinlits dies set - take a look:


The basic mechanism for these cards, which measure 6" x 6" finished size, is fairly straightforward; it's choosing how to decorate them and which papers to use that takes the thought - especially when your collection is as vast as mine!

Here is the visual summary of the key products used on today's project for you to pin for easy reference:


You can see all of my 'How To' summaries on my 'How To - Tips and Techniques' Pinterest board in case you've missed any. 

Enjoy your day and I'll be back tomorrow with another project. Until then, happy stampin'!


Stampin' Up! Supplies Used:

Table built using Product Table Builder by The Crafty Owl - Independent Stampin' Up! Demonstrator.

I'm Dreaming of a White Christmas for PP404

by Joanne James5. August 2018 09:00

Today it's Sunday and time for this week's new challenge over at The Paper Players - yay! It's the turn of the lovely Laurie to host this week and she has a fun theme challenge for you to work with:


I decided to use this week's CAS(E) This Sketch for my layout and by complete coincidence have another card for you using the Half Full stamp set I featured last week, although this week's is decidedly more festive - take a look:


Here's the low-down on today's card:

I'm Dreaming of a White Christmas -  When I came to make my card for today's challenge, I realised I actually don't own that many overtly funny stamp sets - clearly something to be rectified another time! However the principle reason that I purchased the Half Full stamp set that I used on last week's card was for the sentiment that I used on today's card - what a fun play on words! Along with some fussy cut holly it makes for the perfect festive tipple.

Humour on the Inside - The real humour in this set comes when this sentiment on the front of the card is combined with the one I used on the inside. I actually made two of these cards at the same time (I wanted to make a dent in my Christmas card stash!) which made it easy to photograph both the inside and outside at the same time to get the full effect:


I just love that - makes me chuckle very time I read it! So perfect for my wine-loving besties, who I know will appreciate the sentiment too.

Under The Mistletoe Plaid - I wanted to add some festive colour to my card and settled on this warming plaid from the Under The Mistletoe designer series paper set. The warm colours were just what I was looking for to go with my glass of wine - here's the colour combination if you would like to save it for a future project:


Here is the visual summary of the key products used on today's project for you to pin for easy reference:
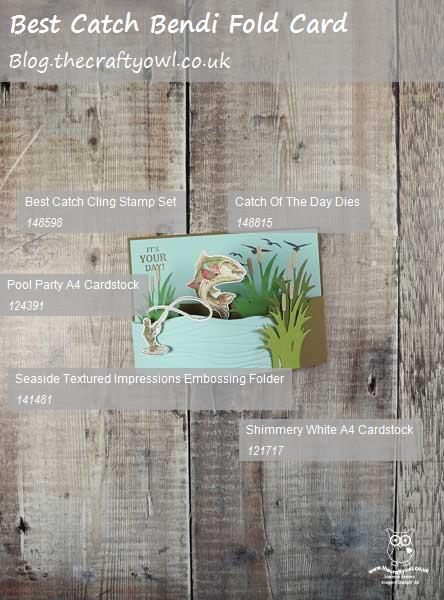
 

You can see all of my Product and 'How To' summaries on my 'How To - Tips and Techniques' Pinterest board in case you've missed any. 

Before you reach for your ink and papers, check out what our amazing team has created to inspire you this week:

Here's a quick recap of our challenge rules:
 
1.  Create a new paper project
2.  Upload your creation to your blog with a link back to us and provide a direct link to the post featuring your challenge submission.
3.  Please link your card to no more than four challenges, TOTAL.
4.  Have FUN!

You can see all of my 'How To' summaries on my 'How To - Tips and Techniques' Pinterest board in case you've missed any. 

Enjoy your day. I'm off for a day at the waterpark with a bunch of 11 year old boys to begin the birthday celebrations of the youngest of the James Juniors. To be followed by a BBQ, football and Nerf wars, so a fairly full-on day - wish me luck!

I'll be back tomorrow with another project. Until then, happy stampin'!


Stampin' Up! Supplies Used: 

Table built using Product Table Builder by The Crafty Owl - Independent Stampin' Up! Demonstrator.

Bonus Days Are Back!

by Joanne James1. August 2018 09:00

It's the first of August and as the recruitment and designer series paper promotions end, I have news of two more fabulous specials for you for the month of August!

First things first: BONUS DAYS ARE BACK! Do you remember this promotion from last year? It was so successful, Stampin' Up! have decided to repeat it this year.


For every £45.00 you spend between 1 August and 31 August (before delivery), you’ll get a £4.50 Bonus Days coupon that you can use between 1 and 30 September. Our new annual catalogue has been out for a couple of months now, so I'm sure you will still have some items on your wish list; this is a great opportunity to shop from it and make savings when you shop again in September with your coupons! You could even use your coupons to shop from the new Autumn-Winter catalogue, which launches on 5 September - perfect timing!

There are some details in terms of small print that you need to take note of, as follows: 

  • Promotion period: 1–31 August 2018
  • Redemption period: 1–30 September 2018
  • An email address is required to participate in this promotion; Bonus Days coupon codes can only be delivered via email.
  • It is strongly recommended that you both save emails containing their Bonus Days coupon codes AND write down the coupon codes in a safe place. Codes cannot be resent if the email is lost, and lost codes cannot be recovered.
  • Bonus Days coupon codes can be redeemed for any product, excluding Starter Kits.
  • There is no limit to the number of coupons you can receive per order or throughout the duration of the promotion.
  • There is no limit on the number of coupons you can use on an order during redemption.

As a demonstrator I am able to pre-order items from the new Autumn-Winter catalogue from today and I am looking forward to collecting some bonus days coupons to make a further dent on my own wishlist in September! 


Today also sees the release of an exclusive limited time stamp set and framelits bundle called the Blended Seasons Bundle and a new set of Waterpencil colours. Whilst the pencils will be available in a future catalogue, the stamp set and framelits will not - available now until 31 August or whilst stocks last, you have just one month to get your hands on this set and its co-ordinating framelits too! Here's a close up of the images and framelits in more detail:


We haven't had a set like this since Thoughtful Branches (one of my all-time favourites!) and I'm sure this one will be equally popular, so don't delay in placing your order - I wouldn't want you to be disappointed. If you order the bundle, you will earn yourself a Bonus Days coupon to use in September too - an added bonus indeed! Don't forget if you are placing an order online to also include this month's hostess code K6VBCUXK to receive a free thank you gift from me too! 

For more information on this set, please see today's second post here, which also includes a card made using this gorgeous bundle.

If you have any questions on any of the above, then please do get in touch - I am always happy to help!

Back shortly with my second post of the day; until then, happy shopping!


Table built using Product Table Builder by The Crafty Owl - Independent Stampin' Up! Demonstrator.

Blended Seasons Time-Limited Exclusive Bundle Available Whilst Stocks Last!

by Joanne James1. August 2018 09:00

This is my second post today - read all about Bonus Days in my previous post here. As promised, this post has a little more detail about the fabulous new  exclusive limited time stamp set and framelits bundle called the Blended Seasons Bundle that has also been released to customers today, along with a new assortment of Watercolour Pencils. Whilst the pencils will be available in a future catalogue, the Blended Seasons stamp set and Stitched Seasons framelits will not - available now until 31 August or whilst stocks last, you have just one month to get your hands on this exclusive bundle! Here's a close up of the images and framelits in more detail:


We haven't had a set like this since Thoughtful Branches (one of my all-time favourites!) and I'm sure this one will be equally popular, so don't delay in placing your order - I wouldn't want you to be disappointed. If you order the bundle, you will earn yourself a Bonus Days coupon to use in September too - an added bonus indeed! Don't forget if you are placing an order online to also include this month's hostess code K6VBCUXK to receive a free thank you gift from me too! 

Here are some photos from Stampin' Up! that really demonstrate the versatility of this fabulous set:


This really is a set suitable for every season! One of the things I love the most is the framelits, that add a stitched detail to both the label and the negative space. This is something that I've featured on my card today, that features the gorgeous palette of greens with a hint of pink over at Fab Friday currently:

I used an old sketch over at As You See It for my layout to create my aperture and layered label with the Stitched Seasons on the front of my card, and then added some of the little diecuts to embellish the front, along with a banner of the Share What you Love designer paper:


You can just see a glimpse of that fabulous floral that I then stamped and coloured on the inside, using my ink pads and a blender pen:


I really am loving this bundle and can't wait to create more with it this month. If you have any questions on any of the above, then please do get in touch - I am always happy to help!

Here is the visual summary of the key products used on today's project for you to pin for easy reference:


You can see all of my 'How To' summaries on my 'How To - Tips and Techniques' Pinterest board in case you've missed any. 

Enjoy your day and I'll be back tomorrow with another project. Until then, happy stampin'!


Stampin' Up! Supplies Used: 

Table built using Product Table Builder by The Crafty Owl - Independent Stampin' Up! Demonstrator.

Last Chance to Earn A Free Ink Pad Collection and 'Buy 3, Get 1 Free' On Designer Paper

by Joanne James31. July 2018 08:00

Good morning everyone! Just popping by today to remind you that both of this month's fabulous offers will end today (10.55pm GMT).

Firstly this month's amazing recruitment offer, the best we've had for a while:

Yes - in addition to your standard £130 of products of your choice you can receive a whole family of ink pads, absolutely FREE! You can choose from any of the collections below (please note the 2017-20 in-colour collection will only be available as a bundle as part of this promotion):

If you are a customer who has a long wish list, or are building your collection of Stampin' Up! inks, this is a great opportunity to add to your collection whilst benefiting from an overall saving of £94 (£31 free product of your choice and £63 ink pad collection) - and free shipping - along with an ongoing discount on the Stampin' Up! products that you love. Equally if you are thinking of starting your own Stampin' Up! business, this offer would enable you to get a fantastic bundle of products to get you off to a flying start. This offer has been incredibly popular, and no wonder - it really is a great deal.

There has never been a better time to join Stampin' Up!: we are at the beginning of a new quarter, so you will have a full 6 months before you need to meet your first quarterly minimum. Every sale from the time you join until the end of December counts towards it, so the sooner you join the sooner you will be earning. The run up to Christmas is a great time to build a business if you're looking to earn or boost your income doing something that you love. I am always keen to hear from people thinking about joining my team and am delighted to have welcomed new members already this month - why not give me a call to discuss what it could mean for you? Alternatively if you've made up your mind already and want to start choosing your kit, click here to complete the online form. There is also the prospect of joining my team and I for Stampin' Up!'s Onstage event in Birmingham in November, which promises to be an even more fantastic event than usual since we will be celebrating our Stampin' Up! 30th anniversary - this is a demonstrator-only event that you are not going to want to miss! 

As if the recruitment offer alone wasn't enough, there is also a fabulous customer offer on during July where for every 3 packs of designer series paper you buy from the following selection, you can choose another one absolutely FREE! The papers included in the promotion are listed below:

Whilst there really is no substitute for seeing the papers up close in order to truly appreciate how beautiful they are, rather than show you a collection of stills, it's worth watching this short video from the lovely people at the Stampin' Up! home office who go through each of the papers above and show a full sheet of each pattern:

This offer is a great opportunity to stock up on some of the new papers and decide which ones you love. I have taken advantage and expanded my collection of designer paper - well, you know how much I love it!

That's all for now; I will be back tomorrow with news of an exclusive time-limited bundle that will be available during August and news of the return of Bonus Days too, so come back the to find out more! Until then, happy stampin'!


New Online Exclusives

There are new products available exclusively in the online store from 5 November - check them out here.

Latest Kits!

Stampin Cut and Emboss

The Layered Landscapes Kit and Nature's Paintings Kit are the latest kits in the online store - get yours here!

Shop Online

Access my online shop 24 x 7, 365 days of the year:

Current November hostess code:

9NKXDTTR

Shop Online

Mini Catalogue

BROWSE THE CATALOGUE

'Tis The Season - the new Stampin' Up! Mini Catalogue is here! For more details and to download your copy click here

Scrapbooking

Stampin' Up! has introduced a new range of 12x12" scrapbooking product and kit - the full range is now available to purchase online. To download a copy of the new digital Scrapbooking Catalogue click here.

2024-25 Annual Catalogue

BROWSE THE CATALOGUE

Click on the image to download your copy of the 2024-25 annual catalogue. For a full list of current SU! supplies, go to my online store. If you would like any help or advice, please drop me a line at joanne@thecraftyowl.co.uk or give me a call on 07773 421446 - I'd be happy to help.

Join My Team

It's always a great time to join Stampin’ Up! New team members can get £130 worth of products for only £99 + free business supplies + free shipping + all the fun being a part of Stampin’ Up! Stampin' Up! has something for everyone: join my growing team and benefit from my support to enjoy Stampin' Up! however you choose.

If you're interested, call me for a chat to understand how I can help you realise your goals. Alternatively, if you have already decided to sign up and you just can't wait, please click here for the link to the online form where you can sign up and order your starter kit right away! 

About Me

Hi I'm Joanne and live in Northampton and when I'm not looking after my husband and two beautiful children, am an avid crafter with a passion for all things Stampin' Up!

I must confess that I have never been a big rubber stamper - until I discovered Stampin' Up! that is. I love the fact that I can get such great results with co-ordinating stamps, inks, papers and punches - the possibilities are endless! Join me on my stamping journey as I share the things I love and be inspired to create amazing things yourself!

Follow Me

Monthly Newsletter

Box Builder

Click the button above to use Box Buster to create your custom box design using the Envelope Punch Board!

Kits Collection Now Available!

Stampin Cut and Emboss

The new Kits Collection from Stampin' Up! is now available!

Click here to see the current kits available and order yours online today.

I Design For


Stampin' Up Stuff

This is my personal blog and is not endorsed by Stampin’ Up! I hope you find it a plentiful source of ideas and personal inspiration but please don't copy my designs for contest submission or use for classes, publication or sale without express permission.