by Joanne James6. November 2024 09:00
Today I'm sharing a card that took no time at all to pull together for the current challenge over at CAS On Friday where the theme is 'corner of your card' - take a look:

Here's the low-down on today's card:
A clean and simple card that took no time at all to put together - yes, you've guessed it, I've used another of those A Little Bit Festive Mix & Match diecuts - this stack of presents was perfect to decorate the corner of my card:

A simple sentiment from the retired 'Perfectly Plaid' stamp set and a trio of festive gold pearls complete my card. So easy - the A Little Bit Festive Mix & Match Specialty Designer Series Paper pack is a must-have for speedy festive crafting!
Here is the visual summary of the key products used on today's project for you to pin for easy reference:

You can see all of my 'How To' summaries on my 'How To - Tips and Techniques' Pinterest board in case you've missed any.
Enjoy your day and I'll be back tomorrow with another project. Until then, happy stampin'!
Stampin' Up! Supplies Used:

by Joanne James17. September 2020 18:00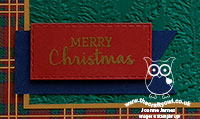
It's Thursday and time for a new challenge over at TicTacToe! It's the turn of Team X to host this week and this week's board was designed by Amy. This is the fun board that we are playing along with:
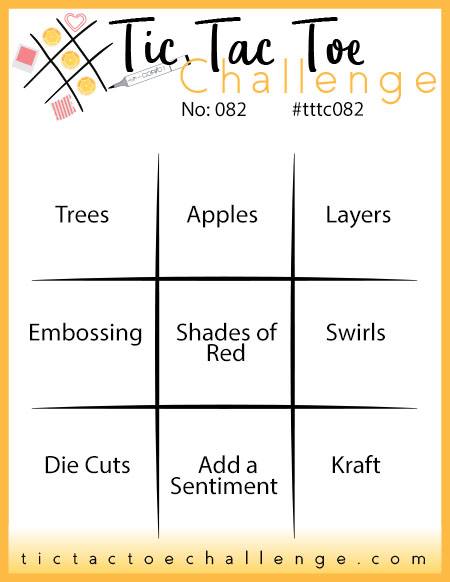

We are rapidly approaching autumn and this week's board has lots of elements that would suit a fall card, but I combined it with the current Fab Friday sketch and went straight to Christmas as I continue to build my card stash! The Fab Friday sketch has a lovely open panel that is open to all kinds of interpretation and after some deliberation I knew exactly what I wanted to use it for - take a look:
Here's the low-down on today's card:
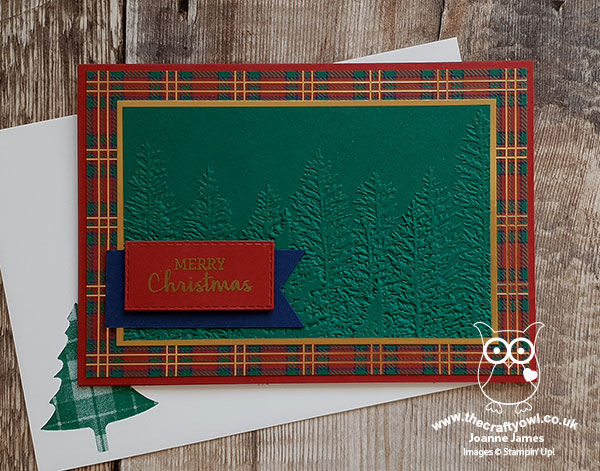
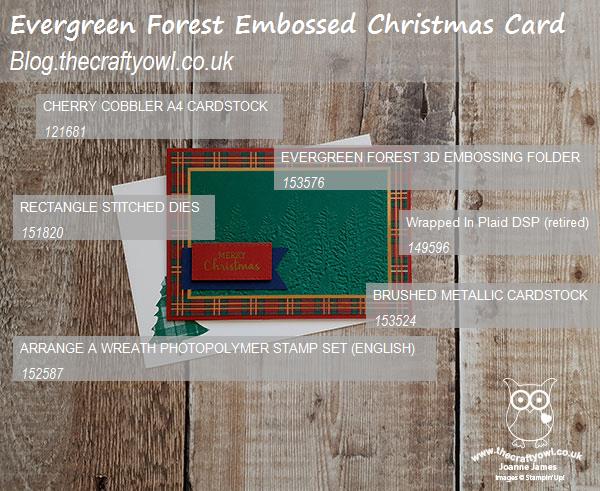
Centre Stage Embossing - I'm not generally a big user of embossing folders, although I do have my favourites: any that create a lightly textured background (bring on Subtle or Tasteful Textile 3D!) or embossing folders that make a statement in their own right (past favourites include Seasonal Wreath or Winter Wonder). The current Autumn Winter catalogue includes an embossing folder that can be used either as a background or a centrepiece - love a double-duty solution! The Evergreen Forest 3D Embossing Folder has a ton of texture and whilst it doesn't need to be confined to Christmas projects, I wanted to showcase it today as a forest of potential Christmas trees - just look at the depth of the embossed detailing:
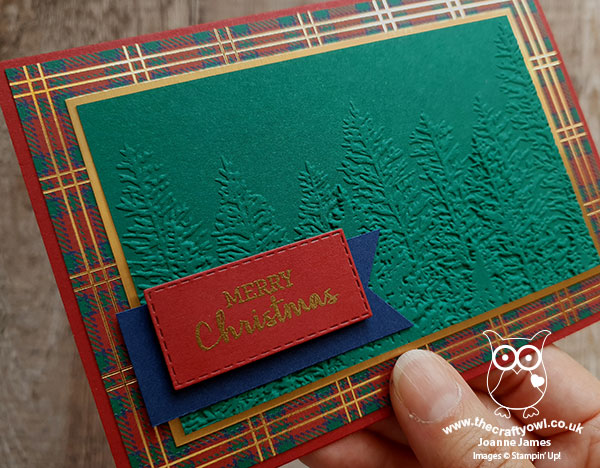
It's In The Detail - I went down the first column of the TicTacToe board for today's card - Trees, Embossing, Diecut - and whilst it's easy to see where the first two elements are on my card, blink and you could miss the last one! I used a Rectangle Stitched Die to cut out my heat embossed sentiment (tick!) and backed this with a simple punch banner. The colours on today's card were inspired by this retired piece of Wrapped in Plaid designer series paper that I chose so that I could highlight my lovely green embossed trees and tie in the gold sentiment and brushed gold foil matting too.
Perfectly Plaid Inside Too - I continued the plaid theme onto the inside of my card too with a stamped plaid Christmas tree and sentiment from the annual catalogue set, 'Perfectly Plaid':

I like this card so much I think I'll make a few more - a great excuse to use up some of that retired plaid paper too!
Here is the visual summary of the key products used on today's project for you to pin for easy reference:
You can see all of my Product and 'How To' summaries on my 'How To - Tips and Techniques' Pinterest board in case you've missed any.
A tictactoe board offers so many creative possibilities - how does this week's board inspire you? Why not have a go? We would love to see you in the gallery and who knows - you might be selected for Designer's Choice and be eligible to be a guest designer on a future challenge.
Enjoy your evening; I'll be back tomorrow with another project. Until then, happy stampin'!
Stampin' Up! Supplies Used:
a5d44bc6-d455-46ef-b9d9-41aae92c3bd9|0|.0|96d5b379-7e1d-4dac-a6ba-1e50db561b04
Tags: Evergreen Forest 3D Embossing Folder, Stampin' Up, Stampin' Up Card, Stampin' Up Card ideas, Stampin' Up Supplies, Shop online, Shop Stampin' Up online, Shop Stampin' Up! Online, TicTacToe Challenge, Arrange A Wreath, Rectangle Stitched Framelits Dies, Perfectly Plaid, Wrapped in Plaid
Cards | Shop Online | Shop Stampin' Up! Online | Stamping
by Joanne James25. October 2019 14:00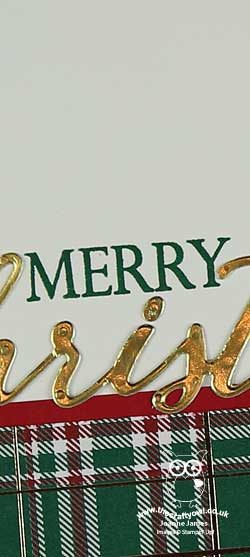
This is my second post for today - you can see my earlier As You See It challenge post here. I had a little extra time yesterday and managed to make another card, this time for the current challenge over at Addicted to CAS where the challenge is to use plaid on your card:

I had some piece of leftover paper having wrapped some gift boxes for the lovely ladies on my retreat last weekend so decided to use one of them for a quick clean and simple Christmas card - take a look:

Whilst this card looks like it has a few steps, it really did take me next to no time to make: I always have some white cardbases cut, the plaid and thin strip of red cardstock were leftovers from other projects, as was the gold foil 'Christmas' - I had a few of these in the die case that I had cut previously, complete with self-adhesive backing. So all that was left to do was cut the paper to size, glue the pieces together and stamp the 'merry' and the holly and add a trio of red rhinestone berries. I even had time to use one of my favourite sentiments from the same 'Merry Christmas To All' stamp set on the inside of my card:

So simple and a great way to use up some of those leftover bits and pieces too!
Here is the visual summary of the key products used on today's project for you to pin for easy reference:

You can see all of my 'How To' summaries on my 'How To - Tips and Techniques' Pinterest board in case you've missed any.
Enjoy your day and I'll be back tomorrow with another project. Until then, happy stampin'!
Stampin' Up! Supplies Used:
39146b22-d8ed-48c5-8829-f254ef8dc2b0|0|.0|96d5b379-7e1d-4dac-a6ba-1e50db561b04
Tags: Christmas, Merry Christmas Thinlits Dies, Merry Christmas To All, Clean and Simple, Perfectly Plaid, Shop online, Shop Stampin' Up online, Shop Stampin' Up! Online, Stampin' Up, Stampin' Up Card, Stampin' Up Card ideas, Stampin' Up Supplies
Cards | Shop Online | Shop Stampin' Up! Online | Stamping
by Joanne James11. October 2019 13:00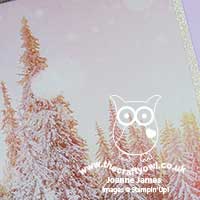
Today I'm sharing my design team card for our new challenge over at As you See It where it's time for a theme challenge:
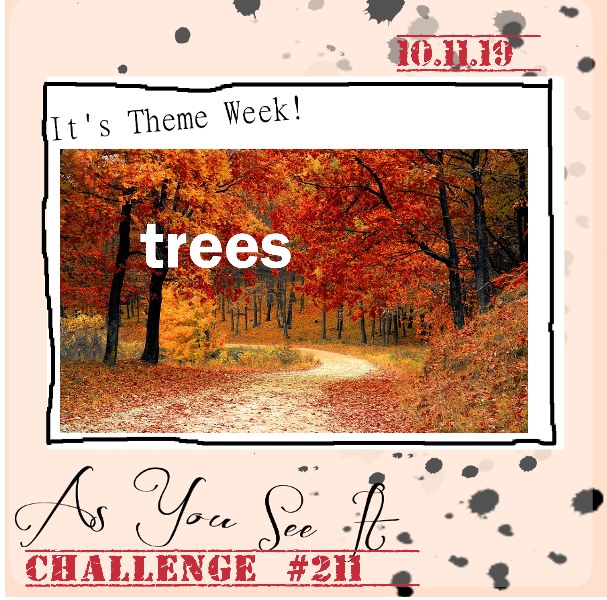
I saw the wonderful autumn trees on Heather's badge this week and had an idea to create something inspired by this, but I couldn't get out of the Christmas zone that I am in this week as I plough ahead with the final preparations for my forthcoming Creative Escapes weekend craft retreat the weekend after next and with the beautiful Feels Like Frost papers still out on my desk following my technique class earlier this week, I couldn't resist another card featuring them - take a look:
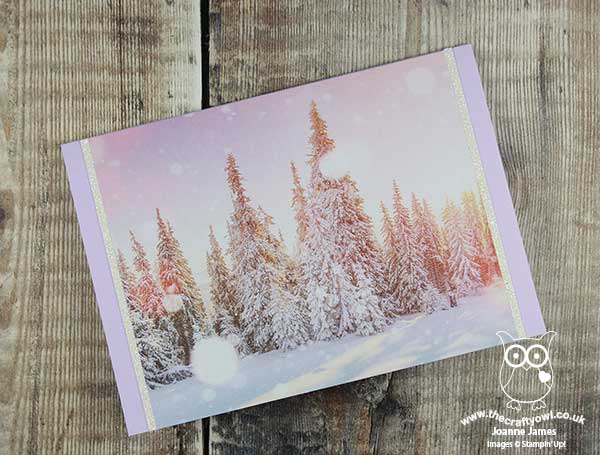
This week's Inspire.Create sketch was perfect for a large centrepiece and this photographic image of snowy fir trees is worthy of a showcase. The photographer has managed to capture the sunlight peeking through the trees and the bokeh along with the soft pink sky make for a stunning image I think. I bordered my DSP with a couple of strips of sparkle glimmer paper to add to the feeling of frost and snow and used a Purple Posy card base - an unusual choice for a Christmas card, yet I think it ties n with the paper nicely.
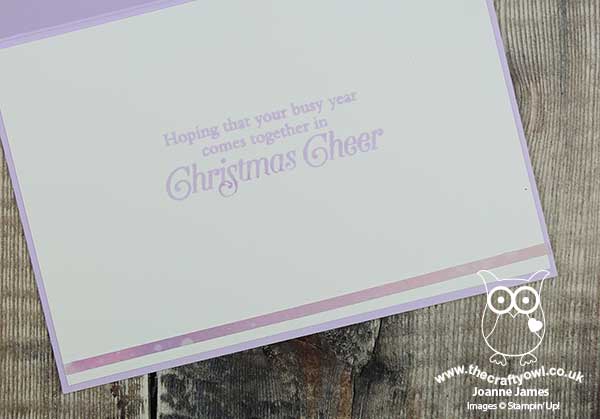
Today's card really does feel a little like cheating, as I couldn't even bring myself to stamp a sentiment on the front of my card. The only stamping was this sentiment from 'Perfectly Plaid' that graced the inside, along with a tiny offcut of DSP from the front of my card (waste, not, want not!):
This card really would take no time at all to create, even though in reality it took me ages as I deliberated over whether to add a sentiment or not - does that ever happen to you when making a card? Still, at least now I can go and make a few more using the other sheets of this paper in the pack in record time!
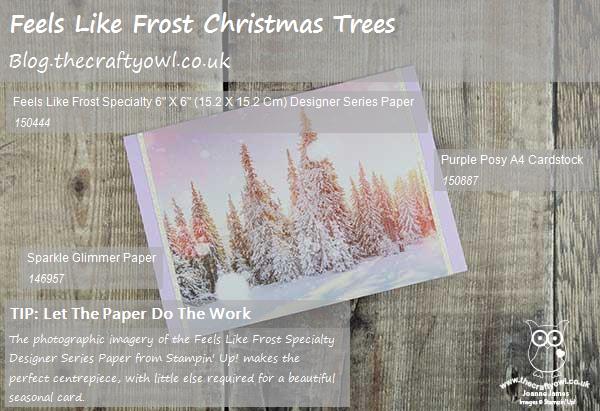
Here is the visual summary of the key products used on today's project for you to pin for easy reference:
You can see all of my 'How To' summaries on my 'How To - Tips and Techniques' Pinterest board in case you've missed any.
Enjoy your day and I'll be back tomorrow with another project. Until then, happy stampin'!
Stampin' Up! Supplies Used:
c69e7e00-685f-4ae4-a755-003a89dcbdaf|0|.0|96d5b379-7e1d-4dac-a6ba-1e50db561b04
Tags: Stampin' Up, Stampin' Up Card, Stampin' Up Card ideas, Stampin' Up Supplies, Shop online, Shop Stampin' Up online, Shop Stampin' Up! Online, Blends, As You See It Challenge, Feels Like Frost, Perfectly Plaid, Christmas
by Joanne James21. September 2019 21:15
I am a bad blogger! I've had such a busy week that I have managed very little to either create or blog. So a quick share from me with another all-out copper clean and simple metallic, inspired by last week's Paper Players challenge that uses this week's CAS(E) This Sketch layout:

I created another super clean and simple Christmas card, this time featuring a couple of Brightly Gleaming Foil Elements baubles and a heat embossed sentiment from the 'Perfectly Plaid' stamp set - take a look:

My card is a simple extra thick Whisper White card base, a layer of copper foil cut with the Rectangle Stitched Framelits, then my copper heat-embossed sentiment on a panel of Whisper White with two foil element baubles hanging from some retired copper metallic thread - definitely clean and simple!
Here is the visual summary of the key products used on today's project for you to pin for easy reference:
to follow
You can see all of my Product and 'How To' summaries on my 'How To - Tips and Techniques' Pinterest board in case you've missed any.
Enjoy your evening; I'll be back tomorrow with this week's card for The Paper Players. Until then, happy stampin'!
Stampin' Up! Supplies Used:
22c4bb65-931b-42ed-97bb-a11bc3912b58|0|.0|96d5b379-7e1d-4dac-a6ba-1e50db561b04
Tags: Christmas, Brightly Gleaming, Shop Stampin' Up! Online, Stamping Shop Stampin' Up online, Shop online, Stampin' Up, Stampin' Up Card ideas, Stampin' Up Supplies, Stampin' Up Card, Perfectly Plaid, Clean and Simple
Cards | Shop Online | Shop Stampin' Up! Online | Stamping
by Joanne James15. September 2019 09:00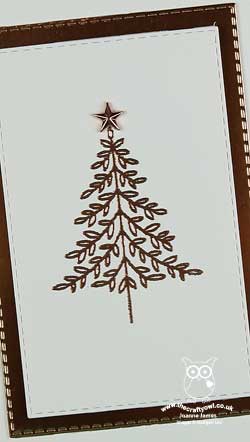
Today it's Sunday and time for this week's new challenge over at The Paper Players! It's the turn of the fabulous Anne Marie to host this week and she has a fun clean and simple challenge for you to work with:

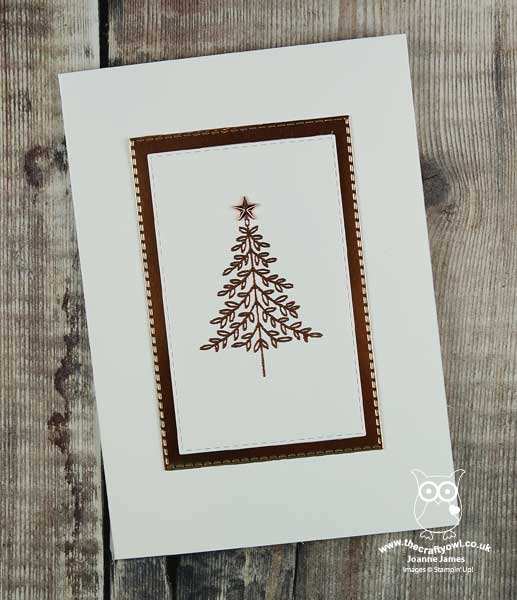
I couldn't resist going all-out copper for my metallic and created a super clean and simple Christmas card featuring a heat embossed tree from the 'Perfectly Plaid' stamp set - take a look:
Since it is clean and simple week, it's worth a reminder of what we at The Paper Players mean by Clean and Simple:
- Minimal layers and embellishments
- Plenty of open space, aka "white" space
- Simple and uncluttered
My card is a simple extra thick Whisper White card base, a layer of copper foil cut with the Rectangle Stitched Framelits, then my copper heat-embossed Christmas tree on a panel of Whisper White with the addition of a simple single copper star embellishment - I didn't even add a sentiment to the front of my card. Just 3 layers with a single image and embellishment and a ton of white space - definitely clean and simple!
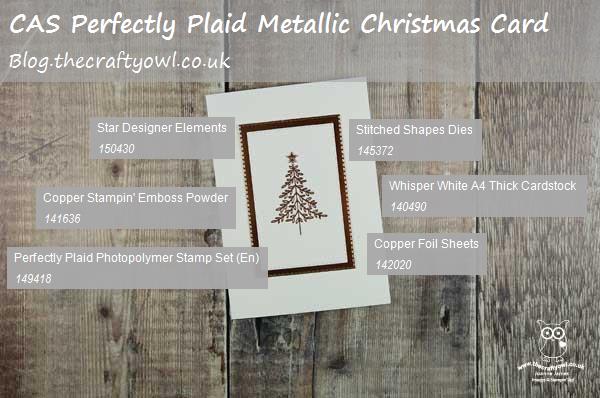
Here is the visual summary of the key products used on today's project for you to pin for easy reference:
You can see all of my Product and 'How To' summaries on my 'How To - Tips and Techniques' Pinterest board in case you've missed any. I loved this CAS challenge; I created another card for this theme too which I will hopefully share with you later in the week!
Before you reach for your ink and papers, check out what our amazing team has created to inspire you this week:
The Paper Players Design Team
Here's a quick recap of our challenge rules:
1. Create a new paper project
2. Upload your creation to your blog with a link back to us and provide a direct link to the post featuring your challenge submission.
3. Please link your card to no more than four challenges, TOTAL.
4. Have FUN!
You can see all of my 'How To' summaries on my 'How To - Tips and Techniques' Pinterest board in case you've missed any.
Enjoy your day; we are hoping to make the most of what is turning out to be a pleasantly warm weekend with possibly the last BBQ of the year, along with homework and more cooking of our gluts of home-grown produce. I'll be back tomorrow with another project. Until then, happy stampin'!
Stampin' Up! Supplies Used:
90376034-bbc7-4323-a5c9-180881ab3698|0|.0|96d5b379-7e1d-4dac-a6ba-1e50db561b04
Tags: Shop Stampin' Up! Online, Stamping Shop Stampin' Up online, Shop online, Stampin' Up, Stampin' Up Card ideas, Stampin' Up Supplies, Stampin' Up Card, The Paper Players, Christmas, Perfectly Plaid, Clean and Simple
Cards | Shop Online | Shop Stampin' Up! Online | Stamping
by Joanne James4. September 2019 20:00 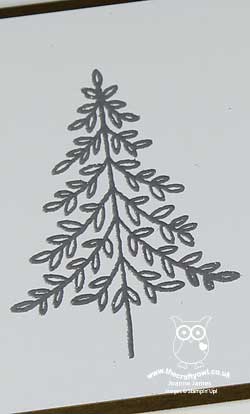
Today I'm sharing a card for this week's TGIF challenge where they have a product spotlight on embossing powder and the team at Less is More where they are all about Metallics:

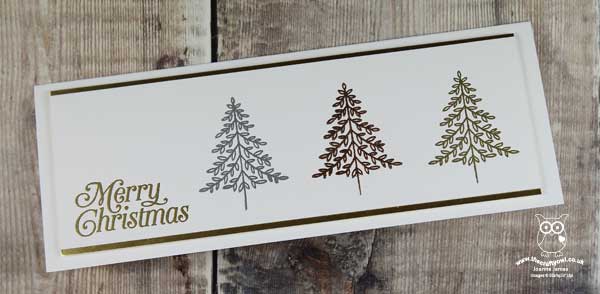
Metallics and embossing powder were the perfect combination but with three metallic powders in my desk drawer, which one to choose? In the end, I decided on all of them - take a look:
Here's the low-down on today's card:
I went long and thin with today's card and paired my embossed gold Merry Christmas sentiment with three identical pine trees, also from the new Perfectly Plaid stamp set, each of them heat embossed in a different metallic onto Thick Whisper White cardstock: silver, copper and gold respectively. I added a thin border of gold foil to the top and bottom of my panel before using dimensionals to adhere it to my cardbase. It was helpful that my metallic powders were an odd number - odds often look better than evens on cards I think!
I have a tip for you when stamping objects in threes: always stamp the outer two first, then the central one; it's much easier to ensure they are evenly spaced that way.
Here is the visual summary of the key products used on today's project for you to pin for easy reference:

You can see all of my 'How To' summaries on my 'How To - Tips and Techniques' Pinterest board in case you've missed any.
The first of the James Juniors is back to school properly today; one down, one to go! In the meantime, we have a fun girly day planned with Junior number two who has another day before she is back too. Enjoy your day and I'll be back tomorrow with another project. Until then, happy stampin'!
Stampin' Up! Supplies Used:
by Joanne James3. September 2019 09:00
Today I'm sharing a card for this week's sketch challenge over at Just Add Ink:
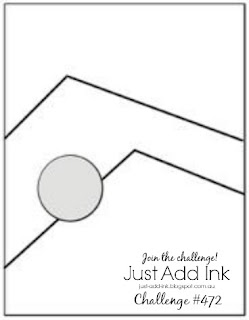
I was intrigued with the angled lines of this sketch, and whilst my instinct was to reach for my beloved designer series papers and start layering, I resisted and instead reached for another new Christmas stamp set and continued with my clean and simple streak - take a look:
Here's the low-down on today's card:
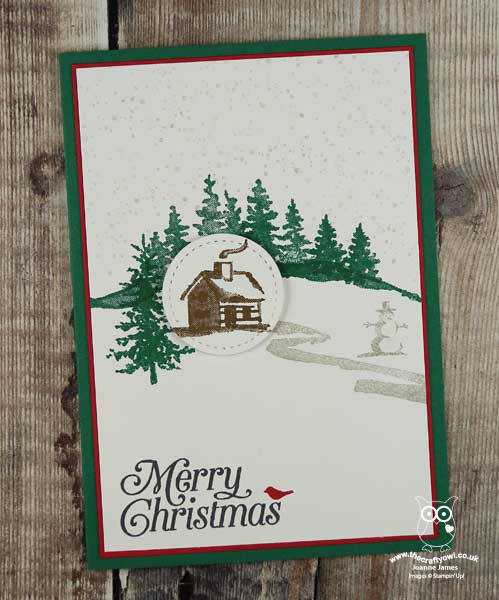
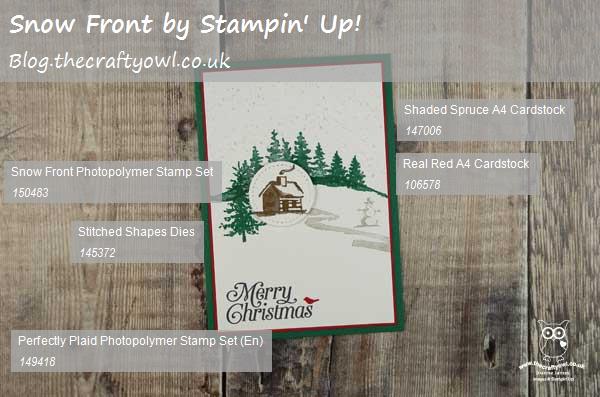
Snow Front - If you are a lover of the 'Waterfront' set that features in the annual catalogue, then the 'Snow Front' set in the new Autumn-Winter catalogue will most certainly make it onto your wish list. With similar brushstroke designs and lots of scenic motifs, this set offers great creative possibilities. The stamp set I used for my snow is actually from the Waterfront set - go figure!
A Clean And Simple Scene - I decided to use the angular lines of the sketch as the basis for the structure of my scene. I used a row of trees for the back point, then a combination of a large pine tree and a path in the snow for the point at the front. I decided to make a feature of my log cabin and stamp it on a stitched circle to accentuate it, before adding in to my scene. I really let the stamps do the talking on today's card - I did add some clear Wink of Stella to the tops of my trees, the falling snow, the roof of my log cabin and snowman, but whilst it looks very pretty in real life, is nigh on impossible to see in the photo so you'll have to take my word for it.
A Pop of Red - I used a predominantly neutral palette for my card with the exception of Shaded Spruce and even after stamping my sentiment I still felt it needed something else. I settled for a red bird balanced on the word 'Christmas' and a thin red mat border for a pop of additional festive colour.
Here is the visual summary of the key products used on today's project for you to pin for easy reference:
You can see all of my 'How To' summaries on my 'How To - Tips and Techniques' Pinterest board in case you've missed any.
I have a day of errands today combined with pre-season rugby practice for the youngest of the James Juniors who is back to school tomorrow. Whatever you have planned, I hope you enjoy your day and I'll be back tomorrow with another project and the launch of the new Stampin' Up! 2019 Autumn-Winter catalogue - woohoo! Until then, happy stampin'!
Stampin' Up! Supplies Used:
5857ba40-0535-4a30-b86d-31b62bc36004|0|.0|96d5b379-7e1d-4dac-a6ba-1e50db561b04
Tags: Snow Front, Christmas, Stitched Shapes Framelits, Stampin' Up, Stampin' Up Card, Stampin' Up Card ideas, Stampin' Up Supplies, Shop online, Shop Stampin' Up online, Shop Stampin' Up! Online, Perfectly Plaid, Waterfront
Cards | Shop Online | Shop Stampin' Up! Online | Stamping