Gilded Autumn Thanksgiving Cajun Craze Pumpkins

by Joanne James15. November 2020 21:00


A lockdown weekend with pouring rain gave me extra crafting time today so I thought I'd squeeze in a second post with a thanksgiving card that I made for a friend of mine, that was inspired by a number of challenges:


I used Julee's fabulous-as-always Mojo Monday sketch and the Card Concept inspiration photo with its rich oranges and browns and pumpkins galore inspired me to use the gold-embossed pumpkin paper from the Gilded Autumn paper pack for my clean and layered card. I decided to pair it with one of my favourite sentiments from 'Country Home' for a Cajun Craze monochromatic card - take a look:


Here's the low-down on today's card:

My Gilded Autumn embossed paper was the starting point for today's card. I just love it! I added a stitched gold foil border and a layered pumpkin, made from one of my retired Patterned Pumpkin Dies and then with the pumpkin coloured with Cajun Craze Blends and splattered with gold shimmer paint, before adding some die cut leaves and vines:


I finished my sentiment banner with a double bow of Cajun Craze metallic ribbon and gold twine for some extra shine. So what do you think? I don't use Cajun Craze that often and there's a lot of it on this card, but I think the gold really takes things up a notch and compliments it beautifully. This almost feels like a Cinderella-esque rags to riches card, metaphorically speaking! I'm also linking this card up over at SUO Challenges where the theme is thanksgiving.

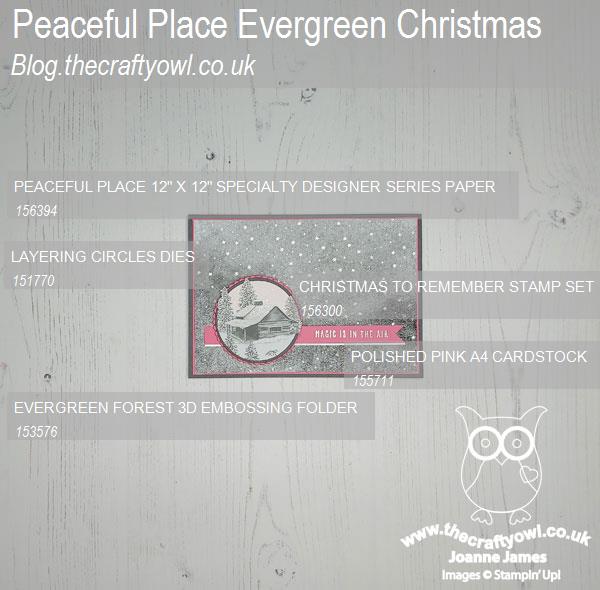
Here is the visual summary of the key products used on today's project for you to pin for easy reference:
 

You can see all of my 'How To' summaries on my 'How To - Tips and Techniques' Pinterest board in case you've missed any. 

Enjoy your evening and I'll be back tomorrow with another project. Until then, happy stampin'!


Stampin' Up! Supplies Used:

Table built using Product Table Builder by The Crafty Owl - Independent Stampin' Up! Demonstrator.


Sounds of the Season CAS Christmas Bells PP517

by Joanne James15. November 2020 09:00

Today it's Sunday and time for this week's new challenge over at The Paper Players! It's the turn of the amazing Ann to host this week and she has a timely Clean and Simple challenge for you to work with:


Our theme this week is 'Hooray For The Holidays'. With Christmas just around the corner I decided to go with another card to add to my growing pile, but you could choose Thanksgiving or any holiday you like - as long as your card is clean and simple.  So what do we mean by Clean and Simple?

  • Minimal layers and embellishments
  • Plenty of open space, aka "white" space
  • Simple and uncluttered

I decided to use the Sounds of the Season jingle bells again on my card this week, this week changing from silver to gold and pairing with red for the challenge over at Less Is More. I also used the sketch over at CAS Colours and Sketches which gave me the perfect opportunity to use a die from the Dove of Hope Dies that I haven't been able to find a good use for until now - take a look:


 The die was just perfect to create a couple of lengths of holes to show the gold foil below, to compliment my diecut bells and gold heat embossed sentiment. You can see the detail a little better on the angled shot below - the weather has been so poor here in the UK that I've struggled to photograph the foil without artificial light, which is never as clear as daylight:


A quick clean and simple check:
  • Minimal layers and embellishments with one main focal point - yes
  • Lots of open 'white' (or in my case red!) space - yes
  • Simple and uncluttered - yes
I'd call that a result! 
 
Here is the visual summary of the key products used on today's project for you to pin for easy reference:


You can see all of my Product and 'How To' summaries on my 'How To - Tips and Techniques' Pinterest board in case you've missed any. 

Before you reach for your ink and papers, check out what our amazing team has created to inspire you this week:

Here's a quick recap of our challenge rules:
 
1.  Create a new paper project
2.  Upload your creation to your blog with a link back to us and provide a direct link to the post featuring your challenge submission.
3.  Please link your card to no more than four challenges, TOTAL.
4.  Have FUN!

You can see all of my 'How To' summaries on my 'How To - Tips and Techniques' Pinterest board in case you've missed any. 

Enjoy your day; my day will definitely be spent indoors today, so I'm thinking cooking, crafting and a movie could be the order of the day! I'll be back tomorrow with another project. Until then, happy stampin'!


Stampin' Up! Supplies Used: 

Table built using Product Table Builder by The Crafty Owl - Independent Stampin' Up! Demonstrator.

Snowflake Splendor Sparkling Snowflake Wishes TTT90

by Joanne James12. November 2020 17:00

A busy couple of days but it's Thursday and time for a new challenge over at TicTacToe! It's the turn of Team X to host this week and the lovely Ashwini is our featured designer this week. This is the fun board that we are playing along with: 


I decided to go down the centre column with blue, holiday and sparkle/shine and am sharing a clean and layered snowflake card with you today - take a look:


Here's the low-down on today's card:

True Blue - The main blue that I chose to feature on my card today is Pacific Point - one of the first three ink pads I ever purchased when I started stamping (along with Real Red and Old Olive, in case you're interested!) and whilst, like my other initial purchases, this is a colour that is still going strong, it's also one I don't use as frequently in my general crafting. So you can imagine how pleased I was when I saw it feature as one of the colours in the Snowflake Splendor patterned paper - I knew it would be the perfect opportunity to give it some love!

Snowflake Splendor - There are so many beautiful patterns in the Snowflake Splendor papers it's difficult to choose just two, but choose I did! I went with a couple of complimentary patterns, both of which feature Pacific Point, to bring out the bold blue colour. I used white mats on my project, which is something I don't often do but is a great way to showcase a stronger colour such as Pacific Point. 

Glimmer and Sparkle - Pacific Point is not the only blue that I showcase on today's card though; the Balmy Blue glimmer paper is so full of sparkle I couldn't resist adding some to my festive snowflake showcase and I think it compliments the other elements beautifully. I also added a sprinkling of sequins for a little more shimmer; along with my sparkle-filled sentiment I think this card is perfect for the current Time Out challenge too, where the challenge word is 'festivals' with the option of added shimmer/glitter - yes please!

Here is the visual summary of the key products used on today's project for you to pin for easy reference:


You can see all of my Product and 'How To' summaries on my 'How To - Tips and Techniques' Pinterest board in case you've missed any. 

A tictactoe board offers so many creative possibilities - how does this week's board inspire you? Why not have a go? We would love to see you in the gallery and who knows - you might be selected for Designer's Choice and be eligible to be a guest designer on a future challenge. 

Enjoy your day; I'll be back tomorrow with another project. Until then, happy stampin'!


Stampin' Up! Supplies Used: 

Table built using Product Table Builder by The Crafty Owl - Independent Stampin' Up! Demonstrator.

Enjoy The Moment CAS Watercolour Sneak Peek

by Joanne James9. November 2020 19:50


So here it is - the card that I actually intended to blog today! This card was inspired by a number of challenges: the colours over at CAS Colours and Sketches, along with this week's CAS(E) This Sketch layout. It's also a great example of #SimpleStamping as it uses nothing more than stamps ink and paper which also just happens to be the theme of the challenge over at Just Add Ink this week:


What's more, this card is a sneak peek of a brand new Stampin' Up! stamp set that will debut in the 2021 Spring-Summer seasonal catalogue - take a look:


Here's the low-down on today's card:

For those of you that follow me on social media, you will know that I attended the bi-annual Stampin' Up! Onstage event this past weekend, which because of Covid, was held virtually online, with some of my team #OnstageAtHome2020. We had a great time and as always it was still exciting to get a first view of the new catalogue and play with some of the new products. I received a new stamp set called 'Enjoy The Moment' in my Onstage swag bag and whilst I don't usually blog cards with new sets this far in advance of catalogue launch (I don't like to be too much of a tease!) I really like this stamp set and I thought it was perfect for the above challenges. I simply watercoloured 4 ovals using the challenge colours onto some Fluid 100 watercolour paper and then using my Stamparatus, I stamped four of the seed pods over the top of each one, stamping a few times to get them nice and black. I stamped my sentiment in black onto a strip of Bumblebee cardstock and added it to my card with dimensionals to finish. A great example of #SimpleStamping - sometimes stamps, ink and paper is all you need!


So what do you think? Have I wet your appetite for the new catalogue?! There are still a couple of months before it launches, so rest assured won't be tempting you too much at this stage. The only way you can get it sooner is to join my team - do get in touch if you really can't wait! Either way, I will be firmly back to Christmas cards tomorrow!

Here is the visual summary of the key products used on today's project for you to pin for easy reference:


You can see all of my 'How To' summaries on my 'How To - Tips and Techniques' Pinterest board in case you've missed any. 

I'll be back tomorrow with another project. Until then, happy stampin'!


Stampin' Up! Supplies Used:

Table built using Product Table Builder by The Crafty Owl - Independent Stampin' Up! Demonstrator.
 

Plush Poinsettia Specialty Paper Banner Christmas Card

by Joanne James9. November 2020 19:25

Happy Monday everyone! I had a fun card class this morning and encouraged by the ladies on my call (thank you Deborah!), instead of getting on with my household chores this afternoon, whilst the edited recording of my class video was rendering I decided to make a 'quick' card which has resulted in an extra post for today because I used the current Freshly Made Sketches layout so I'm squeezing in a link up:

I'd been mulling over what to feature on Judy's banner element and finally settled on some of the gorgeous Plush Poinsettia specialty paper - take a look:


Here's the low-down on today's card:

This card wouldn't take long at all if I was to make it again from scratch, but I spent ages procrastinating over colours and backgrounds so it ended up taking way longer than it should have! It really is pretty straightforward: a banner of the lovely textured flocked white vellum, popped up on a panel of Real Red and a Whisper White card base, with a white-on-red heat-embossed sentiment from the Poinsettia Petals stamp set on some stitched rectangles, with a final embellishment of some sheer ribbon tied with two tiny (retired) jingle bells from my stash because I felt without it my card, whilst beautifully 'clean', was lacking a little something. 

Here's another view of that gorgeous paper, even though I'm not sure the camera really does it justice:


Here is the visual summary of the key products used on today's project for you to pin for easy reference:


You can see all of my 'How To' summaries on my 'How To - Tips and Techniques' Pinterest board in case you've missed any. 

I'll be back shortly with the post that I actually intended for today! Until then, happy stampin'!


Stampin' Up! Supplies Used:

Table built using Product Table Builder by The Crafty Owl - Independent Stampin' Up! Demonstrator.

Sounds of the Season Silver Bells Christmas Card and Gift Tin PP516

by Joanne James8. November 2020 09:00

Today it's Sunday and time for this week's new challenge over at The Paper Players! It's my turn to host this week and I have a festive colour challenge for you to work with:


I'm also linking up with the challenge over at Festive Friday, where I used diecut, pattern paper, ribbon and sentiment from the inspo list. The colours I chose for this week's challenge are some of my favourite to work with when creating cards and projects for the festive season, and whilst you are free to create whatever you like with the palette, I couldn't resist creating a card and matching gift box ready for Christmas. This is a rather photo-heavy post, so here goes! First up - here's my card and co-ordinating gift packaging together:


Pretty, right? Let's take a close look at each on turn. First up - here's the card I made:


Here's the low-down on today's card:

Sounds of The Season - A pair of silver foil jingle bells from the Sounds of the Season Dies are the centrepiece of today's card. I used these larger-than-life bells to frame my sentiment from the 'Wrapped in Christmas' stamp set and paper-pieced the holly leaves with a second set cut from green foil for contrast. I added Real Red Rhinestone jewels for my berries, added some diecut pine sprigs and finished with a Real Red sheer ribbon bow to each. These bows do make the card a little less post-friendly, but I think the extra detail is worth it. You can see the detail on the bells on the close-up below:


'Tis The Season - I used a combination of a Shaded Spruce/Real Red/Black/White plaid and a holly pattern from the 'Tis The Season designer series paper pack to compliment my silver bells and added a thin border of silver between the layers for added shine. I love the white splatter on the plaid pattern - and it's part of the design, no extra effort required!

Rectangle Gift Tin - I liked my card so much that I decided to create a belly band wrap for one of the silver rectangle tins that are in the Autumn-Winter catalogue. Available in packs of 4, they are great for a gift card or to hold a small item such as a piece of jewellery or item of make up, for example. Here's my finished tin:


I've decorated it in much the same way, strengthening the band with a piece of Real Red cardstock for the base layer and adding a wrapped bow in the wide Shaded Spruce ribbon from the Wonder Of The Season Ribbon combo pack. Here's a close up from another angle with a better view of the bell decoration: 


Here are the visual summaries of the key products used on today's projects for you to pin for easy reference:


 And for the tin:


You can see all of my Product and 'How To' summaries on my 'How To - Tips and Techniques' Pinterest board in case you've missed any. 

Before you reach for your ink and papers, check out what our amazing team has created to inspire you this week:

Here's a quick recap of our challenge rules:
 
1.  Create a new paper project
2.  Upload your creation to your blog with a link back to us and provide a direct link to the post featuring your challenge submission.
3.  Please link your card to no more than four challenges, TOTAL.
4.  Have FUN!

You can see all of my 'How To' summaries on my 'How To - Tips and Techniques' Pinterest board in case you've missed any. 

Enjoy your day; I'm hoping to do a little bit of crafting, a little bit of cooking and generally catch up on everything I've avoided doing whilst I've been at Stampin' Up!'s Onstage at Home virtual online event these past couple of days. I'll be back tomorrow with another project. Until then, happy stampin'!

Stampin' Up! Supplies Used: 

Table built using Product Table Builder by The Crafty Owl - Independent Stampin' Up! Demonstrator.

Freezin' Friends Seal For A Pink Christmas

by Joanne James6. November 2020 12:00

Today I'm sharing my design team card for our new challenge over at As you See It where it's time for a colour challenge:


I'm also linking up over at Festive Friday where I chose embossing, diecut and sentiment from the inspo list and decided to use our colour palette this week to create an unusually coloured Christmas card - take a look:


Here's the low-down on today's card:

I was rather time-pressed this week, with class prep, in-colour club and I've been attending Stampin' Up!'s Onstage at Home virtual event, so I needed something I could pull together fairly quickly! I thought that the little seal from 'Freezin' Friends' would be perfect in grey, with a stripey pink bobble hat; I sat him on a little slippery patch of ice (hence the sentiment!) which I diecut from cardstock and layered with vellum brushed with clear Wink of Stella for a sparkly shine. The unconventional element to my card was the Flirty Flamingo card that I used for my card base, which I embossed with the Evergreen Forest Embossing Folder and added a sprinkling of adhesive-backed sequins with a pinkish hue to compliment my wintery scene:


So what do you think - does the pink tree background work for you? A little girly maybe, but I love it!

Here is the visual summary of the key products used on today's project for you to pin for easy reference:


You can see all of my 'How To' summaries on my 'How To - Tips and Techniques' Pinterest board in case you've missed any. 

Here's a summary of our challenge rules:

  • Create any card, scrapbooking page, 3D project or packaging project that fits the challenge.
  • Please include the challenge graphic and link back to the challenge in your blog post. Turn off word verification so we can leave you lots of lovely comments. Make sure you link the post not the whole blog to the Linky. Use #AYSIXXX when uploading to a public gallery.
  • If you’re unsure about ‘the rules’, check the details under the Challenge Guidelines tab on the As You See It Challenge homepage.
  • In a colour challenge, black or other neutral can be used in outlines and sentiments but no other colours should be included. Stampin’ Up colours are used for reference but colours that are a close match are welcome.
We look forward to seeing your creations in the AYSI gallery.

Enjoy your day and I'll be back tomorrow with another project. Until then, happy stampin'!


Stampin' Up! Supplies Used:

Table built using Product Table Builder by The Crafty Owl - Independent Stampin' Up! Demonstrator.

Peace on Earth Coastal Cabana Christmas Card

by Joanne James5. November 2020 11:40

This week is getting busier by the minute so I'm just popping in with a quick card that I'm going to hopefully squeeze in to the current CAS(E) This Sketch challenge, where they have a fabulous sketch this week:


I still had the Joy Dies out on my desk from my last class and knew immediately what I wanted to do with this sketch, which is also perfect for the current Just Us Girls challenge where the focus is on word diecuts. To complete today's challenge trio I used this week's colours over at Global Design Project #GDP265 and used Bermuda Bay as my free choice. So here's my card  - take a look:


Here's the low-down on today's card:

Peace and Joy - I love this stamp and die bundle and I knew that I had to use all 3 layers of my Peace die to full effect on the front of today's card. I played around with the colours for each layer until I was happy with the effect. I really like the endless sentiment combinations you can create; here's how I finished the sentiment on the inside of today's card:


Beautiful World - There are times when stamp sets and bundles have great cross co-ordination, and I think the Beautiful World bundle in the annual catalogue is given a whole new lease of life when paired with either the Peace and Joy bundle or the Dove of Hope bundle from the current Autumn-Winter catalogue. The image of the globe seemed like a fitting stamp to create my repeating background to tie-in with my sentiment, without detracting from it. Not overly Christmassy perhaps, but I think it would make a great masculine Christmas card.

Monochromatic Peace - Having considered a bold contrast for my free choice colour, in the end plumped for Bermuda Bay as I felt the cool palette of aqua and grey against the white fitted with the peaceful theme of my card. What do you think? Would you have gone with something more contrasting - shocking pink, perhaps? Do leave me a comment below, I'd love to hear your thoughts. 

Here is the visual summary of the key products used on today's project for you to pin for easy reference:


You can see all of my 'How To' summaries on my 'How To - Tips and Techniques' Pinterest board in case you've missed any. 

Enjoy your day and I'll be back tomorrow with another project, this time for our new challenge over at As You See It which is all about colour. Until then, happy stampin'!

Stampin' Up! Supplies Used:

Table built using Product Table Builder by The Crafty Owl - Independent Stampin' Up! Demonstrator.

Shimmer Embossed Snowflake Wishes

by Joanne James4. November 2020 22:00

Today I'm sharing a quick card I made that was inspired by this picture inspiration from the recent challenge over at Time Out:


I'm too late to link up, but I really liked the mandala design on the rustic wood background and it inspired me to create a Christmas card using one of the Snowflake Wishes dies and some shimmery embossing paste - take a look:


I created a mask using the largest of the Snowflake dies that cuts out a relief snowflake and used it to layer shimmery white embossing paste onto my rustic background, courtesy of the In Good Taste designer series paper. Tricky to see the dimension in the above shot - it's a little clearer below:


I added a sentiment and embellished with a green jingle bell and retired silver grey twine and tassel from my stash, but the snowflake is the real star of the show. The ladies that attended my Creative Escapes luxury weekend craft retreat last month all had a pot of shimmery white embossing paste in their kits, so I wanted to be able to give them some other ideas and ways that they could use it. Hope you like it ladies!

Here is the visual summary of the key products used on today's project for you to pin for easy reference:


You can see all of my 'How To' summaries on my 'How To - Tips and Techniques' Pinterest board in case you've missed any. 

Enjoy your evening and I'll be back tomorrow with another project. Until then, happy stampin'!


Stampin' Up! Supplies Used:

Table built using Product Table Builder by The Crafty Owl - Independent Stampin' Up! Demonstrator.

Heartwarming Hugs Suite - From CAS Card to Hot Chocolate Gift Carrier!

by Joanne James2. November 2020 18:30

Happy Monday everyone! My week has started at full speed as usual but I'm here today with two projects that are both quite different that feature projects from the Heartwarming Hugs Suite. First up is a clean and simple card using the colours over at Just Add Ink this week (thank you ladies for selecting my candle card as a winner for the 'Just Add Two' challenge last week!) and this week's sketch layout over at CAS Colours and Sketches where they have a great sketch requiring a small, repeating image of some kind:


I decided to go with the coffee cup in the Warm Hugs stamp set and paired it with a sentiment from the same set that I've been wanting to use for a while - take a look:


 The sentiment is quite long so I turned my card to make use of a wider card front, and having stamped my mugs in alternating colours, I added a sentiment across the central row that I heat-embossed in silver on vellum so that it didn't totally obscure the mugs. I also added small rhinestones to the top and bottom row of mugs for a little added silver sparkle:


Finally some stamping to decorate the envelope and inside my card to finish:


Here is the visual summary of the key products used on this project for you to pin for easy reference:


You can see all of my 'How To' summaries on my 'How To - Tips and Techniques' Pinterest board in case you've missed any.

The 'Warm Hugs' stamp set is part of the Heartwarming Hugs Suite which includes lots of fun items and packaging ideas, including mini coffee cups and carriers. I made a few hot chocolate sets to share with some of my lovely customers as gifts recently using the items in the suite and decorated the cups and carriers with some of the papers in the Heartwarming Hugs designer paper pack, with a hot chocolate-filled cup and a bag of marshmallows to go with them and this seemed like a good opportunity to share a project that shows how easy it is to create a heartfelt yet relatively inexpensive gift to share with someone. Here's a close up of my completed carrier:


And here's a photo showing the detail on my decorated hot-chocolate themed cup:


I love the traditional colours that feature in this suite - isn't the dressed mug just adorable?! The textured coffee collar and sentiment added to the cup adds a nice personal touch I think. I'm linking this project up over at Color Throwdown where they are featuring the exact palette of kraft, reds and greens that feature on my decorated cup and gingham carrier.

 Here is the visual summary of the key products used on this project for you to pin for easy reference:


You can see all of my 'How To' summaries on my 'How To - Tips and Techniques' Pinterest board in case you've missed any.

Everyone that I've given one of these to so far has loved them - I'm thinking of making them for my UPS delivery driver and postman too, for them to take home for a warming drink after their rounds! Who would you give one to?

Enjoy your evening and I'll be back tomorrow with another project and news of two fabulous new launches: the new Paper Pumpkin kit and the Curvy Celebrations bundle! Until then, happy stampin'!


Stampin' Up! Supplies Used:

Table built using Product Table Builder by The Crafty Owl - Independent Stampin' Up! Demonstrator.


Mini Catalogue

BROWSE THE CATALOGUE

The mini catalogue is now live! Read and download your copy here.

Shop Online

Access my online shop 24 x 7, 365 days of the year:

Current April hostess code:

VDKNV7BH

Shop Online

Join My Team

It's always a great time to join Stampin’ Up! New team members can get £130 worth of products for only £99 + free business supplies + free shipping + all the fun being a part of Stampin’ Up! Stampin' Up! has something for everyone: join my growing team and benefit from my support to enjoy Stampin' Up! however you choose.

If you're interested, call me for a chat to understand how I can help you realise your goals. Alternatively, if you have already decided to sign up and you just can't wait, please click here for the link to the online form where you can sign up and order your starter kit right away! 

Latest Kit!

Stampin Cut and Emboss

The Rock Legend Kit has all you need to make 8 cards with coordinating envelopes. Along with the new Panda Friends Kit, both are available from January 4th for just £14 each - get yours here!

2023-24 Annual Catalogue

BROWSE THE CATALOGUE

Click on the catalogue for a full list of current SU! supplies - if you would like to order any of the items featured, please drop me a line at [email protected] or give me a call on 07773 421446 - I'd be happy to help.

New Online Exclusives

There are new products available exclusively in the online store from 5 March - check them out here.

About Me

Hi I'm Joanne and live in Northampton and when I'm not looking after my husband and two beautiful children, am an avid crafter with a passion for all things Stampin' Up!

I must confess that I have never been a big rubber stamper - until I discovered Stampin' Up! that is. I love the fact that I can get such great results with co-ordinating stamps, inks, papers and punches - the possibilities are endless! Join me on my stamping journey as I share the things I love and be inspired to create amazing things yourself!

Follow Me

Monthly Newsletter

Box Builder

Click the button above to use Box Buster to create your custom box design using the Envelope Punch Board!

Kits Collection Now Available!

Stampin Cut and Emboss

The new Kits Collection from Stampin' Up! is now available!

Click here to see the current kits available and order yours online today.

I Design For


Stampin' Up Stuff

This is my personal blog and is not endorsed by Stampin’ Up! I hope you find it a plentiful source of ideas and personal inspiration but please don't copy my designs for contest submission or use for classes, publication or sale without express permission.