Today it's Sunday and time for this week's new challenge over at The Paper Players! It's the turn of the fabulous Jaydee to host this week and she has a clean and simple challenge for us to work with:

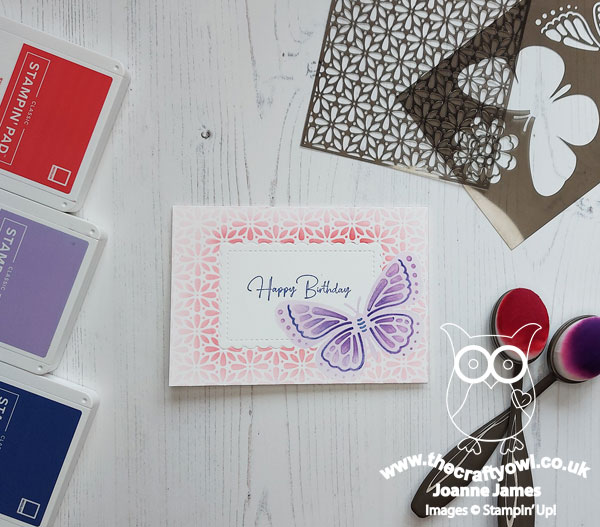
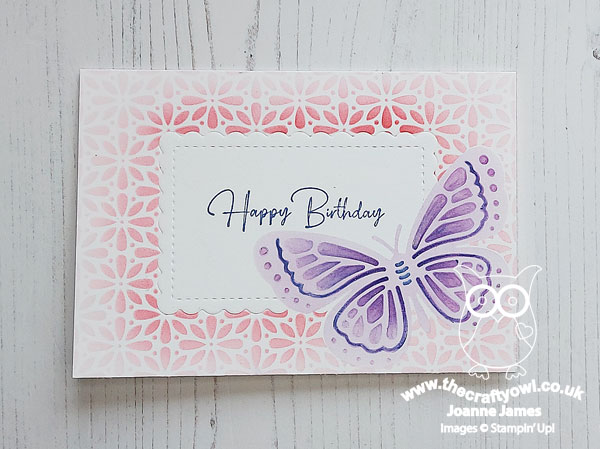
I love one layer cards! had another go with a different colour combo from the palette over at Sunday Stamps (such a great colour palette!) and decided that today I would focus on creating the illusion of layers on my single layer creation using some clever diecut embossing, masking and stencilling - take a look:
Here's the low-down on today's card:
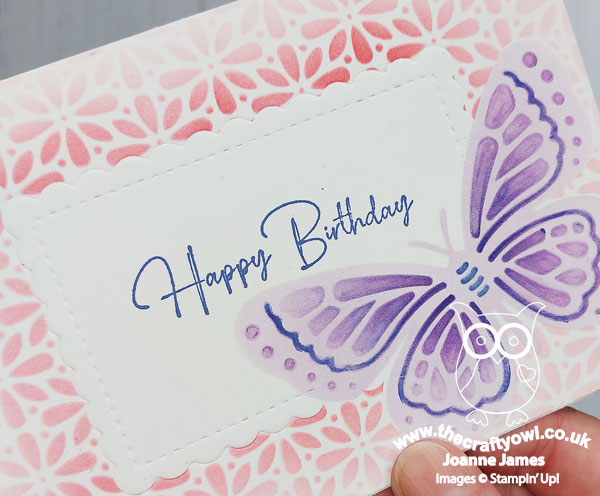
How Many Layers? - I love one layer cards as they are great for clean and simple designs. They can be as simple as a single image and a sentiment; for today's card though, I decided to create the illusion of layers. The first thing I did was use one of my Scalloped Contour Dies to partially emboss the outline of a label. I then stencilled a butterfly on the non-embossed section, then masked it off, along with a second mask to mask off the embossed area before using an alternative stencil to emboss a pattern around the remainder of the card. At this stage the card should look something like this:
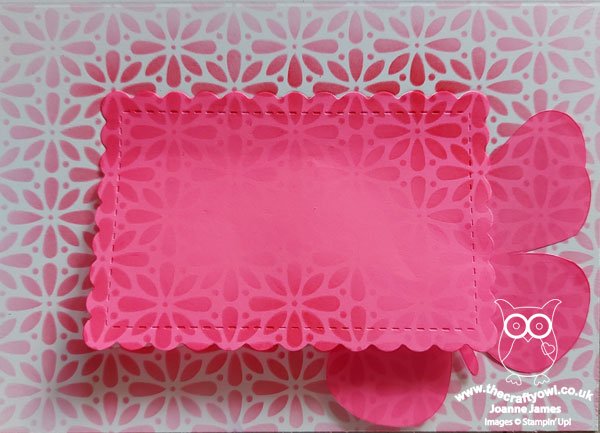
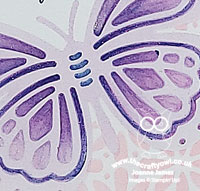
When the masks are removed, the finished card front appears to have three separate layers: the butterfly uppermost, followed by the die-embossed label outline and finally the background floral-patterned layer. The photo below shows these in more detail:
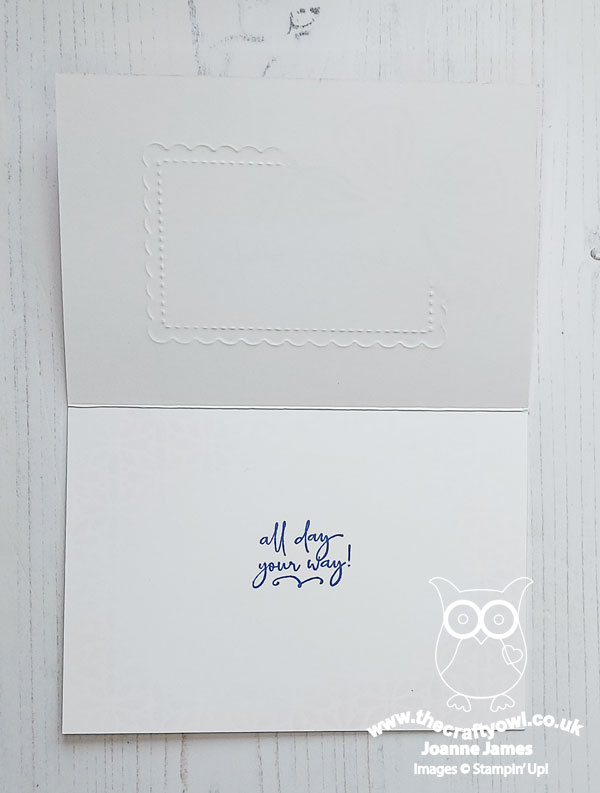
Finally I added a sentiment to my faux-label to complete my card. I also stamped a sentiment on the inside, with some soft stencilling around the edges - I photographed the inside of the front of my card too so that you can see the partial die-embossed label outline more clearly:
By keeping my central label clear, I've tried to preserve some 'white space' on my one layer card. Along with the absence of embellishments of any kind and the one layer that is the crux of this challenge, I have managed to keep thing clean and simple too. I love these Butterflies & Flowers Layering Decorative Masks stencils and will be so sad when they retire at the end of the month.
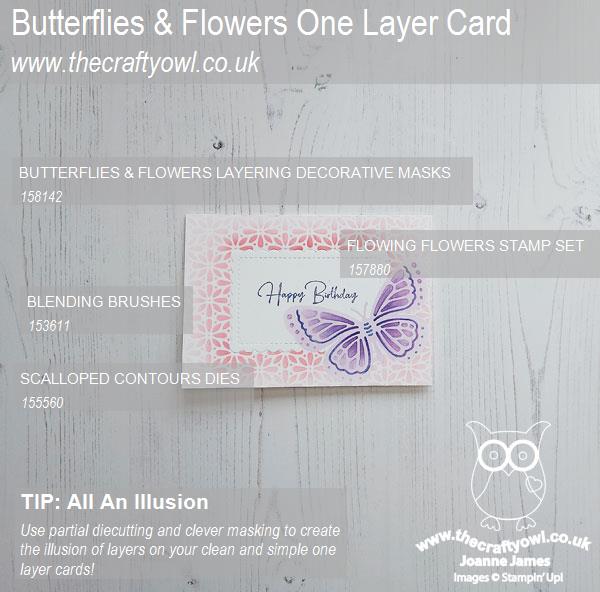
Here is the visual summary of the key products used on today's project for you to pin for easy reference:
You can see all of my Product and 'How To' summaries on my 'How To - Tips and Techniques' Pinterest board in case you've missed any.
Before you reach for your ink and papers, check out what our amazing team has created to inspire you this week:
The Paper Players Design Team
Here's a quick recap of our challenge rules:
1. Create a new paper project
2. Upload your creation to your blog with a link back to us and provide a direct link to the post featuring your challenge submission.
3. Please link your card to no more than four challenges, TOTAL.
4. Have FUN!
Enjoy your day; mine will be a quiet one, having been out and about for the past couple of days. I'll be back soon with another project. Until then, happy stampin'!
Stampin' Up! Supplies Used: