Today it's Sunday and time for this week's new challenge over at The Paper Players! It's the turn of the fabulous Ann to host this week and she has an interesting colour challenge for us to work with:
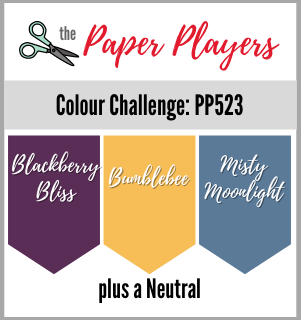

Now I know I said Ann had an 'interesting' colour challenge for us this week ... what I really meant to say was 'incredibly difficult'!! Or at least, it was for me this week! Whilst I don't mind any of these colours in their own, or even paired, as a trio I struggled with them. All three are featured in the new Dandy Garden designer series paper, and usually DSP would be my first port of call for a colour challenge, but the truth is I am not a fan of this pack! Or at least, I should qualify that by saying I'm not a fan of the sides with mixed colours - the monochromatic patterns in this pack are just lovely! Anyway, I had to call in help for this one, both in the form of this week's Paper Craft Crew sketch and a certain James Junior - take a look at what we came up with:
Here's the low-down on today's card:
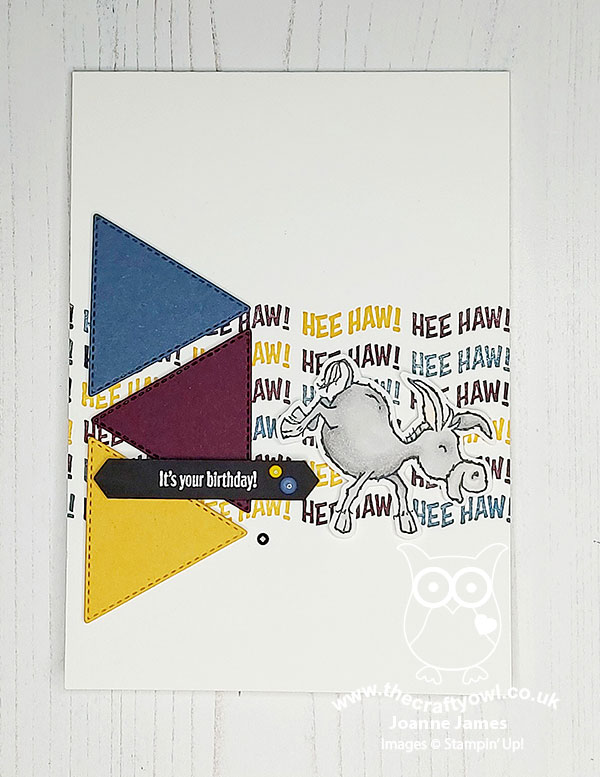
A Trio Of Triangles - I was drawn to this week's PCC sketch with its three triangles, as I had been having a team chat this week with one of my team who has been using her stitched triangles as part of an ongoing challenge and I mentioned that I had bought these before Christmas but not yet used them and I thought the sketch would be a good way to remedy that. The trio would also enable me to work in this week's colours, so provided a great starting point.
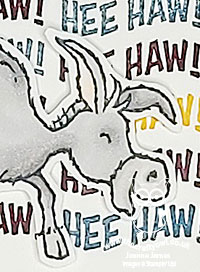
A Darling Donkey - I then needed to decide upon my neutral colour; this is where Rebecca, the self-confessed 'brains' behind today's card, suggested I go with grey and a donkey from the super cute 'Darling Donkeys' stamp set, one of the sets that can be yours free with a £45 spend during Sale-A-Bration. So I coloured one of the funny kicking donkeys and fussy cut it out - perfect!
Hinge-Step HeeHaw - Finally, I just had to work out what to do use for the horizontal background panel. I decided to go with a tri-colour sentiment block, made up of alternating colours of 'heehaw!', one of the sentiments in the Darling Donkeys set. I used my Stampuratus and moved the plates up and down the hinge to perfectly space my words to create a seamless flow across the page. The Stamparatus made light work of the stamping, although 'the hands' (Rebecca's reference to my contribution!) were definitely not working as quickly as 'the brain' (apparently, since it was all her idea!!) I finished my card with a birthday sentiment and a trio of enamel dots.
Despite my initial reservations about this week's colours, I'm actually pretty pleased with the end result. What do you think? Did Team James pull it off?! Do leave me a comment below - I'd love to hear your thoughts. I'll be linking today's card up over at SUO Challenges too where they have 'Designer's Choice' themes this week.
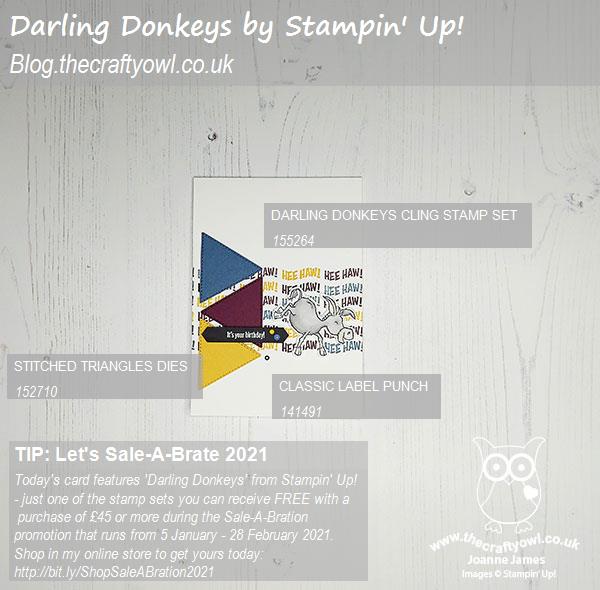
Here is the visual summary of the key products used on today's project for you to pin for easy reference:
You can see all of my Product and 'How To' summaries on my 'How To - Tips and Techniques' Pinterest board in case you've missed any.
Before you reach for your ink and papers, check out what our amazing team has created to inspire you this week:
The Paper Players Design Team
Here's a quick recap of our challenge rules:
1. Create a new paper project
2. Upload your creation to your blog with a link back to us and provide a direct link to the post featuring your challenge submission.
3. Please link your card to no more than four challenges, TOTAL.
4. Have FUN!
You can see all of my 'How To' summaries on my 'How To - Tips and Techniques' Pinterest board in case you've missed any.
Enjoy your day; I'm hoping to do a little crafting and maybe wrap up and brave the elements for a brisk walk - but I'll see what the temperatures are like first! I'll be back tomorrow with another project. Until then, happy stampin'!
Stampin' Up! Supplies Used: