Daffodil Daydream Meets Daffodil Afternoon For Sunday Stamps

by Joanne James20. January 2022 13:28

Today I'm sharing a card that is a 'sneak peek' of one of the cards that I am making with the lovely ladies signed up form my 'Daffodil Daydream' online card class that is taking place next week; I used the great sketch over at Sunday Stamps for my layout, so am linking up with their current challenge. Here's their sketch:

And here's the card that I made using it as my starting point:


Here's the low-down on today's card:

Daffodil Afternoon - I knew I wanted to use this particular design of Daffodil Afternoon designer series paper as my background. Bold designs on dark backgrounds can be intimidating, so I chose it as I wanted to give my class attendees ideas how to use them. Taking advantage of the split panel and choosing the lighter colours for both the card base and mat layer both serve to lighten this pattern. Lots to love about this paper pack, but most of all - it's FREE with a £45 purchase during the current Sale-A-Bration promotion! If you buy the Daffodil Daydream stamp set and die bundle, this makes a great free product choice to accompany it as it co-ordinates beautifully.  

Daffodil Dies - And so onto those Daffodil Dies! There are lots of die pieces in this set but they go together really easily when you know how. We will be going through that in class, so it was only right that I make up a couple of flower heads and use them to decorate my sentiment label. I cut them from colours that matched the daffodils on the paper, then added some ink with a blender brush to each piece to bring a little more depth to the colours. 

And A Beautiful Shape - Finally, I did start out with a circle shape as per the sketch, albeit I then layered it with my sentiment label and daffodil heads almost covering it up! You can see that circle. courtesy of a new die in the Beautiful Shapes set, a little closer on the photo below, where the debossed detail can just about be seen:


I know this die is one I'll be using lots; the added detail makes it a nice centrepiece. It's no stitched circle, granted, but it is a nice alternative!

I'm looking forward to making a version of this card in my 'Daffodil Daydream' online card class next week. I have lots of other classes and events planned in the coming months - if you would like more information, then do get in touch - I'd love you to join me!

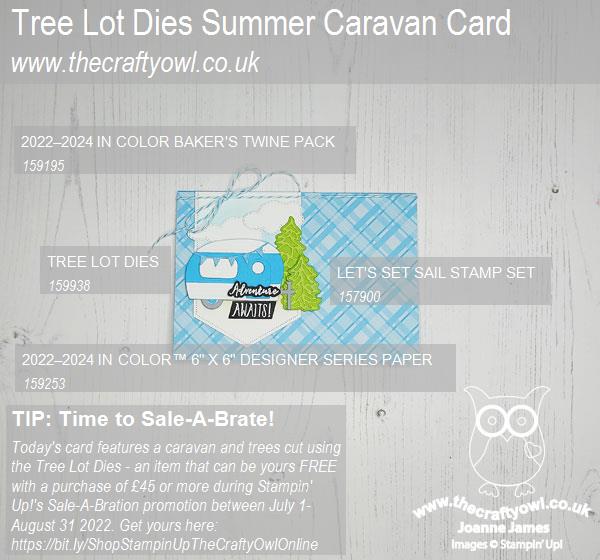
Here is the visual summary of the key products used on today's project for you to pin for easy reference:
 

You can see all of my 'How To' summaries on my 'How To - Tips and Techniques' Pinterest board in case you've missed any. 

Enjoy your day; I have been granted a free pass on the school run this afternoon, so am fortunate to be getting a little extra crafting time (I might even make a head start on tomorrow's chores too!). I'll be back tomorrow with another project. Until then, happy stampin'!


Stampin' Up! Supplies Used:
Table built using Product Table Builder by The Crafty Owl - Independent Stampin' Up! Demonstrator.

Sale-A-Brate with a Pool Party Friendly Hello AYSI 266

by Joanne James14. January 2022 12:00

Today I'm sharing my design team card for our first challenge this year over at As you See It where it's time for a sketch challenge designed by the lovely LeAnne:


A short and sweet post from me today as I've a lot on so need to make it brief. I decided to use one of my Sale-A-Bration freebies for my card today - take a look:


 Here's the low-down on today's card:

Today's card features the pretty 'Friendly Hello' stamp set and co-ordinating papers - one of the co-ordinating bundles that can be yours free as part of the current Sale-A-Bration promotion with a £90 purchase. The line images of the stamp set co-ordinate with the florals and spring colours of the papers perfectly. I left my stamped bird image black and white and coloured the circle behind with my Pool Party Blends to give the same effect as the background papers and added a fussy cut heat-embossed sentiment, with some sparkly ribbon and black enamel dots to finish. The shimmer from the ribbon seems to almost reflect the blue, don't you think?


I usually struggle with a diagonal, but my card for today came together quite easily. The black, white and Pool Party colour combination is also perfect for the Color Dare challenge of neutrals plus one colour of your choice so I'm linking up today's card there too.

If you would like to snap up this bundle of products for FREE, just place an order for £90 or more in my online store before the end of February. Gotta love free craft products!

Here is the visual summary of the key products used on today's project for you to pin for easy reference:


You can see all of my 'How To' summaries on my 'How To - Tips and Techniques' Pinterest board in case you've missed any. 


Here's a summary of our challenge rules:

  • Create any card, scrapbooking page, 3D project or packaging project that fits the challenge.
  • Please include the challenge graphic and link back to the challenge in your blog post. Turn off word verification so we can leave you lots of lovely comments. Make sure you link the post not the whole blog to the Linky. Use #AYSIXXX when uploading to a public gallery.
  • If you’re unsure about ‘the rules’, check the details under the Challenge Guidelines tab on the As You See It Challenge homepage.
  • In a sketch challenge, you are welcome to rotate or flip a sketch. You can replace shapes used such as substituting a circle panel for a square panel. However, we must be able to still see the basis of the original sketch in your finished product.
We look forward to seeing your creations in the AYSI gallery.

Enjoy your day and I'll be back soon with another project. Until then, happy stampin'!


Stampin' Up! Supplies Used:

Table built using Product Table Builder by The Crafty Owl - Independent Stampin' Up! Demonstrator.

Sale-A-Bration 2022 Is Here And A New 2022 Spring Mini Catalogue Too!

by Joanne James4. January 2022 06:00

It's the 4th January and the first Sale-A-Bration promotion of the year is here! It runs from today until 28th February. You can click on the catalogue on the right hand side of my blog page or below to access the Sale-A-Bration leaflet to download a copy or click on the icon above or on the right to go directly to my online shopto place an order - we are LIVE!


So how does Sale-A-Bration work? For anyone who hasn't come across it before, it's Stampin' Up!'s annual promotion that is loaded with offers whether you shop, join or host. You can earn a free Sale-A-Bration product for every £45 you spend between 4 January and 28 February. There is also the opportunity to earn even bigger rewards with a £90 purchase. It's the perfect time to purchase those products you've had on your wish list and earn more products for free! 

It’s also one of the best times of the year to join Stampin’ Up! There is a fabulous joining option during this year's Sale-A-Bration promotion: as usual, you can become a demonstrator for just £99 and choose £130 of  products for your Starter Kit. In addition to an extra £31 worth of product in your starter kit, exclusive to Sale-A-Bration, you will also receive TWO stamp sets of your choice along with your Starter Kit ABSOLUTELY FREE! There couldn’t be a better time to join the Stampin’ Up! family. Plus, the whole kit ships for free!

There is plenty of choice and flexibility, whether you want to be a hobby demonstrator and just use your discount to enable you to purchase craft supplies more cheaply, or alternatively would like to build a flourishing direct sales business and sell supplies to others - it's entirely up to you. Above all else, it's a great opportunity to connect with like-minded individuals united through a common love of crafting.

Hosting is also even more rewarding during Sale-A-Bration. When you host a party and reach a certain amount in sales (see the Stampin’ Rewards chart in the Sale-A-Bration brochure for more information), you can earn a free stamp set!

Even if you reaches the qualifying amount on your own outside of a party, you can earn the same free stamp set too, both in person and when shopping in my online store. What's more, you can even apply your Stampin' Rewards to a Starter Kit and become a demonstrator yourself - I would love to welcome you to my team!

If you would like to host a virtual party, please do get in touch. Equally if you've ever thought about becoming an SU! demonstrator, now is a great time to do so - I would love to have a no-obligation chat with you about joining my team and the benefits.

As if that wasn't enough, today also sees the launch of the new January-June 2022 mini catalogue - full of gorgeous new products:


Just click on the image above or in the sidebar on the right to browse the catalogue online, or contact me on 07773 421446 if you would like a paper copy posted out to you and you don't already have a demonstrator; paper copies have been sent to my regular customers. If you are as excited as me and just can't wait, here's the link to my online store - everything is available to purchase from today!

If you would like more information on any of the above, please don't hesitate to get in touch! 

Thanks so much for popping by - it's always nice to share good news! Back later today with my first post of the year for our new round of challenges over at CAS Colours & Sketches that uses some exciting new product! That post will go live at 1300 GMT. Until then, happy shopping!

Rainbow Glimmer Brilliant Rainbow Card PP572

by Joanne James2. January 2022 09:00

Happy new year everyone! I hope you all had a wonderful Christmas and New Year - I thoroughly enjoyed my festive break with my family and much-needed crafty down-time and today I am officially back to it with my first blog post of the new year. It's Sunday so I'm back with our first challenge of 2022 over at The Paper Players! It's the turn of the amazing Ann to host this week and she has a theme challenge that is perfect for this time of year:


Add a little sparkle - what a great way to see the new year in! I chose glimmer paper as my sparkle of choice and also used the sketch over at Freshly Made Sketches as the starting point for today's layout. My card has it all today: something current, something new, something retired and something free! Take a look and see if you can work out which is which:


Here's the low-down on today's card:

Something Current - There are a couple of notable current products on today's card: my favourite rainbow glimmer paper that I used for my diecut rainbow, along with some of the yellow Ombre Glimmer Paper along with one of the Tasteful Labels Dies that I used to diecut my sun. I just love the shimmer and sparkle!


Something New - I made my glimmer rainbow using the new Brilliant Rainbow Dies that will debut in the upcoming January-June mini catalogue that launches next week. These are so fun! They also have a co-ordinating stamp set called 'Rainbow of Happiness' that I used for my sentiment and to add some extra detail to the inside of my card:


Something Retired - I used a retired Textured Clouds Embossing Folder to add some additional cloud detail to the panel behind my focal images - I haven't used this EF in ages but thought it worked quite well here for some added textural detail.

Something FREE - The final element to today's card is a sneak peek of some free product - the cloud at the end of my rainbow comes from the Sunshine and Rainbows Designer Series Paper - just one of the products that can be yours free with a purchase of £45 during the first Sale-A-Bration promotion of the year that also begins on 4th January. These papers are gorgeous and co-ordinate perfectly with the Rainbow of Happiness Bundle - and everyone loves free product, right?

Here is the visual summary of the key products used on today's project for you to pin for easy reference:


You can see all of my Product and 'How To' summaries on my 'How To - Tips and Techniques' Pinterest board in case you've missed any. 

Before you reach for your ink and papers, check out what our amazing team has created to inspire you this week - including the work of our three new guest designers for 2022, Cindy, Christy and Jennie:

Here's a quick recap of our challenge rules:
 
1.  Create a new paper project
2.  Upload your creation to your blog with a link back to us and provide a direct link to the post featuring your challenge submission.
3.  Please link your card to no more than four challenges, TOTAL.
4.  Have FUN!

You can see all of my 'How To' summaries on my 'How To - Tips and Techniques' Pinterest board in case you've missed any. 

Enjoy your day; I'm spending the day at my mother-in-law's building flat-pack furniture today - wish me luck! I'll be back tomorrow with another project. Until then, happy stampin'!


Stampin' Up! Supplies Used: 

Table built using Product Table Builder by The Crafty Owl - Independent Stampin' Up! Demonstrator.
 

Enjoy The Moment One Layer Autumnal Card

by Joanne James23. October 2021 09:00

Hurrah, it's the weekend! Anyone else feeling like that today? Today I'm sharing a super simple, one layer card for the following challenges:

   May be an image of text that says "#109 COLOUR Crushed Curry SPIRATION CHALLENGES Pool Party Cinnamon Cider Early Espresso"

Never one to shy away from the challenge of a one/no layer card, I decided to pair my entry for the autumnal one-layer theme over at Less Is More with the lovely colours over at Colour INKspiration. I haven't played along there for a while but I love their colour combo of browns with an aqua blue and warm yellow. I decided to make another card with my 'Enjoy The Moment' stampset that I used earlier this week - take a look:


Here's the low-down on today's card:

I stamped a row of circles in alternating challenge colours using the 'Textures and Frames' stamp set from the recent Sale-A-Bration promotion, and stamped over this with a variety of seed pods and seed heads from the 'Enjoy The Moment' stamp set in Early Espresso, masking the edges so that they didn't go outside of the background circles. I added some scored lines above and below my stamped images for added definition, then finished with my sentiment below:


Layering stamped images is a great way to add colour and create depth without the need for layers and these seed heads are so perfect for an autumnal card. This card really is #SimpleStamping at its best - nothing more than stamps, ink and paper. What are you going to stamp today? Do leave me a comment below - I'd love to know.

Here is the visual summary of the key products used on today's project for you to pin for easy reference:


You can see all of my 'How To' summaries on my 'How To - Tips and Techniques' Pinterest board in case you've missed any. 

Enjoy your day; I am off to the hockey pitch for some spectating so will be wrapping up warm against the chillier temperatures we've been experiencing the last few days; I think it may be time for the big coat!! I'll be back tomorrow with my card for out new challenge over at The Paper Players. Until then, happy stampin'!


Stampin' Up! Supplies Used:

Table built using Product Table Builder by The Crafty Owl - Independent Stampin' Up! Demonstrator.

A Masculine Plaid Christmas Clean and Simple TTT132

by Joanne James23. September 2021 18:00

It's Thursday and time for a new challenge over at TicTacToe! It's the turn of Team X to host this week and the lovely Betty is our featured designer this week. This is the fun board that we are playing along with: 


Lots of options on the board this week and I was tempted to create something fall-inspired, but in the end decided to go across the middle with masculine/free/patterned paper and create a Christmas card - take a look:


Here's the low-down on today's card:

Peaceful Prints - The current challenge over at CAS Christmas Card Challenge is to use plaid on a Christmas card, so the Peaceful Prints designer papers, free with an order of £45 during the current Sale-A-Bration promotion, were the perfect starting point. I'm trying to share as many of these fabulous free gifts with you as possible before the promotion ends next week on 30th September- just one more week to go so time to get those orders in!

Plaid Christmas - When considering plaid options for my card, I reached for that 'oldie but goodie' Christmas set from the annual catalogue called 'Plaid Christmas'. I ended up not using it on the front of my card at all - my small, block sentiment is courtesy of the 'Tidings and Trimmings' set - but I did use it to add a plaid Christmas tree to the inside of my card:


Pine Tree PunchI love a good sketch and the current Sunday Stamps one is a keeper - so many ways to use this layout! I couldn't wait to play along and decided to keep things simple and used the central vertical panel to showcase the negative space of my punched Christmas tree so that you could see the lovely red and black plaid below. I added a simple scored border to my rectangle for added interest. 

No fuss or frills - this is both clean and simple and masculine, after all. 

Here is the visual summary of the key products used on today's project for you to pin for easy reference:


You can see all of my Product and 'How To' summaries on my 'How To - Tips and Techniques' Pinterest board in case you've missed any. 

A tictactoe board offers so many creative possibilities - how does this week's board inspire you? Why not have a go? We would love to see you in the gallery and who knows - you might be selected for Designer's Choice and be eligible to be a guest designer on a future challenge. 

Enjoy your day; I'll be back soon with another project. Until then, happy stampin'!


Stampin' Up! Supplies Used: 

Table built using Product Table Builder by The Crafty Owl - Independent Stampin' Up! Demonstrator.

Penguins Playmates Christmas Card

by Joanne James23. September 2021 11:25

Today I'm sneaking in a card that I should have shared yesterday but got to the end of my day and was simply too tired to blog! Check out this cute card I made inspired by this week's theme over at TGIF Challenges:


So many lovely free items available during the current Sale-A-Bration promotion and I chose one of my favourites for my card  - take a look:


Here's the low-down on today's card: 

I have lots of little characters from the Penguin Playmates designer series paper - free with a £45 purchase - that I fussy cut whilst sat watching TV one evening, so I wanted to use some of them on my card today. I added a panel of stripes, also from the paper set, and a sentiment and strategically placed my animals and snowman around it:

The best bit? A number of these characters are incomplete and were cut from the edge of the paper; you should never throw these away though as designs like this one, where they peek around the sentiment panel are the perfect way to use them without anyone being any the wiser. Well, obviously you all know because I told you, but you get where I'm coming from, right?! Here is the visual summary of the key products used on today's project for you to pin for easy reference:


You can see all of my 'How To' summaries on my 'How To - Tips and Techniques' Pinterest board in case you've missed any. 

Enjoy your day and I'll be back later with another project, this time for our new challenge over at TicTacToe. Until then, happy stampin'!


Stampin' Up! Supplies Used:

Table built using Product Table Builder by The Crafty Owl - Independent Stampin' Up! Demonstrator.

Counting Sheep Happy Birthday Card For Festive Friday

by Joanne James17. September 2021 09:00


Today will be a two-post day as I have some news: I am joining the Festive Friday Challenge team! This is a fortnightly challenge that is inspired by a particular day of the year that I have played along with on a number of occasions. The fun thing is that at Festive Friday you do not need to actually celebrate the occasion; your goal is to simply use three or more items from the inspiration list on your project.


The challenge that we are celebrating this week is 'Balloons Around The World Day' which is on 1st October. I often only use three or four elements when I play along, but when I saw this week's board I knew exactly what I wanted to create - and ended up using balloons, red, purple, clouds, sun, stripes, twine and paper-piecing!

This is the card I created:


Here's the low-down on today's card:

I grabbed my 'Counting Sheep' and co-ordinating Sheep Dies, both freebies with the current Sale-A-Bration promotion and created a little scene. I used a (retired) stitched square for my scene and layered this onto a striped banner and then a stitched rectangle, to tie in with the stitched detail on the sun. The one thing you may be asking yourself is 'where is the paper-piecing?' It's subtle, but I assure you it's there: I paper-pieced my sheep's wool with the Snowy White Velvet Sheets - it gives the sheep's coat a fun, almost fuzzy felt, feel and you can see it better on the close-up below:


How cute is that?! And all the better for being made with free products too! If you'd like to get your hands on this bundle, you still have a couple of weeks to place your order before the Sale-A-Bration promotion ends. Bear in mind that products are only available whilst stocks last and as we near the end of the promotion, there is a chance that popular items will sell out, so don't leave it too late!

Here is the visual summary of the key products used on today's project for you to pin for easy reference:


You can see all of my 'How To' summaries on my 'How To - Tips and Techniques' Pinterest board in case you've missed any. 

How does our board inspire you? I can’t wait to see what YOU create! For more inspiration, be sure to visit the rest of the  Festive Friday Challenge Design team:

Ann Schach
Beth McCullough
Sharon Hashimoto Burkert
Melanie Hungerford
Helen Jennings
Stephanie Lanzalotto
Melva Peters
Jaydee
Diane Evans
Joanne James

Enjoy your morning and I'll be back later with my project for the new challenge over at As You See It. Until then, happy stampin'!


Stampin' Up! Supplies Used:

Table built using Product Table Builder by The Crafty Owl - Independent Stampin' Up! Demonstrator.

Be Dazzling Stitched Snowflake Slimline Card CCS 437

by Joanne James14. September 2021 13:00

It's Tuesday and time for a new challenge over at CAS Colours & Sketches. This week's challenge is a sketch challenge and Jenny has asked that we create a slimline card, with a rectangular element behind a single focal image:


Feel free to flip or rotate the sketch when making your card. For my card today I created a mini slimline card and took the opportunity to combine with my entry for the current Less Is More challenge for a clean and simple card that is all about the sparkle - take a look:


Here's the low-down on today's card:

Stitched Snowflakes - I recently picked up the new Stitched Snowflakes dies (I blame my blog friend, the lovely LeAnne Pugliese lol!) having been convinced I can never own too many snowflake dies and these ones also have a lovely stitched detail - bonus! I thought a single diecut snowflake would make a great focal point, and used one of the other dies that cuts a swirl of snowflakes into a flat panel for my rectangular element. 

Be Dazzling - The challenge over at Less Is More currently is 'sparkle' so I just had to cut my snowflake out of Be Dazzling sparkly paper - the ultimate in sparkle and free with a purchase of £45 during the current Sale-A-Bration promotion to boot! I also added a sparkly border between my mat white layers - I mean, you can never have too much sparkle, right?! Well, so long as it's balanced with lots of 'white' space to keep that clean and simple feel ;-) If you would like to get your hands on some 'Be Dazzling' paper, you have until the end of this month or whilst supplies last (whichever comes sooner) to grab some: just hop on over to my online store or give me a call to place an order.


Sparkle of a Different Kind - My sentiment comes from the 'Sparkle of the Season' wreath set - it seemed just right to pair with my sparkling snowflake on today's card.

Here is the visual summary of the key products used on today's project for you to pin for easy reference:


You can see all of my 'How To' summaries on my 'How To - Tips and Techniques' Pinterest board in case you've missed any. 

As a reminder, for our colour challenges, you must use all of the stated challenge colours. You may also use neutral colours; however, the challenge colours should be the most noticeable ones featured on your card. We use Stampin' Up! colour names for reference, but you are welcome to use any other companies' products as long as you match the challenge colours as closely as possible.

That's all from me for now; I have lots to do following yesterday's monthly Stampin' Up! class; on the upside, the forecast is rain all day today so at least I won't be tempted to go out into the garden! Enjoy your day and I'll be back tomorrow with another project. Until then, happy stampin'!


Stampin' Up! Supplies Used:

Table built using Product Table Builder by The Crafty Owl - Independent Stampin' Up! Demonstrator.

Delicate Dahlias You Inspire Me Card

by Joanne James16. August 2021 21:00

I'm late with my post today as I held my monthly card class this morning, but I did manage to squeeze in a little crafty time afterwards so today I'm sharing a card that takes it's inspiration from the challenge prompt photo over at Just Add Ink this week:

So much to love about that photo! The colours, flowers and textures ... I decided to pair those with some free Sale-A-Bration product for my card today - take a look at what I came up with:


Here's the low-down on today's card:

Delicate Dahlias - The focal point flower on my card is the outline flower from 'Delicate Dahlias' - a stamp set that can be yours with a purchase of £90 or more during the current Sale-A-Bration promotion. I heat embossed the flower in gold onto some Cajun Craze cardstock, then added tone-on-tone colour with my Stampin' Blends markers. The sentiment on today's card is also from this set.

Blended Colour - Having used Cajun Craze for my flower and (retired) Pretty Peacock for my card base, I brought both colours together by blending them from the outside in on a piece of Very Vanilla cardstock at the centre of my design.


Texture, Texture - I tried to incorporated lots of textural elements from the inspiration photo on my card: the texture from the vase is similar to my dry embossed card base, and the texture from the cushion is on the gold metallic specialty paper beneath my sentiment. I also added other golden elements through my heat embossing, ribbon and gems.

So what do you think? Can you see how the photo inspired my card today? I would love to know what you use to inspire your crafting - do leave me a comment below.

Here is the visual summary of the key products used on today's project for you to pin for easy reference:

 to follow

You can see all of my 'How To' summaries on my 'How To - Tips and Techniques' Pinterest board in case you've missed any. 

Enjoy your evening and I'll be back tomorrow with another project. Until then, happy stampin'!


Stampin' Up! Supplies Used:

Table built using Product Table Builder by The Crafty Owl - Independent Stampin' Up! Demonstrator.
 
This card was the Winner over at Just Add Ink this week!

New Online Exclusives

There are new products available exclusively in the online store from 5 November - check them out here.

Latest Kits!

Stampin Cut and Emboss

The Layered Landscapes Kit and Nature's Paintings Kit are the latest kits in the online store - get yours here!

Shop Online

Access my online shop 24 x 7, 365 days of the year:

Current November hostess code:

9NKXDTTR

Shop Online

Mini Catalogue

BROWSE THE CATALOGUE

'Tis The Season - the new Stampin' Up! Mini Catalogue is here! For more details and to download your copy click here

Scrapbooking

Stampin' Up! has introduced a new range of 12x12" scrapbooking product and kit - the full range is now available to purchase online. To download a copy of the new digital Scrapbooking Catalogue click here.

2024-25 Annual Catalogue

BROWSE THE CATALOGUE

Click on the image to download your copy of the 2024-25 annual catalogue. For a full list of current SU! supplies, go to my online store. If you would like any help or advice, please drop me a line at joanne@thecraftyowl.co.uk or give me a call on 07773 421446 - I'd be happy to help.

Join My Team

It's always a great time to join Stampin’ Up! New team members can get £130 worth of products for only £99 + free business supplies + free shipping + all the fun being a part of Stampin’ Up! Stampin' Up! has something for everyone: join my growing team and benefit from my support to enjoy Stampin' Up! however you choose.

If you're interested, call me for a chat to understand how I can help you realise your goals. Alternatively, if you have already decided to sign up and you just can't wait, please click here for the link to the online form where you can sign up and order your starter kit right away! 

About Me

Hi I'm Joanne and live in Northampton and when I'm not looking after my husband and two beautiful children, am an avid crafter with a passion for all things Stampin' Up!

I must confess that I have never been a big rubber stamper - until I discovered Stampin' Up! that is. I love the fact that I can get such great results with co-ordinating stamps, inks, papers and punches - the possibilities are endless! Join me on my stamping journey as I share the things I love and be inspired to create amazing things yourself!

Follow Me

Monthly Newsletter

Box Builder

Click the button above to use Box Buster to create your custom box design using the Envelope Punch Board!

Kits Collection Now Available!

Stampin Cut and Emboss

The new Kits Collection from Stampin' Up! is now available!

Click here to see the current kits available and order yours online today.

I Design For


Stampin' Up Stuff

This is my personal blog and is not endorsed by Stampin’ Up! I hope you find it a plentiful source of ideas and personal inspiration but please don't copy my designs for contest submission or use for classes, publication or sale without express permission.