It's Sunday and time for this week's new challenge over at The Paper Players! Our amazing leader Nance is the hostess this week and she has a sketch for us to work with:
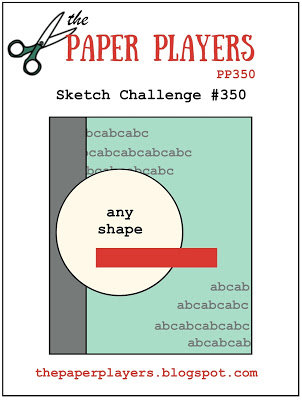
I love a good sketch and this one has lots of creative possibilities. I couldn't resist trying out another technique with my embossing paste, this time adding colour to it and creating a brick wall - take a look:
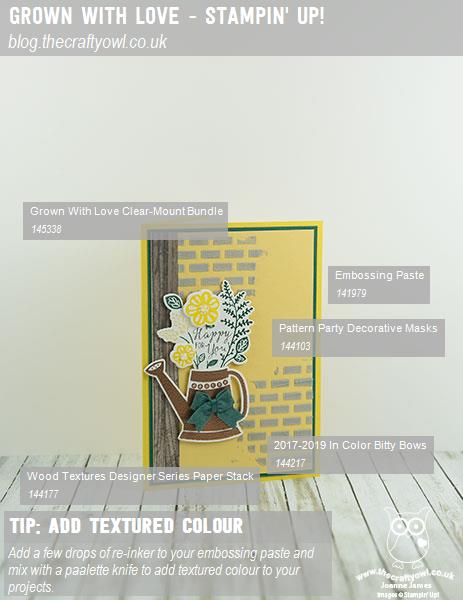
Here's the low-down on today's card:
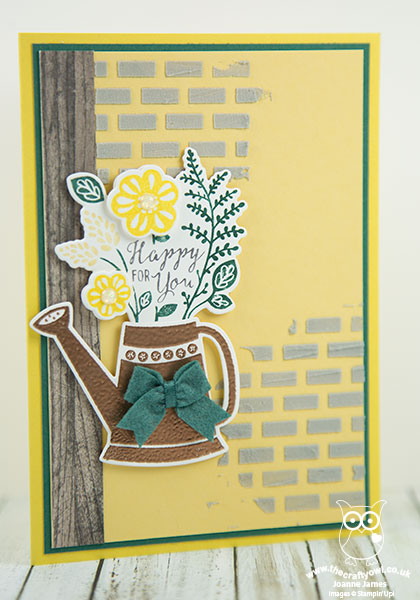
Add Colour To The Texture - I am having fun with my embossing paste and for my card today I decided to add a little Smoky Slate re-inker to my paste before spreading it across my brick Pattern Party Decorative Mask, to create my brickwork background. This paste is so easy to colour - just add a few drops of re-inker and mix with a palette knife and it's good to go.
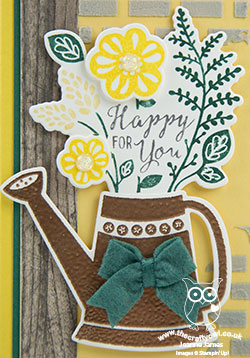
Grown With Love - I was inspired to use the 'Grown With Love' stamp set, with my bright yellow flowers and copper-embossed watering can, by the recent challenge picture over at Just Add Ink. This is challenge is from a couple of weeks ago but the photo stayed with me and I was keen to create something with this source of inspiration and Nance's sketch offered the perfect fit. I've included the picture here so that you can see what I mean:
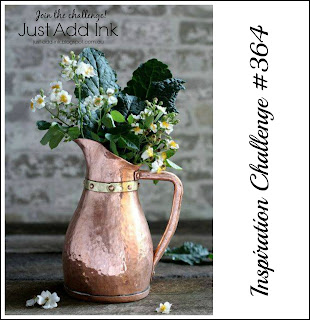
I loved the combination of copper, brick and wood, along with the white and yellow flowers and the dark green foliage - you can see how I've incorporated them on my card. I added a Tranquil Tide In-Color Bitty Bow to my jug in lieu of the horizontal banner on Nance's sketch. Normally I would have used this for a sentiment, however as the sentiment is in the centre of the flowers I thought a bow would make a nice alternative, if less literal, interpretation.
Another Border, Another Wood Texture - As with last week's card, I decided to use another strip of the Wood Textures designer series paper for the border edge, this time in a grey wood to tone in with my bricks. Whilst I love these papers, I wasn't sure how I was going to use them on my projects, so I'm enjoying experimenting with the patterns in small quantities to add texture and pattern to my cards.
Here is the visual summary of the key products used on today's project for you to pin for easy reference:
You can see all of my Product and 'How To' summaries on my 'How To - Tips and Techniques' Pinterest board in case you've missed any.
Before you reach for your ink and papers, check out what our amazing team has created to inspire you this week:
The Paper Players Design Team
If your read our winner's post yesterday, you will also have seen that we have some goodbyes and hellos this weekend too! We are saying goodbye to the lovely
Valentyna and
Crystal who have created some amazing projects this last six months. We are delighted that
Deanne is going to stay with us for another 6 month term and we are excited that she will be joined by the super-talented
Jan Clothier and
Annie Abrahamson - welcome ladies, we are thrilled that you will be joining us at the start of July.
Here's a quick recap of our challenge rules:
1. Create a new paper project
2. Upload your creation to your blog with a link back to us and provide a direct link to the post featuring your challenge submission.
3. Please link your card to no more than four challenges, TOTAL.
4. Have FUN!
I look forward to seeing what you create with our sketch this week. Enjoy the rest of your weekend as it will be over all too quickly; I'll be back soon with another project; until then, happy stampin'!
Stampin' Up! Supplies Used: