Hello Cupcake Simple Sale-A-Bration Birthday Card

by Joanne James31. January 2019 22:25

I've had a busy day so just time to pop in with a quick post to share a simple birthday card that is super quick to make - take a look:

For this week's take on #SimpleStamping I have a CASE (Copy And Share Everything) of one of the samples in the current Sale-A-Bration brochure featuring the Hello Cupcake stamp set - a simple card base with a white panel and a flagged banner (I used the Triple Banner Punch to flag my ends, but you could cut them by hand using scissors), a single stamped image courtesy of the 'Hello Cupcake' stamp set, 3 ink colours and an optional sprinkle of self-adhesive sequins. Really easy to recreate with minimal supplies - just what #SimpleStamping is all about. 

Here is the visual summary of the key products used on today's project for you to pin for easy reference: 


You can see all of my 'How To' summaries on my 'How To - Tips and Techniques' Pinterest board in case you've missed any. 

I'll be back tomorrow with another project. Until then, happy stampin'!


Stampin' Up! Supplies Used:

Table built using Product Table Builder by The Crafty Owl - Independent Stampin' Up! Demonstrator.

Get Your Cake Builder Punch Now Whilst Stocks Last - and the Butterfly Duet Punch Too!

by Joanne James28. January 2019 09:00

Happy Monday everyone! First things first - an apology for the lack of posts last week; for those of you who have tried to access my blog or my website to access the BoxBuster and Envelope Expert tools between Tuesday and Thursday, I had a website outage that impacted both my blog and website and my email, and didn't manage to get it back online until late Thursday afternoon. I know many of you enjoy free access to my tools, and interruptions to service are far from ideal. I have been experiencing issues of one kind or another since I was hacked last October and it is proving incredibly difficult to maintain a consistent online presence. We are working on it and I would ask for your patience and understanding until these issues are fully resolved. If you are reading this and not already following me on Facebook, I urge you to do so here since this is where I will post updates of outages and such like, so you will at least be the first to know when I am back online. Here's hoping for a better week on the IT front!

Back to today's business; a slight change to my blog schedule and I'm sharing a card for a few challenges but that is born out an important business announcement - take a look:


There is a great sketch over at CAS Colours and Sketches that is also perfect to showcase some designer paper for the peeps over at TGIF Challenges. I decided to make a bright and colourful birthday card that also fits with the birthday theme over at SUO Challenges:


Here's the low-down on today's card:

A Piece of Cake - Today's fun cake comes from the 'Piece of Cake' stamp set in the Spring-Summer catalogue; great for birthday cakes and wedding cakes, you can use this set to create a cake for any season or occasion. after all there's always a reason to celebrate! The set also comes with lots of fun sentiment pairs - the reply to the 'cake is the answer ...' that I used on the front of my card is featured on the inside along with my birthday greeting:


How fun is that?! Sure to raise a smile, whatever the celebration.

How Sweet It Is - I coloured my cake with my Stampin' Blends, inspired by the spots and stripes patterns that I chose to highlight in my DSP squares. These patterns are two of my favourites in the bright and fun 'How Sweet It Is' Product Suite, that feature lots of sweets and candy, perfect to indulge your sweet tooth. they also co-ordinate with another of my favourite accessories, the glitter enamel dots from the main catalogue.

Get It While You Can - The Cake Builder Punch (item 148525) and the Butterfly Duet Punch (item 148523) have proved extremely popular since catalogue launch and sales have exceeded forecasts. Although not currently on backorder, stocks of these products are expected to run out within the next two weeks, after which they will no longer be orderable until back in stock. Whilst both punches are carrying over to the next annual catalogue in June, you are advised to get your orders in for these sooner rather than later. I am placing an order this week if you are local to me and would like to save on postage, jut get in touch. Alternatively, place your order directly online.

Here is the visual summary of the key products used on today's project for you to pin for easy reference:


You can see all of my 'How To' summaries on my 'How To - Tips and Techniques' Pinterest board in case you've missed any. 

I like this card so much I made a few using the same design, just switching out the background colours - they are so cheery, i'm definitely a predominantly 'brights' girl at heart!

I have a busy work week this week, so need to get cracking. Enjoy your day and I'll be back tomorrow with another project. Until then, happy stampin'! 


Stampin' Up! Supplies Used:

Table built using Product Table Builder by The Crafty Owl - Independent Stampin' Up! Demonstrator.

By The Bay Clean and Simple Inlaid Frame Card

by Joanne James18. January 2019 09:00

Yay - it's Friday, bring on the weekend! Today I'm sharing a card for the current challenge over at Less is More where I haven't played for a while:

I had a short window for a spot of crafting yesterday and thought I'd whip up another clean and simple card using a couple of new products that fits perfectly with their theme this week - take a look:


Here's the low-down on today's card:

By The Bay - The seagulls paddling on the shoreline that feature on today's card are reminiscent of the ones that featured in the much loved and now retired Wetlands set (anyone else remember that set?) albeit with a little more definition, and they are one of three line-drawn images that feature with three sentiments in 'By The Bay', one of the stamp sets that can be yours free with a purchase of £45 or more during Sale-A-Bration. Perfect for colouring the images are large enough to stand alone but also not so big that they take a long time to colour. I really like this set and you can be sure I will be using it more before the promotion is over. 

Another Way To Frame - To frame my image, I used a new favourite of mine, the Rectangle Stitched Framelits Dies, but this time to cute an aperture frame into my cardfront. I then adhered my watercoloured image behind this. I like the subtle added detail that this gives to a clean and simple card, without adding overt layers. 

Ways With Watercolour - I feel like I've been watercolouring a lot on my cards lately; I don't consider myself to be by any means an expert at watercolouring, but I think that's why I'm enjoying it so much; on watercolour paper, it's easy to build up colour without needing to be too precise in terms of the overall effect. It would take ages if I was to attempt to properly draw and paint the image to achieve omething like this, so I'm grateful that stamps, ink and an aquapainter enable me to produce something this good in a fraction of the time! I used a combination of blues, greys and sandy neutrals to colour my image.

If you like today's clean and simple card, by purchasing the key items used below, you can earn the By The Bay stamp set for free - perfect for creating your own watercoloured masterpieces.

Here is the visual summary of the key products used on today's project for you to pin for easy reference:

You can see all of my 'How To' summaries on my 'How To - Tips and Techniques' Pinterest board in case you've missed any. 

Enjoy your day - I have a monster basket of ironing to wade through but I'm hoping if I focus I might squeeze in a little stamping time before my afternoon school run, so I'm on a mission! I'll be back tomorrow with another project. Until then, happy stampin'!


Stampin' Up! Supplies Used:

Table built using Product Table Builder by The Crafty Owl - Independent Stampin' Up! Demonstrator.

Bella and Friends Clean and Simple Notecards

by Joanne James16. January 2019 21:00

Happy Wednesday everyone! I've decided to write a regular weekly slot dedicated to simple stamping and since today has been a busy one, I thought it was time for one such post! We all like quick and easy projects from time to time, either because you need something last-minute or you need a few of something and just want to run off some multiples. Equally, if you're new to crafting and don't have lots of supplies, simple stamping can be a way to stretch your supplies and focus on basic techniques whilst still producing something with a quality finish. I'll be using the hashtag #SimpleStamping - if you're a user of social media you should search under this hashtag from time to time for lots of papercrafting ideas that are easy to recreate, often using little more than basic supplies and stamps, ink and paper.

For this week's take on #SimpleStamping I have another couple of super simple thank you cards for you that could be whipped up in a jiffy:


I get through lots of thank you cards and sometimes I need to be able to turn out a lot in one go. I love a little colouring with my Blends markers too and sometimes, whilst relaxing, this can take a little while to do a good job. These little puppies are so quick to colour though you can honestly get each card finished in under a minute.  

These cards are also great examples of #SimpleStamping - a pack of notelets, a single stamped image courtesy of the 'Bella and Friends' stamp set in the annual catalogue, some Stampin' Blends and a little time for some colouring and done!

Here is the visual summary of the key products used on today's project for you to pin for easy reference:


You can see all of my 'How To' summaries on my 'How To - Tips and Techniques' Pinterest board in case you've missed any. 

I'll be back tomorrow with another project. Until then, happy stampin'!


Stampin' Up! Supplies Used:

Table built using Product Table Builder by The Crafty Owl - Independent Stampin' Up! Demonstrator.


Framed Happiness Blooms Floral Card

by Joanne James15. January 2019 20:00

Today I'm sharing a card that uses a great sketch from the team over at As You See It and also combines the colour palette over at Inspire.Create this week:


I love the frame of the sketch and considered lots of ways to use it; I may well use this sketch again in a different way but today I just had to highlight one of my favourite suites in the Spring-Summer catalogue - take a look:


Here's the low-down on today's card:

Happiness Blooms - I just love the bright and bold colours and patterns of the Happiness Blooms suite! I chose to feature one of the beautiful designer series papers on my card today that just so happens to feature each and every colour of the Inspire.Create palette - bonus! I honestly could have chosen any of the florals in this pack and been happy with them for my card - I really do love them all, they are so me! 

A Stitched Frame - I used my Rectangle Stitched Framelit Dies to create the piece that frames my patterned paper - I love that they stitch both the inner and outer cut. I even get the leftover stitched rectangle from the centre of my frame to use for another project. I decided to frame in Night of Navy which I think works really well; it highlights the paper withough overwhelming it and really allowing it to shine. 

A Bitty Bloom For A Friend - The Happiness Blooms set is unusual in that it is sentiment-free; so it's easy to pair with either a sentiment element from the Happiness Blooms Memories and More pack or any other set of your choosing. I went with a friendship sentiment from the Incredible Like You stamp set, that I stamped into a 'flower' of sorts and embellished with a sweet little flower made using the new Bitty Bloom punches - so glad we have any set of these super-useful punches to craft with!

Here is the visual summary of the key products used on today's project for you to pin for easy reference:


You can see all of my 'How To' summaries on my 'How To - Tips and Techniques' Pinterest board in case you've missed any. 

Enjoy your evening and I'll be back tomorrow with another project. Until then, happy stampin'!


Stampin' Up! Supplies Used:

Table built using Product Table Builder by The Crafty Owl - Independent Stampin' Up! Demonstrator.

Bee Thankful Simple Stamped Thank You Notelets

by Joanne James5. January 2019 20:00

I've been back in my craft room for a few hours today and yes, it felt good! I have some new makes to share with you this week as a result too. This evening I'm just popping in with a quick post to share a couple of super simple thank you cards that are perfect for the current challenge over at StampInkPaper:

Here's a close up of my card - I did a little basic ombre colouring on the lettering using two shades of the same colour Blend marker:


I made these with the James Juniors over the Christmas period - they make great thank you cards to send for gifts received. I encourage my children to keep up this polite tradition and they are not always that accommodating, however they had fun with this set and whilst they didn't write reams, it's the thought that counts and I'm sure the gesture will be appreciated.

These cards are also great examples of #SimpleStamping - a pack of notelets, a single stamped image courtesy of the 'Bee Thankful' stamp set in the annual catalogue and some Stampin' Blends and a little time for some colouring and done!


Here is the visual summary of the key products used on today's project for you to pin for easy reference:


You can see all of my 'How To' summaries on my 'How To - Tips and Techniques' Pinterest board in case you've missed any. 

I'll be back tomorrow with another project for the first challenge of the year over at The Paper Players - don't miss it! Until then, happy stampin'!


Stampin' Up! Supplies Used:

Table built using Product Table Builder by The Crafty Owl - Independent Stampin' Up! Demonstrator.

Sale-A-Bration 2019 Starts Today And The New Spring-Summer Catalogue Is Here!

by Joanne James3. January 2019 08:00


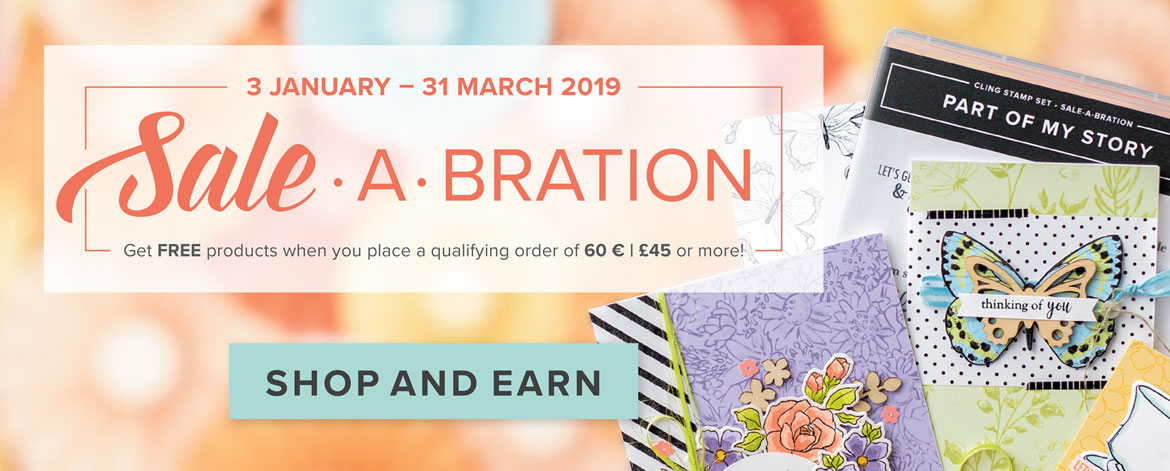
Hello everyone - I'm back! Following a longer than anticipated Christmas break (sometimes, family simply has to come first) the new year brings with it lots of Stampin' Up! goodness: it's time to shake off the January blues, today is THE day - yes, the highlight of the Stampin' Up! calendar, Sale-A-Bration is here! No more sneak peeks - the catalogue is available, the shop is live and from now until 31st March the benefits are yours for the taking. You can click on the catalogue on the right hand side of my blog page or below to access the Sale-A-Bration leaflet to download a copy or click on the icon above or on the right to go directly to my online shop to place an order - we are LIVE!


So what is Sale-A-Bration? For anyone who hasn't come across it before, it's Stampin' Up!'s annual promotion that is loaded with offers whether you shop, join or host:


Earn a free Sale-A-Bration product for every £45 you spend between 3 January and 31 March. There is also the opportunity to earn even bigger rewards with a £90 purchase. It's the perfect time to purchase those products you've had on your wish list and earn more products for free! 


It’s the best time of year to join Stampin’ Up! There are 2 fabulous joining options during this year's Sale-A-Bration promotion: Option 1, you can become a demonstrator for just £99 and choose £71 more of FREE products for your Starter Kit. That's an extra £40 worth of product in your starter kit when compared to the usual £130. Alternatively there is option 2: for £125, you can receive £170 worth of craft items and this exclusive Craft & Carry Tote to carry it all around in too! The tote bag is absolutely fabulous and a must have for all crafters - check it out in this video:


Isn't it just great?! Plus, the whole kit ships for free! There is plenty of choice and flexibility, whether you want to be a hobby demonstrator and just use your discount to enable you to purchase craft supplies more cheaply, or alternatively would like to build a flourishing direct sales business and sell supplies to others - it's entirely up to you. 


Earn an additional £20 in hostess credits when you host a party and have party sales of £200 or more (this also applies to individual orders). So for party sales of £200, that makes a whopping £40 of Stampin' Rewards - more freebies! What's more, you can even apply your Stampin' Rewards to a Starter Kit and become a demonstrator yourself - I would love to welcome you to my team!

If you would like to host a party, real or virtual, please do get in touch; my diary is filling up but there are still lots of slots available and I would love to share these great benefits with you. If you've ever thought about becoming an SU! demonstrator, now is a great time to do so - I would love to have a no-obligation chat with you about joining my team and the benefits.

As if that wasn't enough, today also sees the launch of the new Spring-Summer catalogue - full of gorgeous new products:
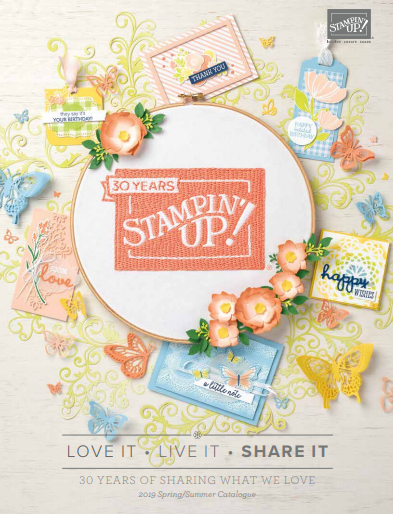
Just click on the image above or in the sidebar on the right to browse the catalogue online, or contact me on 07773 421446 if you would like a paper copy posted out to you and you don't already have a demonstrator. If you are as excited as me and just can't wait, here's the link to my online store - everything is available to purchase from today!

If you would like more information on any of the above, please don't hesitate to get in touch! 

Thanks so much for popping by - it's always nice to share good news! Back soon with lots of projects showcasing products from the new catalogue. Until then, happy shopping!

All Is Bright Quadriptych Christmas Card #AYSI189

by Joanne James28. November 2018 20:00

Today I'm squeezing in a card  for the current challenge over at As You See It where they have this fun sketch to work with:

The layout features a quadriptych: four panels behind the sentiment element. For a lover of designer paper like me, I was spoilt for choice! So I challenged myself to use a pattern that I hadn't before - take a look:


 Here's the low-down on today's card:

Shine On - The All Is Bright designer papers feature lots of photographic prints that whilst beautiful in their own right, I often struggle to use this type of print on cards. I've been using them to make crackers and they look really festive, but thought a combination of colourful tree light bulbs and stars in a repeating pattern would work for today's card.  

A Top 10 Product - I cropped my sentiment with one of the Stitched Ovals from the Stitched Shapes Framelits. This framelit set is one of my most used tools and would definitely feature in my personal Product Top 10. Unfortunately they aren't available today as they are part of the last of the 10% off Online Extravaganza sales and the allocate stock on this popular item ran out yesterday. They should be back in the store tomorrow at their usual price, so my advice would be to pick them up then - they are worth waiting for. 

Making Spirits Bright - I love the sentiment I featured on the front of today's card which comes from the Making Christmas Bright set - these words ring so true for me! Once all the hard work and preparations are done, one of the things I enjoy most about the festive season is spending quality time with friends. I added a twist of Real Red mixed satin ribbon, an All Is Bright star paper clip and a two-tone sentiment on the inside of my card to finish: 

Here is the visual summary of the key products used on today's project for you to pin for easy reference:


You can see all of my 'How To' summaries on my 'How To - Tips and Techniques' Pinterest board in case you've missed any. 

I'll be back tomorrow with another project. Until then, happy stampin'!


Stampin' Up! Supplies Used:

Table built using Product Table Builder by The Crafty Owl - Independent Stampin' Up! Demonstrator.

Sending Christmas Wishes With The Christmas Traditions Punch Box

by Joanne James27. November 2018 16:00


Back today with a card that is inspired by the wintery woodland photo inspiration over at Just Add Ink and this week's CAS(E) This Sketch:


I went with a clean and modern graphic interpretation of the JAI theme - take a look:


Here's the low-down on today's card:

Wintery Woodland Inspiration - Inspiration comes in many ways and forms; I didn't have a suitable Christmas tree stamp to hand, so decided to take a different route and feature these snowy trees from the Santa's workshop Designer Series Paper that I still had out on my desk from making yesterday's card. I love the subtle green diagonal stripe pattern of this paper too, which looks almost textured in appearance. More of a graphical design, yet still inspired by the photo.

Christmas Traditions - Today's sentiment is another from the Christmas Traditions Punch Box that I used yesterday and is featured on pages 2-3 of the Autumn/Winter catalogue: 


This festive-themed tin is choc-full of crafting goodies for creating through the festive season: with a block, two ink spots, set of 6 stamps and a Christmas Traditions Punch, all you need is to add some cardstock and adhesives and you are all set for some festive fun! Perfect for tags, cards and embellishments for your home-baked goodies, this set would make a lovely seasonal gift for a crafter or someone who likes to add a personal touch to their packages during the festive season. I stamped the sentiment with the line of trees to echo my DSP pattern in Versamark and heat-embossed in white embossing powder.

Winter Colour Duo - My card features only two colours today: Garden Green and Whisper White. Garden Green is the major contributor however the white has more than a passing role to play: In addition to the trees,which are echoed in the heat embossed sentiment, its use to mat the DSP and the short banner behind the punched sentiment shape gives definition to those elements, which might otherwise be lost without it. I also added a strip of retired sparkly white ribbon for the vertical element in the sketch - for a little sparkle and texture. 

Here is the visual summary of the key products used on today's project for you to pin for easy reference:


You can see all of my 'How To' summaries on my 'How To - Tips and Techniques' Pinterest board in case you've missed any. 

I hope you like today's card; I have another one featuring another of the stamps in the Christmas Traditions Punch Box in the coming week or so, so be sure to come back and check it out. I have a few more errands before I get back into my painting and decorating - it's a long job! Enjoy your day and I'll be back tomorrow with another project. Until then, happy stampin'!


Stampin' Up! Supplies Used:

Table built using Product Table Builder by The Crafty Owl - Independent Stampin' Up! Demonstrator.

Jolly Holly Christmas Card With The Christmas Traditions Punch Box

by Joanne James26. November 2018 11:10

Another Monday, another week! Hope you all had lovely weekends -  did you spend them shopping for Black Friday deals? I did start my Christmas shopping at last - I'm suddenly feeling under pressure to start ticking things off that particular list. i can't quite believe that one month today will be Boxing Day!! Anyway, let's not dwell on that - today I'm sharing a card using this week's sketch over at Freshly Made Sketches:

The lovely Kim has a great sketch this week, with lots of creative possibilities. I decided my card was going to be all about the holly - take a look:


Here's the low-down on today's card:

A Jolly Holly Christmas - I decided that holly was going to be the theme for my card today and used the square shape to feature a piece of the holly patterned paper from the Santa's Workshop designer series paper and tied my sentiment and holly embellishment (one of the self-adhesive pieces from the Santa's Workshop Memories & More card pack) into my theme. I even carried it over to the inside of my card and added a stamped sprig of holly alongside my sentiment from the super-useful Merry Christmas To All stamp set:

Christmas Traditions - I found the perfect holly-related sentiment for my card in the Christmas Traditions Punch Box that is featured on pages 2-3 of the Autumn/Winter catalogue: 


Just like the Darling Label Punch Box in the annual catalogue (which incidentally has 10% off in the current stamp and kit sale as part of today's Online Extravaganza - order yours here), this festive-themed tin is choc-full of crafting goodies for creating through the festive season: with a block, two ink spots, set of 6 stamps and a Christmas Traditions Punch, all you need is to add some cardstock and adhesives and you are all set for some festive fun! Perfect for tags, cards and embellishments for your home-baked goodies, this set would make a lovely seasonal gift for a crafter or someone who likes to add a personal touch to their packages during the festive season. 

Lots of Layers - I added some texture to my card base with the Subtle Dynamic Textured Impressions Embossing Folder, but otherwise all of the detail and interest on today's card is focused around the square element. In order to really draw the eye to it, I stacked the base behind the holly DSP with 3 layers, made easy with the Layering Square Framelits, using the base colours of the paper and adding a piece of Poppy Parade ribbon for a pop of red - so festive!

Here is the visual summary of the key products used on today's project for you to pin for easy reference:


You can see all of my 'How To' summaries on my 'How To - Tips and Techniques' Pinterest board in case you've missed any. 

I hope you like today's card - tomorrow's card also features the Christmas traditions Punch Box, so be sure to come back and check it out. I have a few more errands before I get back into my painting and decorating - it's a long job! Enjoy your day and I'll be back tomorrow with another project. Until then, happy stampin'!


Stampin' Up! Supplies Used:

Table built using Product Table Builder by The Crafty Owl - Independent Stampin' Up! Demonstrator.

Shop Online

Access my online shop 24 x 7, 365 days of the year:

Current May hostess code:

VDKNV7BH

Shop Online

2024-25 Annual Catalogue

BROWSE THE CATALOGUE

Click on the image to download your copy of the 2024-25 annual catalogue. For a full list of current SU! supplies, go to my online store. If you would like any help or advice, please drop me a line at [email protected] or give me a call on 07773 421446 - I'd be happy to help.

Join My Team

It's always a great time to join Stampin’ Up but during May it's even better! New team members can get £78.25 of new In Color products for FREE! That's in addition to another £130 worth of products of your choice for only £99 + free business supplies + free shipping + all the fun being a part of Stampin’ Up! Stampin' Up! has something for everyone: join my growing team and benefit from my support to enjoy Stampin' Up! however you choose.

If you're interested, call me for a chat to understand how I can help you realise your goals. Alternatively, if you have already decided to sign up and you just can't wait, please click here for the link to the online form where you can sign up and order your starter kit right away! 

Latest Kits!

Stampin Cut and Emboss

The City Sights Kit has all you need to make 8 cards with coordinating envelopes for £20. Along with the new Happy Hollyhocks Kit, a no stamping kit including 9 cards for just £14, both are available from May 1st - get yours here!

New Online Exclusives

There are new products available exclusively in the online store from 5 March - check them out here.

About Me

Hi I'm Joanne and live in Northampton and when I'm not looking after my husband and two beautiful children, am an avid crafter with a passion for all things Stampin' Up!

I must confess that I have never been a big rubber stamper - until I discovered Stampin' Up! that is. I love the fact that I can get such great results with co-ordinating stamps, inks, papers and punches - the possibilities are endless! Join me on my stamping journey as I share the things I love and be inspired to create amazing things yourself!

Follow Me

Monthly Newsletter

Box Builder

Click the button above to use Box Buster to create your custom box design using the Envelope Punch Board!

Kits Collection Now Available!

Stampin Cut and Emboss

The new Kits Collection from Stampin' Up! is now available!

Click here to see the current kits available and order yours online today.

I Design For


Mini Catalogue


The next mini catalogue will be live in September! 

Stampin' Up Stuff

This is my personal blog and is not endorsed by Stampin’ Up! I hope you find it a plentiful source of ideas and personal inspiration but please don't copy my designs for contest submission or use for classes, publication or sale without express permission.