Gorgeous Garden Florals For A New Friend AYSI315

by Joanne James19. January 2024 13:00

Today I'm sharing my design team card for our new challenge over at As you See It where it's time for a bright and colourful colour challenge chosen by the lovely Heather H:


I decided these bold colours called for a bold card so I grabbed my Gorgeous Garden Dies, specifically the floral one, and set to work - take a look at what I came up with:


Here's the low-down on today's card:

Gorgeous Garden Florals - The Gorgeous Garden Dies are a pair of dies found on page 164 of the annual catalogue that can be easily overlooked, since they do not have a co-ordinating stamp set. That said, they are certainly not to be dismissed - they make fabulous cards! I featured the floral die on my card today and having created a tone-on-tone base in Mossy Meadow, I used the three additional colours to add bright pops of colour to the flowers themselves. 

Did someone say FREE? - I have mentioned it previously, but today's post is a great opportunity to remind you that the Gorgeous Garden Dies feature in the current 'Join In With Joanne and Jan' tutorial collection that I have designed in collaboration with my As You See It teamie and good friend Jan Clothier:


This tutorial features 4 main projects with a couple of extras thrown in too featuring a range of techniques and of course the Gorgeous Garden Dies. The projects that feature in the tutorial are exclusive to the tutorial itself and you won't find them on our blogs or anywhere else. How can you get it? Well, if you purchase the Gorgeous Garden Dies from either Jan or myself, then the tutorial with photos and full detailed instructions will be yours FREE - it's as simple as that. 

Celebrating Friends - I finished my card with a diecut sentiment from the 'Love For You' bundle, which seems appropriate since today is 'New Friend Appreciation Day' - isn't there a day for everything these days?! You can see it in more detail below, including the layering detail that I just love: 

I think these dies are an annual catalogue 'hidden gem' - they really are so versatile. I'm linking today's card up with the ladies over at Just Add Ink where their theme this week is 'Just Add ... Florals'.

Here is the visual summary of the key products used on today's project for you to pin for easy reference:
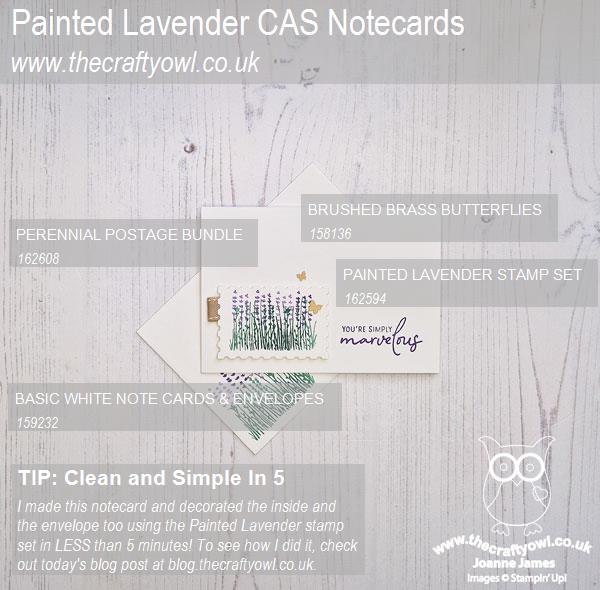
 

You can see all of my 'How To' summaries on my 'How To - Tips and Techniques' Pinterest board in case you've missed any. 

Here's a summary of our challenge rules:

  • Create any card, scrapbooking page, 3D project or packaging project that fits the challenge.
  • Please include the challenge graphic and link back to the challenge in your blog post. Turn off word verification so we can leave you lots of lovely comments. Make sure you link the post not the whole blog to the Linky. Use #AYSIXXX when uploading to a public gallery.
  • If you’re unsure about ‘the rules’, check the details under the Challenge Guidelines tab on the As You See It Challenge homepage.
  • In a colour challenge, black or other neutral can be used in outlines and sentiments but no other colours should be included. Stampin’ Up colours are used for reference but colours that are a close match are welcome.
We look forward to seeing your creations in the AYSI gallery.

Enjoy your day and I'll be back tomorrow with another project. Until then, happy stampin'!


Stampin' Up! Supplies Used:
Table built using Product Table Builder by The Crafty Owl - Independent Stampin' Up! Demonstrator.

Bee Mine I Love You No Matter What AYSI314

by Joanne James5. January 2024 12:00

Happy New Year everyone - the cardmaking has officially begun! Today I'm sharing my design team card for our new challenge over at As you See It where our first challenge for the new year is my favourite, a sketch challenge, designed by our wonderful challenge leader and chief organiser, Heather C:


I love Heather's cascade of hearts - I thought it would be perfect for a cascade of buzzy bees and a showcase of some of the lovely new papers in the new January-April Mini Catalogue - take a look:


 Here's the low-down on today's card:

Bee Mine - Today's card is all about the paper - no surprise there then! The Bee Mine designer series paper has so many beautiful bee-inspired patterns. I chose a rather busy one for my background and added a simple diecut panel that I stamped with some 'bee lines' using one of the stamps in the 'Bee My Valentine' stamp set to create a little space to showcase my cascade of bees.


Snip, Snip - For my bee cascade, i used my paper snips scissors to fussy cut four different bees from another of the sheets in the pack, each with a different expression - they really are so comical! - and popped these up on dimensionals on top of my card base, having already added my sentiment banner too. Here's a close up for you:


Stampin' Up!'s Paper Snips Scissors really do make light work of fussy cutting shapes from paper in this way - the super sharp and pointed tips make it easy to get into even the smallest nooks and crannies. If you don't own a pair, I would highly recommend you invest in some - you won't regret it.

No Matter What - The sentiment from the 'Bee My Valentine' stamp set does have love as its theme, but like many of the greetings in this set they have a much broader use than for Valentine's Day alone. This one is heading to one of the James Juniors - I think it is a great reminder of a parent's unconditional love. 

Here is the visual summary of the key products used on today's project for you to pin for easy reference:


You can see all of my 'How To' summaries on my 'How To - Tips and Techniques' Pinterest board in case you've missed any. 

Here's a summary of our challenge rules:

  • Create any card, scrapbooking page, 3D project or packaging project that fits the challenge.
  • Please include the challenge graphic and link back to the challenge in your blog post. Turn off word verification so we can leave you lots of lovely comments. Make sure you link the post not the whole blog to the Linky. Use #AYSIXXX when uploading to a public gallery.
  • If you’re unsure about ‘the rules’, check the details under the Challenge Guidelines tab on the As You See It Challenge homepage.
  • In a sketch challenge, you are welcome to rotate or flip a sketch. You can replace shapes used such as substituting a circle panel for a square panel. However, we must be able to still see the basis of the original sketch in your finished product.
We look forward to seeing your creations in the AYSI gallery.

Enjoy your day and I'll be back tomorrow with another project. Until then, happy stampin'!


Stampin' Up! Supplies Used:

Table built using Product Table Builder by The Crafty Owl - Independent Stampin' Up! Demonstrator.

Shining Brightly Star Trio AYSI 313

by Joanne James1. December 2023 12:00

Today I'm sharing my design team card for our new challenge over at As you See It where it's time for a speed stamping challenge chosen by Deborah:


The Shining Brightly specialty designer series paper is the only current 'starry' product that I have in my stash, so that was my starting point for today's card. As I rummaged through my stamp sets and other supplies to find things that would co-ordinate, I came across some wooden stars from last year's Christmas Memories & More packs that I had previously coloured gold for another project but not used. The stars were the same design as those on the paper and so my design was born! I remembered the sketch from Sketch Saturday and grabbed a Night of Navy card base and offcut, a circle die, some gold twine, gold foil, Versamark and gold embossing powder and the 'Joy of Noel' stamp set and set my timer for just under 10 minutes. This is my finished card: 


 Here's the low-down on today's card:

I added my DSP to my cardfront, then diecut three circles from the Navy panel, tied it with gold trim and added it to my card with dimensionals and added a wooden star to the centre of each aperture. I then heat-embossed my sentiment and fussy cut it, then added some gold foil behind it and fussy cut that too before adding to my card:


So how long did my card take? I used the full 10 minutes, although most of that time was spent heat embossing and fussy cutting my sentiment and foil shadow. I set my timer for just under 10 minutes so that it would give me a warning time to stop fussy cutting and allow me the last bit to add dimensionals and stick it to my card. I could have added it as a straight label which would have taken much less time, but I really wanted to fussy cut it to make it narrower. So what do you think? What starry creation will you create in 10 minutes or less?

Here is the visual summary of the key products used on today's project for you to pin for easy reference:


You can see all of my 'How To' summaries on my 'How To - Tips and Techniques' Pinterest board in case you've missed any. 

Here's a summary of our challenge rules:

  • Create any card, scrapbooking page, 3D project or packaging project that fits the challenge.
  • Please include the challenge graphic and link back to the challenge in your blog post. Turn off word verification so we can leave you lots of lovely comments. Make sure you link the post not the whole blog to the Linky. Use #AYSIXXX when uploading to a public gallery.
  • If you’re unsure about ‘the rules’, check the details under the Challenge Guidelines tab on the As You See It Challenge homepage.
  • In a speed stamping challenge, please time yourself and say in your post how long your card took to complete. 
We look forward to seeing your creations in the AYSI gallery.

Enjoy your day and I'll be back tomorrow with another project. Until then, happy stampin'!


Stampin' Up! Supplies Used:

Table built using Product Table Builder by The Crafty Owl - Independent Stampin' Up! Demonstrator.

Joy To You Sparkle and Shine Christmas AYSI 312

by Joanne James17. November 2023 12:00

Today I'm sharing my design team card for our new challenge over at As you See It where it's time for a festive theme challenge chosen by me:


Christmas! Yes, with 38 days until the big day, I am in full-on festive card making mode so I thought it would make the perfect for theme for our challenge this week. I created two versions of the same card for this week's challenge - take a look at the first one:


 Here's the low-down on today's card:

Following our vellum challenge here at As You See It a little while ago, I've found myself experimenting more and more with vellum. I had the idea to use a vellum diecut panel to showcase the bold sentiments in the 'Joy To You' stamp set, overlaid onto a super shiny, sparkly background in festive colours, that allowed the background to remain visible. I stamped the largest sentiment and heat-embossed it in gold on a panel cut with the Scalloped Contour Dies, and added this to a base onto which I glued strips of red, green and gold foil and red and gold glimmer paper. I adhered the vellum panel with dimensionals strategically placed behind the widest letters and a trio of gold pearls. Check out the sparkle:


I liked this card so much, I created a second, landscaped version using another of the sentiments in the set, in a silver and blue colourway:


This version uses a slightly smaller sentiment and scalloped die but the principles are them same - and still so sparkly!

I used some retired coloured foils that I had in my stash and paired them with the adhesive-backed gold and silver glimmer paper - did you know that this is available as an online exclusive product? So useful for your festive projects - there is also a three pack of coloured glimmer papers available online. YA design that's great for using up scraps and strips leftover from other projects, you could also make a less traditional version using the pink and green foils that are featured in the current mini catalogue. 

Here is the visual summary of the key products used on today's project for you to pin for easy reference:


You can see all of my 'How To' summaries on my 'How To - Tips and Techniques' Pinterest board in case you've missed any. 

What do think - does this simple design pack a festive punch? Do leave me a comment below - I'd love to hear your thoughts.

Here's a summary of our challenge rules:

  • Create any card, scrapbooking page, 3D project or packaging project that fits the challenge.
  • Please include the challenge graphic and link back to the challenge in your blog post. Turn off word verification so we can leave you lots of lovely comments. Make sure you link the post not the whole blog to the Linky. Use #AYSIXXX when uploading to a public gallery.
  • If you’re unsure about ‘the rules’, check the details under the Challenge Guidelines tab on the As You See It Challenge homepage.
We look forward to seeing your creations in the AYSI gallery.

Enjoy your day and I'll be back tomorrow with another project. Until then, happy stampin'!


Stampin' Up! Supplies Used:

Table built using Product Table Builder by The Crafty Owl - Independent Stampin' Up! Demonstrator.

Deck The Halls With The Joy of Christmas AYSI 311

by Joanne James3. November 2023 12:00

Today I'm sharing my design team card for our new challenge over at As you See It where it's time for a festive recipe challenge chosen by Jane:


So many lovely things to incorporate! I chose Christmas as my holiday and grabbed the sketch over at Atlantic Hearts for my layout (I flipped my sentiment/foliage panels) - take a look:


Here's the low-down on today's card:

I added a split panel of Joy of Christmas designer series paper with a panel of white cardstock embossed with the Merry Melody 3D Embossing Folder, adding a wrap of festive red satin ribbon to join them together. I used a sentiment from the 'Christmas Classics' stamp set featuring the beginning of the Christmas carol of the same name and backed this with the square foliage die from the Christmas Classics bundle cut out of retired platinum foil - it has a matt shine that picks out the subtle grey detailing in the designer paper:

Some diecut greenery and a wooden textural element, along with a red ribbon bow, complete my card. I love the texture and dimension on this card - definitely one for hand delivering rather than posting, but so many interesting elements. 

Here is the visual summary of the key products used on today's project for you to pin for easy reference:


You can see all of my 'How To' summaries on my 'How To - Tips and Techniques' Pinterest board in case you've missed any. 

Here's a summary of our challenge rules:

  • Create any card, scrapbooking page, 3D project or packaging project that fits the challenge.
  • Please include the challenge graphic and link back to the challenge in your blog post. Turn off word verification so we can leave you lots of lovely comments. Make sure you link the post not the whole blog to the Linky. Use #AYSIXXX when uploading to a public gallery.
  • If you’re unsure about ‘the rules’, check the details under the Challenge Guidelines tab on the As You See It Challenge homepage.
We look forward to seeing your creations in the AYSI gallery.

Enjoy your day; we are hoping to attend the annual fireworks display at school this evening, assuming it stops raining and we are spared from the worst of Storm Ciaran - keep your fingers crossed for me! I'll be back tomorrow with another project. Until then, happy stampin'!


Stampin' Up! Supplies Used:

Table built using Product Table Builder by The Crafty Owl - Independent Stampin' Up! Demonstrator.

Christmas Tidings Embossed Vellum Christmas Card AYSI 310

by Joanne James20. October 2023 12:00

Today I'm sharing my design team card for our new challenge over at As you See It where it's time for an interesting 'fill in the blank' challenge from Heather C:


Vellum - so many creative things you can do with it and the Design Team will be sharing lots of them for this challenge. One of my favourite things to do with vellum is ... to dry emboss it! I made a Christmas card using the colours over at 52 Christmas Card Throwdown this week that showcases embossed vellum in all its glory - take a look:


Here's the low-down on today's card:

For my card today, I created a faux bookbinding card. I embossed a whole sheet of vellum using the Christmas Tidings embossing folder and attached it along the edge beneath my binding edge - this is a useful way to avoid visible adhesive, which is something you need to think about when working with vellum. This embossing folder has lots of festive words and images and I chose to highlight the gingerbread man (you can see him near the bind) and add a couple of stamped gingerbread men to my card. I stamped them in Pecan Pie using a long-retired set, 'Scentsational Season', and added bows from 'Cookie Cutter Christmas' (also retired). I've included the link to a current set with a cute gingerbread man in below, in case you don't have one in your collection. You can see mine more closely below - they provide a nice contrast to the fabulous dimension and texture of the embossed vellum:


I added another gingerbread man and a sentiment from 'Joy to You' to the inside of my card too:


You might also notice on the photo above that I embossed the envelope flap too for a co-ordinated look. I love to decorate envelopes in this way - it's super simple and so effective.

Here is the visual summary of the key products used on today's project for you to pin for easy reference:


You can see all of my 'How To' summaries on my 'How To - Tips and Techniques' Pinterest board in case you've missed any. 

Here's a summary of our challenge rules:

  • Create any card, scrapbooking page, 3D project or packaging project that fits the challenge.
  • Please include the challenge graphic and link back to the challenge in your blog post. Turn off word verification so we can leave you lots of lovely comments. Make sure you link the post not the whole blog to the Linky. Use #AYSIXXX when uploading to a public gallery.
  • If you’re unsure about ‘the rules’, check the details under the Challenge Guidelines tab on the As You See It Challenge homepage.
  • In a Fill in the Blank challenge, complete the sentence in the Challenge Banner with the phrase that is true for you and create your project using the words you used. Tell us what you said in your blog or on your site.
We look forward to seeing your creations in the AYSI gallery.

Enjoy your day and I'll be back tomorrow with another project. Until then, happy stampin'!


Stampin' Up! Supplies Used:

Table built using Product Table Builder by The Crafty Owl - Independent Stampin' Up! Demonstrator.

Joy Of Noel Shining Brightly Christmas Card AYSI308

by Joanne James22. September 2023 12:00

Today I'm sharing my design team card for our new challenge over at As you See It where it's time for a sketch challenge chosen by Heather H:


I love a good sketch and since I've been playing with my 'Joy of Noel' set this week putting the finishing touches to projects for next month's 'Create With Joanne & Jan' tutorial set, which I collaborate on with my AYSI teamie Jan Clothier, I thought this sketch lent itself to another Christmas card featuring this versatile bundle - take a look:


Here's the low-down on today's card:

Shining Brightly - Instead of pairing the bundle with the papers in the suite, I decided to use one of the navy and gold patterns in the 'Shining Brightly' Specialty paper pack for the vertical panel. Along with the gold and vanilla patterns in the pack, these papers are truly stunning - and popular! They have been out of stock for a few weeks, but are due back in sometime next week. I will be ordering another pack for sure so if you are also wanting to add these papers to your collection, be sure to let me know so that I can notify you as soon as they come in -  I have a growing list!

Joyous Noel - I just love the sentiments in the 'Joy of Noel' set, especially the NOEL letters. Each one is individual, but since they stamp and diecut in this square pattern, I decided to use them backed with a square of gold foil for my next layer and overlay them with 'Joyous' for the last bit of my sentiment, which I fussy cut by hand. 

Going For Gold - I stamped and heat-embossed the letters in gold onto Night of Navy cardstock before diecutting them, to create a seamless look. This card is quite shiny but you can see the detailing on the stamped image below:

A trio of (retired) gold gems complete my card. This card is actually quite simple to recreate, although I did spend ages procrastinating first time around! I just love the simple elegance - this is most definitely a 'me' card!

Here is the visual summary of the key products used on today's project for you to pin for easy reference:


You can see all of my 'How To' summaries on my 'How To - Tips and Techniques' Pinterest board in case you've missed any. 

Here's a summary of our challenge rules:

  • Create any card, scrapbooking page, 3D project or packaging project that fits the challenge.
  • Please include the challenge graphic and link back to the challenge in your blog post. Turn off word verification so we can leave you lots of lovely comments. Make sure you link the post not the whole blog to the Linky. Use #AYSIXXX when uploading to a public gallery.
  • If you’re unsure about ‘the rules’, check the details under the Challenge Guidelines tab on the As You See It Challenge homepage.
  • In a sketch challenge, you are welcome to rotate or flip a sketch. You can replace shapes used such as substituting a circle panel for a square panel. However, we must be able to still see the basis of the original sketch in your finished product.
We look forward to seeing your creations in the AYSI gallery.

Enjoy your day; I am hoping to get a little extra crafting done this weekend so will hopefully be back tomorrow with another project. Until then, happy stampin'!


Stampin' Up! Supplies Used:

Table built using Product Table Builder by The Crafty Owl - Independent Stampin' Up! Demonstrator.

Crafting With You Times Two AYSI307

by Joanne James8. September 2023 12:00

Today I'm sharing my design team card for our new challenge over at As you See It where it's time for a fun speed challenge chosen by Heather C:


Hobbies - what a fun theme this week and so many options, even when working against the clock! My hobbies include running, playing piano, cross stitch and stamp collecting (the postal kind although my rubber stamp collection is extensive too!) to name but a few, but I'm sure that my choice of crafting for my card today won't surprise you at all!  - Since we are against the clock with no more than 10 minutes at our disposal, quick cards are the order of the day! I ended up making two cards during my crafting session and each came in well within the time limit, so I thought I'd share both since each uses a different approach to saving time! Both cards feature the 'Crafting With You' bundle and the first card I created uses the sketch layout over at SUO Challenges - take a look:


 Here's the low-down on today's card:

Preparation Is Key - The key to a quick card is preparation. You can gather your materials before you start the clock, so knowing exactly what I was going to create I gathered my Bubble Bath card base, offcuts of white and Crumb Cake cardstock, mounted the stamps I was going to use onto blocks and placed them in front of the open ink pads in the correct colours, selected the dies I needed, the necessary tools and gathered together any other supplies such as ribbon and sequins that I had in Bubble Bath in case I wanted to add some final embellishments. Then I pressed start on my stopwatch!

Monochrome Makes Easy - This first card sticks to a simple monochrome pink colour scheme, with just a little grey for the sentiment and outline. This is another good way to save time when you need to make a quick card - keeping colours to a minimum requires much less co-ordination. I stamped and fussy cut the sentiment, stamped the balls of wool and coloured them, then diecut them along with the basket and the stitched frame (I don't know why, but this frame always reminds me of unravelled wool so I thought it would work well with my knitting theme) in one pass through the diecutting machine to save time. I added all of the elements to my card base, then added some tone-on-tone stamped hearts and a trio of self-adhesive sequins to complete my card:


Time taken? Just 6 minutes and 29 seconds!


I even surprised myself at how quickly this came together, especially as one of the biggest time savers - no diecutting - is something I often struggle with. This card just shows though that so long as you are smart about it and at least minimise it or run as much through in one go as possible, you can make it work. I'm also linking this card up over at Less Is More where the current challenge is 'anything goes' - as long as it's clean and simple!

The Ultimate Speed Hack - Having cleaned my stamps and cleared away the debris from my first card, I thought I'd have a go at a second version, this time using the current sketch layout over at Atlantic Hearts Sketch Challenge, for a second card using my favourite speed hack of all: designer series paper! Designer paper is a great way to maximise pattern and detail with minimal time and effort and I knew I had some of this fabulous, albeit retired, Follow Your Art designer series paper in my stash and I have been itching to pair it with the current 'Crafting With You' bundle, so this was the perfect opportunity. This was the card that I created:


Still simple in design: the vertical panel of DSP does much of the work, with a simple banner sentiment that I decorated with a piece of (retired) Calypso Coral ribbon and 4 cotton reels that I diecut using some co-ordinating scraps of cardstock:


This card took slightly longer at 7 minutes and 16 seconds (no photo I'm afraid, I accidentally reset my stopwatch before I could grab a photo so you'll just have to take my word for it!) - whilst those cotton reels were all cut in a single pass, as there are 4 dies in the set, they are small and fiddly to glue. I also had OCD on those banner ends for the cardstock and ribbon, so allowed myself time to get them even. I think this card is my favourite of the two - hence me using it as my ASYI card. I hope you found my tips and tricks useful for creating cards in a hurry - why not make a card celebrating one of your hobbies and join us for our current challenge?

Here is the visual summary of the key products used on today's projects for you to pin for easy reference:


You can see all of my 'How To' summaries on my 'How To - Tips and Techniques' Pinterest board in case you've missed any. 

Here's a summary of our challenge rules:

  • Create any card, scrapbooking page, 3D project or packaging project that fits the challenge.
  • Please include the challenge graphic and link back to the challenge in your blog post. Turn off word verification so we can leave you lots of lovely comments. Make sure you link the post not the whole blog to the Linky. Use #AYSIXXX when uploading to a public gallery.
  • If you’re unsure about ‘the rules’, check the details under the Challenge Guidelines tab on the As You See It Challenge homepage.
  • In a speed stamping challenge, please time yourself and say in your post how long your card took to complete. 
We look forward to seeing your creations in the AYSI gallery.

Enjoy your day. We are expecting another day of glorious sunshine here so I will be making the most of it! I'll be back tomorrow with another project. Until then, happy stampin'!


Stampin' Up! Supplies Used:

Table built using Product Table Builder by The Crafty Owl - Independent Stampin' Up! Demonstrator.


Circle Sayings Beachy Peek A Boo Fancy Fold For AYSI 306

by Joanne James25. August 2023 12:00

Today I'm sharing my design team card for our new challenge over at As you See It where it's time for a seasonal theme challenge chosen by Deborah:


At the beach - wouldn't I like to be there right now? I most definitely would, but instead a card will have to do! I decided to feature sun, sea and sand on today's card which is also a fancy fold - take a look:


 Here's the low-down on today's card:

Circle Sayings - Today's card is a Peek-A-Boo fancy fold: when closed you see one thing in the window, then as you open the card the panel slips aside to reveal a second image or message. The Circles Sayings stamp set is perfect for this style of fancy fold card - it has lots of co-ordinating stamp images and sentiments that can be mixed and matched to create fun combinations. I used the sea and sun image for my first image, along with a fussy-cut partial sentiment attached to the frame and I paired it with the 'warm hello' sentiment, along with shells and sand for the peek-a-boo reveal:


Rays of Light - I wanted to add some additional colour to the front of my card, but without distracting from my seaside image. I decided on some ton-on-tone stamped detail using the Rays of Light stamp set, radiating out from the stamped image and fading into the base. Because I wanted my rays to radiate from the image, they wouldn't reach to the opposite edge of my card, so I added an Azure Afternoon ribbon and bow to balance my design. You can see the detail on the stamped image below, including some snowflake puff paint that I added to the wave foam for some extra dimension:


Peek-A-Boo Fancy Fold - This fold is really not tricky to execute - you just need to ensure the circle aperture is positioned correctly on each layer to ensure they align and that each of the mechanism panels are cut to the correct size. Here's a video that shows the peek-a-boo action:

Isn't that fun?! You can see another example of a card I made with this design here. I'm linking this one up over at The Paper Craft Crew where 'fun folds' is their theme this week.

Here is the visual summary of the key products used on today's project for you to pin for easy reference:


You can see all of my 'How To' summaries on my 'How To - Tips and Techniques' Pinterest board in case you've missed any. 

Here's a summary of our challenge rules:

  • Create any card, scrapbooking page, 3D project or packaging project that fits the challenge.
  • Please include the challenge graphic and link back to the challenge in your blog post. Turn off word verification so we can leave you lots of lovely comments. Make sure you link the post not the whole blog to the Linky. Use #AYSIXXX when uploading to a public gallery.
  • If you’re unsure about ‘the rules’, check the details under the Challenge Guidelines tab on the As You See It Challenge homepage.
We look forward to seeing your creations in the AYSI gallery.

Enjoy your day and I'll be back tomorrow with another project. Until then, happy stampin'!


Stampin' Up! Supplies Used:

Table built using Product Table Builder by The Crafty Owl - Independent Stampin' Up! Demonstrator.

Crushed Curry Cheerful Daisies For AYSI 305

by Joanne James11. August 2023 12:00

Today I'm sharing my design team card for our new challenge over at As you See It where it's time for a recipe challenge chosen by me:


I love yellow, am a big fan of designer paper and make more thank you cards than any other type of card so I created my recipe with these things in mind and can't wait to see what you come up with! I decided to use the sketch over at Try Stamping On Tuesday for my layout and am featuring spots alongside my daisy as my entry for the current theme over at The Flower Challenge - take a look:


Here's the low-down on today's card:

I loved the TSOT layout this week and whilst I didn't go with the slimline option (I've been making a lot of those lately), I think it works as a standard card front too. Since the board contained so many of my favourite things, I thought I would challenge myself to use Crushed Curry as my main yellow; of all the yellows, this is probably the one I use the least and rarely use it outside of autumn/fall. I decided to keep my card monochromatic and use only shades of this colour. I used some of the Inked Botanicals designer series paper that features a spot design for the rear circle shape, then substituted the uppermost circle with a daisy stamped and diecut with the Cheerful Daisies bundle. After inking my flower petals, I used a blending brush on my stamp to remove some of the ink and soften the resulting stamped petals; you can see the contrast to the flower centre, which was stamped at full strength. I then used the same blending brush to add that excess ink to my mat layer behind the daisy, to allow my Very Vanilla leaves to standout from the base:

I stamped my sentiment in Early Espresso as it was less harsh than black and added a trio of (retired) enamel dots to complete my card. So what do you think? Is Crushed Curry a favourite yellow of yours or do you prefer others in the collection? I still prefer Lemon Lolly and Daffodil Delight, but at the same time I love how this card turned out.

Here is the visual summary of the key products used on today's project for you to pin for easy reference:


You can see all of my 'How To' summaries on my 'How To - Tips and Techniques' Pinterest board in case you've missed any. 

Here's a summary of our challenge rules:

  • Create any card, scrapbooking page, 3D project or packaging project that fits the challenge.
  • Please include the challenge graphic and link back to the challenge in your blog post. Turn off word verification so we can leave you lots of lovely comments. Make sure you link the post not the whole blog to the Linky. Use #AYSIXXX when uploading to a public gallery.
  • If you’re unsure about ‘the rules’, check the details under the Challenge Guidelines tab on the As You See It Challenge homepage.
We look forward to seeing your creations in the AYSI gallery.

Enjoy your day; we have birthday celebrations in the James household today so whilst the James Juniors are spending the morning paintballing with friends, I am baking a special birthday cake to enjoy at the celebrations later. I'll be back soon with another project. Until then, happy stampin'!


Stampin' Up! Supplies Used:

Table built using Product Table Builder by The Crafty Owl - Independent Stampin' Up! Demonstrator.

Mini Catalogue

BROWSE THE CATALOGUE

New Year, new products - the new Stampin' Up! Mini Catalogue is here! For more details and to download your copy click here

Shop Online

Access my online shop 24 x 7, 365 days of the year:

Shop Online

Join My Team

It's always a great time to join Stampin’ Up! New team members can get £130 worth of products for only £99 + free business supplies + free shipping + all the fun being a part of Stampin’ Up! Stampin' Up! has something for everyone: join my growing team and benefit from my support to enjoy Stampin' Up! however you choose.

If you're interested, call me for a chat to understand how I can help you realise your goals. Alternatively, if you have already decided to sign up and you just can't wait, please click here for the link to the online form where you can sign up and order your starter kit right away! 

Scrapbooking

Stampin' Up! has introduced a new range of 12x12" scrapbooking product and kit - the full range is now available to purchase online. To download a copy of the new digital Scrapbooking Catalogue click here.

Latest Kits!

Stampin Cut and Emboss

The Birthday Bash Kit is just one of the latest kits in the online store - get yours here!

2024-25 Annual Catalogue

BROWSE THE CATALOGUE

Click on the image to download your copy of the 2024-25 annual catalogue. For a full list of current SU! supplies, go to my online store. If you would like any help or advice, please drop me a line at joanne@thecraftyowl.co.uk or give me a call on 07773 421446 - I'd be happy to help.

New Online Exclusives

There are new products available exclusively in the online store from 1 April - check them out here.

About Me

Hi I'm Joanne and live in Northampton and when I'm not looking after my husband and two beautiful children, am an avid crafter with a passion for all things Stampin' Up!

I must confess that I have never been a big rubber stamper - until I discovered Stampin' Up! that is. I love the fact that I can get such great results with co-ordinating stamps, inks, papers and punches - the possibilities are endless! Join me on my stamping journey as I share the things I love and be inspired to create amazing things yourself!

Follow Me

Monthly Newsletter

Box Builder

Click the button above to use Box Buster to create your custom box design using the Envelope Punch Board!

Kits Collection Now Available!

Stampin Cut and Emboss

The new Kits Collection from Stampin' Up! is now available!

Click here to see the current kits available and order yours online today.

I Design For


Stampin' Up Stuff

This is my personal blog and is not endorsed by Stampin’ Up! I hope you find it a plentiful source of ideas and personal inspiration but please don't copy my designs for contest submission or use for classes, publication or sale without express permission.