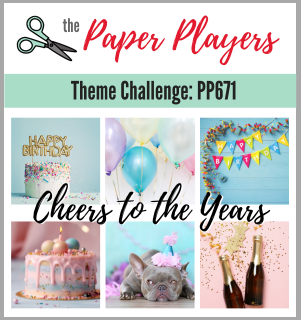
Today it's Sunday and time for this week's new challenge over at The Paper Players! It's our first challenge of 2024 and the fabulous Ann is hosting this week. A new year is a time for celebration and to kick off 2024 Ann has a challenge with celebration of a different kind in mind:

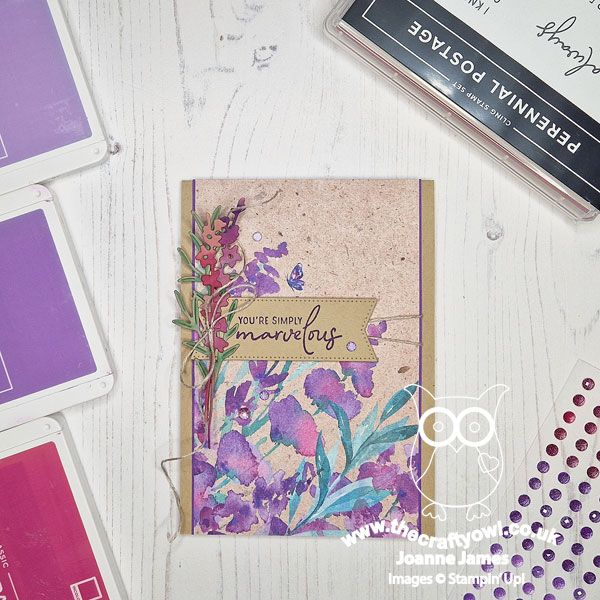
We are celebrating birthdays this week! So many new goodies to play with and so much new product to choose from; I decided to use the sketch layout over at Global Design Project #GDP426 for my card this week as the large central panel is perfect to showcase some lovely new paper - take a look:
Here's the low-down on today's card:
Perennial Lavender - As a lover of all things purple, the Perennial Lavender papers quickly caught my eye. The beautiful watercolour designs in a mix of purples and white on Crumb Cake don't disappoint! I cut one of the sheets into 6 pieces each that fit a cardfront, and trimmed one of them slightly to fit the panel on today's card.
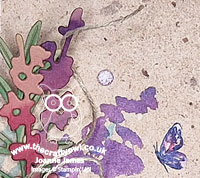
Perennial Postage - My sentiment is from one of the two stamp set bundles in the Perennial Lavender Suite, called 'Perennial Postage'. There isn't a specific happy birthday sentiment, but I think this one works quite well, for birthdays and other occasions. I stamped it onto a banner cut with my favourite Stylish Details Dies and decorated with some diecut lavender stems that I cut from Crumb Cake cardstock and watercoloured with my aquapainter to tie in with the look and feel of the paper - you can see both in more detail below:
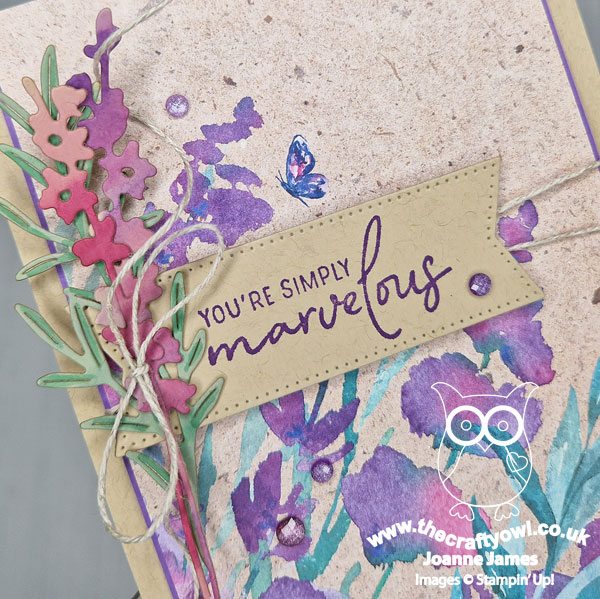
A few sparkly shimmer gems in various shades of purple and some linen thread complete the front of my card.
Inside Detail - I added another sentiment from the same stamp set to the inside of my card to continue the birthday theme and stamped a couple of lavender stems for a little extra decoration:

These papers do have a slightly 'vintage' feel to them which is not my normal 'go to', but they really are so beautiful it would be a shame not to embrace them! I love how this card turned out and I am looking forward to making more projects with them soon.
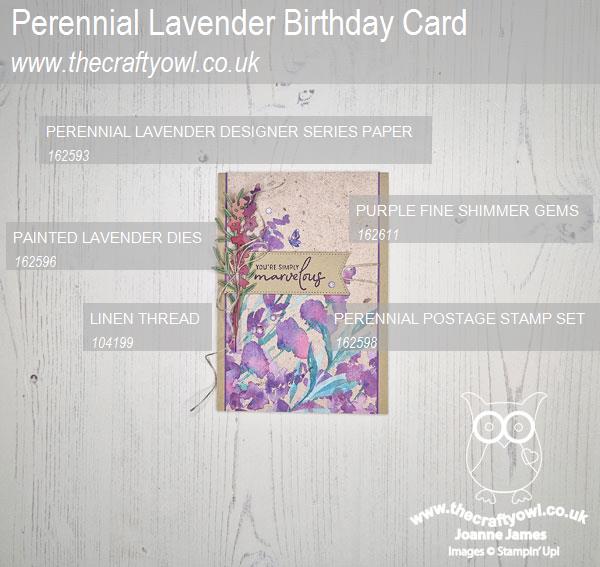
Here is the visual summary of the key products used on today's project for you to pin for easy reference:
You can see all of my Product and 'How To' summaries on my 'How To - Tips and Techniques' Pinterest board in case you've missed any.
Before you reach for your ink and papers, check out what our amazing team has created to inspire you this week:
The Paper Players Design Team
We have our two new guest designers for 2024, Cynthia and Jolanda, on board (waves enthusiastically!) - do pop by and visit their blogs and welcome them to the team.
Here's a quick recap of our challenge rules:
1. Create a new paper project
2. Upload your creation to your blog with a link back to us and provide a direct link to the post featuring your challenge submission.
3. Please link your card to no more than four challenges, TOTAL.
4. Have FUN!
Enjoy your day; I will be making the most of the last couple of days before the youngest of the James Juniors returns to school and I am back to my daily school run commute. Hoping to find a little crafty time so fingers crossed I'll be back tomorrow with another project. Until then, happy stampin'!
Stampin' Up! Supplies Used: