Christmas Scotties Card and Treats FF115

by Joanne James5. August 2022 09:00

Today I have my card for the new challenge over at Festive Friday. 


The challenge that we are celebrating this week is 'International Dog Day' which is on August 26th. Remember the fun thing is that at Festive Friday you do not need to actually celebrate the occasion; your goal is to simply use three or more items from the inspiration list on your project. This week I used dog, treat and texture and actually have a couple of co-ordinating projects for you - take a look:


Here's the low-down on today's projects:

Today's project started with the treat - dog shaped, but the human kind! I found these cute Scottie dog shortbread biscuits at the supermarket and thought they would be perfect packaged in a slim cello bag so that they could be seen in all their glory! 


I added a piece of black cardstock to back them, then closed my treat bag with topper made from the Seasonal Labels Dies folded in half in red gingham paper and finished with a diecut wreath and punched Scottie dog, along with a cute sentiment banner: 


I decided to make a co-ordinating Christmas card to go with my treat, incorporating my 'topper' into the centre of my card design:


I added in additional texture by using the (retired) Checks Embossing Folder to emboss the front panel of my card and left the front sentiment-free:

I'm thinking I might give this card and treat to my post lady in the run up to the festive season as a thank you for her care and attention as she does her daily rounds - I'm sure the irony of my Scottie dog won't be lost on her, although there is no chance of these shortbread biscuits biting back!

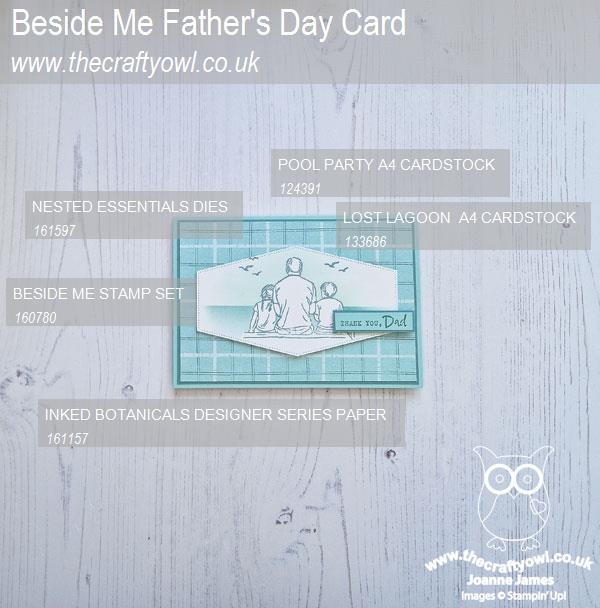
Here is the visual summary of the key products used on today's project for you to pin for easy reference:
 

You can see all of my 'How To' summaries on my 'How To - Tips and Techniques' Pinterest board in case you've missed any. 

How does our board inspire you? I can’t wait to see what YOU create! For more inspiration, be sure to visit the rest of the  Festive Friday Challenge Design team:

Ann Schach
Beth McCullough
Sharon Hashimoto Burkert
Melanie Hungerford
Helen Jennings
Stephanie Lanzalotto
Melva Peters
Jaydee
Diane Evans
Joanne James

Enjoy your day and I'll be back tomorrow with another project. Until then, happy stampin'!


Stampin' Up! Supplies Used:
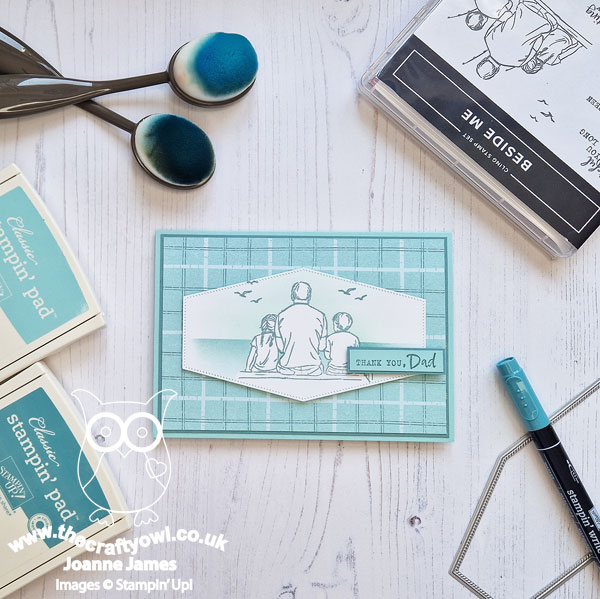
Table built using Product Table Builder by The Crafty Owl - Independent Stampin' Up! Demonstrator.

A Sea Of Thanks With A Fish And A Wish

by Joanne James2. August 2022 13:00

It's Tuesday and time for a new challenge over at CAS Colours & Sketches. Nancy is hosting this month and our first challenge is a colour challenge: 


For my card today I decided to have another go at the nautical challenge over at Addicted to CAS and this time create an uber-CAS card - take a look:


Here's the low-down on today's card:

A few stamped waves, a sentiment and a trio of fish all from the 'A Fish And A Wish' set, with one of the fish popped up on dimensionals with a trio of sparkly bubbles for good measure. I kept things really simple, using a Stampin' Write marker brushed lightly over my fish once I'd stamped them in Highland Heather, to give them a two-tone look:


I like the added detail that highlighting the fish pattern gives and it's a great way to tie them into the sentiment too. Super simple!

Here is the visual summary of the key products used on today's project for you to pin for easy reference:


You can see all of my 'How To' summaries on my 'How To - Tips and Techniques' Pinterest board in case you've missed any. 

As a reminder, for our colour challenges, you must use all of the stated challenge colours. You may also use neutral colours; however, the challenge colours should be the most noticeable ones featured on your card. We use Stampin' Up! color names for reference, but you are welcome to use any other companies' products as long as you match the challenge colours as closely as possible.

A super-quick post from me today - I am a busy, busy bee! Enjoy your day and I'll be back tomorrow with another project. Until then, happy stampin'!


Stampin' Up! Supplies Used:

Table built using Product Table Builder by The Crafty Owl - Independent Stampin' Up! Demonstrator.

Hippest Hippos CAS Snorkelling Shaker Card PP602

by Joanne James31. July 2022 08:00

Today it's Sunday and time for this week's new challenge over at The Paper Players! It's the turn of the fabulous Claire to host this week and she has a fun theme challenge for you to work with:


Claire's board has a distinctly beachy theme this week, so I went across the middle with diecut, blue and patterned paper and yes, you've guessed it - I decided to create another shaker card featuring my favourite Sale-A-Bration stamp set, Hippest Hippos - this time a more clean and simple version than the one I shared with you a few days ago (you can see that card here if you missed it). Time to check out today's card:


Here's the low-down on today's card:

For today's challenge I used up a little more of the (retired) Whale of A Time designer series paper to create an underwater paradise for my snorkelling hippo. This time I cut a partial circle for my frame and used the wave die from the Hippo dies to create the 'surface' of the sea for my hippo to swim along, placing my hippo outside my shaker element rather than inside as on my previous card. Once again I added a pair of handcut customised fins, along with snorkel and mask to my hippo - this time in bright Parakeet Party green:


For this card, my shaker element is a flat 'pocket' shaker - a great way to reduce bulk and a great way to introduce a shaker element to an otherwise clean and simple card. Not forgetting the inside, I used the 'Whale Done' stamp set for some co-ordinated stamping and added a strip of left over designer paper:


Today's hippo's underwater apparel was inspired by my own snorkel, mask and fins which are also bright green in colour - just to make sure Jason doesn't lose me as I'm floating around the Caribbean. I've not done that for a while - happy memories!

Here is the visual summary of the key products used on today's project for you to pin for easy reference:


You can see all of my Product and 'How To' summaries on my 'How To - Tips and Techniques' Pinterest board in case you've missed any. 

I'm also linking today's card up over at Sparkles Monthly Challenges for a second entry into their shaker cards challenge and over at Just Add Ink for another 'Under the Sea' card. Finally I'm linking up over at Addicted to CAS where the theme is 'nautical' - I'm pretty sure I've met that brief, I just hope they think my card is sufficiently clean and simple! 

Before you reach for your ink and papers, check out what our amazing team has created to inspire you this week:

Here's a quick recap of our challenge rules:
 
1.  Create a new paper project
2.  Upload your creation to your blog with a link back to us and provide a direct link to the post featuring your challenge submission.
3.  Please link your card to no more than four challenges, TOTAL.
4.  Have FUN!

Enjoy your day; I'll be back tomorrow with another project. Until then, happy stampin'!


Stampin' Up! Supplies Used: 

Table built using Product Table Builder by The Crafty Owl - Independent Stampin' Up! Demonstrator.

Hippest Hippos Snorkelling Birthday Shaker Card TTT 172

by Joanne James28. July 2022 16:00

It's Thursday and time for a new challenge over at TicTacToe! It's the turn of Team X to host this week and the lovely Betty is our featured designer. This is the fun board that we are playing along with: 


I went right across the middle this week with enamel dots/sequins, free and shaker and - surprise, surprise! - another card featuring my favourite Sale-A-Bration stamp set, Hippest Hippos - take a look:


Here's the low-down on today's card:

I couldn't resist another outing with Hippest Hippos and today's challenge gave me the perfect opportunity to use up some (retired) Whale of A Time designer series paper to create an underwater paradise for my snorkelling hippo. I cut my frame and background out of the same piece of paper, so that my scene extends across the whole of the front of my card. I added my stamped and diecut hippo, complete with snorkel and mask - but there is one thing missing in the Hippo Dies set: everyone knows that to scuba or snorkel effectively, you need fins, right? So I made a pair for my hippo (nothing fancy - cut by hand) - what do you think?

I filled my shaker with a collection of green, silver and clear sequins and beads and added a custom birthday sentiment, courtesy of the 'Amazing Phrasing' and 'Sending Smiles' stamp sets - thank you to the talented Melody Hyde for this great Instagram tip. 

Not forgetting the inside, I used the 'Whale Done' stamp set for some co-ordinated stamping and a fun sentiment:

So what do you think of today's hippo-tastic creation? And using free stamp sets too - yippee!

Here is the visual summary of the key products used on today's project for you to pin for easy reference:


You can see all of my Product and 'How To' summaries on my 'How To - Tips and Techniques' Pinterest board in case you've missed any. 

I'm also linking today's card up over at Sparkles Monthly Challenges where their theme this month is shaker cards and over at Just Add Ink where the theme is 'under the sea'.

A tictactoe board offers so many creative possibilities - how does this week's board inspire you? Why not have a go? We would love to see you in the gallery and who knows - you might be selected for Designer's Choice and be eligible to be a guest designer on a future challenge. 

Enjoy your day; nothing much to report in the James household - all told, a pretty unremarkable week! I'll be back tomorrow with another project. Until then, happy stampin'!


Stampin' Up! Supplies Used: 

Table built using Product Table Builder by The Crafty Owl - Independent Stampin' Up! Demonstrator.
 

Breaking News Graduation Card

by Joanne James28. July 2022 11:00

Today I have an extra quick post to share a card that uses the Sunday Stamps sketch layout that uses a new stamp set called 'Breaking News' from the annual catalogue:

I made for my niece who celebrated her university graduation last week - my monochromatic colour scheme was influenced by the colour of her university gown hood. Here's my card:


Here's the low-down on today's card:

I added a tone-on-tone background using the scroll image to create a custom DSP (a simple way to add interest to a background and also perfect for SUO Challenges who have some great examples of how to create custom DSP too this week - do check them out), then stamped and fussy cut two newspapers with two different sentiment collections. I decided to create a mortar board using some black cardstock, twine and a brad for the additional sketch element:


The sentiment inside is courtesy of Amazing Phrasing - such a great Sale-A-Bration set!


I like this set and think it offers lots of fun options and I love the way you can tailor the newspaper with different stamps and sentiments - I think it will look better in a less monochromatic colour scheme too!

Here is the visual summary of the key products used on today's project for you to pin for easy reference:


You can see all of my 'How To' summaries on my 'How To - Tips and Techniques' Pinterest board in case you've missed any. 

Enjoy your day and I'll be back later with my card for this week's TicTaToe challenge. Until then, happy stampin'!


Stampin' Up! Supplies Used:

Table built using Product Table Builder by The Crafty Owl - Independent Stampin' Up! Demonstrator.
 

Snowflake Specialty Vellum CAS Christmas Card CCS480

by Joanne James26. July 2022 12:00

It's Tuesday and time for a new challenge over at CAS Colours & SketchesThis week's challenge is a sketch challenge and Patricia has asked that we incorporate an angled element overlaid with a sentiment. Feel free to flip or rotate the sketch when making your card.


This is an interesting sketch with so many possibilities for that angled section. For my card today I decided to use it to highlight some new speciality paper and create a clean and simple Christmas card - take a look:


Here's the low-down on today's card:

Snowflake Vellum - I cut a strip of one of the patterns of the new Snowflake Speciality Vellum and tucked it behind the triangle 'v' shape that I cut out of my top white card layer. The vellums in this pack are gorgeous - a variety of snow patterns, some of which are fuzzy white velvet and some of which are silver holographic foil, one of which I used here. They are so pretty - difficult to photograph, but so shiny in real life! I used the remainder of the vellum strip to decorate the flap of my envelope - you can see that on the photo at the bottom of the post.

A Hidden Gem - I love a good word diecut and was disappointed to not find any new ones in the new seasonal catalogue. But wait - there is a hidden gem! In the Santa Express Memories and More card pack, there are two - yes two! - sheets of wooden diecut sentiments - score! These are great for adding dimension and detail to all kinds of projects. They are naturally the colour of whitewashed wood, but I coloured mine silver with a retired silver encore ink pad before adding to my card:


The Santa Express Memories and More pack has some great cards for both both memory keeping and card making, but I have to say I think the pack is worth it for the diecut sentiments alone - such a great way to create an impact!

Sparkle and Shine - I finished my card with a sprinkle of Sparkle and Shine Sequins to highlight my sentiment and bring out the sparkle of the vellum. Not too many - today is clean and simple day, after all! 

Here is the visual summary of the key products used on today's project for you to pin for easy reference:


You can see all of my 'How To' summaries on my 'How To - Tips and Techniques' Pinterest board in case you've missed any. 

Enjoy your day and I'll be back tomorrow with another project. Until then, happy stampin'!


Stampin' Up! Supplies Used:

Table built using Product Table Builder by The Crafty Owl - Independent Stampin' Up! Demonstrator.

Abigail Rose Thank You Card PP601

by Joanne James24. July 2022 08:00

Today it's Sunday and time for this week's new challenge over at The Paper Players! It's the turn of the fabulous LeAnne to host this week and she has my favourite, a sketch challenge for us to work with:


I wasn't sure how to tackle today's sketch initially, but I thought the focal point 'any shape' might lend itself to some fussy cutting, so I decided to reach for some of my designer papers and see where the mood took me! I settled on the lovely browns and neutrals of the Abigail Rose Suite and ended up creating a 'kitchen sink' of a focal point - take a look:


Here's the low-down on today's card:

I decided to use this bold pattern of white florals on a brown scripted background for my base, then fussy cut more of the flowers and used those as the basis for the decoration for my focal point. I used a stitched circle for my base, blending some inks to create an ombre effect and then layering a selection of leafy diecuts in shades of browns, along with some (retired) wooden leaves and sprigs and my trio of fussy cut flowers for decoration. I added a touch more colour to my fussy cut flowers using my Stampin' Blends, to give them a little more definition and added some Elegant Faceted Gems for a touch of sparkle:

I just kept layering and adding in bits and pieces until I felt happy with the way the decoration framed my sentiment (taken from the 'Hand Penned' stamp set) - hence my 'kitchen sink' reference! I decided to make my vertical banner element from vellum, so that it didn't obscure too much of the pattern beneath it. I also added some layered ribbon for detail and texture and to pick up the colour scheme (the Crumb Cake ribbon I used is retired but I've included a link below to a suitable current alternative). 

Very little stamping on today's card and just like my last one another card with lots of bits and pieces, but actually easy to recreate - the paper definitely does the 'heavy lifting' and I love the way the fussy cut flowers tie in with the base below. I'm also linking my card up with the ladies over at TGIF Challenges who are crafting with their favourite things this week - anyone who knows me well can attest to my love of designer series paper - I love it all, any pattern, any size and this card is definitely a showcase of that!

Here is the visual summary of the key products used on today's project for you to pin for easy reference:


You can see all of my Product and 'How To' summaries on my 'How To - Tips and Techniques' Pinterest board in case you've missed any. 

Before you reach for your ink and papers, check out what our amazing team has created to inspire you this week:

Here's a quick recap of our challenge rules:
 
1.  Create a new paper project
2.  Upload your creation to your blog with a link back to us and provide a direct link to the post featuring your challenge submission.
3.  Please link your card to no more than four challenges, TOTAL.
4.  Have FUN!

Enjoy your day; not much going on here 'chez James' this weekend - just enjoying a relaxing weekend in the garden, hopefully with a little crafty time thrown in now things have cooled down a little. I'll be back tomorrow with another project. Until then, happy stampin'!


Stampin' Up! Supplies Used: 

Table built using Product Table Builder by The Crafty Owl - Independent Stampin' Up! Demonstrator.

Texture Chic Memories and More Card FF114

by Joanne James22. July 2022 09:00

Hurrah it's Friday! Today I have my card for the new challenge over at Festive Friday where the challenge that we are celebrating this week is 'International Owl Awareness Day' which is on Friday 5th August.


Remember the fun thing is that at Festive Friday you do not need to actually celebrate the occasion; your goal is to simply use three or more items from the inspiration list on your project. This week I was tempted to go with an owl theme for obvious reasons, but my search for an inspirational quote took me in a completely direction. I ended up using inspirational quote, texture and brown and this is what I came up with:


Here's the low-down on today's card:

Memories and More - The starting point for today's card was the quote on the front of my card. One of the best places to look for inspirational quotes is a Memories and More card pack - and that's where I found this one, in the Texture Chic card pack. I thought these words would make a lovely card for an anniversary, or a much-loved friend to let them know how much they mean to you. I added a stitched edge by running the card through my diecutting machine and then set about incorporating other elements from the Texture Chic Suite into my design.

Texture, Texture - There is an abundance of texture on today's card: the beautiful Texture chic designer paper is used for both a mat layer and for the base layer to my leaves (which I cut out of the middle of the mat layer to be economical!), then there is the stunning distressed gold speciality paper that I used for the top layer 'skeleton' leaves. I decided that my Soft Suede mat was too plain, so picking up the pattern on the quote card, I partially embossed it on opposing corners with one of the (retired) Checks and Dots embossing folders, then applied heat and stick powder and gold Gilded Leafing to these areas and the panel edges to add to tie in with the other gold elements. You do lose some of the definition of the embossing I think, but it does add tons of textural detail:


Some linen thread and Elegant Faceted Gems also add texture to the front of my card.

Seasons of Chic - Having used the Chic Dies to cut the leaves to decorate the front of my card, I used the co-ordinating 'Season of Chic' stamp set for my inside sentiment, along with some extras for decoration:

I rarely make this sort of card, which is quite shabby chic in it's look and feel and contrasts to my usual clean and layered style, but it just sort of evolved and I'm actually quite happy with how it turned out; it's always fun to step out of one's comfort zone once in a while!

Here is the visual summary of the key products used on today's project for you to pin for easy reference:


You can see all of my 'How To' summaries on my 'How To - Tips and Techniques' Pinterest board in case you've missed any. 

How does our board inspire you? I can’t wait to see what YOU create! For more inspiration, be sure to visit the rest of the  Festive Friday Challenge Design team:

Ann Schach
Beth McCullough
Sharon Hashimoto Burkert
Melanie Hungerford
Helen Jennings
Stephanie Lanzalotto
Melva Peters
Jaydee
Diane Evans
Joanne James

Enjoy your day and I'll be back tomorrow with another project. Until then, happy stampin'!


Stampin' Up! Supplies Used:

Table built using Product Table Builder by The Crafty Owl - Independent Stampin' Up! Demonstrator.

Hippest Hippos Cooling Off - WooHoo!

by Joanne James20. July 2022 08:00

Today I'm sharing a card inspired by the colour palette over at Colour Inkspiration that used the Try Stamping On Tuesday sketch layout:

 May be an image of furniture and text that says "COLOUR nSPIRATION SPIRATION CHALLENGES #125 Sweet Sorbet Pacific Point Starry Sky Basic Gray"   

We are hoping for slightly cooler temperatures here in the UK today, but as the weather has been hotting up, I thought it was the perfect time for one of my 'Hippest Hippos' to cool off in the tub - take a look:


Here's the low-down on today's card:

Hippest Hippos - Yes I have another hippo for you - my third this week! This time my hippo is complete with snorkel and mask and ready to dive into his shiny foil bathtub to cool off! I love the cute accessories that come with the Hippo Dies - you really can have your hippo your way! 

Amazing Phrasing - Another sentiment from the 'Amazing Phrasing' stamp set; I didn't stamp the inside of my card as I'm not sure which of the sentiments in the set I'm going to use, as I haven't yet decided who will be the recipient of this card and it can be tailored to suit. This is another Sale-A-Bration stamp set (free with a £90 purchase) that is so versatile and a definite keeper - yay for free product!

Bathtub Blues - I wasn't sure about the combination of Pacific Point and Starry Sky on this colour palette, but as it turns out they were the perfect pairing for a blended background for my cute bathing hippo. I combined both colours with my blending brushes, flicked the surface with my aquapainter and then layered my diecuts on top, including some Pacific Point water splashes, which I brushed with Wink of Stella for a sparkly shine:

This hippo definitely knows how to cool down the fun way! I took a delivery yesterday that came in a large polystyrene box. I promptly filled the empty container with cold water and sat with my feet in it for a much-needed cool down - it was glorious and the perfect way to recycle my packaging too!

Here is the visual summary of the key products used on today's project for you to pin for easy reference:


You can see all of my 'How To' summaries on my 'How To - Tips and Techniques' Pinterest board in case you've missed any. 

Enjoy your day; my niece has her graduation day today so will be thankful for the slightly cooler temperatures as she dons her cap and gown I'm sure. I'll be back tomorrow with another project. Until then, happy stampin'!


Stampin' Up! Supplies Used:

Table built using Product Table Builder by The Crafty Owl - Independent Stampin' Up! Demonstrator.

Hippest Hippos Hey Good Lookin CC479

by Joanne James19. July 2022 12:00

It's Tuesday and time for a new challenge over at CAS Colours & Sketches. Patricia is hosting this month and this week she has another colour challenge for us: 

For my card today I couldn't resist another of those Hippest Hippos. This time I paired this little guy with a fun sentiment from another Sale-A-Bration stamp set that can be yours free with a £90 purchase called 'Amazing Phrasing' - take a look:


Here's the low-down on today's card:

'Amazing Phrasing' is one of those useful stamp sets that you can use to create lots of different sentiment combinations. I thought this hippo looked like he was definitely sweet on someone, so I chose this sentiment and paired it with one on the inside from the 'Hippest Hippos' set:


I went back to a grey hippo today, so with my So Saffron cardbase had to really look at ways to incorporate a little more of the other two colours. In addition to the flower he's holding, I added some pink diecut hearts and stamped part of my sentiment onto Soft Sea Foam and fussy cut it to add in a little more green too:


And that's all there is to it - another clean and simple hip hippo!

Here is the visual summary of the key products used on today's project for you to pin for easy reference:


You can see all of my 'How To' summaries on my 'How To - Tips and Techniques' Pinterest board in case you've missed any. 

As a reminder, for our colour challenges, you must use all of the stated challenge colours. You may also use neutral colours; however, the challenge colours should be the most noticeable ones featured on your card. We use Stampin' Up! color names for reference, but you are welcome to use any other companies' products as long as you match the challenge colours as closely as possible.

Enjoy your day; I got up and crafted early this morning, as my craft room will be like a sauna from mid-morning in this heatwave we are experiencing here in the UK. No complaints here though - I shall be taking it easy and catching up on a good book beneath a fan, probably whilst lying on the stone tiles to keep cool! The weather is supposed to break tomorrow so the temperatures should be easing off a little. Stay safe and enjoy your day wherever you are and I'll be back tomorrow with another hippo project for you. Until then, happy stampin'!


Stampin' Up! Supplies Used:

Table built using Product Table Builder by The Crafty Owl - Independent Stampin' Up! Demonstrator.

New Online Exclusives

There are new products available exclusively in the online store from 5 November - check them out here.

Latest Kits!

Stampin Cut and Emboss

The Layered Landscapes Kit and Nature's Paintings Kit are the latest kits in the online store - get yours here!

Shop Online

Access my online shop 24 x 7, 365 days of the year:

Current November hostess code:

9NKXDTTR

Shop Online

Mini Catalogue

BROWSE THE CATALOGUE

'Tis The Season - the new Stampin' Up! Mini Catalogue is here! For more details and to download your copy click here

Scrapbooking

Stampin' Up! has introduced a new range of 12x12" scrapbooking product and kit - the full range is now available to purchase online. To download a copy of the new digital Scrapbooking Catalogue click here.

2024-25 Annual Catalogue

BROWSE THE CATALOGUE

Click on the image to download your copy of the 2024-25 annual catalogue. For a full list of current SU! supplies, go to my online store. If you would like any help or advice, please drop me a line at joanne@thecraftyowl.co.uk or give me a call on 07773 421446 - I'd be happy to help.

Join My Team

It's always a great time to join Stampin’ Up! New team members can get £130 worth of products for only £99 + free business supplies + free shipping + all the fun being a part of Stampin’ Up! Stampin' Up! has something for everyone: join my growing team and benefit from my support to enjoy Stampin' Up! however you choose.

If you're interested, call me for a chat to understand how I can help you realise your goals. Alternatively, if you have already decided to sign up and you just can't wait, please click here for the link to the online form where you can sign up and order your starter kit right away! 

About Me

Hi I'm Joanne and live in Northampton and when I'm not looking after my husband and two beautiful children, am an avid crafter with a passion for all things Stampin' Up!

I must confess that I have never been a big rubber stamper - until I discovered Stampin' Up! that is. I love the fact that I can get such great results with co-ordinating stamps, inks, papers and punches - the possibilities are endless! Join me on my stamping journey as I share the things I love and be inspired to create amazing things yourself!

Follow Me

Monthly Newsletter

Box Builder

Click the button above to use Box Buster to create your custom box design using the Envelope Punch Board!

Kits Collection Now Available!

Stampin Cut and Emboss

The new Kits Collection from Stampin' Up! is now available!

Click here to see the current kits available and order yours online today.

I Design For


Stampin' Up Stuff

This is my personal blog and is not endorsed by Stampin’ Up! I hope you find it a plentiful source of ideas and personal inspiration but please don't copy my designs for contest submission or use for classes, publication or sale without express permission.