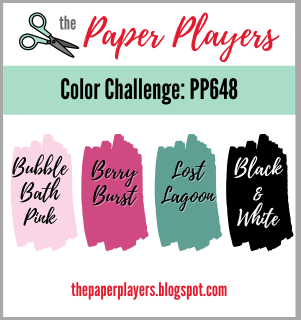
Today it's Sunday and time for this week's new challenge over at The Paper Players! It's the turn of the fabulous Ann to host this week and she has a pretty colour challenge for us to work with:
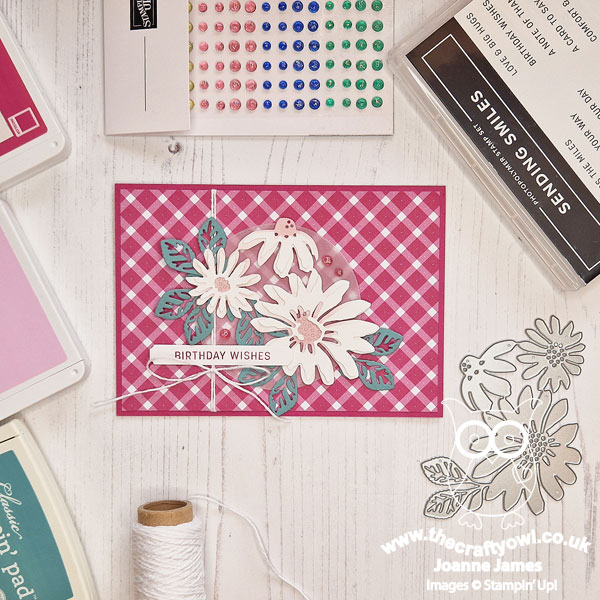
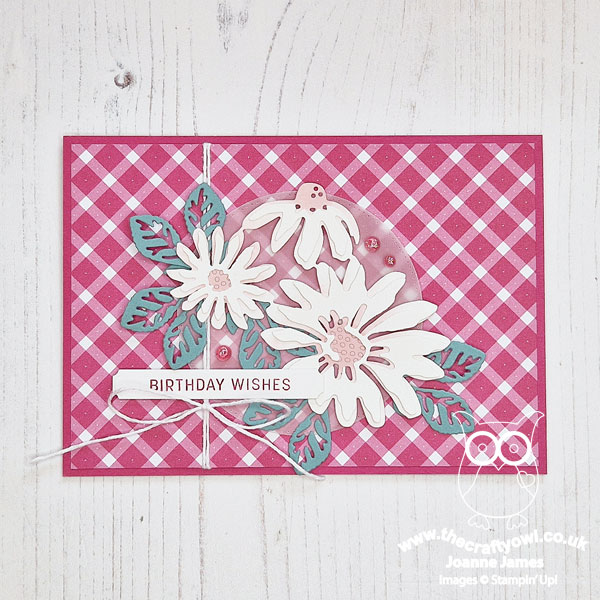
These colours definitely made me think florals so I grabbed my Cheerful Daisies Dies for a pretty birthday card - take a look:
Here's the low-down on today's card:
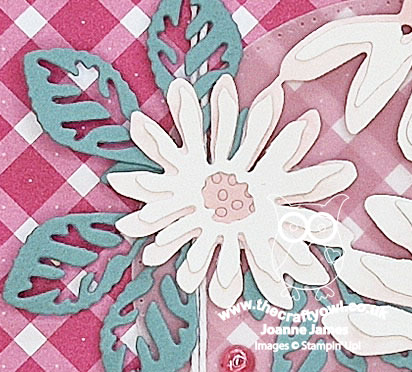
I've seen a few lovely cards online where the daisies have been paired with blue gingham and I thought the Bubble Bath pink and blue/green of Lost Lagoon, along with lots of white, would pair beautifully with some of the Berry Burst Glorious Gingham designer series paper. I used that for my background, then added a vellum diecut circle base for my trio of layered daises. I cut my daisies in white and added some Bubble Bath ink the centres of the bottom layer, along with a hint of ink added with a blending brush to the bottom layer petals, then I cut out lots of the leaves from this die in Lost Lagoon and tucked them in around the base. A white baker's twine bow, a trio of tinsel gems and a simple birthday sentiment from 'Sending Smiles' complete my card:
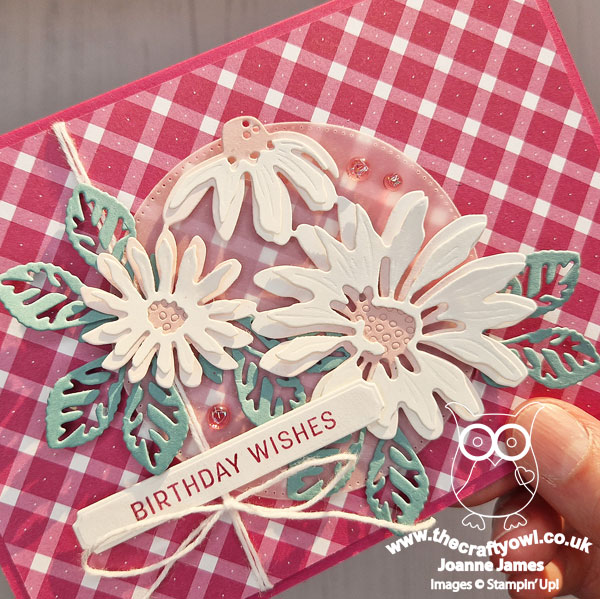
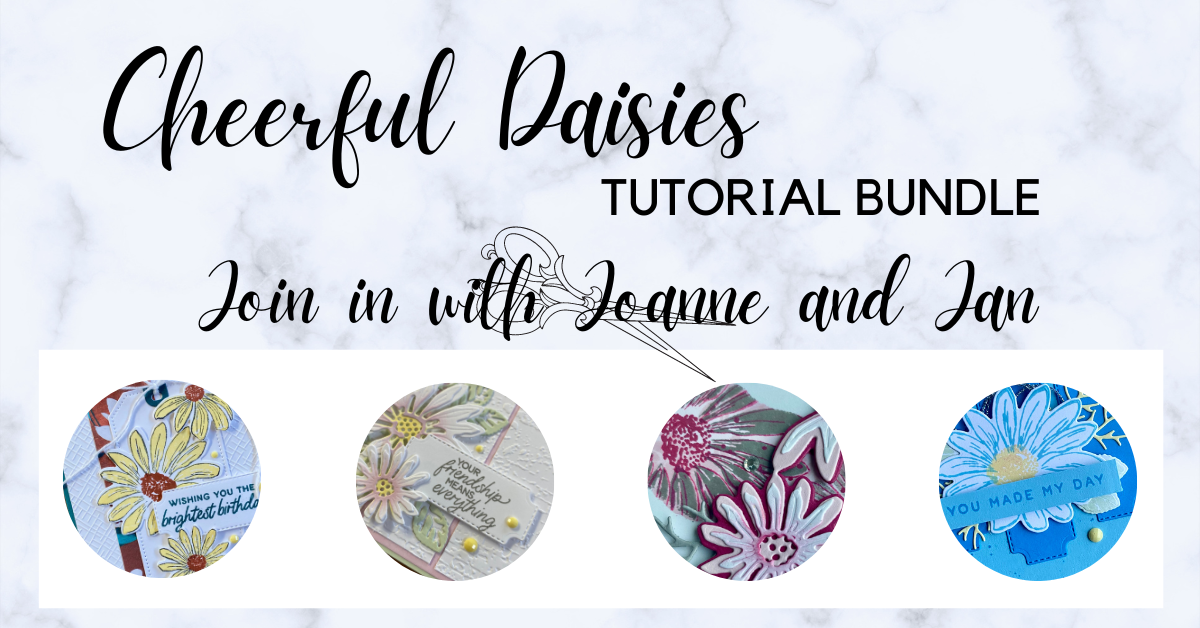
I think the layering of the elements works so well and the predominantly white daisies balance the bold gingham well I think. The Cheerful Daisies bundle is such a great set and this is a perfect time for me to remind you that it is the featured set in my current tutorial bundle with the lovely Jan Clothier - if you place an order with me for the Cheerful Daisies bundle (or if you have it, feel free to substitute with product of equal value) this month, you will receive the tutorial, along with access to our exclusive Facebook group, for free.
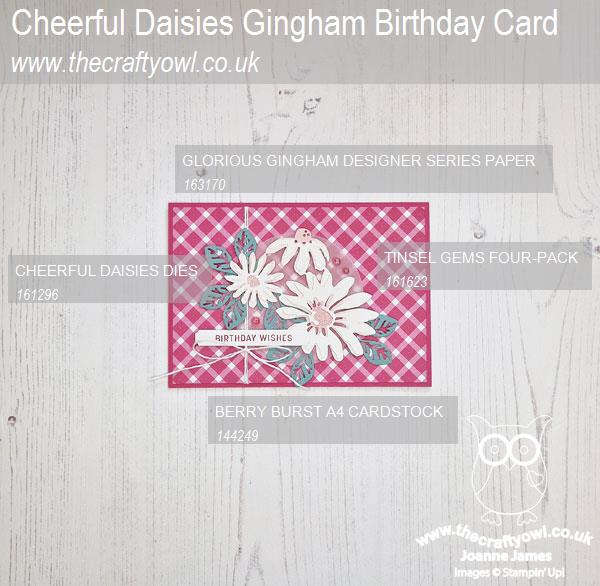
Here is the visual summary of the key products used on today's project for you to pin for easy reference:
You can see all of my Product and 'How To' summaries on my 'How To - Tips and Techniques' Pinterest board in case you've missed any.
Before you reach for your ink and papers, check out what our amazing team has created to inspire you this week:
The Paper Players Design Team
Here's a quick recap of our challenge rules:
1. Create a new paper project
2. Upload your creation to your blog with a link back to us and provide a direct link to the post featuring your challenge submission.
3. Please link your card to no more than four challenges, TOTAL.
4. Have FUN!
Enjoy your day; apologies for my post going live later than intended today. I am away from home and was temporarily without internet, but we are all sorted now so normal service should be resumed from this point forward! I'll be back soon with another project. Until then, happy stampin'!
Stampin' Up! Supplies Used: