More Christmas Goodness - The Christmas Seasonal Supplement Launches Today!

by Joanne James20. October 2014 22:20

DON'T FORGET: 4 DAYS LEFT UNTIL THE FREE PACK OF PAPER FOR 6 MONTHS SIGN UP DEAL ENDS - CLICK HERE TO FIND OUT MORE AND JOIN MY STAMPIN' UP! TEAM TODAY!


I'm back from Convention and will have more news on that tomorrow. Today has been all about catching up with my family, but I wanted to write a quick post to let you know that today Stampin' Up! has launched a new supplement to the Autumn-Winter Seasonal catalogue with a handful of new products that are guaranteed to get you in the mood for the festive season: 

If you click on the above image, it will take you to the full supplement. There are two main great products that I would really like to highlight to you:

The Many Merry Stars Simply Created Kit - everything you need to create 26 stars that can be used as home décor or boxes for festive packaging and the largest of which measures a whopping 38 cm in diameter and would make a lovely alternative to a wreath with the addition of some wide ribbon. Check out the picture below showing just some of what's included, as demonstrated by Pam Morgan at the European Convention in Brussels this past weekend:


There is a also the 'Hello December' Project Life kit - perfect if you like to keep a 'daily December' record during the festive season.

I will be offering classes using both of the above products - I already have a Many merry Stars class scheduled for 24th November so if you'd like to attend call or email me for more details, more details on additional classes to follow - but meanwhile, do take a look at the supplement as all the items contained within it are only available WHILE STOCKS LAST - if you want to get you hands on them, I suggest you hop on over to the online store or give me a call as soon as possible to add your order to the one I'm placing tomorrow.

Back tomorrow with more creativity and fun; until then, happy stampin'!


Table built using Product Table Builder by The Crafty Owl - Independent Stampin' Up! Demonstrator.


Bright and Beautiful, Clean and Simple For The Paper Players

by Joanne James19. October 2014 07:00

DON'T FORGET: 5 DAYS LEFT UNTIL THE FREE PACK OF PAPER FOR 6 MONTHS SIGN UP DEAL ENDS - CLICK HERE TO FIND OUT MORE AND JOIN MY STAMPIN' UP! TEAM TODAY!

As you read this I'll be on my way home from Stampin' Up!'s European Convention and will undoubtedly have some pictures to share later this week, but meanwhile it's time for this week's challenge over at The Paper Players and Sandy has a clean and simple yet glitzy challenge for us this week:

We are using silver or gold on our cards this week - think Encore ink, embossing, sequins, glitter - so many possibilities! I decided to go with silver paired with white, and chose to use the lovely Bright and Beautiful stamp set and co-ordinating star framelits for my clean and simple card:

I used Whisper White as my card base and stamped the sentiment in Versamark and heat embossed it with silver embossing powder. I did the same with the middle-sized star in the set, but cut this out using a framelit and layered it on a second star cut out of Brushed Silver cardstock using dimensionals, having glued the silver star to my card base. I added a sprinkling of Frosted Sequins to finish my clean and simple card. This would be a great card to make a lot of if you wanted to make a dent in your Christmas cards - you could switch the base card colours and even make in gold too to ring the changes and it doesn't take a large volume of supplies.

Hope you like today's card - check out this week's challenge page over at The Paper Players to see what the rest of the Design Team have been up to - there are some amazing cards to see as always. We look forward to seeing what you come up with this week!

Back tomorrow with another project; until then, happy stampin'!


Stampin' Up! Supplies Used:

Table built using Product Table Builder by The Crafty Owl - Independent Stampin' Up! Demonstrator.


Colour Block Sweet Baby Card for Colour Me...!

by Joanne James15. October 2014 09:00

DON'T FORGET: 9 DAYS LEFT UNTIL THE FREE PACK OF PAPER FOR 6 MONTHS SIGN UP DEAL ENDS - CLICK HERE TO FIND OUT MORE AND JOIN MY STAMPIN' UP! TEAM TODAY!


It's Wednesday and time for this week's challenge over at Colour Me...! where we have a subtle colour palette for you to work with this week:

This colour palette presented me with the perfect opportunity for a card using the 'colour blocking' technique that I've had in my head for a while. Take a look at my card and then I'll explain:

Colour blocking is the technique of using large blocks of colour to create a solid background and works really well as a background for silhouette shapes in black or white or where you have one large image that you can reverse-block on top, as I've done here with the babygro onesie. I created my colour block background out of three equal pieces of cardstock in the challenge colours running horizontally across my card. I stamped my sentiment in the darkest colour, Island Indigo, onto the lightest one, Crisp Cantaloupe, and then picked out each of the colours in the embellishments: a Soft Sky button, some Island indigo baker's twine and a trio of Crisp Cantaloupe hearts.

Deceptively easy but rather effective I think and a technique that could work with lots of different colour combinations. So what do you think? Feel free to leave a comment on today's card, before hopping over to check out the amazing cards by the rest of the Colour Me...! team:

And our talented guest designer for October - Jen Mitchell
 
We look forward to seeing your subtle creations. 
 
Back tomorrow with another project; until then, happy stampin'!
 
 
Stampin' Up! Supplies Used:
Table built using Product Table Builder by The Crafty Owl - Independent Stampin' Up! Demonstrator.
 

Wondrous Wreath for a Christmas Door

by Joanne James14. October 2014 08:00

DON'T FORGET: 10 DAYS LEFT UNTIL THE FREE PACK OF PAPER FOR 6 MONTHS SIGN UP DEAL ENDS - CLICK HERE TO FIND OUT MORE AND JOIN MY STAMPIN' UP! TEAM TODAY!

As promised, I have a Christmas card for you today! When I saw the colour palette over at Create with Connie and Mary this week I knew it was time to dust off my Wondrous Wreath set which hasn't seen much action of late and put it to good use:

 Before we get onto today's card, I want to give a big shout out to the lovely ladies over at the Create With Connie and Mary Design Team - I was fortunate to be one of their top picks for my Mingle All The Way snowflake card last week and as always have pinned the winners badge to my Pinterest page with pride (click here if you would like to check my progress against all the challenges I enter!) They are an amazing bunch who often share amazing cards and projects and I highly recommend you check them out. So, on to my card! I thought these colours would be perfect for a Christmas Wreath on a nice Hardwood front door, so this is what I came up with:

I created my panelled door using a base of Baked Brown Sugar and then layered some pieces in the same colour stamped with the Hardwood stamp in Baked Brown Sugar ink, having stamped the edges to add some definition. For my wreath, I decided to stamp the same colour ink onto the cardstock for both my wreath and flowers to give a deeper and more intense finish and added a die cut ribbon and bow to hang it from the door. I finished my flowers with some tiny pearls to add a little interest and contrast. I decided to mount my wreath flat so that my card can be added to my 'post friendly' pile. However I am in something of a quandary; this is one of the few cards I've made with no sentiment on the front because I wanted to be able to see my door, and whilst I really like it, I keep looking at it and wondering if it needs a red and white sentiment banner across the bottom. What do you think? I'm still undecided - feel free to leave a comment below if you think it needs modifying!

Back tomorrow with my Design Team card for Colour Me...! and the new Wednesday Weekly Deals - until then, happy stampin'!


Stampin' Up! Supplies Used:

Table built using Product Table Builder by The Crafty Owl - Independent Stampin' Up! Demonstrator.


Tags: , , , , , , , ,

Cards | Stamping

Happy Hauntings - Boo! Halloween Card

by Joanne James13. October 2014 10:19

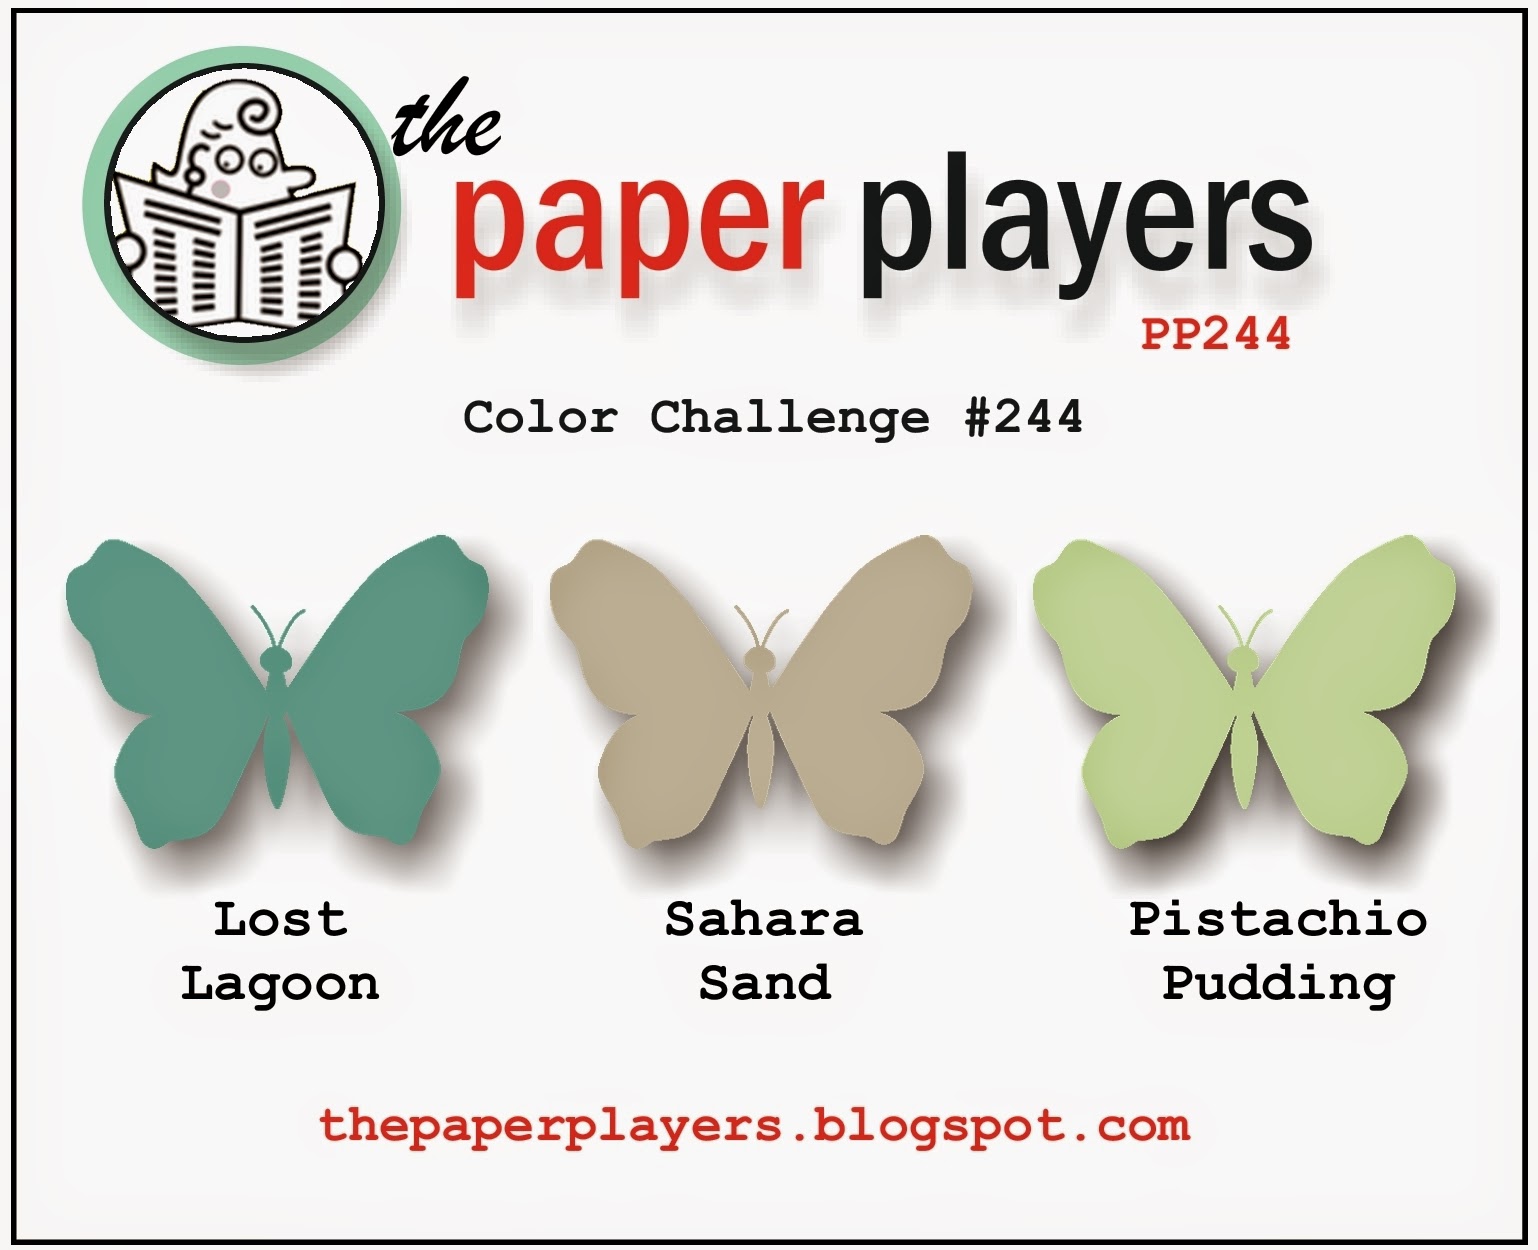
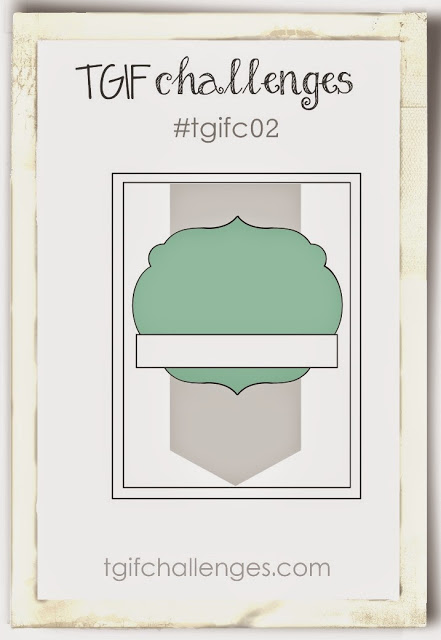
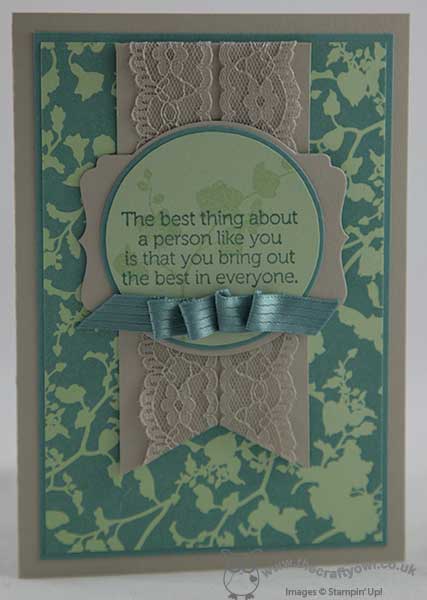
Monday already - where does the time go?! This week promises to be full of fun and excitement, but for today there is lots to be done! I have a Stampin' Up! party to prepare for this evening and I need to put the finishing touches to tomorrow's project class, so a nice early blog post is most definitely the order of the day! As Halloween approaches, lots of the current colour challenges have colour palettes to match - today's card uses this week's colours over at Pals Paper Arts and this week's CAS(E) This Sketch:


There are some great examples on the challenge page where these colours have been used in a non-traditional way, but I decided to stick with the spooky theme and create another Halloween card - take a look:

I used a base of Basic Black cardstock, then used a panel of Tangelo Twist that is narrower than the base and popped up on dimensionals. I used my little letter thinlits to cut the word 'BOO' out of the length of the orange cardstock, then I used my Fun Fall framelits to cut two ghosts out of Very Vanilla and adhered these to the edge of the Tangelo Twist piece, aligning the 'O's to look like the ghost's mouth - they really look like they're floating off the edge of the card. I finished with a stamped sentiment and tied some black and white baker's twine around the Tangelo Twist layer and tied in a bow.

Whilst I used the negative space of the die cut letters for my card, the letters themselves didn't go to waste - I stamped some bats from 'Freaky Friends' onto a Very Vanilla envelope then adhered my 'Boo!' on top to add interest. Waste not, want not, as the saying goes!

I hope you like today's fun spooky card; back tomorrow with something altogether more Christmassy! Until then, happy stampin'!


Stampin' Up! Supplies Used:

Table built using Product Table Builder by The Crafty Owl - Independent Stampin' Up! Demonstrator.


Santa's 'Stache of Cheer Card

by Joanne James12. October 2014 20:32

Good evening lovely blog readers! Now I know it's Sunday and for me that's normally an early post with my Design Team card for The Paper Players, right? Well, those lovely ladies have given me a week off as I'm heading to Brussels for Stampin' Up!'s European Convention later this week and so won't be around to comment on all the lovely cards in the challenge gallery or choose my favourite. This week Ann has a colour challenge for you so why not pop over to The Paper Players challenge blog for some great design team inspiration and to link up your card? If you need a little inspiration from me, check out my card for Sandy's sketch challenge a couple of weeks ago - you can find it here - as by complete coincidence I used this week's challenge colour palette on my card. I'll be back 'with the programme' next Sunday and my blog post will be scheduled to go live before I return home from Brussels, so normal service will resume then.

For those of you that don't already know, Stampin' Up!'s European Convention is an annual event that is exclusive to demonstrators and is a great opportunity to meet other demonstrators, craft, gain business insight and knowledge and be rewarded for achievements in sales and recruitment throughout the year. I will be bringing you more information about the event here on my blog later this week and will be sharing news and excitement via my Facebook Page whilst I'm away too, so if you haven't already 'liked' my page, hop on over and do it today so that you don't miss out on all the latest news, excitement and maybe even a few 'sneak peeks'.

Anyway, onto the crafty stuff! I managed to squeeze in some crafting today so made a card for this week's challenge over at Freshly Made Sketches, which had the following sketch for inspiration:

This is what I decided to do with it:

I decided to use my Santa Stache Santa stamp - gotta love that mustache! - which I coloured with my Blendabilities markers, and combined it with some of the bold striped paper from the Trim The Tree DSP paper stack for the patterned panel.

That's all from me for today; back tomorrow with another project; until then, happy stampin'!


Stampin' Up! Supplies Used:

Table built using Product Table Builder by The Crafty Owl - Independent Stampin' Up! Demonstrator.


Something To Say For Breast Cancer Awareness

by Joanne James11. October 2014 20:20

A quick card from me today; I managed to squeeze in an hour of crafting this afternoon and thought I would have a play with this week's challenge over at Colour Q:

The colours for this week's challenge were chosen in honour of Breast Cancer Awareness Month and there is some great Design Team inspiration, so I thought I would have a little go at creating my own 'think pink' card. Here's my card:

I used a Basic Black card base and top mat and substituted Pretty in Pink with Pink Pirouette for my interim layer and embellishments. I stamped my sentiment from 'Something to Say' in Versamark and heat embossed it in Silver, then added a row of punched hearts and a symbolic pink ribbon (retired, but you could use the new seam binding ribbon in the same colour) to the front of my card. The other half of the sentiment was stamped in black on the inside of the card, along with a pink heart:

A very simple card, but one that would be perfect to reach out to someone suffering from breast cancer and remind them you are there for them - and with breast cancer rates so high, unfortunately, most of us know someone that would be a worthy beneficiary of a card like this.

Back tomorrow with another project; until then, happy stampin'!


Stampin' Up! Supplies Used:

Table built using Product Table Builder by The Crafty Owl - Independent Stampin' Up! Demonstrator.


Tags: , , , , ,

Cards | Stamping

CAS Autumn Leaf Stencilled Card

by Joanne James10. October 2014 08:00

It's Friday - the end of the week already! Today's card uses the offcuts from the card I made earlier in the week for my Colour Me...! design card (you can see that card here). Having cut out the leaf with my Sihouette Cameo, I was left with a perfect outline to make a stencil and since that's the theme over at Addicted to CAS this week, I thought I'd have a go.

Here's my clean and simple card with a real Autumn feel: 

I used a combination of Hello Honey, Crushed Curry, Cherry Cobbler, Cajun Craze, Tangelo Twist and Pumpkin Pie and sponged the colours into the stencil to create my autumn leaf. I stamped on to Naturals Ivory cardstock - this card has some lovely flecks in it and a real natural feel that suited my card. I finished my card simply with a sentiment from Good Greetings stamped in Cajun Craze and some Autumn Wooden Elements that I sponged in Chocolate Chip and tied with some linen thread.

Another clean and simple card - I'm also linking up to this week's challenge over at Less Is More where the theme is the colours of 'Autumn's Bounty'; I think my sponged leaf and acorn embellishment have a definite fall feel.

Back tomorrow with another project; until then, happy stampin'!


Stampin' Up! Supplies Used:

Table built using Product Table Builder by The Crafty Owl - Independent Stampin' Up! Demonstrator.


Tags: , , , , , , , ,

Cards | Stamping

Pool Party Merry Christmas

by Joanne James9. October 2014 08:00

I have another Christmas card to share with you today - the card I promised yesterday is actually scheduled tomorrow (my mistake!) so if you wanted to see that one, you've another day to wait! Back to today's card - this was inspired by the sketch over at CAS(E) This Sketch this week:

I went for a simple one layer card to add to my Christmas pile - here it is:

I stamped the 'Merry' from Seasonally Scattered in Versamark onto a base of Whisper White and heat embossed it in Pool Party embossing powder, which gives it a lovely shine. I then stamped the 'Christmas' from Watercolour Winter Too in Versamark onto a piece of Pool Party cardstock and heat embossed in white, flagged then ends then popped this onto dimensionals and positioned beneath my stamped base. Lastly, I added a few silver sequins to finish.

A super simple card but one that packs a real punch. A quick post from me today, as I have a fun day planned crafting with friends making advent calendars.

Back tomorrow with another card; until then, happy stampin'!


Stampin' Up! Supplies Used:

Table built using Product Table Builder by The Crafty Owl - Independent Stampin' Up! Demonstrator.


Tags: , , , , , , ,

Cards | Stamping

Autumn Leaves And A New Technique for Colour Me..!

by Joanne James8. October 2014 09:00

Here's today's creative post - my Design Team card for this week's challenge over at Colour Me...! where we have the striking colour combination of Cherry Cobbler and Hello Honey to work with this week:


These are great autumnal colours and I like Claire was inspired by this week's photo and those lovely leaves surrounding the bowl. I also used this week's Deconstructed Sketch layout as the basis for my design. So you want to see my card? Here it is:

Another 6" square card - my second this week - and lots of layers, so pay attention!

I decided today's card would be a perfect opportunity to try out a technique that I've seen a lot in blogland recently - the alcohol marker marbling technique, where you colour a piece of plastic with your Stampin' Up! Blendabilities, spritz with alcohol and then lay your glossy cardstock on top. I watched this tutorial on Splitcoast Stampers to get an idea of how to get the effect, although I decided to use gold foil in place of glossy white cardstock as I wanted to really emphasise the richness of the autumnal colours. I cut out my leaf using my Silhouette Cameo, but you could use the Autumn Accents Bigz Die if you have it. In keeping with the challenge, I used the darkest of the Cherry Cobbler Blendabilities and the darkest of my Daffodil Delight Blendabilities (much more like Hello Honey) to create my marbled leaf. Depending on how much alcohol you add, depends on the effect you achieve. I used very little for the leaf that I used on my card as I wanted to colours to remain quite vibrant, but I also made some that were much more subtle. When you are using this technique on gold foil cardstock, you need to be careful that you don't rub the card too much or otherwise some silver from the layer beneath will show through. You can see this in places on my leaf, but I like it that way - I think it just adds more to the finish of the leaf. Here's a 'work in progress' picture that shows the difference in the subtle effect you can achieve:

I tied my leaf with some linen thread then mounted it on a piece of Cherry Cobbler cut out with a Window Frame framelit, and backed this with a square of kraft cardstock. I crossed some Hello Honey cardstock and some textured Cherry Cobbler cardsock (retired) beneath this, along with a little label of Hello Honey that is stamped with my 'give thanks' sentiment in Cherry Cobbler, on top of a mat of kraft cardstock, stamped with the En Francais (retired) background stamp in Baked Brown Sugar ink. Another mat of textured Cherry Cobbler cardstock to finish before the kraft cardstock base.

So what do you think? Feel free to leave a comment on today's card, before hopping over to check out the amazing cards by the rest of the Colour Me...! team:

And our talented guest designer for October - Jen Mitchell
 
We look forward to seeing your striking creations. 
 
Back tomorrow with another project that actually uses the negative space from the leaf I cut out today - pop back if you'd like to see what I did with it! Until then, happy stampin'!
 
Stampin' Up! Supplies Used:
 
Table built using Product Table Builder by The Crafty Owl - Independent Stampin' Up! Demonstrator.


Tags: , , , , , , , , ,

Cards | Stamping

New Online Exclusives

There are new products available exclusively in the online store from 5 November - check them out here.

Latest Kits!

Stampin Cut and Emboss

The Layered Landscapes Kit and Nature's Paintings Kit are the latest kits in the online store - get yours here!

Shop Online

Access my online shop 24 x 7, 365 days of the year:

Current November hostess code:

9NKXDTTR

Shop Online

Mini Catalogue

BROWSE THE CATALOGUE

'Tis The Season - the new Stampin' Up! Mini Catalogue is here! For more details and to download your copy click here

Scrapbooking

Stampin' Up! has introduced a new range of 12x12" scrapbooking product and kit - the full range is now available to purchase online. To download a copy of the new digital Scrapbooking Catalogue click here.

2024-25 Annual Catalogue

BROWSE THE CATALOGUE

Click on the image to download your copy of the 2024-25 annual catalogue. For a full list of current SU! supplies, go to my online store. If you would like any help or advice, please drop me a line at joanne@thecraftyowl.co.uk or give me a call on 07773 421446 - I'd be happy to help.

Join My Team

It's always a great time to join Stampin’ Up! New team members can get £130 worth of products for only £99 + free business supplies + free shipping + all the fun being a part of Stampin’ Up! Stampin' Up! has something for everyone: join my growing team and benefit from my support to enjoy Stampin' Up! however you choose.

If you're interested, call me for a chat to understand how I can help you realise your goals. Alternatively, if you have already decided to sign up and you just can't wait, please click here for the link to the online form where you can sign up and order your starter kit right away! 

About Me

Hi I'm Joanne and live in Northampton and when I'm not looking after my husband and two beautiful children, am an avid crafter with a passion for all things Stampin' Up!

I must confess that I have never been a big rubber stamper - until I discovered Stampin' Up! that is. I love the fact that I can get such great results with co-ordinating stamps, inks, papers and punches - the possibilities are endless! Join me on my stamping journey as I share the things I love and be inspired to create amazing things yourself!

Follow Me

Monthly Newsletter

Box Builder

Click the button above to use Box Buster to create your custom box design using the Envelope Punch Board!

Kits Collection Now Available!

Stampin Cut and Emboss

The new Kits Collection from Stampin' Up! is now available!

Click here to see the current kits available and order yours online today.

I Design For


Stampin' Up Stuff

This is my personal blog and is not endorsed by Stampin’ Up! I hope you find it a plentiful source of ideas and personal inspiration but please don't copy my designs for contest submission or use for classes, publication or sale without express permission.