Tree Lot Dies Summer Caravan Adventures PP599

by Joanne James10. July 2022 08:00

Today it's Sunday and time for this week's new challenge over at The Paper Players! It's the turn of the fabulous LeAnne to host this week and she has a bright and fresh colour challenge for us to work with:


I haven't had much time to play beyond my design commitments lately, but can never resist a good sketch so I decided to combine this week's trio of colours with the fabulous sketch over at Just Add Ink this week (hello ladies!). I resisted the urge to go floral and inspired by the glorious weather we are having in the UK at the moment cast my mind back to memories of childhood holidays and created a summery card with some new (free!) dies - take a look:


Here's the low-down on today's card:

Tree Lot Dies - Both the caravan and the trees on today's card were cut using the Tree Lot Dies - one of a number of products that can be yours FREE during the current Sale-A-Bration promotion. Designed to co-ordinate with the 'Trees For Sale' stamp set in the new July-December mini catalogue, a number of the dies work well on their own too - and not just for Christmas cards either. The Tree Lot Dies can be yours free with an order of £90 or more - why not buy the co-ordinating stamp set as a starting point?

Get Creative With Colour - LeAnne's colour palette this week is an interesting one; the inclusion of white alongside two colours might at first glance seem limiting, but the are lots of ways to get creative with these colours and create interest. I used a piece of Tahitian Tide in-colour designer paper as my base - this gives both pattern and shades of colour. I also used some in-colour ombre glimmer paper for the flags on my caravan and used a neat trick to create two shades of Parakeet Party for my trees: I cut both layers of my tree from parakeet Party cardstock, then coloured each base tree all over with my dark Parakeet Party Stampin' Blends marker. This gave this piece a darker finish and allowed contrast with the detailed top layer.

Texture Tricks - In addition to variation in colour, I used texture to add interest to my card design: the caravan die has lots of embossed detailing, I layered my trees, I added some subtle blended background colour to my banner before I built my scene (I used a retired Stitched Nested Label Die for the banner itself), added some stitched diecut clouds courtesy of the Give It A Whirl Dies, the glimmer paper pennant banner, a baker's twine bow and lastly a heat-embossed sentiment, from the 'Let's Set Sail' stamp set - you can see these details more closely below:

I actually wanted a sentiment from the retired 'Glamper Greetings' set that said 'Home is where you park it' but I couldn't find my stamp set anywhere in the chaos that is my craft room - it is long overdue a thorough clean-out! 'Adventure Awaits' didn't quite suite the sketch as well, but was still an appropriate sentiment for my card, which is headed to a previous team member of mine who in a few month's time is about to embrace retirement and depart on a belated gap-year in her motor home - I'm sure many adventures await her on her travels.

So what do you think? I love this fresh colour combination - do leave me a comment below with your thoughts, I'd love you to share your views.

Here is the visual summary of the key products used on today's project for you to pin for easy reference:


You can see all of my Product and 'How To' summaries on my 'How To - Tips and Techniques' Pinterest board in case you've missed any. 

Before you reach for your ink and papers, check out what our amazing team has created to inspire you this week:

Here's a quick recap of our challenge rules:
 
1.  Create a new paper project
2.  Upload your creation to your blog with a link back to us and provide a direct link to the post featuring your challenge submission.
3.  Please link your card to no more than four challenges, TOTAL.
4.  Have FUN!

Enjoy your day; I am still playing catch up, but will definitely be taking some time out this afternoon to watch the men's singles final at Wimbledon; it should be a great match and I've definitely earned it - I might even treat myself to a Pimms too; well, it would be rude not to!! I'll be back soon with another project. Until then, happy stampin'!


Stampin' Up! Supplies Used: 

Table built using Product Table Builder by The Crafty Owl - Independent Stampin' Up! Demonstrator.

Snowflake Wishes Hexagonal Shaker Box and Matching Christmas Card PP520

by Joanne James6. December 2020 09:00

Today it's Sunday and time for this week's new challenge over at The Paper Players! It's my turn to host this week and I have a timely theme challenge for you to work with:
 

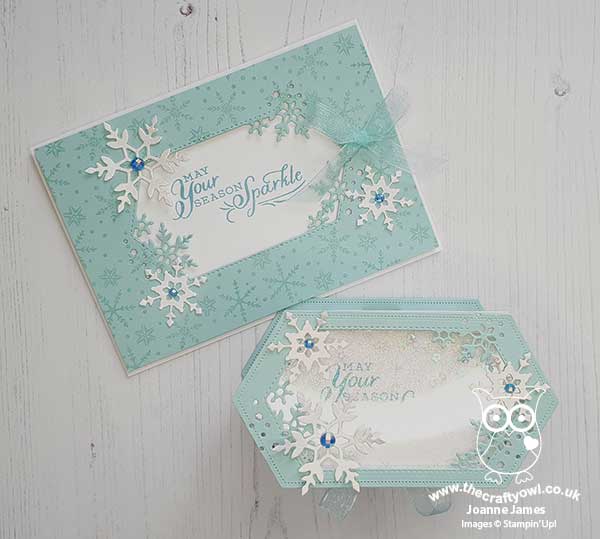
19 days to go and yes - it's beginning to feel a lot like Christmas, so that is my theme this week! You can share your gifts, cards, packaging - we would love to see your festive makes! I love to make co-ordinating cards and gift packaging at this time of year so I have one such set to share with you today. My post is photo-heavy as I'm going to share both a Christmas card and a rather fancy matching gift box using products from the Snowflake Splendor Suite. I even have a video tutorial for you!

First up - here's my Christmas card, with the hexagonal aperture cut using the So Many Snowflake dies:
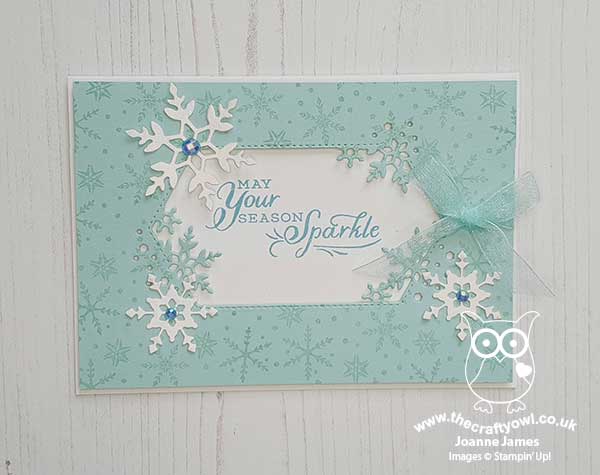
 

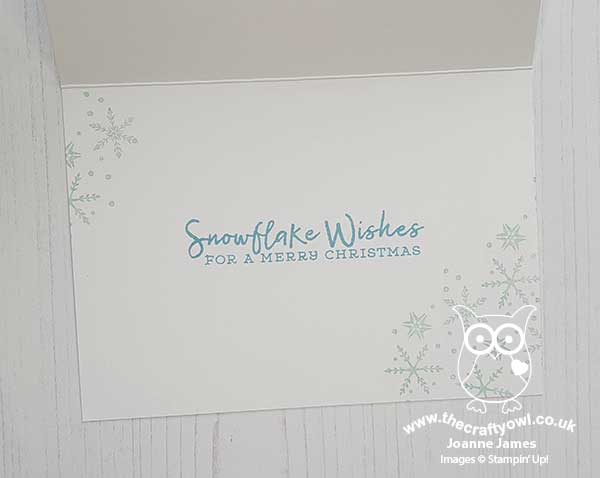
I added some diecut snowflakes painted with Frosted White shimmer paint and finished with those pretty Balmy Blue adhesive-backed gems and a pretty Pool Party sheer ribbon bow, with a simple sentiment and snowflake decoration on the inside of my card:
 

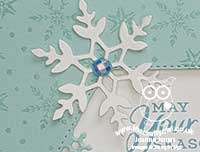
 Check out the effect of those faceted gems - so sparkly!
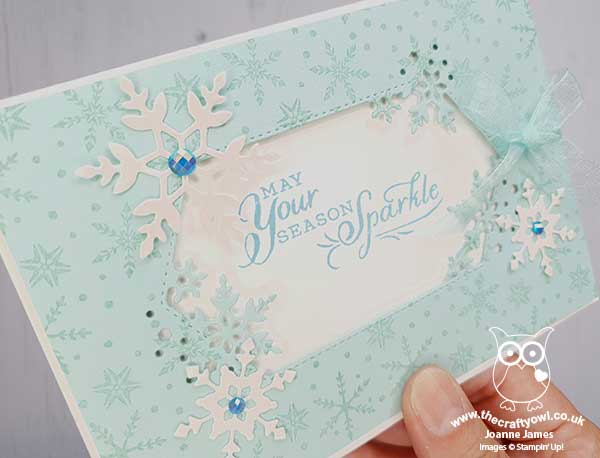
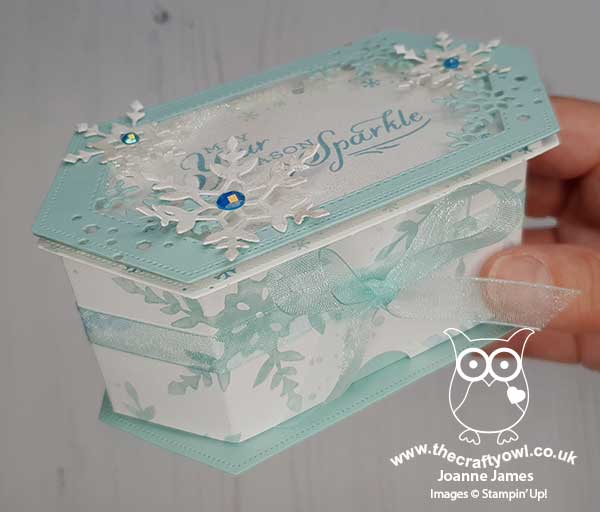
This card was a variation on one I made in my monthly card class featuring the Snowflake Wishes bundle a few months ago. I liked the card so much, I decided to make a matching box, using the same hexagonal aperture and the Stitched Nested Label Dies from the annual catalogue. I made a simple birthday gift box using these dies previously (you can see that box here if you missed it) and have been wanting to make a video tutorial to show how it was done, so this seemed like the perfect opportunity. Here is my finished box closed:
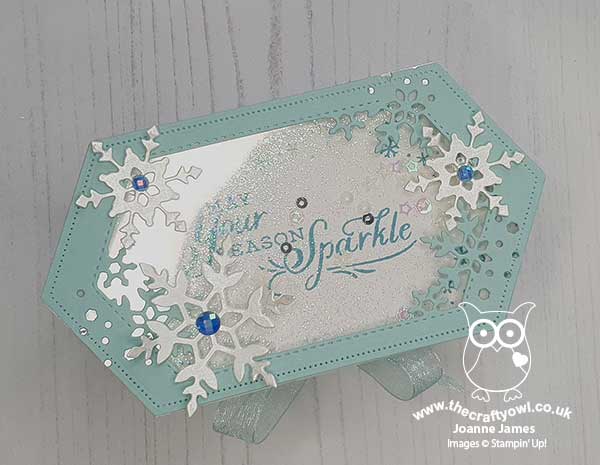
 

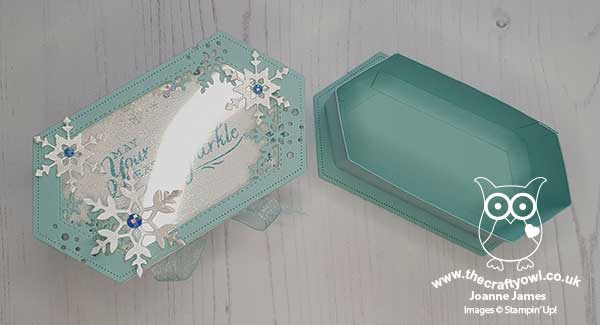
And this is what it looks like open - the lid and base extend beyond the sides of the box and the top slides off to reveal the inside:
 

I wanted to step up my box so instead of simply creating an open aperture on the lid, I added some acetate and created a shaker, filled with snowflake sequins and glitter - check out  this out - it's not only the sentiment that's full of sparkle:
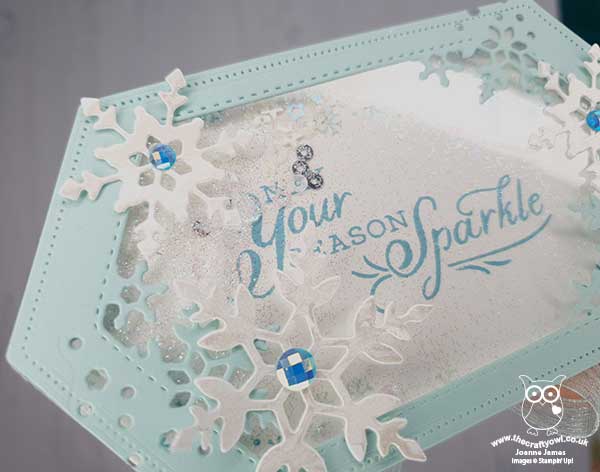
 

I added some Snowflake Splendor designer paper to the sides of my box lid and wrapped and tied it with more of the Pool Party sheer ribbon, to tie it in with the detail on my card - you can see that better below:
 

Rather than detail exactly how I made this project in words, I thought I would make a video tutorial should you wish to have a go at making one yourself - so here it is:

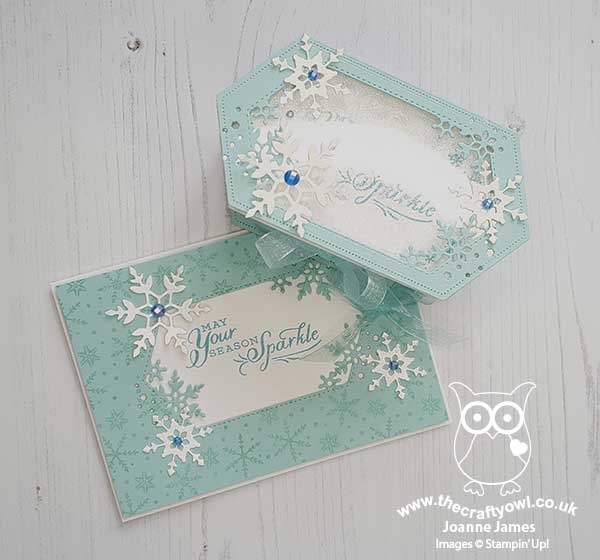
I am just in love with this set; the box isn't huge, but will hold small gifts such as chocolates, jewellery, a scented candle - lots of options! Here's a final photo of my projects together:
 

I would love to know what you thought of my video tutorial too; was it useful? Would you like to see more of this type of content. Do let me know - I would love to hear your thoughts!

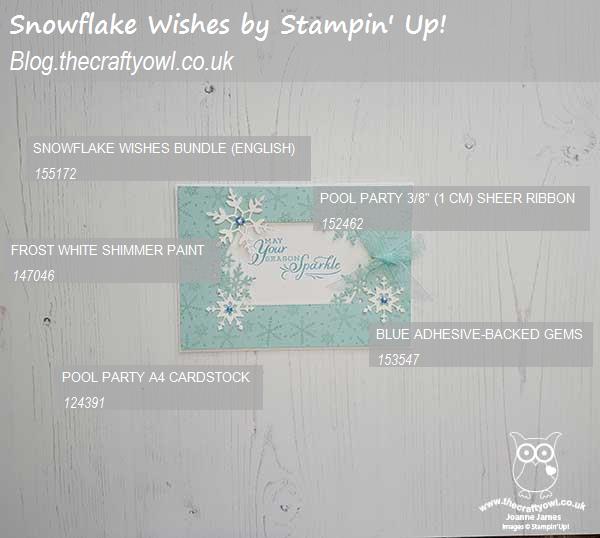
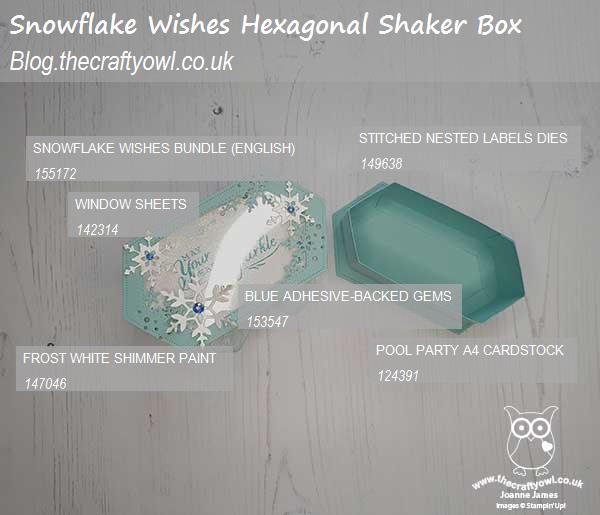
Here is the visual summary of the key products used on today's project for you to pin for easy reference:


You can see all of my Product and 'How To' summaries on my 'How To - Tips and Techniques' Pinterest board in case you've missed any. 

Before you reach for your ink and papers, check out what our amazing team has created to inspire you this week:

Here's a quick recap of our challenge rules:
 
1.  Create a new paper project
2.  Upload your creation to your blog with a link back to us and provide a direct link to the post featuring your challenge submission.
3.  Please link your card to no more than four challenges, TOTAL.
4.  Have FUN!

You can see all of my 'How To' summaries on my 'How To - Tips and Techniques' Pinterest board in case you've missed any. 

Enjoy your day; I started writing Christmas cards whilst at hockey yesterday and am hoping to crack on with those this afternoon to get them in the post tomorrow, which will be a huge achievement! I'll be back tomorrow with another project. Until then, happy stampin'!
Stampin' Up! Supplies Used: 

Table built using Product Table Builder by The Crafty Owl - Independent Stampin' Up! Demonstrator.

A Yellow Flourish Meets Embossed Ornate Florals

by Joanne James19. April 2020 11:00


Today I have an extra card for you in addition to my Paper Players Design Team card (you can see that card here) as I'm sharing a card I made yesterday afternoon for the current Global Design Project challenge where they are doing a 'CASE The Designer' with this pretty tulip card by Janneke de Jong:


I loved the layout on Janneke's card and wanted to use it as the basis for a CASE'd card - here's what I came up with:


Here's the low-down on today's card:

A Lesson in CASE - There are a number of different definitions in the crafting world for the term 'CASE' and the one that the GDP team uses is 'Copy and Selectively Edit'. So if you look at my card, it has a number of similarities to Janneke's card: yellow and white are the dominant colours, I used the same sketch layout along with a single floral stem and no sentiment. There are a number of differences though too - things I have changed to make this card my own. 

A Yellow Flourish - The first of these is my choice of florals. I went full-on yellow with my card and used the single stemmed floral from the Flourish Dies for my floral. I cut it twice from Daffodil Delight cardstock and glued them together to make a stronger floral as I was using it as my uppermost layer. I used the co-ordinating stampset, Flourishing Phrases, to decorate the envelope and inside of my card too; there are lots of great sentiments in this set so when I've decided what I am going to use this card for, I will add one to the inside if needs be. Here's a quick photo of the inside:


Ornate Florals - I kept the central Stitched Nested Label as per Janneke's original card and the yellow sponging around the edge on the layer beneath - this was probably my favourite thing about this card, I love the effect - and I embossed the white label too. I chose to use the new Ornate Floral 3D embossing folder for my detail - those little flowers compliment any kind of floral I think. Here's a closeup of the detail showing the layering and texture:


 I love yellow, especially on cards and flowers - this is the kind of card that makes me happy! 

 Here is the visual summary of the key products used on today's project for you to pin for easy reference:


You can see all of my 'How To' summaries on my 'How To - Tips and Techniques' Pinterest board in case you've missed any. I'm also linking this card up with the team over at SUO Challenges where embossing is the theme - this time with dry embossing as my focus. 

Enjoy your day and I'll be back tomorrow with another project. Until then, happy stampin'!


Stampin' Up! Supplies Used:

Table built using Product Table Builder by The Crafty Owl - Independent Stampin' Up! Demonstrator.

Bird Ballad Shadow Box Birthday Card For PP448

by Joanne James30. June 2019 09:00

Today it's Sunday and time for this week's new challenge over at The Paper Players! It's my turn to host this week and as it's the fifth Sunday in the month I have a tic-tac-toe challenge for you to work with:


I have been on a bit of a creative roll lately with the lovely Bird Ballad suite and I couldn't resist using it again for my birthday card today - take a look:


Here's the low-down on today's card:

Hello Sunshine - Yellow is one of my favourite colours to work with; I always think there is something so cheery about sending a yellow card, so I couldn't resist including this colour on the board and I decided to use Daffodil Delight for the base of my card. I'm also linking today's card up over at Festive Friday #FF037 where they have the design element of yellow as part of their current challenge:

#festivefridaychallenge, #FF0037, World Emoji Day, Yellow

A Fancy Fold - The outside of my card looks simple enough, with just a hint of embossing and a fussy cut bird and branch to highlight my sentiment, with a little linen thread and a Bird Ballad trinket for decoration. You could even be forgiven for wondering which line on the tictactoe board I completed (I actually followed the middle vertical line and the diagonal bottom left to top right). This card is no ordinary card though - it's a shadow box card and it opens to reveal this pretty stepped inside, courtesy of some windows cut with the Stitched Nested Label Dies and featuring a rear panel of the Bird Ballad DSP:


Not Just  A Label - The Stitched Nested Labels Dies are useful for framing and make great labels for sentiments - but you can also use them to make a fun lidded box too. Here's one I made using the second largest die for the base:


This box measures approx. 1 1/2" x 3" x 2" deep so is the perfect size for a few chocolates or a small gift. This is what it looks like inside:


The base and lid have a lipped edge, slide neatly together and I used colours to tie in with my card - I love when things co-ordinate! I've been working on a whole set of these boxes in different sizes and am planning to share those with you soon (maybe even with a video tutorial!)

This little card and gift combo is heading to my running buddy, whose birthday it is the week after next - she loves something handcrafted! I'm linking up with the team over at SUO Challenges today too where the current theme is 'birthdays'.

Here is the visual summary of the key products used on today's project for you to pin for easy reference:


You can see all of my Product and 'How To' summaries on my 'How To - Tips and Techniques' Pinterest board in case you've missed any. 

Before you reach for your ink and papers, check out what our amazing team has created to inspire you this week:

Here's a quick recap of our challenge rules:
 
1.  Create a new paper project
2.  Upload your creation to your blog with a link back to us and provide a direct link to the post featuring your challenge submission.
3.  Please link your card to no more than four challenges, TOTAL.
4.  Have FUN!

You can see all of my 'How To' summaries on my 'How To - Tips and Techniques' Pinterest board in case you've missed any. 

Enjoy your day; we will be collecting the youngest of the James Juniors from a sleepover and hoping the sun and high temperatures last long enough to enjoy a BBQ lunch. then having a quiet-ish day before his final week of school this year before he breaks for summer - eek!  I'll be back tomorrow with another project. Until then, happy stampin'!


Stampin' Up! Supplies Used: 

Table built using Product Table Builder by The Crafty Owl - Independent Stampin' Up! Demonstrator.

One Sketch Three Ways For The Paper Players PP447

by Joanne James23. June 2019 09:00

Today it's Sunday and time for this week's new challenge over at The Paper Players! I am hosting this week on behalf of the lovely Jaydee who had a fall a few weeks ago and is taking a few weeks off from crafting to recuperate. Jaydee has my favourite, a sketch challenge, for us to work with this week:


My regular readers will know how much I love a good sketch and this is one that can be used time and again. I liked it so much I made not one, not two but three cards with it to share with you this week (I'm making up for my lack of blog posts in recent days!) This is the first card I came up with using one of the Bird Ballad papers that I had yet to use:


A simple card with an inset panel of DSP; the neat feature on this card is that I cut off the shaped end and extended one of the nested stitched labels for the sentiment and then added a bird I fussy cut from the paper itself.

My second card uses the reverse of this bird patterned DSP for a soft floral card that is delicate and pretty:


I used a basic nested stitched label for my sentiment this time but added a ruffle of ribbon (retired but I've linked below to a current one that would make a great substitute) and a fussy-cut flower and leaves with a few sparkly self-adhesive sequins. This one is much more girly and pretty!

My third and final card uses both a border and fussy cut hummingbird from the Mosaic Mood paper set and highlights a new in-colour - Terracotta Tile:


I am on a mission to use these papers as the main feature of my cards by simply co-ordinating with a variety of different sentiments. I used the same sentiment on this card from the 'Free As A Bird' stamp set that I used on the previous cards above, but this time punched it out of Very Vanilla cardstock using the new Timeless Label Punch. This is going to be a really useful punch for sentiments - the longer length makes it very versatile. I also picked up the green colour from my hummingbird and added a contrasting edge border to my top layer using the straight stitched die that can be found in the Stitched Nested Labels Die Set. We have a Facebook Group for Stampin' Up! demonstrators that has had lots of discussion as to how you would use this particular die, so I thought I would give you another example!

So which of today's cards is your favourite? I think I'm leaning towards the pretty pink florals with the ruffle of ribbon, which was inspired by this week's TGIF Challenge (badge at bottom of post). I buy lots of ribbon but often don't use it enough on my cards so I'm hoping to find the time to have another go at their challenge this week with something that features ribbon as the main focus, so do pop back later in the week for another idea. I'd love to know which one gets your vote - as always, feel free to leave me a comment below.

Here is the visual summary of the key products used on today's projects for you to pin for easy reference:

Card Number 1:


Card Number 2:


 Card Number 3:


You can see all of my Product and 'How To' summaries on my 'How To - Tips and Techniques' Pinterest board in case you've missed any. 

Before you reach for your ink and papers, check out what our amazing team has created to inspire you this week:

Here's a quick recap of our challenge rules:
 
1.  Create a new paper project
2.  Upload your creation to your blog with a link back to us and provide a direct link to the post featuring your challenge submission.
3.  Please link your card to no more than four challenges, TOTAL.
4.  Have FUN!

You can see all of my 'How To' summaries on my 'How To - Tips and Techniques' Pinterest board in case you've missed any. 

Enjoy your day; finally the sun is shining here in the UK for the second day in a row, so I will be spending mine enjoying a BBQ lunch and pottering in the garden. I might even take my laptop outside and prep some of this week's blog posts! I'll be back tomorrow with another project. Until then, happy stampin'!


Stampin' Up! Supplies Used: 

Table built using Product Table Builder by The Crafty Owl - Independent Stampin' Up! Demonstrator.
 

Waterfront Caribbean Beach Friend Card for PP444

by Joanne James2. June 2019 09:00

Today it's Sunday and time for this week's new challenge over at The Paper Players! It's the turn of the fabulous Ann to host this week and she has a timely theme challenge for you to work with:


I went clean and simple this week so will also be playing along over at CASology where the cue card is 'Summer'. I used my Waterfront stamp set to create a beach scene reminiscent of my favourite Caribbean vacations - take a look:


Here's the low-down on today's card:

A Waterfront Beach - Waterfront is one of those sets that I don't feel I've used anywhere nearly enough and I'm so glad it's carrying over into the new annual catalogue. It's a great set for creating unique scenery and landscapes for all seasons so was perfect for my bright beach huts on the shore under the bright sun and shade of the palm trees. I decided to feature the 2018-20 In Colours on my card today; these are such a great co-ordinating set of brights they were just perfect for my card today. 

A Nested Label - Did you spot the new label I used for the scene on my card? It's from the Stitched Nested Labels that co-ordinate with the Bird Ballad Suite in the upcoming new catalogue and they have such pretty stitched border detail. The whole label is symmetrical; I cut the point off mine on the right side as I wanted my label to align to the right of my card. 

Making Waves - I added a little interest and texture to my Blueberry Bushel background by running it through the retiring Seaside embossing folder. I love this embossing folder and use it lots so will be sad to see it go. 

And that's all there is to it, other than to say do you think if I wish hard enough I could jump into my card and find myself relaxing on that sunny beach too?!

Here is the visual summary of the key products used on today's project for you to pin for easy reference:


You can see all of my Product and 'How To' summaries on my 'How To - Tips and Techniques' Pinterest board in case you've missed any. 

Before you reach for your ink and papers, check out what our amazing team has created to inspire you this week:

Here's a quick recap of our challenge rules:
 
1.  Create a new paper project
2.  Upload your creation to your blog with a link back to us and provide a direct link to the post featuring your challenge submission.
3.  Please link your card to no more than four challenges, TOTAL.
4.  Have FUN!

You can see all of my 'How To' summaries on my 'How To - Tips and Techniques' Pinterest board in case you've missed any. 

Enjoy your day; ... I'll be back tomorrow with another project. Until then, happy stampin'!


Stampin' Up! Supplies Used: 

Table built using Product Table Builder by The Crafty Owl - Independent Stampin' Up! Demonstrator.

Mini Catalogue

BROWSE THE CATALOGUE

The mini catalogue is now live! Read and download your copy here.

Shop Online

Access my online shop 24 x 7, 365 days of the year:

Current April hostess code:

VDKNV7BH

Shop Online

Join My Team

It's always a great time to join Stampin’ Up! New team members can get £130 worth of products for only £99 + free business supplies + free shipping + all the fun being a part of Stampin’ Up! Stampin' Up! has something for everyone: join my growing team and benefit from my support to enjoy Stampin' Up! however you choose.

If you're interested, call me for a chat to understand how I can help you realise your goals. Alternatively, if you have already decided to sign up and you just can't wait, please click here for the link to the online form where you can sign up and order your starter kit right away! 

Latest Kit!

Stampin Cut and Emboss

The Rock Legend Kit has all you need to make 8 cards with coordinating envelopes. Along with the new Panda Friends Kit, both are available from January 4th for just £14 each - get yours here!

2023-24 Annual Catalogue

BROWSE THE CATALOGUE

Click on the catalogue for a full list of current SU! supplies - if you would like to order any of the items featured, please drop me a line at [email protected] or give me a call on 07773 421446 - I'd be happy to help.

New Online Exclusives

There are new products available exclusively in the online store from 5 March - check them out here.

About Me

Hi I'm Joanne and live in Northampton and when I'm not looking after my husband and two beautiful children, am an avid crafter with a passion for all things Stampin' Up!

I must confess that I have never been a big rubber stamper - until I discovered Stampin' Up! that is. I love the fact that I can get such great results with co-ordinating stamps, inks, papers and punches - the possibilities are endless! Join me on my stamping journey as I share the things I love and be inspired to create amazing things yourself!

Follow Me

Monthly Newsletter

Box Builder

Click the button above to use Box Buster to create your custom box design using the Envelope Punch Board!

Kits Collection Now Available!

Stampin Cut and Emboss

The new Kits Collection from Stampin' Up! is now available!

Click here to see the current kits available and order yours online today.

I Design For


Stampin' Up Stuff

This is my personal blog and is not endorsed by Stampin’ Up! I hope you find it a plentiful source of ideas and personal inspiration but please don't copy my designs for contest submission or use for classes, publication or sale without express permission.