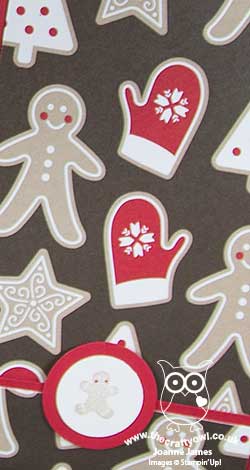
Layered Gingerbread In A Jar - The Perfect Homemade Christmas Gift PP373

by Joanne James3. December 2017 09:00

It's Sunday and time for this week's new challenge over at The Paper Players! The lovely Laurie is the hostess this week and she has a rather delicious seasonal theme for us to work with:
    

I'm also linking up with the team over at Stamp Ink Paper this week who are looking at Christmas wrapping and packaging solutions. I love to make gingerbread at this time of year but it's still a little early for me to have baked and wrapped creatively, so instead I decided to share with you a little something that I've been preparing for Ben's school Christmas Fayre the week after next that fits Laurie's theme perfectly. They are having a 'Jam Jar Tombola' stall, so I've been busy making up jars of all kinds for the children to win, including some jars of dry ingredients that they can use for their own festive baking. Here's one of my jars for gingerbread cookies - take a look:
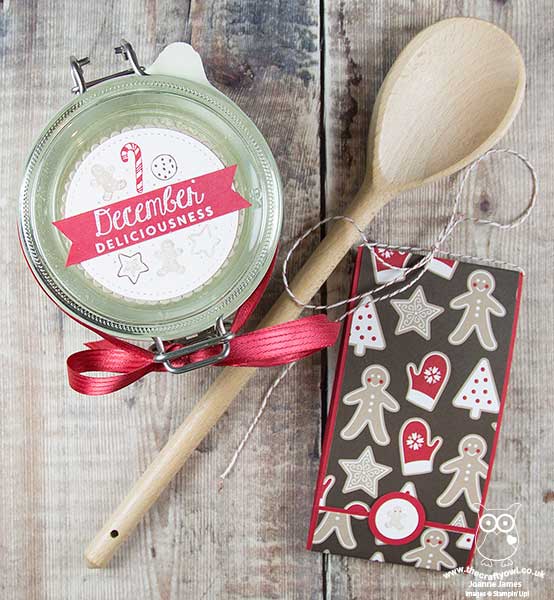
 

These really are so easy to make: you simply layer the dry ingredients into a kilner jar, then decorate and add a tag with the details of any ingredients you need to add and the method. 

I used the 'December Deliciousness' stamp from the 'My Little Things' stamp set to decorate my jar, using my markers to selectively colour each of the elements in and adding a heat-embossed sentiment banner across the middle to create a decorated top to my jar. I paired it with some retired paper that fits perfectly with my theme for a folded tag that includes the ingredients and recipe, some ribbon and a wooden spoon that I will be tying to the side of the jar too ready for stirring - you could also add a gingerbread cutter if you have one.

I'm a big fan of homemade gifts at Christmas and there is no limit to the things you can put in a jar; with a little decoration this kind of thing can make a thoughtful, presentable gift.

If you would like to make a jar like mine, I've included the details from the inside of my folded tag below:

Easy Gingerbread Biscuits

This jar contains:

  • 100g soft light brown sugar
  • 1 tsp ginger, ¼ tsp allspice
  • ¼ tsp cinnamon, 225g plain flour
  • ½ tsp baking powder
  • ½ tsp bicarbonate of soda


You will need to add:

  • 150g melted butter
  • 1 tbsp golden syrup
  • 1 egg yolk


Method:

  • Mix 150g melted butter with 1 tbsp golden syrup and 1 egg yolk.
  • Add to the dry ingredients, mix well, then knead to a dough.
  • Chill for 15 mins then roll out.
  • Cut into biscuits and bake at 200C/180C fan/gas 6 for 8-10 mins. Cool on a wire rack.


Here is the visual summary of the key products used on today's project for you to pin for easy reference:
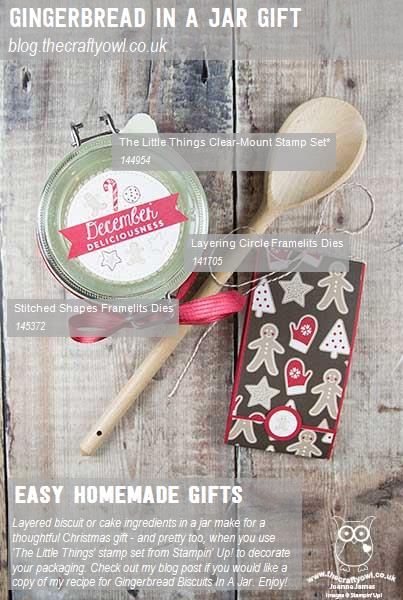
 

You can see all of my Product and 'How To' summaries on my 'How To - Tips and Techniques' Pinterest board in case you've missed any. 

Before you reach for your ink and papers, check out what our amazing team has created to inspire you this week:

The Paper Players Design Team
 
 
Here's a quick recap of our challenge rules:
 
1.  Create a new paper project
2.  Upload your creation to your blog with a link back to us and provide a direct link to the post featuring your challenge submission.
3.  Please link your card to no more than four challenges, TOTAL.
4.  Have FUN! 


I look forward to seeing what you create with this week's theme. Enjoy the rest of your weekend as it will be over all too quickly; my Christmas festivities have truly started in earnest this week and I am busier than ever! I am off to run a pre-Christmas Stampin' Up! party for a customer and her friends this afternoon, then will be returning home to put the finishing touches to my class preparations for my Delightful Daises Technique Class tomorrow and complete my 100 card challenge for the Ronald McDonald Christmas Cheer campaign that is happening in the UK this weekend.

I'll be back as soon as time allows with more projects; until then, happy stampin'!


Stampin' Up! Supplies Used: 

Table built using Product Table Builder by The Crafty Owl - Independent Stampin' Up! Demonstrator.

At Home With You Christmas Card and Matching Gift Bag Punch Board Gift Box

by Joanne James21. September 2017 18:59

Happy Friday everyone! I'm not sure where the time goes - I can't believe it's the end of the working week already - well, for some anyway! Today I'm sharing a another card along with a matching gift box from one of last month's monthly technique classes using the At Home With You bundle - take a look:


Here's the low-down on today's card:

At Home With You At Christmas - The At Home With You bundle is so versatile and works for lots of different seasons. Today's card features the gorgeous holly bough around the door, along with the holly wreath and the ornamental trees either side of the front door. I coloured them with my Stampin' Write markers and they were easily cut out with the framelits. I even decorated the inside and envelope for complete co-ordination.

More Ways To Add Texture - As with the last card I shared featuring this set (you can see that card here if you missed it), today's card has another three ways in which you can incorporate texture into your projects:

Adding Texture 1: Stamping To add to the Christmas feel, I wanted a red front door; by stamping my Real Red cardstock with the Hardwood stamp in Real Red, before stamping with the door outline in black, to add some tone-on-tone interest and texture for added kerb appeal.

Adding Texture 2: Dry Embossing On both my card and box I embossed the Smoky Slate base cardstock with my Brick Wall textured embossing folder to create some textured walls as a backdrop for my festive entrance.

Adding Texture 3: Embellish Sometimes on a card it helps to minimise bulk especially if you need it to be post-friendly, however this is rarely the case with packaging and the addition of bulky embellishments is less of an issue. On my gift box, in addition to a tag and ribbon, I added a boxwood wreath to my front door - I love the extra texture this adds.

A Matching Gift Box - It's always nice to be able to create fancy packaging for gifts and no more so than at this time of year. I made my simple gift box using the Gift Bag Punch Board (I just didn't score the side indents to make the bag shape) and created a little triangle roof for a lid (it's a simple hinged closure that is held in place with washi tape) that I stencilled some tile on using some Basic Grey ink and my brick pattern Patterned Party Decorative Mask and added a tag punched with the super-useful Everyday Label Punch:

This box measures approx. and is a reasonable size, big enough to accommodate most small gifts. Here's a picture of both items together:


Here is the visual summary of the key products used on today's project for you to pin for easy reference:


You can see all of my 'How To' summaries on my 'How To - Tips and Techniques' Pinterest board in case you've missed any. 

Enjoy the rest of your day and I'll be back tomorrow with another project. Until then, happy stampin'!


Stampin' Up! Supplies Used:

Table built using Product Table Builder by The Crafty Owl - Independent Stampin' Up! Demonstrator.

Label Me Pretty Homemade Jam #GDP087

by Joanne James20. May 2017 11:00

Happy Saturday everyone! A mix of old and new today and not a card but some cute packaging which is perfect for this week's Global Design Project challenge:

Many of my readers know that the James family are keen vegetable growers and we have a small kitchen garden which keeps us supplied with fresh vegetables through the summer months. We also have a collection of fruit trees and last year for the first time I started making my own jam. one of my James Juniors is an absolute jam addict - given the choice, Ben would live on jam on toast  - so much so, that his big sister once declared we should have called him 'Jam-in-Ben' rather than 'Ben-jam-in', something that sticks to this day!

Anyway, I digress - making my own jam is a great way to make the most of our fruit and meet demand. I also love to give it away as a gift occasionally too and that's where today's project comes in; whilst Ben is all about the jam itself, if I'm gifting it I like to pretty up the packaging somewhat and there is a stamp set in the new catalogue that is perfect for me  - take a look:


Here's the low-down on today's card:

Label Me Pretty - The new 'Label Me Pretty' stamp set is just perfect for me and anyone else how likes to preserve or cook and pretty-up their gifts for giving; the label I've used today works for any kind of produce. The set includes lots of other stamps too, that would work for other types of gift giving or on cards too - look out for more featuring those another day. Wondering how I got it so beautifully cut out too? That would be the co-ordinating Pretty Label Punch  - love this! I will have my jams labelled in no-time!! 

Fruit Stand - I paired my label with a band of strawberry-patterned Fruit Stand paper; a great pack with images of apples, pears lemons and peaches too. This is retiring 31 May though so if you want to add this to your jam jars you need to stock up soon!

Add A Spoon - Lastly, I wanted to add a little something to my jar and added a little wooden spoon, stamped with a strawberry from the 'Cool treats' stamp set. This is a simple way to add a 'wow' to a plain spoon - and in the words of Ben, a great way to enable someone to tuck in to their jam as soon as they receive it! I simply tied it to my jar using some of the retiring Cucumber Crush 5/8" mini-striped ribbon - here's a close up of my spoon detail: 


Here is the visual summary of the key products used on today's project for you to pin for easy reference:


You can see all of my 'How To' summaries on my 'How To - Tips and Techniques' Pinterest board in case you've missed any. 

Given the recent addition of four chickens to the James Household, my next challenge is to use some of our eggs to create homemade lemon curd, one of Rebecca's favourite treats. Watch this space for some lemon-inspired packaging at some point later in the year! Oh and if Stampin' Up! could provide some raspberry-patterned paper it would also be much appreciated!!

I'll be back tomorrow with another project for this week's new challenge over at The Paper Players. We have a busy day today - Rebecca has a big swimming meet and is racing all day (at the time of writing, she has already achieved two 100m personal bests for her breaststroke and individual medley, so that is great news) and Ben has a football-themed birthday party to attend followed by his swimming lesson. Enjoy your day and until tomorrow, happy stampin'!


Stampin' Up! Supplies Used:

Table built using Product Table Builder by The Crafty Owl - Independent Stampin' Up! Demonstrator.

Oh Happy Day Card Kit - The Best One Yet

by Joanne James22. July 2016 07:00


My regular readers will know what a fan I am of Stampin' Up!'s kits and today I want to share with you the latest all-inclusive kit offering - the Oh Happy Day Card Kit. Here's one of the finished cards from the set:


And here's a catalogue image that shows all of the cards that can be made with this kit:


Here's the low-down on the Oh Happy Day Kit and why I think they are perfect for just about anyone and everyone:

All Inclusive - The Oh Happy Day card kit is one that contains everything you need to create 20 unique cards: card bases, co-ordinating envelopes, die cut images and shapes, a Stampin' Spot ink pad, set of 13 photopolymer stamps and an acrylic block and a range of accessories and embellishments. Simply add your choice of adhesive and you are good to go. 

Great Value For Money - At £31.50, this kit offers exceptional value for money - where else could you buy 20 handcrafted greetings cards at less than £1.60 each and have a stamp set, ink spot, block and a range of embellishments left over to create even more things with too? Not to mention the creative fun you will have putting them together along the way!

The Perfect Gift -  Whether young or old, experienced crafter or new to crafting, this kit is perfect for you. Follow the instructions included or unleash your own creativity and do your own thing - and if you're trying to buy for 'the person who has everything' - I bet they don't have one if these! The kit comes in a lovely gift box too, so all you need is some ribbon and a tag and you are done.

Here is a reminder of this fantastic kit if you are getting organised and want to pin it to your Pinterest 'Christmas Gifts' board to pin for easy reference:


You can see all of my 'How To' summaries on my 'How To - Tips and Techniques' Pinterest board in case you've missed any. 

Also the lovely people at Stampin' Up! have also produced a video showing this kit in more detail if you'd like a close look:

I truly do think that this is one of the best kits yet - it's the bright and colourful equivalent of the equally good Watercolour Wishes kit - you can read all about that one here. Enjoy your day and I'll be back tomorrow with another project; until then, happy stampin'!


Stampin' Up! Supplies Used:

Table built using Product Table Builder by The Crafty Owl - Independent Stampin' Up! Demonstrator.

Mini Catalogue

BROWSE THE CATALOGUE

New Year, new products - the new Stampin' Up! Mini Catalogue is here! For more details and to download your copy click here

Shop Online

Access my online shop 24 x 7, 365 days of the year:

Current March hostess code:

 3JRGYMXT

Shop Online

Join My Team

It's always a great time to join Stampin’ Up! New team members can get £130 worth of products for only £99 + free business supplies + free shipping + all the fun being a part of Stampin’ Up! Stampin' Up! has something for everyone: join my growing team and benefit from my support to enjoy Stampin' Up! however you choose.

If you're interested, call me for a chat to understand how I can help you realise your goals. Alternatively, if you have already decided to sign up and you just can't wait, please click here for the link to the online form where you can sign up and order your starter kit right away! 

Scrapbooking

Stampin' Up! has introduced a new range of 12x12" scrapbooking product and kit - the full range is now available to purchase online. To download a copy of the new digital Scrapbooking Catalogue click here.

Latest Kits!

Stampin Cut and Emboss

The Birthday Bash Kit is just one of the latest kits in the online store - get yours here!

2024-25 Annual Catalogue

BROWSE THE CATALOGUE

Click on the image to download your copy of the 2024-25 annual catalogue. For a full list of current SU! supplies, go to my online store. If you would like any help or advice, please drop me a line at joanne@thecraftyowl.co.uk or give me a call on 07773 421446 - I'd be happy to help.

New Online Exclusives

There are new products available exclusively in the online store from 7 January - check them out here.

About Me

Hi I'm Joanne and live in Northampton and when I'm not looking after my husband and two beautiful children, am an avid crafter with a passion for all things Stampin' Up!

I must confess that I have never been a big rubber stamper - until I discovered Stampin' Up! that is. I love the fact that I can get such great results with co-ordinating stamps, inks, papers and punches - the possibilities are endless! Join me on my stamping journey as I share the things I love and be inspired to create amazing things yourself!

Follow Me

Monthly Newsletter

Box Builder

Click the button above to use Box Buster to create your custom box design using the Envelope Punch Board!

Kits Collection Now Available!

Stampin Cut and Emboss

The new Kits Collection from Stampin' Up! is now available!

Click here to see the current kits available and order yours online today.

I Design For


Stampin' Up Stuff

This is my personal blog and is not endorsed by Stampin’ Up! I hope you find it a plentiful source of ideas and personal inspiration but please don't copy my designs for contest submission or use for classes, publication or sale without express permission.

DSP Special Release

Check out 3 popular designer series paper designs in fresh new colourways! Available exclusively in the online store from 3 December - check them out here