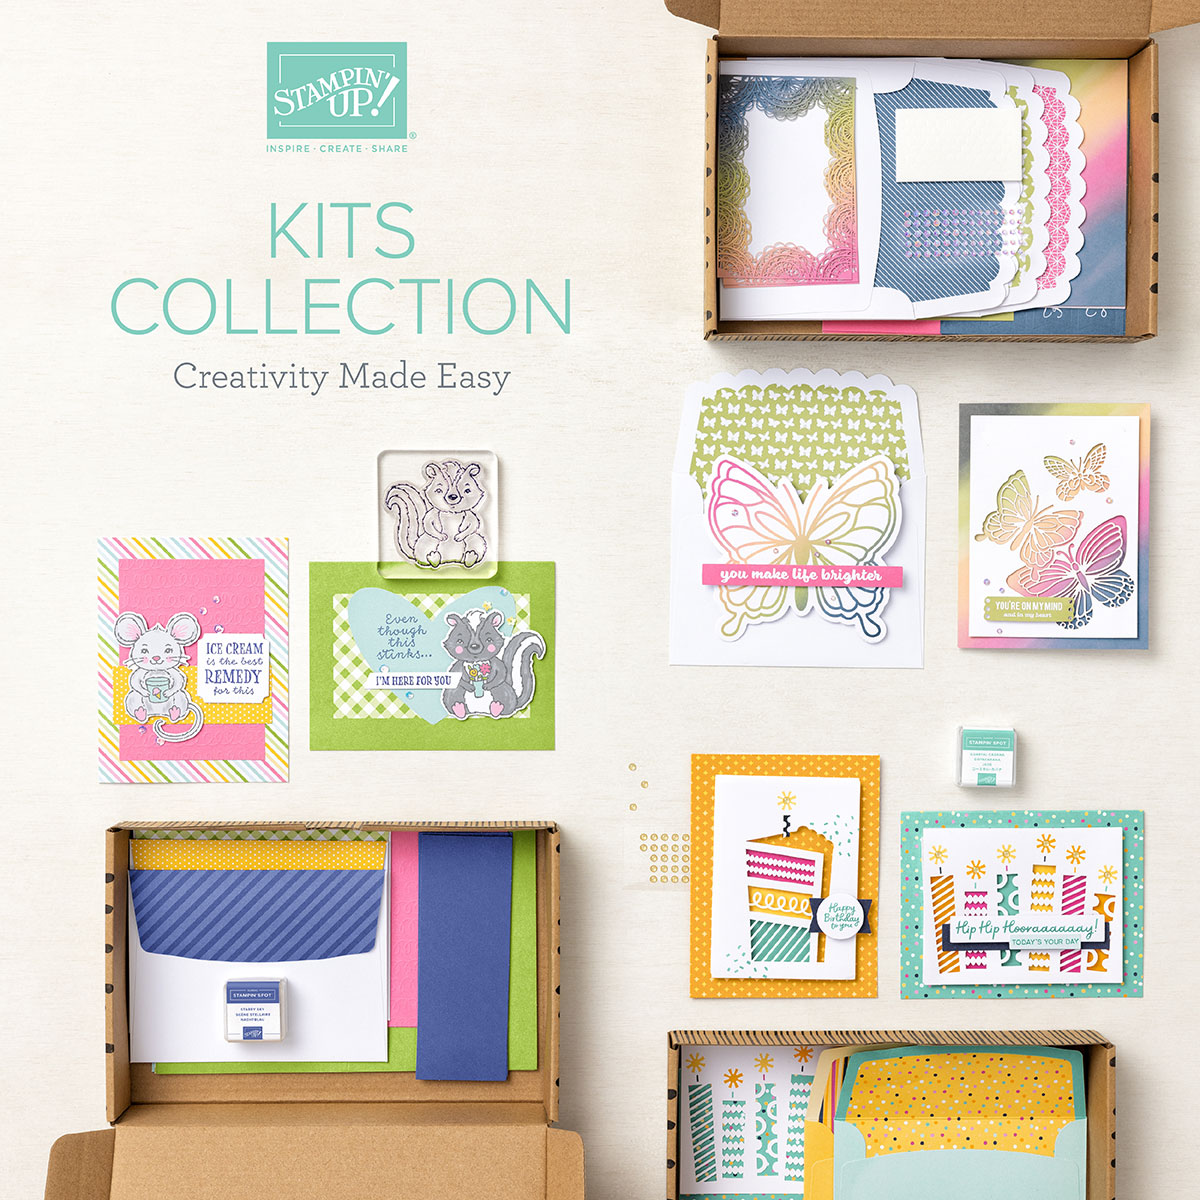
Stampin' Up!'s New Kits Collection is Here!

by Joanne James1. June 2021 18:50

As if the launch of the January-June mini catalogue retiring list and a creative post wasn't enough for you today, I also have more great news - Stampin' Up!'s new line of all-inclusive craft kits launches to customers today! Designed to be the perfect introduction to paper-crafting, the Kits Collection by Stampin’ Up! is great for the beginner crafter or the crafter on the go.

You can now go online and choose from a variety of affordably priced, versatile kits for multiple occasions. Whatever your skill or experience, the kits are designed for you, the customer, to be in control and and choose the kit experience that is most comfortable for you. 

Kits are all-inclusive, pre-cut, and ready to use with complete step-by-step instructions; plus, new kits will be added to the online store regularly, so remember to check back often! The following kits are currently available in the online store: 


Kit prices range from just £11.25 to £18 each - why not head on over to the online store and check them out? Happy shopping!

Tags: , , , , , ,

Gifts | Shop Online | Shop Stampin' Up! Online

Paper Pumpkin Joy To The World Craft Along Cards

by Joanne James7. December 2020 14:41

Today I have a quick post to share with you showing the outputs from the Paper Pumpkin 'Joy To The World' craft along session I held a couple of weeks ago. If you need a reminder about this fun global kit, you can read all about it in my post here. We made the cards in the kit as per the instructions, then also make some alternative designs, using items from the kit and some additional ink and cardstock. First up - the card designs that come with the kit:


The kit contains supplies to make 8 cards using the above designs, with materials left over. We made the first four cards, then decided to make some alternatives. I added some extra thick white cardstock and Just Jade cardstock, along with some Cherry Cobbler cardstock, 'Tis The Season designer series paper and a Cherry Cobbler ink pad. First up, a trio of Christmas cards:


 Each of these cards uses the stamp set from the kit, along with various bits and pieces, which when added to allow a completely different card. After the craft along session, when making a few more cards to use up the remainder of the kit supplies, I also challenged myself to make some non-Christmas cards using the same element. With a little creative stamping for the sentiments, I came up with another pair of cards:


 This was the first one, using one of the French diecuts, but I figured everyone is familiar with the word 'amour' for love, so would now what it meant! The second card was designed as a birthday card:


 I used the sentiment from 'Beautiful Friendship' on the inside of my card, which has a very similar font so works well:


I think this card would be lover for someone celebrating a winter birthday - I know just the person, so my card will be winging its way to her! 

If you would like to get your hands on a 'Joy To The World' Paper Pumpkin kit, I've included a link the store below. They are available whilst supplies last but at the time of writing are still in stock, so you can still grab one! Great for easy crafting with 8 lovely cards and matching envelopes at the end of it if you follow the instructions, or a few more if you add some extra supplies and get a little bit more creative!


I'll be back shortly with another post with news of the Year End Closeout Sale and Carryover Products list, which go live tomorrow. Until then, happy stampin'!


Stampin' Up! Supplies Used:

Table built using Product Table Builder by The Crafty Owl - Independent Stampin' Up! Demonstrator.

Heartwarming Hugs Suite - From CAS Card to Hot Chocolate Gift Carrier!

by Joanne James2. November 2020 18:30

Happy Monday everyone! My week has started at full speed as usual but I'm here today with two projects that are both quite different that feature projects from the Heartwarming Hugs Suite. First up is a clean and simple card using the colours over at Just Add Ink this week (thank you ladies for selecting my candle card as a winner for the 'Just Add Two' challenge last week!) and this week's sketch layout over at CAS Colours and Sketches where they have a great sketch requiring a small, repeating image of some kind:


I decided to go with the coffee cup in the Warm Hugs stamp set and paired it with a sentiment from the same set that I've been wanting to use for a while - take a look:


 The sentiment is quite long so I turned my card to make use of a wider card front, and having stamped my mugs in alternating colours, I added a sentiment across the central row that I heat-embossed in silver on vellum so that it didn't totally obscure the mugs. I also added small rhinestones to the top and bottom row of mugs for a little added silver sparkle:


Finally some stamping to decorate the envelope and inside my card to finish:


Here is the visual summary of the key products used on this project for you to pin for easy reference:


You can see all of my 'How To' summaries on my 'How To - Tips and Techniques' Pinterest board in case you've missed any.

The 'Warm Hugs' stamp set is part of the Heartwarming Hugs Suite which includes lots of fun items and packaging ideas, including mini coffee cups and carriers. I made a few hot chocolate sets to share with some of my lovely customers as gifts recently using the items in the suite and decorated the cups and carriers with some of the papers in the Heartwarming Hugs designer paper pack, with a hot chocolate-filled cup and a bag of marshmallows to go with them and this seemed like a good opportunity to share a project that shows how easy it is to create a heartfelt yet relatively inexpensive gift to share with someone. Here's a close up of my completed carrier:


And here's a photo showing the detail on my decorated hot-chocolate themed cup:


I love the traditional colours that feature in this suite - isn't the dressed mug just adorable?! The textured coffee collar and sentiment added to the cup adds a nice personal touch I think. I'm linking this project up over at Color Throwdown where they are featuring the exact palette of kraft, reds and greens that feature on my decorated cup and gingham carrier.

 Here is the visual summary of the key products used on this project for you to pin for easy reference:


You can see all of my 'How To' summaries on my 'How To - Tips and Techniques' Pinterest board in case you've missed any.

Everyone that I've given one of these to so far has loved them - I'm thinking of making them for my UPS delivery driver and postman too, for them to take home for a warming drink after their rounds! Who would you give one to?

Enjoy your evening and I'll be back tomorrow with another project and news of two fabulous new launches: the new Paper Pumpkin kit and the Curvy Celebrations bundle! Until then, happy stampin'!


Stampin' Up! Supplies Used:

Table built using Product Table Builder by The Crafty Owl - Independent Stampin' Up! Demonstrator.


The New Stampin' Up! Trimmer Is Here And The Exclusive Christmastime Is Here Suite Now Available

by Joanne James1. November 2019 08:00

It's the first of November and with that comes two exciting announcements! Following the withdrawal of our previous trimmer due to Stampin' Up!'s inability to obtain a reliable source of blades, I am pleased to announce that our brand new paper trimmer is available to all customers today and I can honestly say it’s excellent!


Demonstrators have had the last month to order and fall in love with it and let me tell you, fall in love I did. I LOVED the old trimmer and never thought it could be improved. But I was wrong. This one has awesome larger blades that cut like a knife through butter. The new trimmer has some of the great features of the old trimmer and some new ones of its own, in particular a great detailed grid cutting guide, no removable cutting track and an improved ruler across the join of the extendable arm. The attendees at my recent weekend craft retreat also road-tested the trimmer and were extremely positive about its performance.

The new trimmer is a great price too at only £23 which is cheaper than our last one. The trimmer is available now from 1st November but packs of additional blades will not be launched for sale till January. They will be sold in packs of 4 blades for £11.25 and I will remind you when they are available to buy in the New Year.


Christmastime Is Here Suite

There is also a new exclusive product suite being launched today called 'Christmastime Is Here' which has the most beautiful Christmas Rose stamps, dies, patterned paper with matching accessories. It is available whilst stocks last and is not in any publication.

You can purchase the whole bundle or purchase your favourite products from the bundle, whichever you prefer. There is even a limited edition bracelet which would make a lovely Christmas gift for someone or a treat for yourself maybe.

Links to my online store for all of the configurations of the Christmastime Is Here suite can be found below. You can go to the item in my shop by clicking the photo or simply search for 'Christmastime is Here' (Christmastime is one word with no gap in between).

If you are considering treating yourself to the whole bundle and the new trimmer a starter kit would be a great option: you will receive £130 worth of any products of your choice and it only costs £99, so there's there option to add something else in too and still make a saving. If you'd like to take advantage then click here to join my team or get in touch to discuss further - I would love to welcome you.

Back soon with another post, including some lovely makes featuring this suite. In the meantime, happy shopping!


Table built using Product Table Builder by The Crafty Owl - Independent Stampin' Up! Demonstrator.


Sending Christmas Wishes With The Christmas Traditions Punch Box

by Joanne James27. November 2018 16:00


Back today with a card that is inspired by the wintery woodland photo inspiration over at Just Add Ink and this week's CAS(E) This Sketch:


I went with a clean and modern graphic interpretation of the JAI theme - take a look:


Here's the low-down on today's card:

Wintery Woodland Inspiration - Inspiration comes in many ways and forms; I didn't have a suitable Christmas tree stamp to hand, so decided to take a different route and feature these snowy trees from the Santa's workshop Designer Series Paper that I still had out on my desk from making yesterday's card. I love the subtle green diagonal stripe pattern of this paper too, which looks almost textured in appearance. More of a graphical design, yet still inspired by the photo.

Christmas Traditions - Today's sentiment is another from the Christmas Traditions Punch Box that I used yesterday and is featured on pages 2-3 of the Autumn/Winter catalogue: 


This festive-themed tin is choc-full of crafting goodies for creating through the festive season: with a block, two ink spots, set of 6 stamps and a Christmas Traditions Punch, all you need is to add some cardstock and adhesives and you are all set for some festive fun! Perfect for tags, cards and embellishments for your home-baked goodies, this set would make a lovely seasonal gift for a crafter or someone who likes to add a personal touch to their packages during the festive season. I stamped the sentiment with the line of trees to echo my DSP pattern in Versamark and heat-embossed in white embossing powder.

Winter Colour Duo - My card features only two colours today: Garden Green and Whisper White. Garden Green is the major contributor however the white has more than a passing role to play: In addition to the trees,which are echoed in the heat embossed sentiment, its use to mat the DSP and the short banner behind the punched sentiment shape gives definition to those elements, which might otherwise be lost without it. I also added a strip of retired sparkly white ribbon for the vertical element in the sketch - for a little sparkle and texture. 

Here is the visual summary of the key products used on today's project for you to pin for easy reference:


You can see all of my 'How To' summaries on my 'How To - Tips and Techniques' Pinterest board in case you've missed any. 

I hope you like today's card; I have another one featuring another of the stamps in the Christmas Traditions Punch Box in the coming week or so, so be sure to come back and check it out. I have a few more errands before I get back into my painting and decorating - it's a long job! Enjoy your day and I'll be back tomorrow with another project. Until then, happy stampin'!


Stampin' Up! Supplies Used:

Table built using Product Table Builder by The Crafty Owl - Independent Stampin' Up! Demonstrator.

Jolly Holly Christmas Card With The Christmas Traditions Punch Box

by Joanne James26. November 2018 11:10

Another Monday, another week! Hope you all had lovely weekends -  did you spend them shopping for Black Friday deals? I did start my Christmas shopping at last - I'm suddenly feeling under pressure to start ticking things off that particular list. i can't quite believe that one month today will be Boxing Day!! Anyway, let's not dwell on that - today I'm sharing a card using this week's sketch over at Freshly Made Sketches:

The lovely Kim has a great sketch this week, with lots of creative possibilities. I decided my card was going to be all about the holly - take a look:


Here's the low-down on today's card:

A Jolly Holly Christmas - I decided that holly was going to be the theme for my card today and used the square shape to feature a piece of the holly patterned paper from the Santa's Workshop designer series paper and tied my sentiment and holly embellishment (one of the self-adhesive pieces from the Santa's Workshop Memories & More card pack) into my theme. I even carried it over to the inside of my card and added a stamped sprig of holly alongside my sentiment from the super-useful Merry Christmas To All stamp set:

Christmas Traditions - I found the perfect holly-related sentiment for my card in the Christmas Traditions Punch Box that is featured on pages 2-3 of the Autumn/Winter catalogue: 


Just like the Darling Label Punch Box in the annual catalogue (which incidentally has 10% off in the current stamp and kit sale as part of today's Online Extravaganza - order yours here), this festive-themed tin is choc-full of crafting goodies for creating through the festive season: with a block, two ink spots, set of 6 stamps and a Christmas Traditions Punch, all you need is to add some cardstock and adhesives and you are all set for some festive fun! Perfect for tags, cards and embellishments for your home-baked goodies, this set would make a lovely seasonal gift for a crafter or someone who likes to add a personal touch to their packages during the festive season. 

Lots of Layers - I added some texture to my card base with the Subtle Dynamic Textured Impressions Embossing Folder, but otherwise all of the detail and interest on today's card is focused around the square element. In order to really draw the eye to it, I stacked the base behind the holly DSP with 3 layers, made easy with the Layering Square Framelits, using the base colours of the paper and adding a piece of Poppy Parade ribbon for a pop of red - so festive!

Here is the visual summary of the key products used on today's project for you to pin for easy reference:


You can see all of my 'How To' summaries on my 'How To - Tips and Techniques' Pinterest board in case you've missed any. 

I hope you like today's card - tomorrow's card also features the Christmas traditions Punch Box, so be sure to come back and check it out. I have a few more errands before I get back into my painting and decorating - it's a long job! Enjoy your day and I'll be back tomorrow with another project. Until then, happy stampin'!


Stampin' Up! Supplies Used:

Table built using Product Table Builder by The Crafty Owl - Independent Stampin' Up! Demonstrator.

Snowflake Showcase Pillow Box Creative Retreat Gifts

by Joanne James2. November 2018 19:00

As promised in my earlier post today (you can read that here if you missed it), today I'm sharing something a little different that I gave a sneak peek of on my Facebook page the week before last - a 3D project! Today is the perfect day to share it since it coincides with the launch of the Snowflake Showcase product suite yesterday - you can read all about that here.

The weekend before last I held my second residential craft retreat this year. I love these weekends: they are a great opportunity for me to spend quality time with my customers, some of whom I see at my regular classes but for many who follow my blog and shop with me online and for whom this is an opportunity to get away from it all for some quality crafting time amongst friends. I am grateful that they choose to spend a weekend with me crafting and as such in addition to their goody bags, they receive lots of little pillow gifts and table favours throughout their stay as a token of my appreciation. When they leave at the end of the weekend, I like to gift them a key ring that is unique to that retreat as a reminder of the fun time that they've had. It has to showcase some fabulous Stampin' Up! product too, both on the keyring and the packaging so for this one I just had to feature the limited edition, exclusive Snowflake Showcase products that went live on sale yesterday. So first up here is the packaging for my gift:


I dressed up one of the kraft pillow boxes available in the annual catalogue with some silver-trimmed ribbon and added a sentiment banner stamped tone-on-tone with the border stamp and then heat-embossed my sentiment in silver over the top. I then added the fabulous string of snowflakes diecut to the front of the box for a real 'wow'.

It didn't end there; I continued the snowflake theme inside with a keyring, that had a snowflake tree, a teeny-tiny sentiment and one of my craft retreat logos all stamped onto shrink plastic and reduced in size, along with one of the gorgeous snowflake trinkets that are also part of this suite. I made them in two colourways, Pool Party and Balmy Blue:


Here's a picture of them both together - gift and packaging. What do you think - cute enough to hang your keys from? 

I received such lovely comments from the ladies who attended my retreat, who all said they felt truly spoiled all weekend. Here's one of the pictures I shared over on my Facebook page of us at dinner on the Saturday evening, with some of them sharing another of their table gifts:


Christmas crackers, what else?! I will have more projects using the fabulous Snowflake Showcase in the coming weeks so look out for those and meanwhile do get in touch with me directly or via my online store to order yours whilst supplies last.

Equally, if you would like to be similarly spoiled and enjoy a fabulous crafty weekend away from it all, there are still spaces available on my March 2019 retreat which will be held in the West Midlands on 2-3 March - you can read more about it here and I would love it if you could join me! The dates for next October will be released soon and I already have a waiting list for this event, so if you would like to be one of the first to receive the details as they are published then do get in touch with me via joanne@thecraftyowl.co.uk to register your interest as spaces are likely to be snapped up quickly!

Enjoy your evening and I'll be back tomorrow with another project. Until then, happy stampin'!


Stampin' Up! Supplies Used:

Table built using Product Table Builder by The Crafty Owl - Independent Stampin' Up! Demonstrator.

Santa's Workshop Card and Envelope Punch Board Gift Voucher Holder

by Joanne James29. October 2018 07:00

I so enjoyed making my cards for this week's challenge over at The Paper Players that I shared with you yesterday, that I just had to make more with those fabulous little elves. As such today I'm sharing another card that I made using products from the Santa's Workshop Suite, along with a gift voucher holder made using the Envelope Punch Board. Both of these use the current sketch over at Freshly Made Sketches as the basis for my layout:


First up is my card - full of busy elves! Take a look:


Here's the low-down on today's card:

More Santa's Workshop - I'm loving this elf patterned paper and whilst it's busy, it seemed the perfect background to accompany my sweet elf and his accompanying pile of Christmas presents. I love how the sentiment is in two halves and carries over neatly to the inside of my card:


Stitched Shapes and Layered Ovals - With all those elves, I wanted to keep the rest of my card fairly simple, so used a large stitched oval to create some additional white space around my sentiment, layered on a scallop-edged oval in Poppy Parade for definition. Whilst I don't often use ovals, preferring circles or squares generally, sometimes an oval is the shape that works best for balance. One thing I do use lots though are my Stitched Shapes Framelits - these are on my Top 5 Framelits Of All Time list (I must publish that list one of these days!) - a must have for adding subtle detail to your frames.

Envelope Punch Board Gift Card Holder - having made my card, I still had a couple of elves with flocked hats left that I had diecut from the Santa's Workshop DSP and decided that I would use the same basic layout but in a landscape orientation to get a headstart on my Christmas Gift Voucher holders. I created a simple wallet using my trusty Envelope Punch Board to create the closure; this is similar to ones I've created previously, only I decided to 'go large' this time and create a wallet large enough to hold £10 notes - I have growing nieces and nephews and these days, only cash will do so I am finding I need to come up with ever more creative ways to gift it! This wallet measures 6" x 6" square and again uses the sketch for the front layout (the stamp I used is from last year's retired Merry Little Labels set):


The wallet opens to reveal a sliding pocket insert, where the money sits in the pocket flap which opens to reveal Christmas wishes and with enough space above to include a personalised message: 


I love this style of wallet and make them often. If you would like the dimensions, then just leave a comment below - I'm thinking this might be worth another blog post in itself! 

This wallet would also be great to fill with Stampin' Up! gift vouchers for a crafty friend or even to treat yourself - if you would like to order Stampin' Up! gift vouchers for Christmas and receive them beautifully packaged in a wallet like this, then do get in touch and place your order.

Here is the visual summary of the key products used on today's project for you to pin for easy reference:


You can see all of my 'How To' summaries on my 'How To - Tips and Techniques' Pinterest board in case you've missed any. 

Enjoy your day and I'll be back tomorrow with another project. Until then, happy stampin'!


Stampin' Up! Supplies Used:

Table built using Product Table Builder by The Crafty Owl - Independent Stampin' Up! Demonstrator.

Have a Fun Night In With A Lots of Happy Card Kit

by Joanne James22. January 2018 20:00

I've started the week with one of the James Juniors home from school with the dreaded lurgy, so no time to craft 'from scratch' today. Days like this are perfect days to work on a kit though, where all the hard work and prep is done for you. So today I'm sharing not one card but 5 - yes the five different all-occasion card designs that feature in the fabulous new 'Lots of Happy Card Kit' - take a look:


Here's the low-down on this kit:

Lots of Happy, Lots To Love - There's lots to love in this all-inclusive kit: with 4 each of 5 designs, you can create a total of 20 all-occasion cards using the included 'Lots of Happy' stamp set and then colour these using the Watercolour Pencils that are also included in the kit. two of the four pencils that are included are exclusive to this kits and not available with the standard pencil set. Here are each of the 5 designs individually:


A Fun Night In - The Lots of Happy Card Kit is perfect for a fun night in with friends - if ever you needed an excuse to get together on a wintry afternoon or evening and have some fun, this is it! No skill or previous experience necessary, so whether you consider yourself a crafter or a complete novice that just loves to send beautiful handcrafted cards, this kit is for you! The theraputic benefits of colouring are well-known (you can read all about that in my previous post here) - add some refreshments - tea and cake or wine and nibbles, either works! - and a fun night is guaranteed! If you would be interested in hosting a fun evening with friends, do get in touch - I would love to help you to host a night to remember! What's more if you invite 7 friends to participate during Sale-A-Bration - each kit costs £31.50 each - as the hostess you can get your kit for FREE!

And There's More - This fabulous kit also has a refill available, so if you enjoyed it the first time around, you can reuse your stamp set, block, ink and pencils and create even more cards! A refill costs just £19 - that's less than £1 per card, bargain!

Also the lovely people at Stampin' Up! have also produced a video showing this kit in more detail if you'd like a closer look:

Here is the visual summary of the key products used on today's project for you to pin for easy reference:


You can see all of my 'How To' summaries on my 'How To - Tips and Techniques' Pinterest board in case you've missed any. 

I know I often say this when a new kit comes along, but this really is a good one - the end results are so contemporary and pretty, I love it! Contact me to get one for yourself today!

I'll be back tomorrow with another project. Until then, happy stampin'!


Stampin' Up! Supplies Used:

Table built using Product Table Builder by The Crafty Owl - Independent Stampin' Up! Demonstrator.

Layered Gingerbread In A Jar - The Perfect Homemade Christmas Gift PP373

by Joanne James3. December 2017 09:00

It's Sunday and time for this week's new challenge over at The Paper Players! The lovely Laurie is the hostess this week and she has a rather delicious seasonal theme for us to work with:


I'm also linking up with the team over at Stamp Ink Paper this week who are looking at Christmas wrapping and packaging solutions. I love to make gingerbread at this time of year but it's still a little early for me to have baked and wrapped creatively, so instead I decided to share with you a little something that I've been preparing for Ben's school Christmas Fayre the week after next that fits Laurie's theme perfectly. They are having a 'Jam Jar Tombola' stall, so I've been busy making up jars of all kinds for the children to win, including some jars of dry ingredients that they can use for their own festive baking. Here's one of my jars for gingerbread cookies - take a look:


These really are so easy to make: you simply layer the dry ingredients into a kilner jar, then decorate and add a tag with the details of any ingredients you need to add and the method. 

I used the 'December Deliciousness' stamp from the 'My Little Things' stamp set to decorate my jar, using my markers to selectively colour each of the elements in and adding a heat-embossed sentiment banner across the middle to create a decorated top to my jar. I paired it with some retired paper that fits perfectly with my theme for a folded tag that includes the ingredients and recipe, some ribbon and a wooden spoon that I will be tying to the side of the jar too ready for stirring - you could also add a gingerbread cutter if you have one.

I'm a big fan of homemade gifts at Christmas and there is no limit to the things you can put in a jar; with a little decoration this kind of thing can make a thoughtful, presentable gift.

If you would like to make a jar like mine, I've included the details from the inside of my folded tag below:

Easy Gingerbread Biscuits

This jar contains:

  • 100g soft light brown sugar
  • 1 tsp ginger, ¼ tsp allspice
  • ¼ tsp cinnamon, 225g plain flour
  • ½ tsp baking powder
  • ½ tsp bicarbonate of soda


You will need to add:

  • 150g melted butter
  • 1 tbsp golden syrup
  • 1 egg yolk


Method:

  • Mix 150g melted butter with 1 tbsp golden syrup and 1 egg yolk.
  • Add to the dry ingredients, mix well, then knead to a dough.
  • Chill for 15 mins then roll out.
  • Cut into biscuits and bake at 200C/180C fan/gas 6 for 8-10 mins. Cool on a wire rack.


Here is the visual summary of the key products used on today's project for you to pin for easy reference:


You can see all of my Product and 'How To' summaries on my 'How To - Tips and Techniques' Pinterest board in case you've missed any. 

Before you reach for your ink and papers, check out what our amazing team has created to inspire you this week:

The Paper Players Design Team
 
 
Here's a quick recap of our challenge rules:
 
1.  Create a new paper project
2.  Upload your creation to your blog with a link back to us and provide a direct link to the post featuring your challenge submission.
3.  Please link your card to no more than four challenges, TOTAL.
4.  Have FUN! 


I look forward to seeing what you create with this week's theme. Enjoy the rest of your weekend as it will be over all too quickly; my Christmas festivities have truly started in earnest this week and I am busier than ever! I am off to run a pre-Christmas Stampin' Up! party for a customer and her friends this afternoon, then will be returning home to put the finishing touches to my class preparations for my Delightful Daises Technique Class tomorrow and complete my 100 card challenge for the Ronald McDonald Christmas Cheer campaign that is happening in the UK this weekend.

I'll be back as soon as time allows with more projects; until then, happy stampin'!


Stampin' Up! Supplies Used: 

Table built using Product Table Builder by The Crafty Owl - Independent Stampin' Up! Demonstrator.

New Online Exclusives

There are new products available exclusively in the online store from 5 November - check them out here.

Latest Kits!

Stampin Cut and Emboss

The Layered Landscapes Kit and Nature's Paintings Kit are the latest kits in the online store - get yours here!

Shop Online

Access my online shop 24 x 7, 365 days of the year:

Current November hostess code:

9NKXDTTR

Shop Online

Mini Catalogue

BROWSE THE CATALOGUE

'Tis The Season - the new Stampin' Up! Mini Catalogue is here! For more details and to download your copy click here

Scrapbooking

Stampin' Up! has introduced a new range of 12x12" scrapbooking product and kit - the full range is now available to purchase online. To download a copy of the new digital Scrapbooking Catalogue click here.

2024-25 Annual Catalogue

BROWSE THE CATALOGUE

Click on the image to download your copy of the 2024-25 annual catalogue. For a full list of current SU! supplies, go to my online store. If you would like any help or advice, please drop me a line at joanne@thecraftyowl.co.uk or give me a call on 07773 421446 - I'd be happy to help.

Join My Team

It's always a great time to join Stampin’ Up! New team members can get £130 worth of products for only £99 + free business supplies + free shipping + all the fun being a part of Stampin’ Up! Stampin' Up! has something for everyone: join my growing team and benefit from my support to enjoy Stampin' Up! however you choose.

If you're interested, call me for a chat to understand how I can help you realise your goals. Alternatively, if you have already decided to sign up and you just can't wait, please click here for the link to the online form where you can sign up and order your starter kit right away! 

About Me

Hi I'm Joanne and live in Northampton and when I'm not looking after my husband and two beautiful children, am an avid crafter with a passion for all things Stampin' Up!

I must confess that I have never been a big rubber stamper - until I discovered Stampin' Up! that is. I love the fact that I can get such great results with co-ordinating stamps, inks, papers and punches - the possibilities are endless! Join me on my stamping journey as I share the things I love and be inspired to create amazing things yourself!

Follow Me

Monthly Newsletter

Box Builder

Click the button above to use Box Buster to create your custom box design using the Envelope Punch Board!

Kits Collection Now Available!

Stampin Cut and Emboss

The new Kits Collection from Stampin' Up! is now available!

Click here to see the current kits available and order yours online today.

I Design For


Stampin' Up Stuff

This is my personal blog and is not endorsed by Stampin’ Up! I hope you find it a plentiful source of ideas and personal inspiration but please don't copy my designs for contest submission or use for classes, publication or sale without express permission.