by Joanne James10. June 2015 19:52Having had a busy start to my week with two technique classes and my monthly Project Life Class, I am finally back with my blog today to share with you one of the cards we made in my technique class. The class featured the now retired set 'Painted Petals' from the Spring-Summer Seasonal catalogue; the ladies that attend my classes were so keen to have a class using this set that we decided we would carry it over into June. Here is one of the cards we made:
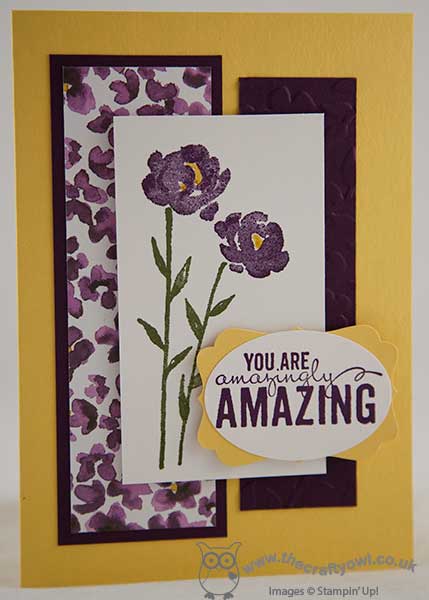
A beautifully bright and cheery card in Daffodil Delight and Blackberry Bliss. We used some retired All Abloom DSP matted on Blackberry Bliss, alongside a panel of Blackberry Bliss that we embossed with the Spring Flowers embossing folder (also retired), then mounted our panel of Whisper White stamped with the double flower image in Blackberry Bliss and Mossy Meadow (the yellow flower centres were added with a Crushed Curry Stampin' Write marker). To finish we added the sentiment, punched out with a large oval punch and mounted on a piece of yellow cut with the Decorative Label punch. This was our 'finishing up' card, having made a rather more complicated box card beforehand (one to share another day!).
Next month's technique class is featuring the gorgeous new stamp set 'You've Got This'. If you would like to join with me and two groups of the nicest people you could wish to know, do get in touch for more details and to book your place.
That's all from me today; back tomorrow with a card for our new challenge over at Create With Connie And Mary. Until then, happy stampin'!
Stampin' Up! Supplies Used:
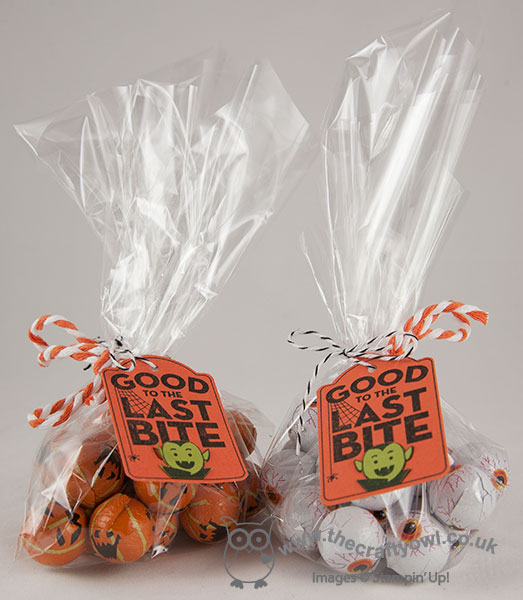
by Joanne James31. October 2014 16:00I'm off to a Halloween party today with friends and I wanted to do a quick post to share with you some of the treats I made to take for the children. I found these cute mini pumpkins for the girls and slightly more scary eyeballs for the boys, and just tied them in some cellophane with the White and Tangerine Tango Two-tone Trim and added some cute tags:
I also found these cute chocolate Halloween figures that I dressed up with some covers made using the Scalloped Tag Topper Punch with a large oval punched out of the front section, and decorated with some colourful tags - I stamped the Halloween image from the 'Merry Everything' stamp set twice, once on Tangerine Tango then again on some scraps of retired Lucky Limeade cardstock and cut out the Dracula on the green cardstock and paper-pieced them together.
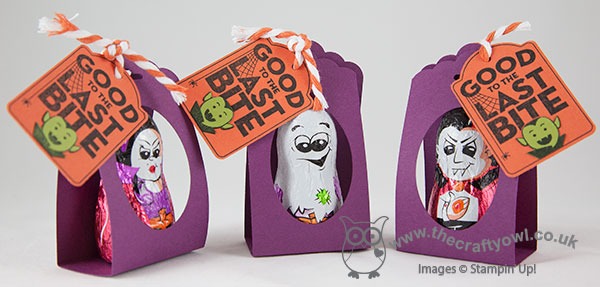
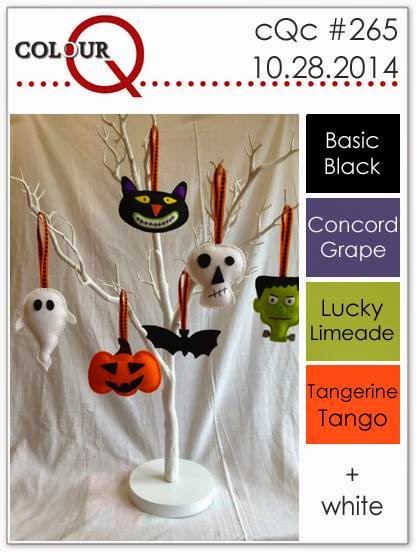
How cute are these? I'm entering these into this week's challenge over at Colour Q, as they were inspired by this week's colour scheme and challenge badge (I substituted Rich Razzleberry as my purple, since I didn't have and Concorde Grape):
Happy Halloween everyone! Back tomorrow with another project; until then, happy stampin'!
Stampin' Up! Supplies Used:
by Joanne James1. March 2014 20:16Today I've had the kind of day where I feel like a true working mother - my 'to do' list is reaching epic proportions and I seem to be rushing from one thing to the next and am welcome for the break that sitting down to write my blog today has given me: and breathe ...!
Well being Welsh, there's only one thing I could share with you today: March 1st is St David's Day, the day that celebrates the patron saint of Wales, so it had to be a card featuring the national flower - daffodils. The first time I saw the Petite Petals punch I knew it would make great daffodil petals - it was the perfect shape. I've seen a few examples in blogland - the first one of which I think was by Jackie Topa - but today I'm going to share my version with you. So for working mothers everywhere and Welsh people at home and abroad, Here's today's card:
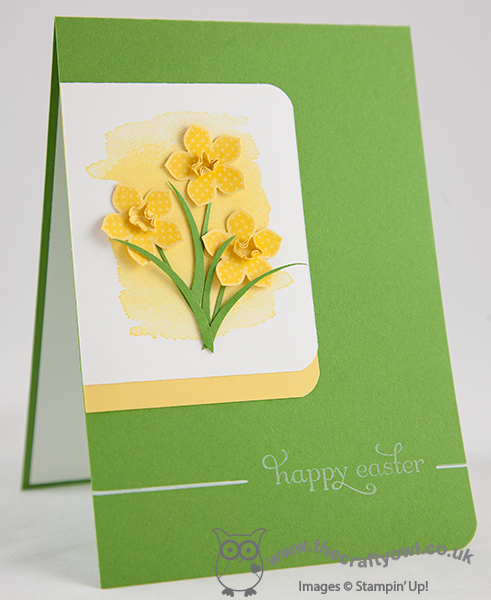
I stamped the petals in Daffodil Delight onto the same colour cardstock using the spotted flower stamp just to give some pattern, and made the trumpets by using a flower shape from the Itty Bitty Punches which I formed by scrunching around the rounded end of my paper piercing tool. here's a close up of the flowers so that you can see what I mean:
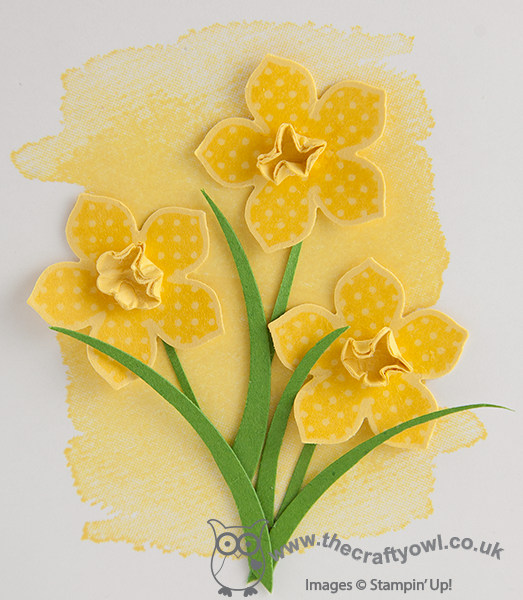
I cut some stems and leaves using the edges of my large oval punch and my paper snips, and mounted these onto a piece of Whisper White cardstock that I background stamped with the large colourwash stamp from the Happy Watercolour set to add some interest. I edged this piece with yellow for definition and mounted my decorated piece onto a Gumball Green card base. I decided to make my card into an Easter card and stamped my sentiment in Whisper White kraft ink and set it within a horizontal line that I drew in with my chalk marker.
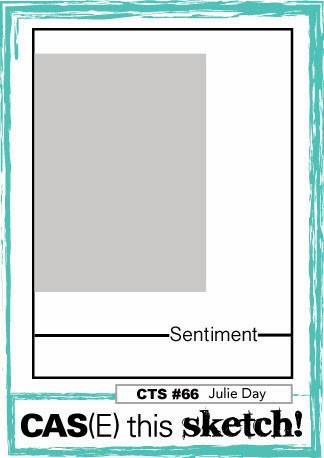
I used this week's sketch layout at CAS(E) this Sketch for my card this week and was delighted to see that the challenge over at Less is More this week is to use yellow and green on your card - perfect!
Back tomorrow with another project; until then, happy stampin'!
Stampin' Up! Supplies Used:
aca38dd3-4a82-4fa0-96b6-1224bf6f20ec|0|.0|96d5b379-7e1d-4dac-a6ba-1e50db561b04
Tags: Punch Art, Petite Petals, large oval punch, Delightful Dozen, Easter, Happy Watercolour, Envelope Punch Board, Shop online, Stampin' Up, Stampin' Up Card, Stampin' Up Card ideas, Stampin' Up Supplies
Cards | Punch Art | Stamping
by Joanne James25. December 2013 21:05Well, it's here at last - Merry Christmas lovely blog readers! We've had a lovely day today that has involved much present unwrapping, eating and Lego building - don't you just love Christmas?!
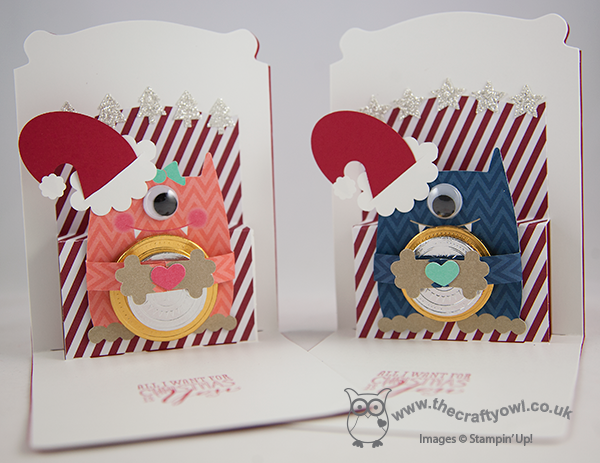
I still have a few Christmas things that I haven't shared with you, so today thought I would share the Christmas cards I made for my little James juniors. I was inspired by Lizy Bartaby's card here - I loved the idea of the Santa Monster Hugs but took my cards a step further by making them into pop-ups using my Pop 'n' Cuts base; I'm always looking for new ways to use this. So I made a co-ordinating pair of his and hers santa monster hugs. Here's the little girl santa monster:
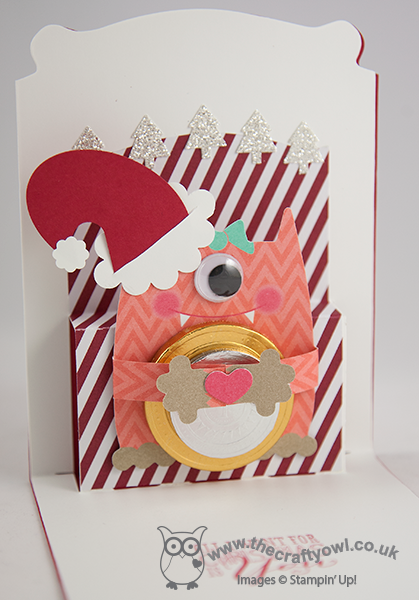
Cute, huh? Here's the little boy monster that is her partner-in-crime:

How cute are these? I made my hats using an oval punch with a section cut out using the word window punch to create the curve of the hat. I made the brim using a 'squashed' scallop circle as I don't own a scalloped oval punch, which would of course make this slightly easier. A pop up card and chocolate coins - I'm not sure which the children thought was best (who I am kidding - the chocolate, of course!)
I'm sure this won't be the last we'll be seeing of these little guys - but for now, I hope you have all had a wonderful Christmas and that Santa brought you everything that was on your wish list.
Back tomorrow with another project; until then, happy stampin'!
Stampin' Up! Supplies Used:
8697ac64-5747-40a2-873e-ccca9c8231c3|0|.0|96d5b379-7e1d-4dac-a6ba-1e50db561b04
Tags: Christmas, large oval punch, Merry Minis, Season of Style, Shop online, Stampin' Up, Stampin' Up Card, Stampin' Up Card ideas, Stampin' Up Supplies, Christmas Messages, Monster Hugs, Pop 'n' Cuts
Cards | Pop Ups | Stamping
by Joanne James29. October 2013 23:12Today's blog post is a late one as I've been out this evening and had a reasonably hectic day and didn't get a chance to do it beforehand. I used sketch #64 over at Paper Craft Crew Challenges as the basis for this card and I'm just in time to sneak in a link up, so thought I'd better get typing! I had a commission card request for a female birthday card that featured netball. Whilst I knew the basketball stamp in 'Great Sport' would make the perfect netball, I was wondering how I was going to pull it all together. I decided to use the PPCC sketch this week as the basis for my design layout. Here's the sketch inspiration:
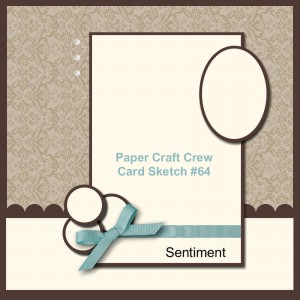
So, sunglasses at the ready - here is my interpretation:

The card is very orange, but having played around with various other colour combinations this really did seem to work best (and luckily, the recipient loves the colour orange!) Any of the colours I would ordinarily have paired with Tangerine Tango made the card look too masculine and really didn't work. I did use some Real Red as an accent colour and a little Basic Grey. Wondering how I created the netball hoop and net? I simply used my large oval punch to cut some thin strips of cardstock and adhered them to each other in a weave pattern.
And the moral of the story? Orange is for all cards, not just Halloween ones! Pop over to the Paper Craft Crew Challenge page and see how the designers and other participants have interpreted this week's sketch.
Back tomorrow with news of more great offers from Stampin' Up; until then, happy stampin'!
Stampin' Up Supplies Used:
by Joanne James14. September 2013 21:09Last week it was my mother-in-law's birthday and today I'm sharing the birthday card I made for her, using my Chalk Talk set for the first time:
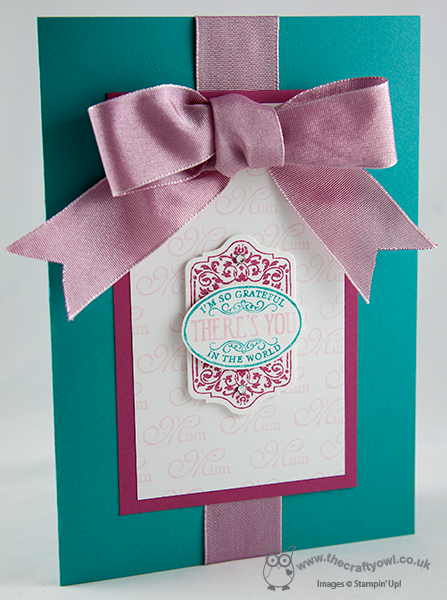
I had some of the lovely pink wide ribbon left over from the Spring-Summer Seasonal Catalogue earlier in the year and I wanted this to be a real feature of this card, so the actual stamping is understated. I really love the sentiment on this Chalk Talk stamp and for someone who is such an integral part of our family, it was especially appropriate for this card. Also, did you notice the background paper - wondering where I got this from? Well, I made it myself using the 'Mum' stamp from the retired 'For My Family' stamp set. I'm really pleased with how it turned out - and I didn't even use a stamp-a-ma-jig to line it up! I love the colour combo too - I'm really into Bermuda Bay at the moment and I think it works really well with the pinks in this card.
Back tomorrow with another card; until then, happy stampin'!
Stampin' Up Supplies:
Stamps: Chalk Talk, For My Family (retired)
Cardstock: Whisper White, Rose Red, Bermuda Bay
Ink/Stampin' Write Markers: Pink Pirouette, Rose Red, Bermuda Bay
Tools: Chalk Talk Framelits, Extra Large Oval Punch, Big Shot, Magnetic Platform
Finishing Touches: 1 1/4" Two Tone Ribbon (retired), Basics Rhinestones
by Joanne James24. May 2013 21:19As promised, I'm back today with the last of the owl punch cards from this month's class. Our last card was another alternative use for this versatile punch; this time, to make a cute giraffe punch art card:
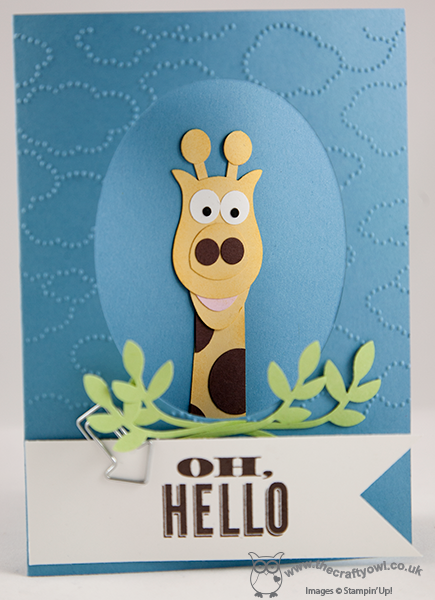
To make this card, the owl's body (minus his feet!) becomes the giraffe's head - clever, right?! We then used a variety of circle punches and the large oval punch to create the rest of him. The edges of the finished giraffe were sponged in So Saffron ink to add dimension and I placed him inside the card looking out, for added interest. The oval aperture was easy to make using an oval framelit and a few branches from the Bird Builder punch were added to give the giraffe something to munch on. I finished this card with embossed clouds and an 'Oh Hello' sentiment highlighted with a Cute Clip (love these!), but you could just as easily use a happy birthday greeting - I think this would make a lovely card for a little person.
I hope you like the finished card - there were a few interesting adaptations to this card by the ladies at my class: everything from hearts added to the sentiment banner to eyelashes on the giraffe. That's one of the things I love about teaching classes - whilst I scope out the original design, it can still be adapted or customised to make it individual to you. If you would like to attend my stamping classes, please do get in touch via joanne@thecraftyowl.co.uk for more details. Next month's class is a One Sheet Wonder class using the Secret Garden stamp set and framelits.
Back tomorrow with another project - until then, happy stampin'!
Stampin' Up Supplies:
Stamps: Oh Hello
Cardstock: Whisper White, Marina Mist, Pink Pirouette, So Saffron, Chocolate Chip, Basic Black, Certainly Celery
Ink/Stampin' Write Markers: Early Espresso
Tools: Owl Punch, Cloudy Day Textured Impressions Embossing Folder, 1" Circle Punch, 3/4" Circle Punch, Bird Builder Punch, Oval Framelits, Itty Bitty Shapes Punch (circle), Large Oval Punch
Finishing Touches: Cute Clip
978903eb-96a2-4560-8b79-e81e3b888ce1|0|.0|96d5b379-7e1d-4dac-a6ba-1e50db561b04
Tags: bird builder punch, circle punch, Cloudy Day Textured Impressions Embossing Folder, Classes, Cute Clips, Itty Bitty Punches, Oh Hello, Owl Punch, Ovals Framelits, Punch Art, Stampin' Up, Stampin' Up Card, Stampin' Up Card ideas, Stampin' Up Supplies, large oval punch
Cards | Classes | Punch Art
by Joanne James22. May 2013 20:36As promised, here's the second card from last week's Owl Punch card class - this time Nurse Owl coming to wish the recipient 'Get Well Soon':
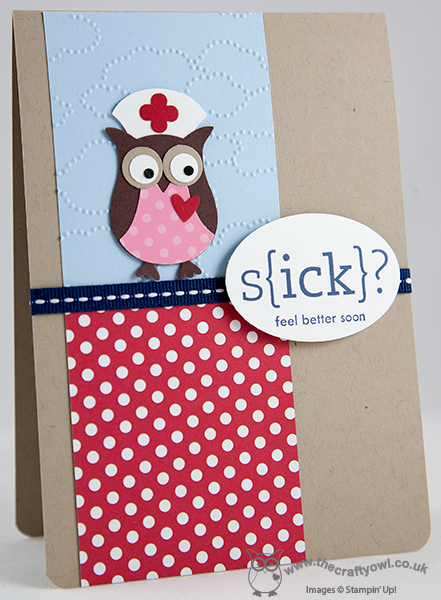
I've seen these little nurse owls lots of times and think they make a great focal point for a 'get well soon' card. The nurses hat is made from an upside-down 'waistcoat' piece of the owl, whilst the cross is punched with one of the punches from the the Itty Bitty Punches set. This is the only card from our class that we made that wasn't an original design of mine. Jo Dumbleton shared this card on her Facebook page recently and as I was planning my class, with my owl punch, cloudy day embossing folder and 'sick' stamp at the ready, I knew her card would be perfect to showcase all three - and I didn't feel I could improve upon it. I hope you like it too.
Back tomorrow with another of our class cards - and it will be an owl, but not as you know it; you'll have to pop back tomorrow to see what I mean ... until then, happy stampin'!
Stampin' Up Supplies:
Stamps: Word Play
Cardstock: Whisper White, Basic Black, Crumb Cake, Chocolate Chip, Real Red, Brights DSP, Polka Dot Parade DSP
Ink/Stampin' Write Markers: Night of Navy
Tools: Owl Punch, Large Oval Punch, Itty Bitty Shapes Punch, Cloudy Day Textured Impressions Embossing Folder, 3/16" Corner Punch
Finishing Touches: 1/4" Night of Navy Stitched Grosgrain Ribbon
by Joanne James10. May 2013 21:16Good evening, blog followers! Apologies for the lack of blog post yesterday; things have been very busy in the world of the Crafty Owl this past few days and yesterday just ran away with me. Anyway, back today with a card I wanted to share in advance of next week's card class featuring my favourite punch of all time - the owl punch. This punch really is so versatile; there are many examples of alternative uses for this punch. Today I'm sharing an alien pop-up card, inspired by the many examples found on Pinterest - this is the outside:
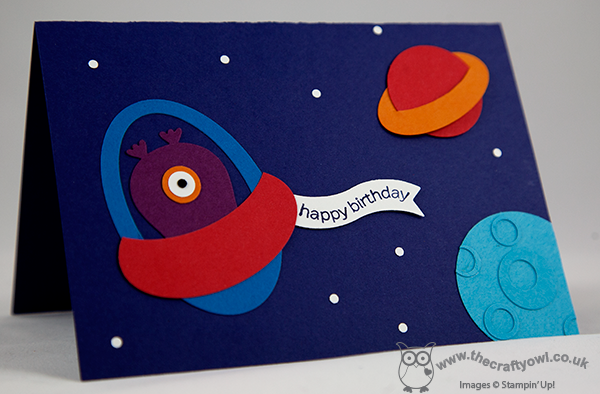
Recognise the alien in the spaceship? An upside-down owl with one eye, along with some punch art planets and stars. When you open it up, the inside looks like this:
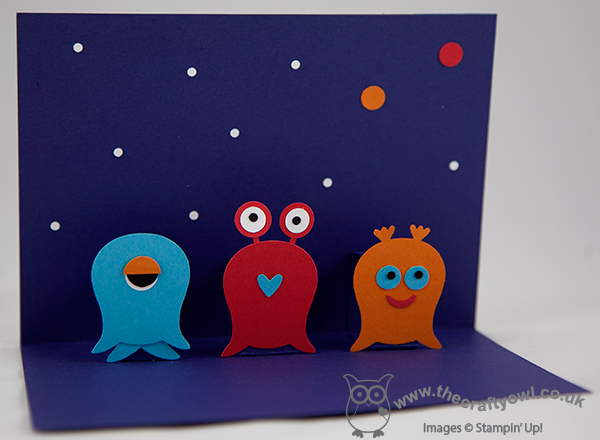
A trio of aliens pop up to wish you a happy birthday! This kind of card is such fun - you can customise your aliens and make them different every time. perfect for a birthday that's 'out of this world'! The owl punch is the feature punch for this month's card class - if you live in Northampton and the surrounding areas and would be interested in attending one of my classes, do get in touch for more details. Right - I'm done with the alien puns; I'm off to try and schedule tomorrow's blog post as I'll be on a Stampin' Up! regional training day in Telford all day - should be fun! Until tomorrow, happy stampin'!
Stampin' Up Supplies:
Stamps: Happiest Birthday Wishes (retired)
Cardstock: Whisper White, Rich Razzleberry, Tempting Turquoise, Pacific Point, Pumpkin Pie, Basic Black, Concord Crush (retired), Poppy Parade (retired)
Ink/Stampin' Write Markers: Concord Crush (retired)
Tools: Owl Punch, Large Oval Punch, Small Oval Punch, 1" Circle Punch, 1 1/4" Circle Punch, Oval Framelits, Bitty Banners
f79f64f2-a211-44b2-946e-f5843d8e7492|0|.0|96d5b379-7e1d-4dac-a6ba-1e50db561b04
Tags: Big Shot, Bitty Banners, circle punch, Happiest Birthday Wishes, large oval punch, Ovals Framelits, Owl Punch, Punch Art, small oval punch, Stampin' Up, Stampin' Up Card, Stampin' Up Card ideas, Stampin' Up Supplies
Cards | Classes | Punch Art
by Joanne James29. April 2013 20:32I'm back with more Pop 'n' Cuts to share today, but not as a card. As I mentioned yesterday, in the same way that the Dress Up Framelits can be used without the Pop 'n' Cuts base, the base can also be used without the framelits as a structure to make a pocket or treat holder. Here's an example of one such treat holder, designed by the lovely Monica Gale, that I made at my quarterly training session:
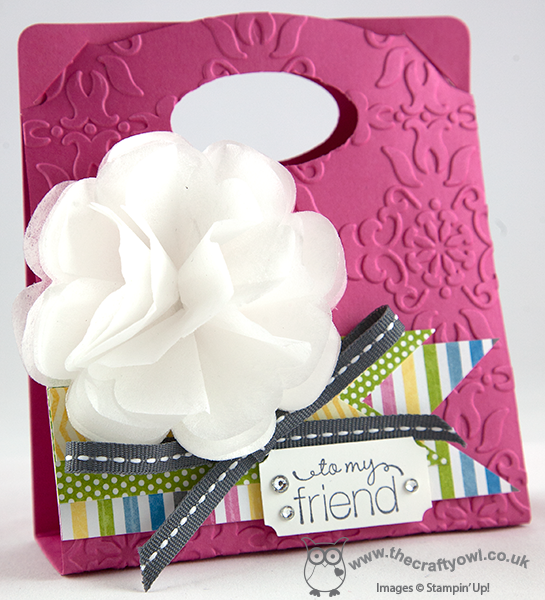
How lovely is this? it was so easy to put together: just cut a base using the die and the Big Shot, then emboss the front panel, score in the base lines and punch some ovals for handles, then decorate as desired. We used some strips of Sunshine and Sprinkles DSP and made a gorgeous flower from the filter paper that features on page 7 of the Spring-ummer catalogue. If you haven't noticed this, at £2.75 for 12 sheets it represents great value and each pack has enough to make lots of flowers in all different shapes and sizes. This flower was made with 6 layers of filter paper and the second smallest frameit in the Floral Frames set.
This treat holder would be great to wrap around a cellophane bag of chocolates or a hand-iced biscuit (that's what I'll be using mine for!) as a sweet treat for someone special. Come back tomorrow to see the card I made that co-ordinates with the treat holder that features a 'stepped up' filter paper flower. Until then, happy stampin'!
Stampin' Up Supplies:
Stamps: Friendly Phrases
Cardstock: Melon Mambo, Whisper White, Sunshine and Sprinkles DSP
Ink: Basic Grey
Tools: Pop 'n' Cuts Base, Floral Frames Framelits, Big Shot, Ticket Duo Builder Punch, Large Oval Punch, Vintage Wallpaper Embossing Folder
Finishing Touches: Basics Rhinestones, 1/4" Stitched Grosgrain Ribbon Basic Grey, Creped Filter Paper
b876467c-d59a-48af-a0bc-ce5ad74ecea5|0|.0|96d5b379-7e1d-4dac-a6ba-1e50db561b04
Tags: 3D Projects, Big Shot, boxes, large oval punch, Pop 'n' Cuts, Stampin' Up, Stampin' Up Supplies, Sunshine and Sprinkles, Friendly Phrases, Floral Frames Framelits, Ticket Duo Builder Punch, Vintage Wallpaper Embossing Folder, Creped Filter Paper
3D Projects | Boxes