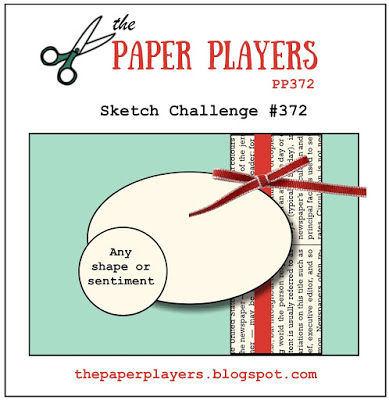
It's Sunday and time for this week's new challenge over at The Paper Players! It's my turn to host this week and I have my favourite kind of challenge, a sketch, for you all to work with:
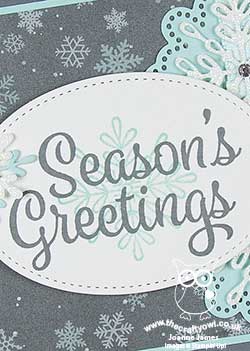
My card today is all about the snowflakes and uses the Snowflake Sentiments bundle - take a look:
Here's the low-down on today's card:
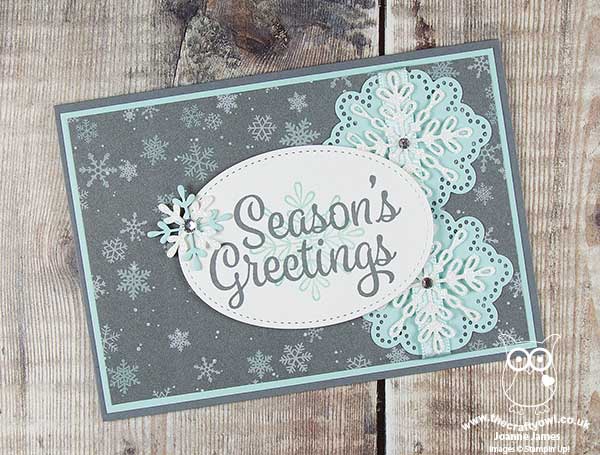
Snowflake Inspiration - I used the piece of snowflake patterned paper from the Christmas Round The World DSP pack as the starting point for my card today; the dark grey reminds me of a snowy sky and is the perfect backdrop for those pale blue and white snowflakes.
Swirly Snowflake Border - The paper pairs beautifully with the stamps and thinlits in the Snowflake Sentiments bundle. I used the Swirly Snowflake thinlits to create my layered border and snowflake embellishment. The detail on these delicate cuts makes for some really pretty pieces, especially when cut from Dazzling Diamonds glimmer paper - the snowflakes are so sparkly against the Pool Party layer and the grey of the background paper. The thinlits are designed to cut with a straight edge to one side of the border, but I wanted them to be a mirror image so I snipped away the excess from the snowflakes and cut the background piece in the same way.
Open To Interpretation - I added a ribbon and bow to my sketch as I don't often add bows to the front of my card, yet when I came to make my card, I chose not to add a bow as I didn't want to obscure the detail of those pretty snowflakes, although I did add a strip of ribbon between the border layers. I also moved up the position of my snowflake embellishment to provide a better balance with the positioning of my sentiment. These changes don't make my card 'wrong' - they are just one way to interpret the sketch. I can't wait to see how it inspires you!
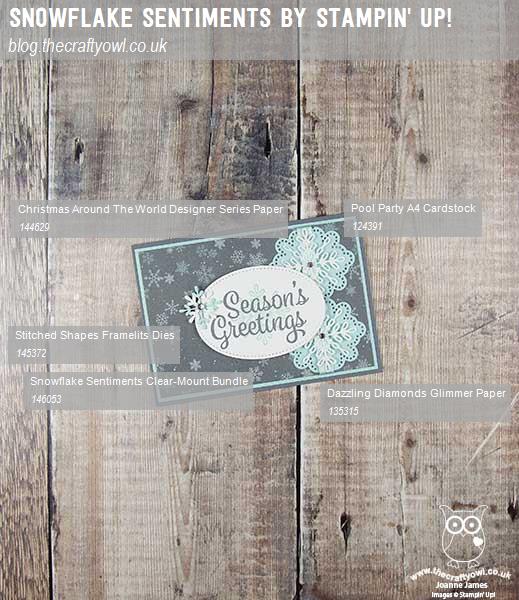
Here is the visual summary of the key products used on today's project for you to pin for easy reference:
You can see all of my Product and 'How To' summaries on my 'How To - Tips and Techniques' Pinterest board in case you've missed any.
Before you reach for your ink and papers, check out what our amazing team has created to inspire you this week:
The Paper Players Design Team
Here's a quick recap of our challenge rules:
1. Create a new paper project
2. Upload your creation to your blog with a link back to us and provide a direct link to the post featuring your challenge submission.
3. Please link your card to no more than four challenges, TOTAL.
4. Have FUN!
I look forward to seeing your interpretations of my sketch in the gallery this week. Enjoy the rest of your weekend as it will be over all too quickly; we are ice-skating later with the swimming squad - our first Christmas party of the season! I'll be back tomorrow with another project; until then, happy stampin'!
Stampin' Up! Supplies Used: