Tree Lot Dies Christmas Home Decor And Festive Table Favour AYSI 280

by Joanne James29. July 2022 12:00

Today I'm sharing my design team card for our new challenge over at As you See It where it's time for a festive 'fill in the blank' challenge:
       

Today we are all about Christmas in July. I do like to get a start on Christmas cards at this time of year, but when it come to my favourite Christmas in July creation it has to be home decor and table favours; these always take longer to make than you think they will and in the busy run up to Christmas there is rarely time to devote large chunks of time to crafting, so I like to get a good headstart on these kinds of projects - it makes me feel organised! I have two projects for you today - a piece of home decor and a co-ordinating table favour. Both use the Tree Lot Dies, available free with a £90 purchase during the current Sale-A-Bration promotion - and I took the inspiration for my festive caravan and 'trees for sale' scene from the top right photo over at Hand Stamped Sentiments - what a great inspo board! First up - here's my home decoration piece:
 

Here's the low-down on today's projects:

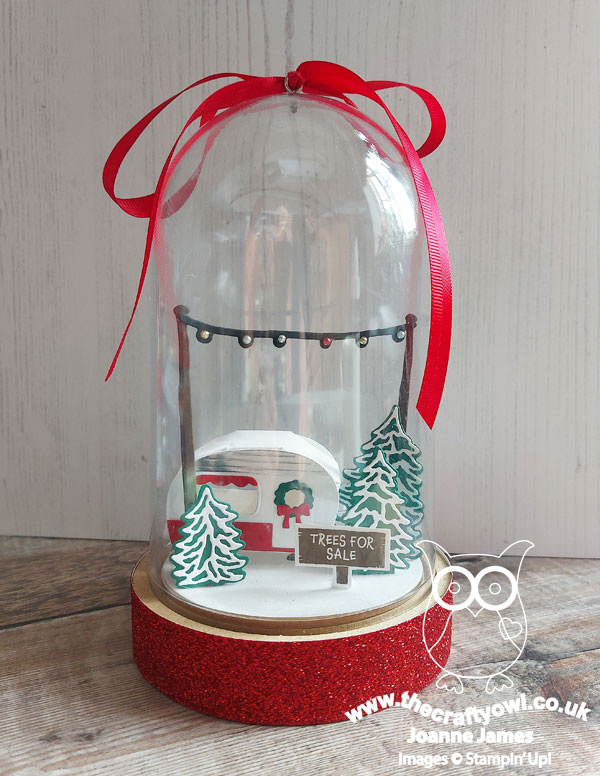
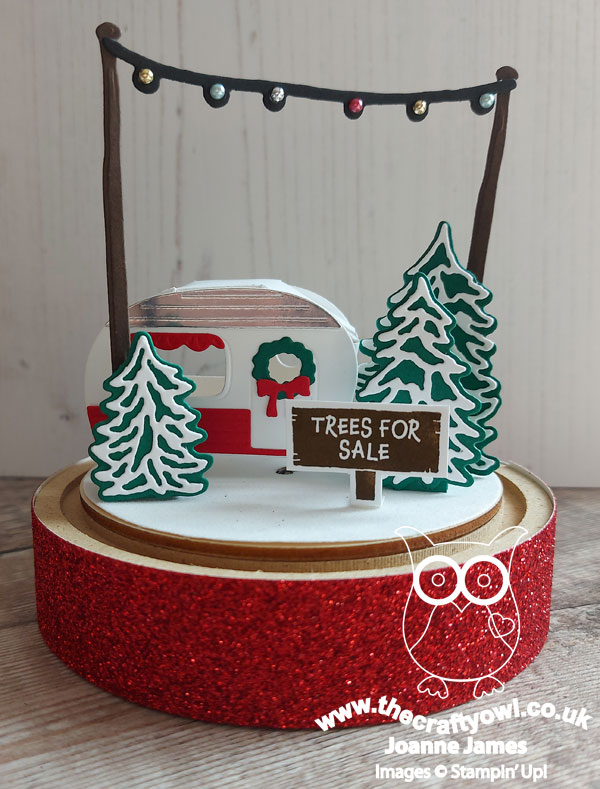
I used a dome that I had in my office that I bought last year that was just waiting to be made into something, and built my little scene onto the base, having first covered the base with snowy white velvet paper (cut with a retired layering circles die). The string of lights, embellished with the pretty Festive Pearls, the trees and the 'trees for sale' sign are all one dimensional and stand with the aid of small supports behind them. The caravan is made by diecutting two of the diecut caravan pieces and adding a base (described in more detail with the table favour below) and a second curved piece of cardstock for the roof (the roof piece measures 3 1/2" x 1 1/2", scored at 1/2" on each side and 1/4" on each side respectively). I added some red ribbon to the top of my dome and red glimmer to the base of my dome for extra festive feel. Here's a close up of my little scene, with the dome removed so that you can see the detail more easily:
 

My finished dome measures 11cm wide by 19cm tall and that's not all - it lights up too! 
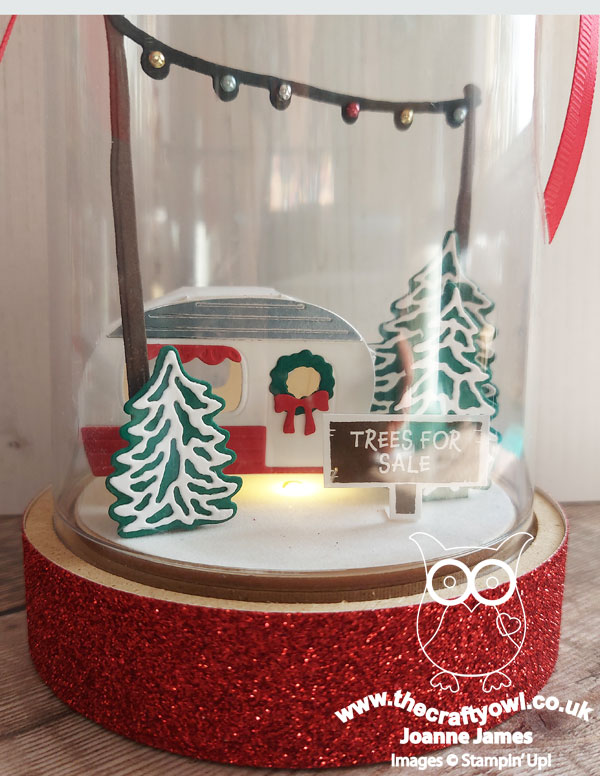
 

A little tricky to see since I photographed it in daylight, but a nice feature to give a cosy night time glow. In addition to my decoration, which could be used as a table centrepiece, I also created the first of a set of table favours made from the caravan die. These are quite easy to make: just cut two caravan sides, then take a piece of cardstock measuring 4 1/8" x 1 1/2", scored at 1" on each side and 1/4/" on each side respectively, to create the open box shape. They are just big enough to hold two Lindor chocolates or similar:
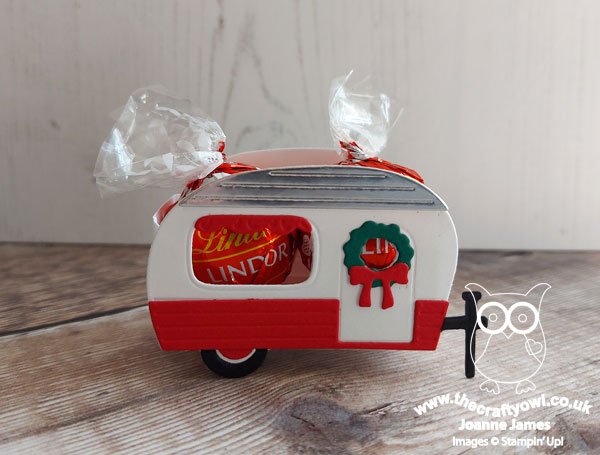
How cute is that?! Both of today's projects are quite easy to make, but I won't lie - there is a time-consuming element, since all of the little pieces need to be cut and glued in place. Worth it though I think - and if you start now, you will have them finished and ready to go when Christmas rolls around!

The key products used on today's project are included in the table below - no visual today. 

Here's a summary of our challenge rules:

  • Create any card, scrapbooking page, 3D project or packaging project that fits the challenge.
  • Please include the challenge graphic and link back to the challenge in your blog post. Turn off word verification so we can leave you lots of lovely comments. Make sure you link the post not the whole blog to the Linky. Use #AYSIXXX when uploading to a public gallery.
  • If you’re unsure about ‘the rules’, check the details under the Challenge Guidelines tab on the As You See It Challenge homepage.
  • In a Fill in the Blank challenge, complete the sentence in the Challenge Banner with the phrase that is true for you and create your project using the words you used. Tell us what you said in your blog or on your site.
How will you fill in the blank? What are your favourite Christmas In July projects to create? We look forward to seeing your creations in the AYSI gallery.

Enjoy your day and I'll be back tomorrow with another project. Until then, happy stampin'!


Stampin' Up! Supplies Used:
Table built using Product Table Builder by The Crafty Owl - Independent Stampin' Up! Demonstrator.

Sweet Soiree Silver Mini Gable Gift Box

by Joanne James12. March 2018 21:00

Another Monday, another week! Today I'm sharing a cute packaging option that is perfect as a wedding favour or thank you gift and takes minutes to put together - take a look:


Here's the low-down on today's project:

Gifts And Goodies - Have you spotted these lovely silver mini gable boxes on page 13 of the current seasonal catalogue? I'm all for making my own boxes, but sometimes you just need the speed and convenience of something off-the-shelf - and the silver gable box is the answer. Whether used as they are, or dry embossed (perhaps with the new Petal Pair embossing folders) or decorated with some designer series paper to dress them up a little, these sturdy little boxes are easy to turn from their flat-packed state into something robust enough to carry a small gift: perhaps some truffles, nail polish, or a few reinkers or embellishment sets ... and lots more besides! You can even turn them inside out so that you have a white outer that can then also be coloured as you choose.

Sweet Soiree - I've added a wrap with a piece of Sweet Soiree Specialty Designer Series Paper to my container. These gorgeous silver foiled designs give the hand-painted appearance of these papers a textured look all of their own and co-ordinate perfectly with the silver box - minimum effort, maximum impact!

Finishing Touches - I've added some Berry Burst metallic-edge ribbon and a small circle-punched tag, stamped with the Cake Soiree stamp set, to my box as a finishing touch. So pretty, I almost don't want to give it away!

Here is the visual summary of the key products used on today's project for you to pin for easy reference:


You can see all of my 'How To' summaries on my 'How To - Tips and Techniques' Pinterest board in case you've missed any. 

I'll be back tomorrow with another project. Until then, happy stampin'!


Stampin' Up! Supplies Used:

Table built using Product Table Builder by The Crafty Owl - Independent Stampin' Up! Demonstrator.

Bohemian Petite Cafe Gift Bag

by Joanne James6. June 2015 21:51

Just time to squeeze in a quick post from me today to share a really quick and easy packaging idea using the Stampin' Up! Petite Cafe gift bags and some lovely new product from the 2015-16 Stampin' Up! Annual Catalogue:

Isn't the little shopping trolley so cute?! This was a gift to me from my wonderful upline Monica recently and I wanted to share the lovely bag with you. It is decorated with the new Bohemian DSP and a stamped scallop circle with one of the stamps from the new 'Friendly Wishes' stamp set. The banners were punched in seconds using the new Triple Banner Punch and the bag was finished off with some Venetian Crochet Trim and Metallic Gold Baker's Twine. What was inside? Well, that would be telling...but it was yummy!

With packaging so quick and easy to recreate there really is no excuse not to add the handmade touch to your sweet treats!

Back tomorrow with a special project for the new challenge over at The Paper Players where I am the hostess this week. Come back then - I guarantee you won't want to miss it! Until then, happy stampin'! 


Stampin' Up! Supplies Used:

Table built using Product Table Builder by The Crafty Owl - Independent Stampin' Up! Demonstrator.


A Sweet Tweet For You!

by Joanne James13. February 2015 22:00

Yay it's Friday! It's been a long week and I'm glad the weekend is finally here. As it's Valentine's Day tomorrow, both James Juniors were keen to take some sweet treats into school to share with their class mates. I found these lovely heart-shaped jelly beans, that fitted perfectly into the thin cello bags:

This is just the first few - production became quite intense at one point and included boy- and girl themed packaging. You can see pictures of the total effort over on my Facebook page. These pretty pink ones were of course headed in the direction of the young ladies; we were stamping the tab top from the 'Hey, Valentine' set in a variety of pinks and colouring in with Blendabilities. Here's a close-up:

I definitely like the Melon Mambo one best (I'm such a 'brights' girl at heart) but they all look cute, especially with the addition of a heart-shaped Hodgepodge clip too. This little bag topper is a perfect fit for these cello bags and will work just as well at any other time of year too, not just Valentines. I also made a batch for a children's birthday party that I am hosting tomorrow afternoon, in pinks and purples. Our cello bags are great value at 50 for £2.25 and make such a nice way to create beautifully decorated party favours.

I'm told that the treats were well received by everyone which is nice to know and provided the perfect start to our forthcoming week-long half-term break.

Back tomorrow with another project; until then happy stampin'!


Stampin' Up! Supplies Used:

Table built using Product Table Builder by The Crafty Owl - Independent Stampin' Up! Demonstrator.


Mini Catalogue

BROWSE THE CATALOGUE

The mini catalogue is now live! Read and download your copy here.

Shop Online

Access my online shop 24 x 7, 365 days of the year:

Current April hostess code:

VDKNV7BH

Shop Online

Join My Team

It's always a great time to join Stampin’ Up! New team members can get £130 worth of products for only £99 + free business supplies + free shipping + all the fun being a part of Stampin’ Up! Stampin' Up! has something for everyone: join my growing team and benefit from my support to enjoy Stampin' Up! however you choose.

If you're interested, call me for a chat to understand how I can help you realise your goals. Alternatively, if you have already decided to sign up and you just can't wait, please click here for the link to the online form where you can sign up and order your starter kit right away! 

Latest Kit!

Stampin Cut and Emboss

The Rock Legend Kit has all you need to make 8 cards with coordinating envelopes. Along with the new Panda Friends Kit, both are available from January 4th for just £14 each - get yours here!

2023-24 Annual Catalogue

BROWSE THE CATALOGUE

Click on the catalogue for a full list of current SU! supplies - if you would like to order any of the items featured, please drop me a line at [email protected] or give me a call on 07773 421446 - I'd be happy to help.

New Online Exclusives

There are new products available exclusively in the online store from 5 March - check them out here.

About Me

Hi I'm Joanne and live in Northampton and when I'm not looking after my husband and two beautiful children, am an avid crafter with a passion for all things Stampin' Up!

I must confess that I have never been a big rubber stamper - until I discovered Stampin' Up! that is. I love the fact that I can get such great results with co-ordinating stamps, inks, papers and punches - the possibilities are endless! Join me on my stamping journey as I share the things I love and be inspired to create amazing things yourself!

Follow Me

Monthly Newsletter

Box Builder

Click the button above to use Box Buster to create your custom box design using the Envelope Punch Board!

Kits Collection Now Available!

Stampin Cut and Emboss

The new Kits Collection from Stampin' Up! is now available!

Click here to see the current kits available and order yours online today.

I Design For


Stampin' Up Stuff

This is my personal blog and is not endorsed by Stampin’ Up! I hope you find it a plentiful source of ideas and personal inspiration but please don't copy my designs for contest submission or use for classes, publication or sale without express permission.