Mixed Florals Everyday Arches Pop-Up Card

by Joanne James2. March 2025 08:00

At last - March has arrived! Today it's Sunday and time for this week's new challenge over at The Paper Players! It's the turn of the fabulous Claire to host this week and she has a seasonal theme challenge for us to work with:


Spring flowers - I am so ready for spring! It has been beautifully crisp and sunny here in the UK for the last few days and finally there are signs of spring. Snowdrops and crocuses are blossoming, and daffodils are starting to bloom, with tulips not far behind. I knew that for today's card I wanted to create something bright and colourful using the tulips stamp in the Mixed Florals stamp set - take a look at what I came up with:


Here's the low-down on today's card:

Full Of Life - My colour scheme for today's card was inspired by the piece of pink and orange ombre paper from the Full of Life pack. Like me, Claire is a fan of bright colours and I thought this injection of brights is just what was needed to propel us into spring! 

Mixed Florals - I used the large image featuring tulips on the front of my card - along with daffodils, tulips are the flower that most represents spring to me. I used lots of colours to get the blend of colours for my florals; I added some brass butterflies along with a Lemon-Lime Twist diecut piece behind, but really wanted the coloured florals to take centre stage:

I finished the front of my card with a diecut sentiment from the Greetings For All pack - I needed a bold sentiment to balance out the design.

Everyday Arches - I used one of the Everyday Arches Dies to frame my ombre designer paper on the front of my card, then used the insert to back another and create a simple pop-up design on the inside of my card for extra interest, and added another floral stem to decorate:


This kind of pop-up/out is so easy to use (you just need to score a strip of paper and create a four-sided 'box' to sit between the base and the panel you want to pop) and is a great way to do something a little different to add interest. 

Yay for brights and spring flowers - I can't wait to see what you create for this week's challenge. 

Here is the visual summary of the key products used on today's project for you to pin for easy reference:


You can see all of my Product and 'How To' summaries on my 'How To - Tips and Techniques' Pinterest board in case you've missed any. 

Before you reach for your ink and papers, check out what our amazing team has created to inspire you this week:

Here's a quick recap of our challenge rules:
 
1.  Create a new paper project
2.  Upload your creation to your blog with a link back to us and provide a direct link to the post featuring your challenge submission.
3.  Please link your card to no more than four challenges, TOTAL.
4.  Have FUN!

Enjoy your day; I'll be back tomorrow with another project. Until then, happy stampin'!


Stampin' Up! Supplies Used: 

Table built using Product Table Builder by The Crafty Owl - Independent Stampin' Up! Demonstrator.

Thankful Garden using Stampin Write Markers PP726

by Joanne James23. February 2025 08:00

Today it's Sunday and time for this week's new challenge over at The Paper Players! It's the turn of the fabulous Stef to host this week and she has my favourite, a sketch challenge for us to work with:


Full disclosure - I LOVE this sketch - there are so many creative possibilities! So much so, I have not one but three cards to share with you that all have it as the starting point. So first up, my challenge card! I had another idea that I wanted to try with the Thankful Garden stamp set, so I decided to use the blue/mauve colour combination over at Color Dare and set to work - take a look at what I came up with:


Here's the low-down on today's card:

Thankful Garden - I've made no secret of how much I love this bundle, that will launch with the new wave of Online Exclusives on 4th March. For today's card, I put the stencils to one side and used my Stampin' Write markers to outline colour the flower head and stem:


If you're not a fan of detailed colouring, this is a great way to use your Stampin' Write markers. You can currently receive not one but TWO colour family sets of Stampin' Write markers in addition to £130 of product for £99 when you join Stampin' Up! during the current Sale-A-Bration promotion. That's also the only way you can receive the Thankful Garden bundle before the 4th March launch date - by adding it to your starter kit. Now there's two reasons to sign up before the promotion ends on Friday :-) I added a couple of white diecut leaves and embossed a panel of Fresh As A Daisy DSP with the (retired) Painted Texture Embossing Folder behind my blossom, a few gems and a sentiment I fussy cut from the Greetings For All Ephemera pack to complete my card. I debated whether or not to use up some ribbon and add a bow and really couldn't decide:


I decided on balance I preferred it without, but what do you think? Do leave me a comment and let me know!

Goodbye Boho Blue - Boho Blue and Moody Mauve are the featured blue and purple on today's card; both are 2023-25 In Colours that are due to retire at the end of April. I will be featuring these and the other in-colours in this set in the next couple of months, but take this as your first reminder: now is a great time to stock up on re-inkers and any other 2023-25 in-colour supplies. They often run out before the end of the catalogue sales period, so don't leave it too late. Besides, if you add them to your basket and spend £55 or more before the end of the month, you can add a free product to your basket too - win-win!

Take Two and Three - As I mentioned above, I think this sketch is a keeper and so versatile. Whilst I used the flower as my shape for my PP card, I created two more cards that were more faithful to the circle. The first one was an Easter card using the Frames and Flowers DSP and one of the diecut wreaths, along with a sentiment from one of my favourite retired Easter sets, 'Easter Promise':


This paper pack really is the pack that just keeps on giving, I've made so many cards using it. 

My third card was the the current challenge over at The Alphabet Challenge Blog where they are on 'W for Wings' and this time I used a full panel of Lily Pond Lane DSP, overlaid with a panel out of which I diecut a circle to frame and highlight the mama and her brood of ducklings:


Aren't they just so cute?! This card is actually for one of my team, to celebrate the addition of the new 'ducklings' that she has welcomed to her Stampin' Up! team during the current Sale-A-Bration promotion - she loves ducks! I could have kept going with this sketch - I'm so looking forward to see what everyone else does with it in the PP gallery this week!

Here is the visual summary of the key products used on today's main project for you to pin for easy reference:


You can see all of my Product and 'How To' summaries on my 'How To - Tips and Techniques' Pinterest board in case you've missed any. 

Before you reach for your ink and papers, check out what our amazing team has created to inspire you this week:

Here's a quick recap of our challenge rules:
 
1.  Create a new paper project
2.  Upload your creation to your blog with a link back to us and provide a direct link to the post featuring your challenge submission.
3.  Please link your card to no more than four challenges, TOTAL.
4.  Have FUN!

Enjoy your day; I am making banoffee pie today - yum! I'll be back tomorrow with another project. Until then, happy stampin'!


Stampin' Up! Supplies Used: 

Table built using Product Table Builder by The Crafty Owl - Independent Stampin' Up! Demonstrator.

Yay For Documenting The Day PP725

by Joanne James16. February 2025 08:00

Today it's Sunday and time for this week's new challenge over at The Paper Players! It's the turn of the fabulous Jan to host this week and she has a fun clean and simple challenge for us to work with:


I love a clean and simple card and although this week's theme is masculine and I definitely made my card with that in mind, it could also work for females too - take a look:


Here's the low-down on today's card:

I went with another masculine congratulations card; as my regular readers will know, this is a big exam year in the James household as the youngest of the James Juniors is sitting his A Levels, and with lots of male friends too I'm expecting there to be lots of congratulations cards in order, so I'm getting ahead now! Following my previous card here featuring the word DADDY, I had another idea using the letters from the word DAY in the Sale-A-Bration 'Documenting The Day' stamp set. Selective stamping also makes the word YAY, perfect for a congratulations card so that was the starting point for my card. My graphic 3D style lettering was inspired by a photo that I saw a few weeks ago over at Inspired By featuring these colourful cushions - can you spot the one that inspired my card in the photo below?

I liked the one with the dimensional word FUN so set about recreating it with my DAY stamp. I simply stamped the letters A and Y onto post-it notes, then once I'd stamped the word YAY, I masked each letter and stamped it again, offsetting the stamp to achieve the shadow effect using a different colour each time:

I popped the finished stamped panel onto a bright blue card base with a yellow frame to complete my card. Creative use of a stamp, ink and paper - simple! If you dismissed the 'Documenting The Day' stamp set as only useful for scrapbooking, then think again - there are lots of creative card options too! Sale-A-Bration runs until 28th February, so you can still get your hands on this set whilst supplies last!

Here is the visual summary of the key products used on today's project for you to pin for easy reference:


You can see all of my Product and 'How To' summaries on my 'How To - Tips and Techniques' Pinterest board in case you've missed any. 

Before you reach for your ink and papers, check out what our amazing team has created to inspire you this week:

Here's a quick recap of our challenge rules:
 
1.  Create a new paper project
2.  Upload your creation to your blog with a link back to us and provide a direct link to the post featuring your challenge submission.
3.  Please link your card to no more than four challenges, TOTAL.
4.  Have FUN!

Enjoy your day; we are still celebrating Valentine's this weekend and I am being treated to a day out with the men in my life - dinner and a double-cinema date is on the cards, oh to be loved!! I'll be back on Tuesday with another project. Until then, happy stampin'!


Stampin' Up! Supplies Used: 

Table built using Product Table Builder by The Crafty Owl - Independent Stampin' Up! Demonstrator.

Natural Botanicals Three Ways For PP724

by Joanne James9. February 2025 08:00

Today it's Sunday and time for this week's new challenge over at The Paper Players! It's the turn of the fabulous LeAnne to host this week and she has a fresh colour challenge for us to work with:


I decided to break out a new set that I haven't yet used and armed with the layout over at Try A Sketch On Tuesday, set to work. Take a look at what I came up with:


Here's the low-down on today's card:

Natural Botanicals Three Ways - I decided the large botanical images in the 'Natural Botanicals' stamp set would be a great way to showcase LeAnne's bright colour palette this week and I used the stamps in three different ways: as layered images on my diecut circle (the yellow flower is the reverse of the daisy), heat embossed in white onto Flirty Flamingo cardstock for my fussy cut daisy and finally stamped the smaller images tone-on-tone onto cardstock strips in the challenge colours to create my background panel. I overlaid my stripes with a piece of vellum to tone the colours down slightly, but you can still see the detail of the stamping beneath:


Greetings For All - My simple 'hello' greeting is from the Greetings For All Mix & Match Ephemera pack in the mini catalogue. With 6 sheets of black and white pre-diecut greetings, you'll never be lost for a suitable sentiment to finish your card - and no stamping required.

Want Natural Botanicals For FREE? - I purchased 'Natural Botanicals' from the mini catalogue and it is still available to buy, however it can also be yours FREE with a £55 product purchase as part of the second month of our current Sale-A-Bration promotion - how good is that?! You can read about the other new products that have been added in my Sale-A-Bration post earlier this week - here's the link if you missed it. 

Here is the visual summary of the key products used on today's project for you to pin for easy reference:


You can see all of my Product and 'How To' summaries on my 'How To - Tips and Techniques' Pinterest board in case you've missed any. 

Before you reach for your ink and papers, check out what our amazing team has created to inspire you this week:

Here's a quick recap of our challenge rules:
 
1.  Create a new paper project
2.  Upload your creation to your blog with a link back to us and provide a direct link to the post featuring your challenge submission.
3.  Please link your card to no more than four challenges, TOTAL.
4.  Have FUN!

Enjoy your day; I'll be back tomorrow with another project. Until then, happy stampin'!


Stampin' Up! Supplies Used: 

Table built using Product Table Builder by The Crafty Owl - Independent Stampin' Up! Demonstrator.

Daddy Or Chips For PP723

by Joanne James2. February 2025 08:00

Today it's Sunday and time for this week's new challenge over at The Paper Players! It's the turn of the fabulous Ann to host this week and she has a timely theme challenge for us to work with:
    

With Valentine's Day just around the corner (it's my wedding anniversary this month too!) there's lots of reasons to make a love-themed card. I actually went in a completely different direction for today's card - although it definitely still fits in with our theme this week. I had been wanting to 'scratch a creative itch' to create something using a couple of my Sale-A-Bration stamp sets; take a look at my card and then I'll explain! Here's my card:


Here's the low-down on today's card:

Stretching Documenting The Day - There's a great stamp set that can be yours free with a £55 purchase during the current Sale-A-Bration promotion: it's called 'Documenting The Day' and is designed primarily with scrapbooking in mind. With several phrases that allow you to build beautiful sentiments around memorable days, the 'Documenting The Day' stamp set is perfect for providing the narrative and accents to your scrapbooking pages. Each of the phrases includes the word 'DAY' in block capitals - see below:


For me, this is where the additional potential of this set comes in. Those letters can be rearranged to make 'DAD' or 'DADDY' too, which opens up a whole new set of possibilities! You could simply snip the letters (shock horror!) of the stamp apart for additional flexibility, or if like me this is something you can't ever bring yourself to do, you can use your stamping platform and some selective inking and masking of the letters to achieve the same effect. Using the stamping platform also allows you to stamp the letters again if necessary to get a nice, solid image. I stamped my word DADDY in Night of Navy onto Basic White cardstock and fussy cut around it to keep the word in one piece. I used a slimline card base to accommodate and allow enough of my background to show around the stamped word. Again, you could stamp and cut the letters out individually to make this step easier (although I don't think it would look as good!)

Friendly Seagulls - The background to my card is a mix of hearts from the 'Documenting The Day' set above and cartons of chips from another Sale-A-Bration stamp set - this time 'Friendly Seagulls'. I also used this stamp set to complete the sentiment on my card, which you can see more closely on the photo below:

I also added another heart and a chip-loving seagull to the inside of my card for a little extra decoration:


Inspired By - So some of my international readers in particular may be wondering where the inspiration for today's card came from. The minute I had both of these stamp sets in my possession, I was reminded of a much-loved advert that was played many times on commercial TV here in the UK in my younger years. I could explain it, but instead I actually found it on YouTube and have included the link below for your viewing pleasure! If you watch it, you will completely understand how it inspired today's card:

This is a real moment of 90's nostalgia for me; I was already in my teens when this advert was being aired on the TV, but there is something about that little Welsh girl that reminds me of my (much) younger self! So the moral of today's post is  - love can be found in the simplest things - including Daddy or chips! For for me it was creating today's card! I'm also playing along at Time Out Challenges where they have a 'Pick Two' challenge - I actually used three things from their list: Food (chips), Heart (background and behind sentiment) and Love (sentiment) and at TGIF Challenges where the theme is Sale-A-Bration:


I hope you enjoyed my trip down memory lane; here is the visual summary of the key products used on today's project for you to pin for easy reference:
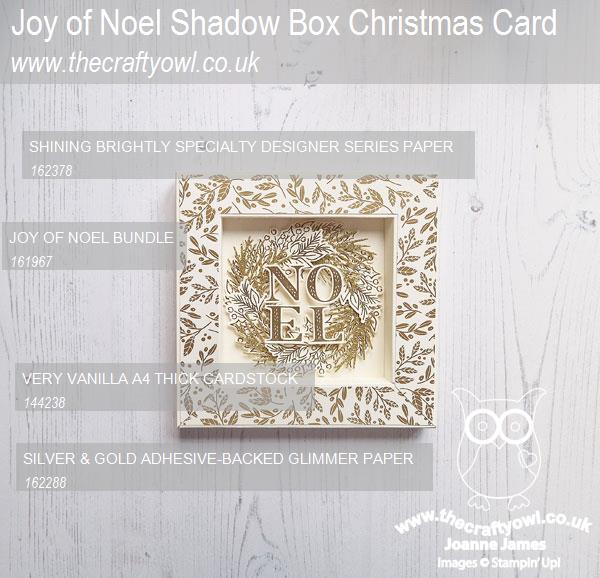
 

You can see all of my Product and 'How To' summaries on my 'How To - Tips and Techniques' Pinterest board in case you've missed any. 

Have either of these stamp sets made it into your Sale-A-Bration shopping basket yet? We still have one month of this year's promotion to go, so there's still time! I have lots of other ideas using both of these sets that I've still to share with you this month, so be sure to pop back for additional inspiration.

Before you reach for your ink and papers, check out what our amazing team has created to inspire you this week:

Here's a quick recap of our challenge rules:
 
1.  Create a new paper project
2.  Upload your creation to your blog with a link back to us and provide a direct link to the post featuring your challenge submission.
3.  Please link your card to no more than four challenges, TOTAL.
4.  Have FUN!

Enjoy your day; I'm having a quiet one at home, filled with cooking and crafting and maybe a movie or two! I'll be back tomorrow with another project. Until then, happy stampin'!


Stampin' Up! Supplies Used: 
Table built using Product Table Builder by The Crafty Owl - Independent Stampin' Up! Demonstrator.

Delightful Wishes for PP722

by Joanne James26. January 2025 08:00

Today it's Sunday and time for this week's new challenge over at The Paper Players! It's my turn to host this week and I have my favourite, a sketch challenge, for us to work with:


I designed my layout with a few layers and a focal sentiment; there's lots of scope for interpretation. I decided to keep my card really simple as I wanted to play with some of the new items in the Floral Delight Suite - take a look:


Here's the low-down on today's card:

Floral Delight - First up, I used a piece of the Floral Delight designer series paper to cover the whole of my card base. The yellow and blue designs in this paper pack are so cheery and reminiscent of spring - so pretty! I chose a pale blue design covered in bold, bright yellow flowers and kept the rest of my card pretty simple so that it really allowed these florals to shine.

Delightful Wishes - For my focal sentiment, I combined the stamps and dies from the Delightful Wishes bundle, focusing on the layered diecut for the word 'wishing' as my centrepiece:


The sentiments in this set are great and the die can be combined with the stamped elements to create several different greetings. I added them to an elongated rectangle cut with the Nested Essentials Dies, with a couple of flagged banners beneath. I also added a couple of the tiny bee trinkets too - so sweet!

Inside Stamping - There is minimal stamping on the front of my card, so I thought I would use some of the other stamps in the set to decorate the inside:


This stamped flower spray is a two-step stamp and was really easy to line up, adding in the twigs and leaves after the blossoms. I made this card as a get well card for a friend who has recently been a little under the weather; I hope she likes it.

Here is the visual summary of the key products used on today's project for you to pin for easy reference:


You can see all of my Product and 'How To' summaries on my 'How To - Tips and Techniques' Pinterest board in case you've missed any. 

Before you reach for your ink and papers, check out what our amazing team has created to inspire you this week:

Here's a quick recap of our challenge rules:
 
1.  Create a new paper project
2.  Upload your creation to your blog with a link back to us and provide a direct link to the post featuring your challenge submission.
3.  Please link your card to no more than four challenges, TOTAL.
4.  Have FUN!

Enjoy your day; I'll be spending mine indoors keeping warm and doing a little cooking and crafting, no big plans. I'll be back tomorrow with another project. Until then, happy stampin'!


Stampin' Up! Supplies Used: 

Table built using Product Table Builder by The Crafty Owl - Independent Stampin' Up! Demonstrator.

Stamped With Love Clean and Simple for PP721

by Joanne James19. January 2025 08:00

Today it's Sunday and time for this week's new challenge over at The Paper Players! It's the turn of the fabulous Jaydee to host this week and she has a fun clean and simple challenge for us to work with:


I decided to focus on one stamp set and two colours, courtesy of Color Dare, and create a clean and simple card with something of a collage feel - take a look:


Here's the low-down on today's card:

Stamped With Love - I used the largest Perennial postage die to cut my mat and I couldn't not use the 'Stamped With Love' stamp set this week - the postbox was just perfect for this week's theme! I heat-embossed the post box onto Real Red cardstock and paper-pieced the letter and separately stamped the letter and pen before adding my sentiment. 

Top Tip - I have a great tip when you are fussy-cutting images without a white border, as I've done today: if you run the edge of a Stampin' Write marker around the cut edge, it will give you a lovely solid black line and disguise any less than perfect cutting. you're welcome :-)

A Hint of Pink - To balance the red of my postbox and diecut heart, I stencilled a pale pink heart using a stencil I made using the Friends For Life dies and added a stamped heart to the back of the postbox letter. I finished the rather quirky sentiment on the inside of my card and added another couple of pink hearts to decorate:


This rather understated love note will be perfect for the youngest of the James Juniors, who will appreciate the sentiment. My layering may be stretching the bounds of clean and simple slightly this week, but I tried to balance my collage-style design with plenty of surrounding white space and no embellishments. What do you think of today's card? Do leave me a comment below - I'd love to hear your thoughts.

Here is the visual summary of the key products used on today's project for you to pin for easy reference:


You can see all of my Product and 'How To' summaries on my 'How To - Tips and Techniques' Pinterest board in case you've missed any. 

Before you reach for your ink and papers, check out what our amazing team has created to inspire you this week:

Here's a quick recap of our challenge rules:
 
1.  Create a new paper project
2.  Upload your creation to your blog with a link back to us and provide a direct link to the post featuring your challenge submission.
3.  Please link your card to no more than four challenges, TOTAL.
4.  Have FUN!

Enjoy your day; I'll be back tomorrow with another project. Until then, happy stampin'!


Stampin' Up! Supplies Used: 

Table built using Product Table Builder by The Crafty Owl - Independent Stampin' Up! Demonstrator.

Terrific Toadstools for PP720

by Joanne James12. January 2025 08:00

Today it's Sunday and time for this week's new challenge over at The Paper Players! It's the turn of the fabulous Elizabeth to host this week and she has a bright colour challenge to welcome in the new year:


I love this trio of bright colours - the perfect antidote to a grey winter's day! These colours also appear in some of my new designer paper, so I decided to grab it and along with Karren's layout over at Freshly Made Sketches this week and set to work. Take a look at what I came up with:


Here's the low-down on today's card:

I used my 'Terrific Toadstools' stamp set again to stamp a trio of toadstools in Melon Mambo pink and Pumpkin Pie orange, this time masking the stems before I stamped the caps so that I could cut them out seamlessly as one piece - you can see the ink effects below:

I added some greenery and iridescent dots, along with a sentiment, and adhered them to a diecut circle. For the background strips, I added a co-ordinating diecut strip, a thin piece of Pumpkin Pie and the main panel which is piece of striped Toadstool Gardens designer paper - one of the products that can be yours FREE with a £55 purchase during Sale-A-Bration. There are so many fun patterns in this paper pack and they co-ordinate beautifully with the Terrific Toadstools bundle. I added a co-ordinating flap to my envelope too because, well, you can never have too much designer series paper right, especially if it's FREE! So what do you think - does the Toadstool Gardens paper make it on to your Sale-A-Bration wishlist?

Here is the visual summary of the key products used on today's project for you to pin for easy reference:


You can see all of my Product and 'How To' summaries on my 'How To - Tips and Techniques' Pinterest board in case you've missed any. 

Before you reach for your ink and papers, check out what our amazing team has created to inspire you this week:

Here's a quick recap of our challenge rules:
 
1.  Create a new paper project
2.  Upload your creation to your blog with a link back to us and provide a direct link to the post featuring your challenge submission.
3.  Please link your card to no more than four challenges, TOTAL.
4.  Have FUN!

Enjoy your day; I'll be back soon with another project. Until then, happy stampin'!


Stampin' Up! Supplies Used: 

Table built using Product Table Builder by The Crafty Owl - Independent Stampin' Up! Demonstrator.

Seasons Of Elegance Sophisticated Skates PP719

by Joanne James8. December 2024 08:00

Today it's Sunday and time for this week's new challenge over at The Paper Players! It's our last Paper Players challenge of the year before we take a break for Christmas! It's the turn of the fabulous Ann to host this week and she has a rich colour challenge for us to work with:


I knew that my starting point for this card would be the Season of Elegance Specialty designer series paper as it features all of Ann's chosen colours this week. I decided to pair it with the Sophisticated Sled bundle for a rich Christmas card and using the above layout from Sketch Saturday where they are asking us to choose a previous sketch (I took the optional twist and went with sketch #341 from 2014) and set to work. Take a look at what I came up with:


Here's the low-down on today's card:

I used the reverse of the Pretty Peacock Seasons of Elegance foiled paper for the base of my card, then added a panel of the foiled side, matted with gold foil, for the centre. I added my diecut skates and foliage from the Sophisticated Sled bundle, then picked out the Cherry Cobbler in my sentiment banner, skate laces and a rather over-the-top ribbon bow:

A few textured gold enamel dots and some gold twine complete my card. Talking a leaf out of my PP teamie Elizabeth's book, I made two cards at the same, adding a smaller, more post-friendly bow to the second card; you can see them both together below:


As you know I don't often use a lot of ribbon on my cards, but I really love the showy ribbon bow on today's card; totally impractical for posting, but beautiful! Worth the hand-delivery, I'm sure you will agree. The Seasons of Elegance papers are so beautiful too and the foiling really adds a touch of luxury to these cards.

Here is the visual summary of the key products used on today's project for you to pin for easy reference: 


You can see all of my Product and 'How To' summaries on my 'How To - Tips and Techniques' Pinterest board in case you've missed any. 

Before you reach for your ink and papers, check out what our amazing team has created to inspire you this week:

Here's a quick recap of our challenge rules:
 
1.  Create a new paper project
2.  Upload your creation to your blog with a link back to us and provide a direct link to the post featuring your challenge submission.
3.  Please link your card to no more than four challenges, TOTAL.
4.  Have FUN!

Enjoy your day; we are battling storm winds and rain here in the UK, so I will definitely be staying inside keeping warm. I am making Christmas crumble for dessert today - if I remember I'll take a picture to share in a future post. I am pretty much done with making Christmas cards now (although I still have a few more to share with you this week!) I am now in the throws of writing them, so that will be this afternoon's task. I'll be back tomorrow with another project. Until then, happy stampin'!


Stampin' Up! Supplies Used: 

Table built using Product Table Builder by The Crafty Owl - Independent Stampin' Up! Demonstrator.

Detailed Deer Christmas PP718

by Joanne James1. December 2024 08:00

Today it's Sunday and time for this week's new challenge over at The Paper Players! It's the turn of the fabulous LeAnne to host this week and she has a fun theme challenge for us to work with:


Now you don't have to make a Christmas card for this week's challenge - any card that features a deer is acceptable. I considered making another card using the same Reindeer Days papers that I featured on last week's PP card, but when I saw Linda's layout over at Freshly Made Sketches my mind went in a completely different direction! I paired the layout with the seasonal colours over at Sunday Stamps (I used gold, silver, (retired) Evening Evergreen and Very Vanilla) and ended up making two slightly different cards. Here's the first one that I made:


I added a trio of festive pines cut from glimmer paper using one of the (retired) Christmas Tree Dies to my card base (I mirrored Linda's sketch as I wanted my panels to rise left to right rather than drop left to right, as if fitted better with the shape of my deer) and overlaid this with a gold foil deer cut from my favourite deer set of all time: the (retired) Detailed Deer Thinlit Dies. I love this deer - it's so elegant! I added a simple silver twine bow and a gold heat-embossed sentiment from 'Greetings of the Season'. I loved the finished card and since I'd cut enough trees and deer for two cards, I decided to change up my second one slightly and emboss my card base with the Snowflake Sky 3D embossing folder. 

Here's the second one:


I wasn't sure if the embossing would be too much alongside the contrasting foil and glimmer paper texture, but the embossed detail really adds an extra dimension to this card - you can see it better on the close up below. Isn't it beautiful?


I decided this second card was my favourite, even though my first one is much more my true style. I'm also linking up over at TGIF Challenges where their theme is 'Winter Wonderland' this week - the addition of the snowflakes definitely adds to the wintery feel. Which one do you prefer? Do leave me a comment below - I'd love to hear your thoughts. I'm really pleased with how these cards turned out; I have a few more Christmas cards to make and share, but need to think about writing and posting them soon!

Before you reach for your ink and papers, check out what our amazing team has created to inspire you this week:

Here's a quick recap of our challenge rules:
 
1.  Create a new paper project
2.  Upload your creation to your blog with a link back to us and provide a direct link to the post featuring your challenge submission.
3.  Please link your card to no more than four challenges, TOTAL.
4.  Have FUN!

Enjoy your day; today we are putting up the tree and decorating the James house for Christmas. This is earlier than we usually do, but Ben and I have been listening to Christmas songs whilst on the school run for over a week already, so are excited to be getting into the festive spirit! I'll be back tomorrow with another project. Until then, happy stampin'!


Stampin' Up! Supplies Used: 

Table built using Product Table Builder by The Crafty Owl - Independent Stampin' Up! Demonstrator.

2026 May-Aug Catalogue

The Stampin' Up! 2026 May-Aug Catalogue is now live! Click on the image to download your copy.

Product of The Month

Stampin Cut and Emboss

The exclusive Product of the Month can be yours for only £5 when you spend £70 or more in a single order. Make sure you purchase ASAP because once it's sold out, it's gone for good! See this month's exclusive product here.

Shop Online

Access my online shop 24 x 7, 365 days of the year:

Shop Online

New Online Exclusives

There are new products available exclusively in the online store from 5 May - check them out here.

Stampin' Up! Craft Classes

The Paper Mixer class featuring the Paper Medley Mix-In Designer Series Paper will be held on 21 May and is available to purchase from 5 May; get the full details here.

Paper Pumpkin

Paper Pumpkin is now here in the UK! The monthly subscription window is from 11th of the month. Sign up for yours here!

Latest Kits!

Stampin Cut and Emboss

Serene Scenes and Pretty Party are the latest kit additions to the online store - get yours here!

Join My Team

It's always a great time to join Stampin’ Up! New team members can get £130 worth of products for only £99 + free business supplies + free shipping + all the fun being a part of Stampin’ Up! Stampin' Up! has something for everyone: join my growing team and benefit from my support to enjoy Stampin' Up! however you choose. 

If you're interested, call me for a chat to understand how I can help you realise your goals. Alternatively, if you have already decided to sign up and you just can't wait, please click here for the link to the online form where you can sign up and order your starter kit right away! 

About Me

Hi I'm Joanne and live in Northampton and when I'm not looking after my husband and two beautiful children, am an avid crafter with a passion for all things Stampin' Up!

I must confess that I have never been a big rubber stamper - until I discovered Stampin' Up! that is. I love the fact that I can get such great results with co-ordinating stamps, inks, papers and punches - the possibilities are endless! Join me on my stamping journey as I share the things I love and be inspired to create amazing things yourself!

Follow Me

Monthly Newsletter

Box Builder

Click the button above to use Box Buster to create your custom box design using the Envelope Punch Board!

I Design For


Stampin' Up Stuff

This is my personal blog and is not endorsed by Stampin’ Up! Stampin' Up! is a registered trademark of Stampin' up! Inc. I hope you find my blog a plentiful source of ideas and personal inspiration but please don't copy my designs for contest submission or use for classes, publication or sale without express permission.