Lights Aglow Twinkling Lights Christmas Card PP621

by Joanne James11. December 2022 08:00

Today it's Sunday and time for this week's new challenge over at The Paper Players! It's the turn of the fabulous Ann to host this week and she has a festive colour challenge for you to work with:


I still had my Lights Aglow designer paper out on my desk having made yesterday's cards, so I grabbed another of the patterns in the set and this week's layout over at Freshly Made Sketches and set to work. This is what I came up with:


Here's the low-down on today's card:

I used a Cherry Cobbler card base, then adhered a sheet of Lights Aglow designer paper patterned with Very Vanilla stars to my card base. I then added a central panel of gold glimmer paper, and allowing for a thin vertical border, adhered another piece of paper from the pack, strewn with festive garlands, to which I'd added some diecut banners using one of the Twinkling Lights dies so that the gold glimmer paper showed through from below:


I did cut the piece of DSP that I used for the central section from the centre of the sheet, as I wanted the curves of the garlands to be centred, which is a little frivolous, but I know I will use the remnants on other projects as there is a beautiful gold embossed snowflake design on the reverse too.

I added a final panel of Cherry Cobbler with a sentiment heat embossed in gold to the bottom of the panel to complete the front of my card. To finish I added an extra sentiment from the 'Brightest Glow' stamp set to the inside of my card:


This is a great card that didn't take too long to create, which was especially good as I have been rather pushed for creative time this week.

Here is the visual summary of the key products used on today's project for you to pin for easy reference:


You can see all of my Product and 'How To' summaries on my 'How To - Tips and Techniques' Pinterest board in case you've missed any. 

Before you reach for your ink and papers, check out what our amazing team has created to inspire you this week:

Here's a quick recap of our challenge rules:
 
1.  Create a new paper project
2.  Upload your creation to your blog with a link back to us and provide a direct link to the post featuring your challenge submission.
3.  Please link your card to no more than four challenges, TOTAL.
4.  Have FUN!

Enjoy your day; today is the day that we will be decorating the James household inside and out for Christmas, so we are all looking forward to that. I am also going to be doing some crafting of a different kind, as I have a festive-themed fancy dress outfit to make for Rebecca to wear this week - a Sixth Form festive tradition, more on that later in the week! I'll be back tomorrow with another project. Until then, happy stampin'!


Stampin' Up! Supplies Used: 

Table built using Product Table Builder by The Crafty Owl - Independent Stampin' Up! Demonstrator.

Jolly Memories and More Santa PP620

by Joanne James4. December 2022 08:00

Today it's Sunday and time for this week's new challenge over at The Paper Players! It's the turn of the fabulous LeAnne to host this week and she has a fun and festive theme challenge for you to work with:


I knew exactly where I was headed for today's card - yes the Santa Express Suite and the Memories and More card pack - you know how I love these cards! I went with a quick and simple card that is super easy for you to recreate - take a look:


Here's the low-down on today's card:

I took a Petal Pink card base and used a retired snowflake stamp for a little tone-on-tone stamping for the background. I added a strip of red glimmer paper and an offcut of Santa Express designer paper, then used one of the wooden sentiments from the Memories & More pack along with a santa, fussy cut from one of the cards in the pack, for a jolly focal point:

I also used a couple of the wooden elements from the pack and a diecut snowflake for added detail. The stamped sentiment on the front of the card comes from the 'Jingle Jingle Jingle' stamp set, which I also used for the inside of my card:


Super easy using up lots of bits and pieces and really easy to recreate - just what we need now that we are into December! What's more, the Santa Express Memories and More card pack is reduced as part of the Last Chance promotion - I already treated myself to a couple of extra packs, and I would recommend you do too!

Here is the visual summary of the key products used on today's project for you to pin for easy reference:


You can see all of my Product and 'How To' summaries on my 'How To - Tips and Techniques' Pinterest board in case you've missed any. 

Before you reach for your ink and papers, check out what our amazing team has created to inspire you this week:

Here's a quick recap of our challenge rules:
 
1.  Create a new paper project
2.  Upload your creation to your blog with a link back to us and provide a direct link to the post featuring your challenge submission.
3.  Please link your card to no more than four challenges, TOTAL.
4.  Have FUN!

Enjoy your day; we are enjoying a family lunch and an extra session of hockey this evening; fortunately, this is practice for an indoor tournament so we will be out of the cold for once! I'll be back tomorrow with another project. Until then, happy stampin'!


Stampin' Up! Supplies Used: 

Table built using Product Table Builder by The Crafty Owl - Independent Stampin' Up! Demonstrator.

Penguin Place Meets Charming Landscapes PP619

by Joanne James27. November 2022 08:00

Today it's Sunday and time for this week's new challenge over at The Paper Players! It's the turn of the fabulous Laurie to host this week and she has my favourite, a sketch, for us to work with:


I decided to use a little 'something old(er), something new' on my card this week - take a look:


Here's the low-down on today's card:

I almost used the returning favourite 'Penguin Place' stamp set on my card for last week's challenge, but went in a different direction so decided to use it this week instead. This is one of the sets that carried over from last year, but I haven't used much this time around so thought it was time to remedy that. I paired the sliding penguin with an embossed background courtesy of one of the new Charming Landscapes embossing folders - I just love these and the one with the mountains has perfectly embossed curved lines that suited the contours of the penguin. I masked off the mountains and inked in the sky using my beldning brushes as I've done on previous cards using this set and used some (retired) white frosted shimmer paint to paint back in the snowflakes. You can see that more closely, as well as some of the embossed detail, more clearly below:

I stamped and fussy cut a few trees in blue to co-ordinate with my scene (which I painted with clear Wink of Stella for added sparkle) and the snowflake-patterned Storybook Gnomes paper I used for my outer frame. I added a simple sentiment to the front which I paired with this one on the inside:


I'm clearly entering my 'blue' phase as far as Christmas cards are concerned - it was fun to play with this cute penguin again though!

Here is the visual summary of the key products used on today's project for you to pin for easy reference:


You can see all of my Product and 'How To' summaries on my 'How To - Tips and Techniques' Pinterest board in case you've missed any. 

Before you reach for your ink and papers, check out what our amazing team has created to inspire you this week:

Here's a quick recap of our challenge rules:
 
1.  Create a new paper project
2.  Upload your creation to your blog with a link back to us and provide a direct link to the post featuring your challenge submission.
3.  Please link your card to no more than four challenges, TOTAL.
4.  Have FUN!

Enjoy your day; we are off to the cinema this afternoon to watch a streamed theatre production of Charles Dickens' 'A Christmas Carol' - nothing like a GCSE English Literature course to lead to a fun family afternoon out! I'll be back tomorrow with another project. Until then, happy stampin'!


Stampin' Up! Supplies Used: 

Table built using Product Table Builder by The Crafty Owl - Independent Stampin' Up! Demonstrator.

Jingle Jingle Jingle in Red and Green PP618

by Joanne James20. November 2022 08:00

Today it's Sunday and time for this week's new challenge over at The Paper Players! It's my turn to host - it's Clean and Simple Week and I've made it festive for you:


I am properly in festive card making mode now, so I chose CAS Christmas! Your project can be any kind of Christmas card, as long as it's clean and simple. What do we mean by clean and simple? Your project must:

  • have minimal layers and embellishments
  • have plenty of open space
  • be simple and uncluttered

I used the lovely Kim's sketch over at Freshly Made Sketches this week and in contrast to last week's card, today I'm using the Colour Hues palette of scarlet red and green for a traditional festive affair - take a look:


Here's the low-down on today's card:

For the vertical element on my card, I stamped and diecut a candy cane using the Sweet Candy canes bundle, creating a two-tone effect by using my Stamparatus and inking first the red sections with sponge daubers, stamping then cleaning my stamp and adding the green stripes. For the horizontal elements, I used a combination of a heat-embossed white sentiment stamped onto my Garden Green card front and the word 'jolly', both from the 'Jingle Jingle Jingle' stamp set, which I stamped in red, outlined in green, and fussy cut and popped up on dimensionals overlapping my candy cane.

I added a couple of simple green sprigs and a flat jingle bell trinket tied with twine to complete my card:

Simple, colourful and fun - and I repeated the sentiment on the envelope too for a little extra pizzazz.

Here is the visual summary of the key products used on today's project for you to pin for easy reference:


You can see all of my Product and 'How To' summaries on my 'How To - Tips and Techniques' Pinterest board in case you've missed any. 

Before you reach for your ink and papers, check out what our amazing team has created to inspire you this week:

Here's a quick recap of our challenge rules:
 
1.  Create a new paper project
2.  Upload your creation to your blog with a link back to us and provide a direct link to the post featuring your challenge submission.
3.  Please link your card to no more than four challenges, TOTAL.
4.  Have FUN!

Enjoy your day; today we are at home with both of the James Juniors spending the day catching up on homework, having spent most of yesterday out on the hockey pitch (one win 8-1, one loss 5-0 - I'll leave you to work out which score belongs to which!) I shll be cooking, ironing and hopefully fitting in a little crafting too (fingers crossed!) I'll be back tomorrow with another project. Until then, happy stampin'!


Stampin' Up! Supplies Used: 

Table built using Product Table Builder by The Crafty Owl - Independent Stampin' Up! Demonstrator.

Leaves of Holly in Silver and Blue PP617

by Joanne James13. November 2022 08:00

Today it's Sunday and time for this week's new challenge over at The Paper Players! It's the turn of the fabulous Jaydee to host this week and she has a sparkly colour challenge for us to work with:


I thought the icy colours of blue, silver and white would make a pretty Christmas card so I grabbed my Leaves of Holly bundle and used Linda's sketch over at Freshly Made Sketches for my layout (I flipped the main images to suit the shape of my main holly label die) and set to work - take a look at what I came up with:


Here's the low-down on today's card:

I decided to layer a couple of the main holly labels from the Holly Berry Dies, one in dark metallic silver and one in white that I stamped my main greeting on and overlaid them having turned the bottom one through 180 degrees. I added in a selection of holly leaves and foliage behind each, cut from a combination of silver foil and white glimmer paper and interspersed with some blue ones. I created my own piece of variegated blue cardstock by adding three blue inks randomly to a sheet of whisper white cardstock and then diecut a selection of solid and outline leaves from this, overstamping some in Starry Sky ink too - I just love the effect! I added some silver twine and a selection of opal rounds and blue faceted enamel dots to my Starry Sky cardbase, that I had inked around the edges and added some white ink splatters to as a finishing touch:


Aren't those holly leaves just so pretty? I added a second smaller label towards the bottom of my card as per the sketch for the second part of my sentiment - this set has some great combination sentiments which work well with this layout. I also used a larger A5 card base to accommodate my design; I like having a few special, larger cards for close friends and family members at this time of year and this design works perfectly.

Here is the visual summary of the key products used on today's project for you to pin for easy reference:


You can see all of my Product and 'How To' summaries on my 'How To - Tips and Techniques' Pinterest board in case you've missed any. 

How do this week's colours inspire you? I'd love to know what you think of today's non-traditional holly leaves card - do leave me a comment below and share your thoughts.

Before you reach for your ink and papers, check out what our amazing team has created to inspire you this week:

Here's a quick recap of our challenge rules:
 
1.  Create a new paper project
2.  Upload your creation to your blog with a link back to us and provide a direct link to the post featuring your challenge submission.
3.  Please link your card to no more than four challenges, TOTAL.
4.  Have FUN!

Enjoy your day; I spent all day yesterday at the side of the hockey pitch and this morning I'm taking the youngest of the James Juniors to participate in his school army cadets Remembrance Day parade and service - always a spectacular sight and such an important duty, 'lest we forget'. I'll be back tomorrow with another project using some of the leftover pieces from today, so stay tuned. Until then, happy stampin'!


Stampin' Up! Supplies Used: 

Table built using Product Table Builder by The Crafty Owl - Independent Stampin' Up! Demonstrator.

Cottage Wreaths Grateful Gingham PP616

by Joanne James6. November 2022 08:00

Today it's Sunday and time for this week's new challenge over at The Paper Players! It's the turn of the fabulous Claire to host this week and she has a seasonal theme challenge for us to work with:


Giving thanks! With the American holiday of Thanksgiving around the corner, giving thanks is perhaps even more at the forefront of our minds, however this is a theme that works all year round - we always have something to be thankful for, however small. I used Jen's split layout over at Freshly Made Sketches and the first three colours of the Sunday Stamps palette for my card - take a look:


Here's the low-down on today's card:

I used the So Saffron Gingham Cottage designer paper for my split panel background and added my leafy stamped Cottage Wreath across the split. I inked my wreath in So Saffron and added Cajun Craze to it with a sponge dauber for a variegated effect, before adding the twig wreath in Soft Suede (I stamped this off twice first) and cutting it out with the Country Wreaths Dies. I added a simple stamped sentiment to the centre and decorated my wreath with a bow of (retired) Cajun Craze ribbon tied with linen thread, along with a couple of leaves cut from copper foil and a couple of copper metallic dots:

I could have used the diecut bow in the Country Wreaths Dies set to create a 'cleaner' bow detail, but I decided to change things up and use up some of the many rolls of ribbon I have and I must say I love it - it really brings out the autumnal colours. What are you thankful for - who would you give thanks to? Do leave me a comment below or better still, play along with this week's challenge - we would love to have you join us.

Here is the visual summary of the key products used on today's project for you to pin for easy reference:


You can see all of my Product and 'How To' summaries on my 'How To - Tips and Techniques' Pinterest board in case you've missed any. 

Before you reach for your ink and papers, check out what our amazing team has created to inspire you this week:

Here's a quick recap of our challenge rules:
 
1.  Create a new paper project
2.  Upload your creation to your blog with a link back to us and provide a direct link to the post featuring your challenge submission.
3.  Please link your card to no more than four challenges, TOTAL.
4.  Have FUN!

Enjoy your day; I will be preparing for the departure of the eldest of the James Juniors on another trip - her second in three weeks! This time it's a Geography field trip though - muddy fields and rivers call, a far cry from the tourist sights of San Francisco. I'll be back tomorrow with another project. Until then, happy stampin'!


Stampin' Up! Supplies Used: 

Table built using Product Table Builder by The Crafty Owl - Independent Stampin' Up! Demonstrator.

Hues of Happiness Birthday Card PP615

by Joanne James30. October 2022 08:00

Today it's Sunday and time for this week's new challenge over at The Paper Players! It's the turn of the fabulous Anne Marie to host this week and as it's the fifth Sunday of the month she has a bonus Tic Tac Toe challenge for us to work with:


I used Jen T's sketch over at Freshly Made Sketches for my layout and went across the bottom of the grid with yellow, birthday and stitching for a fresh and vibrant birthday card this week - take a look:


Here's the low-down on today's card:

Hues of Happiness - The Hues of Happiness designer series paper made light work of the decoration for today's card! I diecut a trio of flowers and some leaves and used them to accent a stitched circle that I had also partially diecut with one of the Blossoming Happiness Dies. 

Sending Birthday Wishes - I used the Sending Smiles Bundle to create my sentiment, layering my diecut 'sending' with a vellum base so that it doesn't obscure too much of the detail beneath:

I used Early Espresso for my sentiment as it picked up the brown tones in the flowers and was less harsh than black. 

Don't forget the inside - I added a sentiment from 'Happiness Abounds' and a little extra detail to finish off the inside of my card: 

Here is the visual summary of the key products used on today's project for you to pin for easy reference:

You can see all of my Product and 'How To' summaries on my 'How To - Tips and Techniques' Pinterest board in case you've missed any. 

Before you reach for your ink and papers, check out what our amazing team has created to inspire you this week:

Here's a quick recap of our challenge rules:
 
1.  Create a new paper project
2.  Upload your creation to your blog with a link back to us and provide a direct link to the post featuring your challenge submission.
3.  Please link your card to no more than four challenges, TOTAL.
4.  Have FUN!

Enjoy your day; we will be catching up on tales from the USA today as the prodigal daughter returned from her trip to SanFranciso last night. I'll be back tomorrow with another project. Until then, happy stampin'!


Stampin' Up! Supplies Used: 

Table built using Product Table Builder by The Crafty Owl - Independent Stampin' Up! Demonstrator.


Santa Express Memories and More Christmas Shaker Card PP614

by Joanne James23. October 2022 08:00

Today it's Sunday and time for this week's new challenge over at The Paper Players! It's the turn of the fabulous Ann to host this week and she has my favourite, a sketch challenge for us to work with:


I saw Ann's sketch and immediately knew what I wanted to do with it - I love it when that happens! I mirror-flipped the sketch on the vertical and this is what I came up with - take a look:


Here's the low-down on today's card:

A Christmas Shaker - Who can resist a shaker, let alone one that is this colourful and festive?! I thought that central frame would be perfect for a feature shaker, filled with red, white and silver sequins. I made a frame using my Rectangle Stitched Framelits and used one of the patterned acetates from the Santa Express Memories and More Cards for my shaker front: 

I chose some complimentary papers from the Santa Express designer series paper pack in Poppy Parade and a colourful 'ho, ho, ho' design for my frame and central border element to tie in with my shaker frame.

Ho Ho Santa - I accented my shaker frame with a jolly santa that I fussy cut from one of the Santa Express Memories and More cards, to which I added one of the flat jingle bell trinkets using some co-ordinating (retired) festive baker's twine.

Don't Forget The Inside - I finished the inside of my card with another offcut of designer paper and a sentiment from the Sweet Candy Canes stamp set - I also used a narrow one from the same set on the front of my card:

I just love this card - so fun!! The Santa Express Memories & More cards are just fantastic - so useful for cards and scrapbooking alike! This is the first one of the included acetates that I've used; I also love the wood word diecuts too. An all-round, super useful set!

Here is the visual summary of the key products used on today's project for you to pin for easy reference:


You can see all of my Product and 'How To' summaries on my 'How To - Tips and Techniques' Pinterest board in case you've missed any. 

Before you reach for your ink and papers, check out what our amazing team has created to inspire you this week:

Here's a quick recap of our challenge rules:
 
1.  Create a new paper project
2.  Upload your creation to your blog with a link back to us and provide a direct link to the post featuring your challenge submission.
3.  Please link your card to no more than four challenges, TOTAL.
4.  Have FUN!

Enjoy your day; we are taking it easy following our early start; I think ironing and an afternoon movie might be required! I'll be back tomorrow with another project. Until then, happy stampin'!


Stampin' Up! Supplies Used: 

Table built using Product Table Builder by The Crafty Owl - Independent Stampin' Up! Demonstrator.

Santa Express Memories and More Card PP613 CAS

by Joanne James16. October 2022 08:00

Today it's Sunday and time for this week's new challenge over at The Paper Players! It's the turn of the fabulous LeAnne to host this week and she has a fun clean and simple challenge for us to work with:
    

I used Judy's great sketch over at Freshly Made Sketches this week for my layout and found some wheels on Santa's Express train for my no-stamping clean and simple card - take a look:


Here's the low-down on today's card:

Today's card really is so simple! I used a pair of Santa Express Memories & More cards to create my fun scene: I trimmed one down for the background then fussy cut my santa express train from another to create my snowy scene. I added a couple of borders, some (retired) Petal Pink ribbon to the bottom border and a few (retired) adhesive snowflakes to complete my scene:

I didn't even have to stamp a sentiment as there was already one printed onto the Memories & More card! These are great for quick cards and the acetates and wooden diecut words that are also included in the pack make this set great value for Christmas crafting. 

Here is the visual summary of the key products used on today's project for you to pin for easy reference:
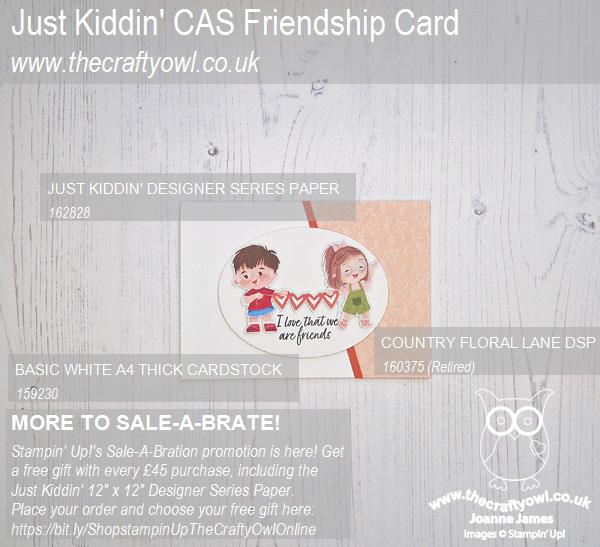
 

You can see all of my Product and 'How To' summaries on my 'How To - Tips and Techniques' Pinterest board in case you've missed any. 

Before you reach for your ink and papers, check out what our amazing team has created to inspire you this week:

Here's a quick recap of our challenge rules:
 
1.  Create a new paper project
2.  Upload your creation to your blog with a link back to us and provide a direct link to the post featuring your challenge submission.
3.  Please link your card to no more than four challenges, TOTAL.
4.  Have FUN!

Enjoy your day; we will be catching up on homework following another university open day visit yesterday for one of the James Juniors, whilst the other will be recovering from an army cadet sleepout under an improvised shelter and looking forward to a few home comforts! I'll be back tomorrow with another project. Until then, happy stampin'!


Stampin' Up! Supplies Used: 
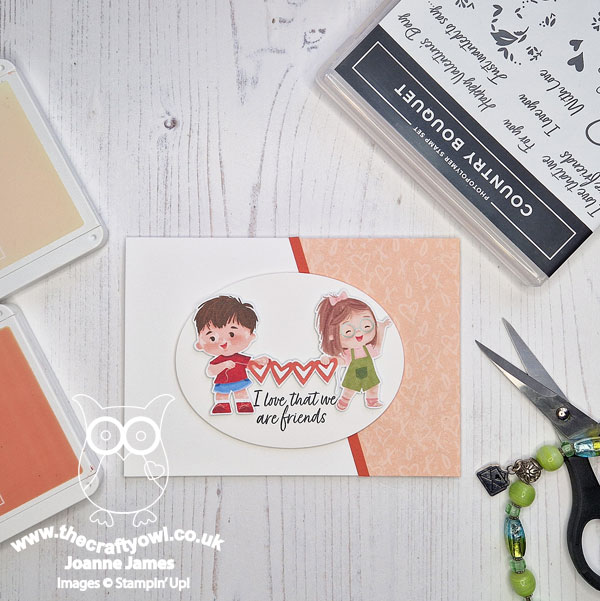
Table built using Product Table Builder by The Crafty Owl - Independent Stampin' Up! Demonstrator.

Natures Harvest Echinacea and Meadow Dies Watercolour Print for PP612

by Joanne James9. October 2022 08:00

Today it's Sunday and time for this week's new challenge over at The Paper Players! It's the turn of the fabulous Laurie to host this week and she has an interesting colour challenge for us to work with:


I say interesting because Laurie's colours immediately made me think of Halloween, but since I rarely send Halloween cards and I don't have much in the way of current Halloween product, I was determined to use these colours on anything but a Halloween card! So much so, I started creating and ended up with not one but two cards to share with you today - and neither remotely anything to do with October 31st! Here's the first one using Amy's layout over at Freshly Made Sketches this week - take a look:


Here's the low-down on my first card:

Staying faithful to Amy's sketch, I added a band of Brights designer series paper to my Gorgeous Grape card base and decided to create a nature-inspired watercolour as my focal point. I stamped the echinacea from the 'Nature's Harvest' stamp set in Stazon onto watercolour paper, then loosley watercoloured my image using the challenge colours and my aquapainters. Once I'd painted my image, I added some speckles by flicking my black Stampin' Blends marker across the image before cutting out with the largest circle in my Stylish Shapes Dies:


I added a white-on-black sentiment from 'Art Gallery' to complete my card. I liked this card so much, I thought I'd use one of the dies in the co-ordinating set to try out a watercolour print technique that I'd seen on Pinterest. My first attempt was a hot mess, but taking my learns and a different die from the Meadow Dies set I had a second attempt and like this one much better! Here's the card in question:


Have you ever tried the watercolour print technique using diecuts? It's actually quite straightforward: diecut your flower from watercolour paper and colour with Stampin' Write markers. Once coloured, place the flower onto a blank piece of watercolour paper and lightly spritz with water. The water 'spreads' the ink from the diecut one the blank piece - you can also 'stamp' this piece with the wet, coloured flower (but I didn't do that here). Allow both pieces to dry then add to your card; I cut a frame out of my spritzed piece and then added my diecut flower offset from the relief image on the frame. I added some clear faceted gems and a sentiment from the 'Charming Sentiments' stamp set that, when paired with the words 'faith over fear' stamped on the inside were the perfect words of encouragement needed for a card to send to a friend battling breast cancer right now:


What do you think? I quite like the effect and will definitely be trying this with other dies in other colours. I am also linking my second card up over at Time Out since the sentiment is perfect for their theme this week.

Here are the visual summary of the key products used on today's projects for you to pin for easy reference:


You can see all of my Product and 'How To' summaries on my 'How To - Tips and Techniques' Pinterest board in case you've missed any. 

So what do these colours say to you - Halloween, or something else completely? Before you reach for your ink and papers, check out what our amazing team has created to inspire you this week:

Here's a quick recap of our challenge rules:
 
1.  Create a new paper project
2.  Upload your creation to your blog with a link back to us and provide a direct link to the post featuring your challenge submission.
3.  Please link your card to no more than four challenges, TOTAL.
4.  Have FUN!

Enjoy your day; I'll be back on Tuesday with another project. Until then, happy stampin'!


Stampin' Up! Supplies Used: 

Table built using Product Table Builder by The Crafty Owl - Independent Stampin' Up! Demonstrator.

Mini Catalogue

BROWSE THE CATALOGUE

The mini catalogue is now live! Read and download your copy here.

Shop Online

Access my online shop 24 x 7, 365 days of the year:

Current March hostess code:

S9F2XJJW

Shop Online

Join My Team

It's always a great time to join Stampin’ Up! New team members can get £130 worth of products for only £99 + free business supplies + free shipping + all the fun being a part of Stampin’ Up! Stampin' Up! has something for everyone: join my growing team and benefit from my support to enjoy Stampin' Up! however you choose.

If you're interested, call me for a chat to understand how I can help you realise your goals. Alternatively, if you have already decided to sign up and you just can't wait, please click here for the link to the online form where you can sign up and order your starter kit right away! 

Latest Kit!

Stampin Cut and Emboss

The Rock Legend Kit has all you need to make 8 cards with coordinating envelopes. Along with the new Panda Friends Kit, both are available from January 4th for just £14 each - get yours here!

2023-24 Annual Catalogue

BROWSE THE CATALOGUE

Click on the catalogue for a full list of current SU! supplies - if you would like to order any of the items featured, please drop me a line at [email protected] or give me a call on 07773 421446 - I'd be happy to help.

New Online Exclusives

There will be new products available exclusively in the online store from 5 March - check them out here.

About Me

Hi I'm Joanne and live in Northampton and when I'm not looking after my husband and two beautiful children, am an avid crafter with a passion for all things Stampin' Up!

I must confess that I have never been a big rubber stamper - until I discovered Stampin' Up! that is. I love the fact that I can get such great results with co-ordinating stamps, inks, papers and punches - the possibilities are endless! Join me on my stamping journey as I share the things I love and be inspired to create amazing things yourself!

Follow Me

Monthly Newsletter

Box Builder

Click the button above to use Box Buster to create your custom box design using the Envelope Punch Board!

Kits Collection Now Available!

Stampin Cut and Emboss

The new Kits Collection from Stampin' Up! is now available!

Click here to see the current kits available and order yours online today.

I Design For


Stampin' Up Stuff

This is my personal blog and is not endorsed by Stampin’ Up! I hope you find it a plentiful source of ideas and personal inspiration but please don't copy my designs for contest submission or use for classes, publication or sale without express permission.