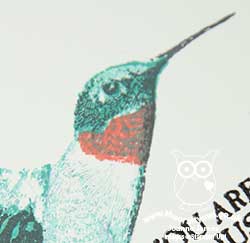
Picture Perfect Hummingbird Card

by Joanne James13. March 2016 09:00

It's Sunday and time for a new challenge over at The Paper Players! It's the turn of our esteemed leader the amazing Nance to host our challenge this week and she has a fun colour scheme for you to play along with:
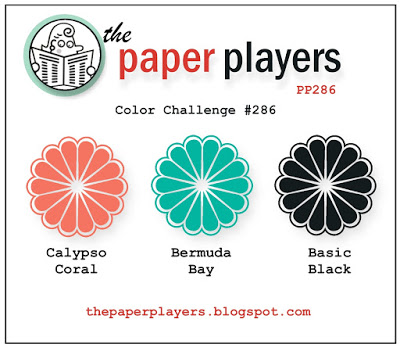
 

For my card this week I was inspired to use my Picture perfect stamp set for the first time; I've seen so many brightly coloured hummingbirds with this set, I thought these colours would be perfect to create one of my very own. Take a look:
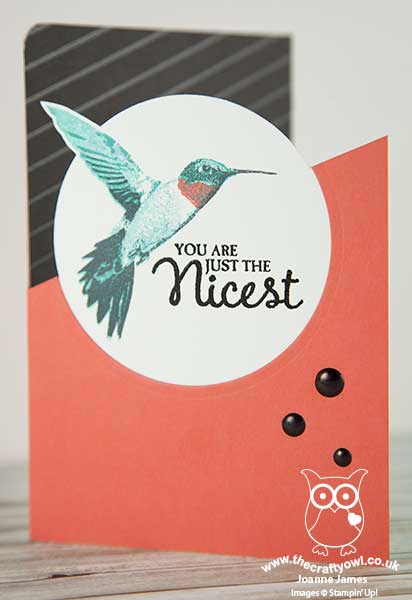
 

Here are the key features of today's card:

Picture Perfect Hummingbird - 'Picture Perfect' is a multi-step image stamp set, with each of the stamps having two, three or four layers. The hummingbird comes in four pieces, so in order to get four layers with only three colours, I stamped my first and third layers in Bermuda Bay, having stamped off the first one so that it was lighter in colour. I stamped the second stamp in Calypso Coral and the fourth and final one in Memento Black. Whilst it sounds complicated, this set is made from photopolymer which makes lining up the images really straightforward. 

Partial Die Cutting using Circle Framelits - I decided upon a rather unusual layout for my card today, using a base of Calypso Coral with the top part of the front cut away on the diagonal. I stamped my bird onto a piece of Whisper White and having fussy cut his wing tip by hand, I then cut a partial circle up to the diagonal before adhering behind so that it aligned with my cut away circle on my card base. Circle Framelits are invaluable for this kind of partial diecutting, as you simply roll through the Bid Shot to the desired point without cutting the whole way through.

Color Me Irresistible Specialty Designer Series Paper - I used this black pre-embossed paper last week on this card and decided it was just the thing to add a block of colour to the background of my card today too. The subtle stripes align perfectly to the diagonal line of my card and add interest without detracting from the bird.

Lastly, I stamped my sentiment in Versamark and heat embossed it in black and added a trio of White Perfect Accents, coloured black using a Sharpie, for a little extra shine. I spent ages trying to work out what to do with these colours, but once I'd decided on using this stamp set, it all came together seamlessly. Love it when that happens!

Here's today's visual summary of the key things needed to make today's card for easy reference:
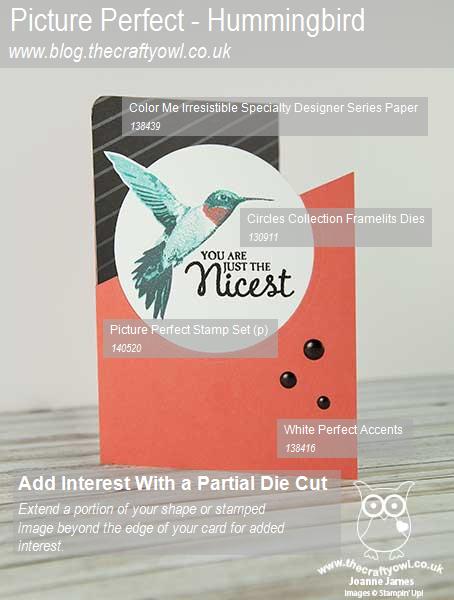
 

Remember you can also find all of my 'Tip and Techniques' summaries on my Pinterest page here.

Before you reach for your ink and papers, check out what our amazing team has created to inspire you this week:

The Paper Players Design Team
 
 
Here's a quick recap of our challenge rules:
 
1.  Create a new paper project
2.  Upload your creation to your blog with a link back to us and provide a direct link to the post featuring your challenge submission.
3.  Please link your card to no more than four challenges, TOTAL.
4.  Have FUN! 


I look forward to seeing what you create with our colour palette this week. We are off to basketball today and hockey today, Rebecca has a birthday party to attend to and I have lots of preparation for this week's classes to be getting on with, so it's going to be a busy one!

Back tomorrow with another project; until then, happy stampin'!


Stampin' Up! Supplies Used: 

Table built using Product Table Builder by The Crafty Owl - Independent Stampin' Up! Demonstrator.

Sunburst Sayings and Thinlits Shine It's Your Day

by Joanne James6. March 2016 09:00

Firstly, happy Mothering Sunday to all UK mothers reading this - today is most certainly our day! It's also Sunday and time for a new challenge over at The Paper Players! It's the turn of the talented Sandy to host our challenge this week and she has a great theme for you to play along with:

    PPA-290-Mar03

I was all set to make a rainy day card for today's challenge but I couldn't get the idea in my head to work on paper - so some other time for that card! Instead I decided to use my Sunburst Thinlits and create a bright sunshine card which came together much more like my vision:


I used this week's sketch over at Pals Paper Arts for my layout and created a fun fold card, where the second part of my sentiment acted as a clasp to hold the left-hand panel closed. I used a panel of Daffodil Delight spotted Schoolhouse Designer Series Paper on the right-hand panel and on the left I stamped some sunshines in Versamark and heat embossed them with clear embossing powder. This sunshine is from one of the early limited edition Sale-A-Bration sets, 'Hello' and the good news is that availability of this stamp set has been extended while stocks last. You've still time to snap it up, but you'd better be quick!

For my main square, I used a background of Tempting Turquoise to which I added a Daffodil Delight sunburst, edged with Tangelo Twist. For my sunshine centre, I stamped 'Shine' from the 'Sunburst Sayings' stamp set onto some Daffodil Delight cardstock and fussy cut the outer elements of the sentiment before cutting the remainder with a circle framelit, which allowed my sentiment to overhang. I backed this circle with a mat cut from a 1 3/4" scalloped circle punch, that I punched once then rotated and punched again to create the starburst effect - this is a neat little trick and perfect for this kind of design. It's also a great way to get a second shape from one punch. I then framed the whole square with a Tangelo Twist frame cut using my square framelits. The second part of my sentiment was cut with the washi tape thinlit from the Mini Treat Bag Thinlits set and I adhered this with a dimensional to the right so that it could serve to hold the fold shut. I just love the bright sunshine colours of today's card and the layering of all the elements within the focal square - this will certainly brighten someone's day. The 'Sunburst Sayings' stamp set and Sunburst Thinlit die are another of the great 'bundle and save' offers in the current seasonal catalogue, giving you a saving of 15% when you purchase them together - bonus!

Here's today's visual summary for easy reference:


Thank you to everyone who has left me a sweet comment or feedback on these new graphics, which have been very well received; they make great Pins too!

Before you reach for your ink and papers, check out what our amazing team has created to inspire you this week:

The Paper Players Design Team
 
 
Here's a quick recap of our challenge rules:
 
1.  Create a new paper project
2.  Upload your creation to your blog with a link back to us and provide a direct link to the post featuring your challenge submission.
3.  Please link your card to no more than four challenges, TOTAL.
4.  Have FUN! 

I look forward to seeing what you create with our theme this week. We are off to basketball this morning with time for a special Mother's Day lunch before venturing out to a birthday party this afternoon. Not quite the restful Mother's Day I had in mind, but life goes on today as always and as my family frequently tell me "Every day is Mother's Day in the James Household!". I have been treated to cards, flowers and gifts today so I am feeling perhaps a little more loved than usual :-) 

I hope you all have an enjoyable Mothering Sunday, whether you are celebrating or are focused on other things today. Back tomorrow with another project; until then, happy stampin'!


Stampin' Up! Supplies Used:

Table built using Product Table Builder by The Crafty Owl - Independent Stampin' Up! Demonstrator.

Gift From The Garden

by Joanne James28. February 2016 09:00

It's Sunday and time for a new challenge over at The Paper Players! It's the turn of my sweet friend Claire to host our challenge this week and she has a great sketch for you to play along with:


For my card this week I was inspired to use the 'Gift From The Garden' stamp set and the colours and watering can and polka dots over at Color Throwdown provided just the additional inspiration I needed:


Claire's sketch has lots of layers so this gave plenty of opportunity to incorporate lots of elements. I used kraft cardstock for my base and stamped the flowerpot trio in Versamark all over the front to create a subtle tone on tone background design that was in keeping with the theme of my card. I then added a piece of Mint Macaron Birthday Bouquet designer series paper and strip of white seam binding ribbon and layered a piece of polka dot Pink Pirouette designer series paper from the Subtles stack before adding my stamped circles. I punched two circles of Whisper White and stamped a pair of Mint Macaron wellies on one and a Pink pirouette watering can on the other. I also stamped the watering can a second time on a piece of scrap so that I could fussy cut it out and overlap the spout when I layered the circles together. I stamped my sentiment in Soft Suede and then stamped the heart flower in a pot onto a piece of Whisper White, fussy cut it out then added a flowerpot cut from kraft coloured corrugated paper and a pink punched heart with added pearl. Lastly, I added a twine bow to my ribbon to finish my card.

I'm not sure that I would have chosen these pastel colours for a card using this set had I not seen the Color Throwdown photo, yet I think they make for a pretty card. The thing I love most about this card though is my custom patterned paper for my cardbase; it is subtle enough to not overpower and you don't even see that much of it, yet ties in so well with the theme of my card.I love the earthy tone of the kraft cardstock too - I really must use this more often I think! This card is headed to a wonderful green-fingered friend of mine; I'm not sure she owns a pink watering can or green wellies but I just know she will love this card.

Here's today's visual summary for easy reference:

Before you reach for your ink and papers, check out what our amazing team has created to inspire you this week:

The Paper Players Design Team
 
 
Here's a quick recap of our challenge rules:
 
1.  Create a new paper project
2.  Upload your creation to your blog with a link back to us and provide a direct link to the post featuring your challenge submission.
3.  Please link your card to no more than four challenges, TOTAL.
4.  Have FUN! 

I look forward to seeing what you create with our sketch this week. We are off to basketball today and Rebecca is playing in a hockey tournament too, so another day of sport in store.

Back tomorrow with another project; until then, happy stampin'!


Stampin' Up! Supplies Used:

Table built using Product Table Builder by The Crafty Owl - Independent Stampin' Up! Demonstrator.

Birthday Bouquet Balloons Card

by Joanne James21. February 2016 09:00

It's Sunday and time for a new challenge over at The Paper Players! It's my turn to host our challenge this week and I have a fun clean and simple challenge for you to play along with:


Up, up and away! Balloons are very on-trend currently, but you can use any airborne object on your card today - just keep it clean and simple. For my card this week I was inspired to use balloons and in contrast to yesterday's bright balloon card decided to feature a piece of the delicately patterned balloon paper from the Birthday Bouquet designer series paper set:


I used a base of Mint Macaron to which I adhered a strip of Pool Party 3/8" Glitter Ribbon before adding a piece of the balloon patterned paper. I added a simple sentiment from the 'Suite Sayings' stamp set, which I cut out with my Project Life Cards & Labels Framelits, and added a couple of balloons stamped with the 'Balloon Builders' stamp set to give the same muted effect as the paper. Finally, I created some tassels with some frayed Pool Party Glitter Ribbon and a few clear sequins to finish my card. On reflection, whilst my card has minimal layers it doesn't have much of the 'white space' that is traditionally typical of 'clean and simple' cards, but I love the soft feel if it and the glimmer from the ribbon and the balloon tassles so I had to share it with you! I'm also linking up again with the team over at The Global Design Project where their theme this week has been balloons - what can I say, we were obviously thinking along similar lines!

For those of you who like a visual summary, here's something new that I will be featuring in my blog posts - a labelled photograph of the key products required to make today's card: 

These images are perfect for pinning to give you a visual reference of the supplies needed to re-create this card which can be useful if you want to come back to it at a later date. I will be pinning these to my new 'How To - Tips and Techniques' Board on Pinterest too, which you can find here.

Before you reach for your ink and papers, check out what our amazing team has created to inspire you this week, all of whom have created some fantastic examples of clean and simple cards:

The Paper Players Design Team
 
 
Here's a quick recap of our challenge rules:
 
1.  Create a new paper project
2.  Upload your creation to your blog with a link back to us and provide a direct link to the post featuring your challenge submission.
3.  Please link your card to no more than four challenges, TOTAL.
4.  Have FUN! 

I look forward to seeing your clean and simple creations in the gallery. We are off to basketball and back to hockey today and are planning a fun afternoon of board games and maybe a walk out along the canal if the weather stays dry for long enough. 

Back tomorrow with another project; until then, happy stampin'!


Stampin' Up! Supplies Used: 

Table built using Product Table Builder by The Crafty Owl - Independent Stampin' Up! Demonstrator.


You Brighten My Day Layered Sunburst Card

by Joanne James14. February 2016 09:00

Happy Valentine's Day everyone! It's Sunday and time for a new challenge over at The Paper PlayersThis week it is the turn of the queen of die-cuts, the lovely Laurie, to host and she has a colour challenge for you to play along with:


This week's colours are about as far from Valentines as you could possibly get, but this colour palette offers some great opportunities for bright cards on a cold Winter's day. For my card this week I was inspired to use my new Sunburst Thinlits to create a layered sunburst, paired with some patterned cloud paper:

To create my sunburst I cut two sunbursts, one in Daffodil Delight to fit my card panel and the other full size in Tangelo Twist. To get a perfect 'shadow' I cut the orange one into three pieces to give equal shadow lines on each ray, then trimmed the ends to fit flush with the yellow one. I mounted my sunburst onto a piece of Pool Party cloud paper, taken from the Sweet L'il Things designer series paper stack. I stamped my sentiment in Tangelo Twist onto Very Vanilla and layered the circles to create the centrepiece for my sun. Finally, I added a trio of orange Brights sequins to finish. Quite a simple card to look at, but consisting of nine layers in total, each of which adds to the finished look and feel of the card. I love the bright colours of this week's colour palette  -so cheery and sure to brighten everyone's day! 

Before you reach for your ink and papers, check out what our amazing team has created to inspire you this week:

The Paper Players Design Team
 
 
Here's a quick recap of our challenge rules:
 
1.  Create a new paper project
2.  Upload your creation to your blog with a link back to us and provide a direct link to the post featuring your challenge submission.
3.  Please link your card to no more than four challenges, TOTAL.
4.  Have FUN! 

I look forward to seeing what you create with this week's colours. We have a restful day planned today, with a sport-free day as it's the start of the half-term holiday for the James Juniors. Pretty much a whole week of lie-ins - bliss!

Back tomorrow with another project; until then, happy stampin'!


Stampin' Up! Supplies Used:

Table built using Product Table Builder by The Crafty Owl - Independent Stampin' Up! Demonstrator.

You Did It! With Giggle Greetings

by Joanne James7. February 2016 09:00

Did you miss me? Apologies for the lack of blog posts over the last couple of days. I've had plenty of projects, just not enough time to write up! However today it's Sunday and time for a new challenge over at The Paper PlayersThis week it is the turn of my talented friend LeAnne to host and she has a fun theme challenge for you to play along with:


This proved something of a tricky week for me! As someone known for not being the world's biggest pet lover, I don't have much in the way of cats or dogs in my stamp collection. I'd been thinking about what I was going to do for this challenge all week, wondering whether I should get creative with some punch art, when I had a 'light bulb' moment and thought I would use my Balloon Builders set and build a dog. When I looked at my finished attempt, I wasn't sure about it; my husband poked his head round my office door, looked at it and said "Well, maybe it could pass for Wylie Kyote ... are you SURE you don't have any cat or dog stamps??" and proceeded to go searching along my shelves! So needless to say the balloons got tossed aside in favour of this card, as my dear husband had a 'Eureka!' moment and discovered my long-unused Giggle Greetings set:


I used this week's Colour Q palette and coloured my dog with my retired Blendabilities and created some fun layers with some embossing using my large polka dots embossing folder on the top one. I framed my stamped piece using my Circle Framelits, added a few banners from some retired scraps of designer series paper and some thick Cherry Cobbler baker's twine and my card is complete.

A fun puppy dog that as it turns out was perfect for the job and since I needed a few congratulations cards too I got one of those into the bargain! That will teach me to get all creative and not check my collection thoroughly first!! (edited to add: I did decide to put the balloon animal to good use, although balloon dog might be considered a stretch! You can find him here - let me know what you think!)

Before you reach for your ink and papers, check out what our amazing team has created to inspire you this week:

The Paper Players Design Team
 
 
Here's a quick recap of our challenge rules:
 
1.  Create a new paper project
2.  Upload your creation to your blog with a link back to us and provide a direct link to the post featuring your challenge submission.
3.  Please link your card to no more than four challenges, TOTAL.
4.  Have FUN! 


I look forward to seeing what you create with this week's theme. We have a day of sport today, with basketball and hockey in store and then some time this afternoon making Tudor costumes for Ben's current school history project.

Back tomorrow with another project; until then, happy stampin'!


Stampin' Up! Supplies Used: 

Table built using Product Table Builder by The Crafty Owl - Independent Stampin' Up! Demonstrator.

Botanical Builders Purple Flowers Birthday Card

by Joanne James30. January 2016 08:50

It's Sunday and time for a new challenge over at The Paper PlayersThis week it is the turn of the sweet Jaydee to host and she has a tic-tac-toe for you to play along with:


When I was considering which squares to use to create my card, I noticed that none of the other girls on the team had used purple. This is one of my favourite colours, so I decided to use this as my starting point. I was also drawn to the black and white striped background and central focal image of Connie Collins' card for 'Case The Designer' over at The Global Design Project, so wanted to combine the two. I settled on the top row - flowers, bling, purple - for my card today:

My background paper is from the 'Go Wild' paper stack - these papers are not just great for animal prints! I used a trio of purples for my flowers, die cut using the Botanical Builder Framelits Dies, and I used them to frame my birthday sentiment from the Tin of Cards stamp set - I just love the fonts in this set. My 'bling' is in the form of a liberal dose of Wink of Stella on my main flower and a scattering of rhinestones across my card. 

Before you reach for your ink and papers, check out what our amazing team has created to inspire you this week:

The Paper Players Design Team
 
 
Here's a quick recap of our challenge rules:
 
1.  Create a new paper project
2.  Upload your creation to your blog with a link back to us and provide a direct link to the post featuring your challenge submission.
3.  Please link your card to no more than four challenges, TOTAL.
4.  Have FUN! 


I look forward to seeing what you create with this week's tic-tac-toe challenge - so many creative possibilities! Rebecca is playing in a hockey tournament today so I shall be wrapped up warm with a mug of tea in hand as I watch and hoping for a little craft time this afternoon. Enjoy your Sunday however you are spending it!

Back tomorrow with another project; until then, happy stampin'!


Stampin' Up! Supplies Used: 

Table built using Product Table Builder by The Crafty Owl - Independent Stampin' Up! Demonstrator.

You Are Tea-riffic Teapot Card

by Joanne James24. January 2016 09:00

It's Sunday and time for a new challenge over at The Paper PlayersThis week it is the turn of the lovely Nance to host and she has my favourite type of challenge, a sketch, for you to play along with:

For my card this week I was inspired to use my Cups and Kettle Framelits Dies and co-ordinating 'Have A Cuppa' Designer Series Paper Stack for a fun card:


My colour scheme was taken directly from the paper stack and my card is otherwise really quite self explanatory. I added a White Perfect Accent to my teapot lid and some clear Wink of Stella to the steam heart above the spout for added shimmer. I love the bright colours in these papers and the many little elements in the framelit set - endless creative possibilities! 

Before you reach for your ink and papers, check out what our amazing team has created to inspire you this week:

The Paper Players Design Team
 
 
Here's a quick recap of our challenge rules:
 
1.  Create a new paper project
2.  Upload your creation to your blog with a link back to us and provide a direct link to the post featuring your challenge submission.
3.  Please link your card to no more than four challenges, TOTAL.
4.  Have FUN! 


I look forward to seeing what you create with this week's theme. We have a an important day of sport today: Ben is playing basketball this morning and no hockey this week as Rebecca has an afternoon of swimming with County trials today - wish us luck!

Back tomorrow with another project; until then, happy stampin'!


Stampin' Up! Supplies Used: 

Table built using Product Table Builder by The Crafty Owl - Independent Stampin' Up! Demonstrator.


You Send Me Soaring Valentine's Card and Technique Video Tutorial

by Joanne James17. January 2016 09:00

It's Sunday and time for a new challenge over at The Paper PlayersThis week it is the turn of the lovely Sandy to host and she has a timely clean and simple theme for you to play along with:

For my card this week I was inspired to use the Sale-A-Bration set ''Sky is The Limit' to create my clean and simple Valentine's card - I was so keen to make a card with a red bi-plane! Here it is:


I used a base of Soft Sky and a piece  of diagonal striped black and white paper from the neutrals paper stack for a mat, then took a piece of watercolour paper that I washed with my aqua painter and some Soft Sky and Pool Party inks for a hint of colour. Once my sky panel was thoroughly dry, I stamped the clouds and smoke trail in Versamark and heat embossed them in white, the stamped the sentiment and heat embossed that in black. I then went back to my clouds and smoke trail and used the effect I shared with you previously on this card here, where I filled in the space with Tombo, covered in White embossing powder and then heat embossed until the powder set and the glue bubbled. This effect not only works for snow as on my previous card but for clouds and smoke trails too!

I also added a touch of Melon Mambo within the heart to make it stand out a little. Finally, I stamped my bi-plane in Real Red onto a piece of Whisper White cardstock and fussy cut it out, adding a small piece of window sheet cut using my flower builder punch (the stamen) and a silver mini-brad to accentuate the propeller, before popping it on a couple of dimensionals and adding to my card - here's a close up:


Isn't that fun? I hope you like today's card - this is a set with so many uses, not just Valentines. It's a limited time Sale-A-Bration offer and is only available until 15th February. Plenty of time to get it in order to make a love-themed card for a special person though, so don't forget to add it to your next £45 order for free!

I've edited today's post to include a little video tutorial that I filmed this afternoon that shows exactly how I created the effect I described above:


I hope you enjoyed that - I haven't made a video in ages but there have to be some advantages to waking up to snow on the ground - more time to craft!

Before you reach for your ink and papers, check out what our amazing team has created to inspire you this week:

The Paper Players Design Team
 
 
Here's a quick recap of our challenge rules:
 
1.  Create a new paper project
2.  Upload your creation to your blog with a link back to us and provide a direct link to the post featuring your challenge submission.
3.  Please link your card to no more than four challenges, TOTAL.
4.  Have FUN! 


I look forward to seeing what you create with this week's theme. We have no hockey due to the freezing weather here in the UK and a frozen pitch; in fact, snow on the ground meant that snowball fights even won out over basketball today. As for me - the results of my endeavours are included above!!

Back tomorrow with another project; until then, happy stampin'!


Stampin' Up! Supplies Used: 

Table built using Product Table Builder by The Crafty Owl - Independent Stampin' Up! Demonstrator.

Follow Your Dreams Caravan Card

by Joanne James10. January 2016 09:00

It's Sunday and time for a new challenge over at The Paper PlayersThis week it is the turn of my sweet friend Claire to host and she has a great colour palette for you to play along with:


I love this bold and bright colour palette and actually created a couple of cards with it. One is very 'me' so I saved that for another day; today's card uses this week's sketch over at Mojo Monday and has a rather different feel to it - I think it's the marbled paper! - take a look:


I paired a piece of the Tempting Turquoise Perfectly Artistic marbled patterned paper with some retired heart-patterned DSP, as a backdrop for my colourful little caravan from 'You're Sublime', which I coloured with my inks and an aquapainter (the body is paper-pieced with a piece of the marbled paper on the reverse). A punched heart, some ribbon, sequins and another pink heart topped with an epoxy sticker for added dimension finish my card. 

I love the rather subtle colouring that the marbled paper adds; I am looking forward to experimenting with this paper further. It's available free with a £45 spend until £15th February as one of the Sale-A-Bration 'limited time' offers, so if it's on your list it's one to get sooner rather than later. As for that little caravan - how cute! This card is destined for Gail, one of my team, who is often holidaying to interesting destinations in her caravan. She is about to become an official warden for The Caravan Club so this image is so appropriate and the sentiment perfect.

Before you reach for your ink and papers, check out what our amazing team has created to inspire you this week:

The Paper Players Design Team
 
 
Here's a quick recap of our challenge rules:
 
1.  Create a new paper project
2.  Upload your creation to your blog with a link back to us and provide a direct link to the post featuring your challenge submission.
3.  Please link your card to no more than four challenges, TOTAL.
4.  Have FUN! 


I look forward to seeing what you create with this week's colours. We have a day of sport today, with basketball and hockey in store as we fully get back into the new season. I'm hoping to squeeze in a little craft time too.

Back tomorrow with another project; until then, happy stampin'!


Stampin' Up! Supplies Used: 

Table built using Product Table Builder by The Crafty Owl - Independent Stampin' Up! Demonstrator.

2025-26 Annual Catalogue

BROWSE THE CATALOGUE

Click on the image to download your copy of the 2025-26 annual catalogue. For a full list of current SU! supplies, go to my online store. If you would like any help or advice, please drop me a line at joanne@thecraftyowl.co.uk or give me a call on 07773 421446 - I'd be happy to help.

Shop Online

Access my online shop 24 x 7, 365 days of the year:

Shop Online

Join My Team

It's always a great time to join Stampin’ Up! Between 6-31 May, new team members can get £170 worth of products for only £99 + free business supplies + free shipping + all the fun being a part of Stampin’ Up! That's an extra £40 of product - FREE! Stampin' Up! has something for everyone: join my growing team and benefit from my support to enjoy Stampin' Up! however you choose.

If you're interested, call me for a chat to understand how I can help you realise your goals. Alternatively, if you have already decided to sign up and you just can't wait, please click here for the link to the online form where you can sign up and order your starter kit right away! 

Latest Kits!

Stampin Cut and Emboss

The Sending A Smile Kit and The Beautiful Blues Kit are the latest kit additions to the online store - get yours here!

New Online Exclusives

There are new products available exclusively in the online store from 6 May - check them out here.

About Me

Hi I'm Joanne and live in Northampton and when I'm not looking after my husband and two beautiful children, am an avid crafter with a passion for all things Stampin' Up!

I must confess that I have never been a big rubber stamper - until I discovered Stampin' Up! that is. I love the fact that I can get such great results with co-ordinating stamps, inks, papers and punches - the possibilities are endless! Join me on my stamping journey as I share the things I love and be inspired to create amazing things yourself!

Follow Me

Monthly Newsletter

Box Builder

Click the button above to use Box Buster to create your custom box design using the Envelope Punch Board!

Kits Collection Now Available!

Stampin Cut and Emboss

The new Kits Collection from Stampin' Up! is now available!

Click here to see the current kits available and order yours online today.

I Design For


Stampin' Up Stuff

This is my personal blog and is not endorsed by Stampin’ Up! Stampin' Up! is a registered trademark of Stampin' up! Inc. I hope you find my blog a plentiful source of ideas and personal inspiration but please don't copy my designs for contest submission or use for classes, publication or sale without express permission.